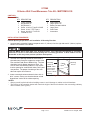
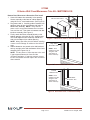
Wolf 828022 is a versatile and powerful kitchen appliance that combines the functions of a steam oven, convection oven, and microwave oven into a single, sleek unit. With its ability to steam, bake, roast, and microwave, this multifunctional oven offers a wide range of cooking options to meet your culinary needs.
Wolf 828022 is a versatile and powerful kitchen appliance that combines the functions of a steam oven, convection oven, and microwave oven into a single, sleek unit. With its ability to steam, bake, roast, and microwave, this multifunctional oven offers a wide range of cooking options to meet your culinary needs.


-
 1
1
-
 2
2


Wolf 828022 Installation guide
- Type
- Installation guide
- This manual is also suitable for
Wolf 828022 is a versatile and powerful kitchen appliance that combines the functions of a steam oven, convection oven, and microwave oven into a single, sleek unit. With its ability to steam, bake, roast, and microwave, this multifunctional oven offers a wide range of cooking options to meet your culinary needs.
Ask a question and I''ll find the answer in the document
Finding information in a document is now easier with AI
Related papers
Other documents
-
Klip Xtreme KFM-330 Datasheet
-
 Barkan Mounting Systems 44B User manual
-
 Extreme Tools DX7218HRKU Owner's manual
-
Viking Range RDMOS201SS Installation guide
-
Insignia NS-OTR16SS9/ NS-OTR16WH9 1.6 Cu. Ft. Over-the-Range Microwave Installation guide
-
GE ZEM200WY Installation guide
-
GE Monogram ZEM200 Series Installation Instructions Manual
-
Whirlpool MK1150XJT Installation guide
-
-
KitchenAid GM8155XJT2 Installation guide

