STARRY S01414 User manual

Type
User manual
Starry Titan Poletop Mount
Note the dierence between two types of
Side Arm. One set is notched to be matched
with notch on Poletop Plate.
Mount is loosely assembled, all fasteners
snugged. One axis levelled, tightened, sec-
ond “tilt” corrected with mallet, all fasten-
ers tightened
Tools: 13mm socket, socket for AEP-supplied
pole bolts, mallet
Starry Titan Poletop Mounting Radio
1.
Complete radio head is preassmbled with
a lifting eye. Open crate top and secure to
lift/cherry picker arm.
2.
The 4 bolts (circled) drop through keyholes
in the poletop mount. Rotate radio ~6° to
lock into place.
Tool: 13mm combination wrench
3.
Attach conduits
Starry Titan Poletop Cabling
Radios are pre-wired into the service box.
1.5” Conduits x2
Fiber
1gbps and 10gbps duplex per radio,
10mhz and pps signals (tncs)
Power
4x 14awg (2 48vdc pairs) and
1x 6awg ground
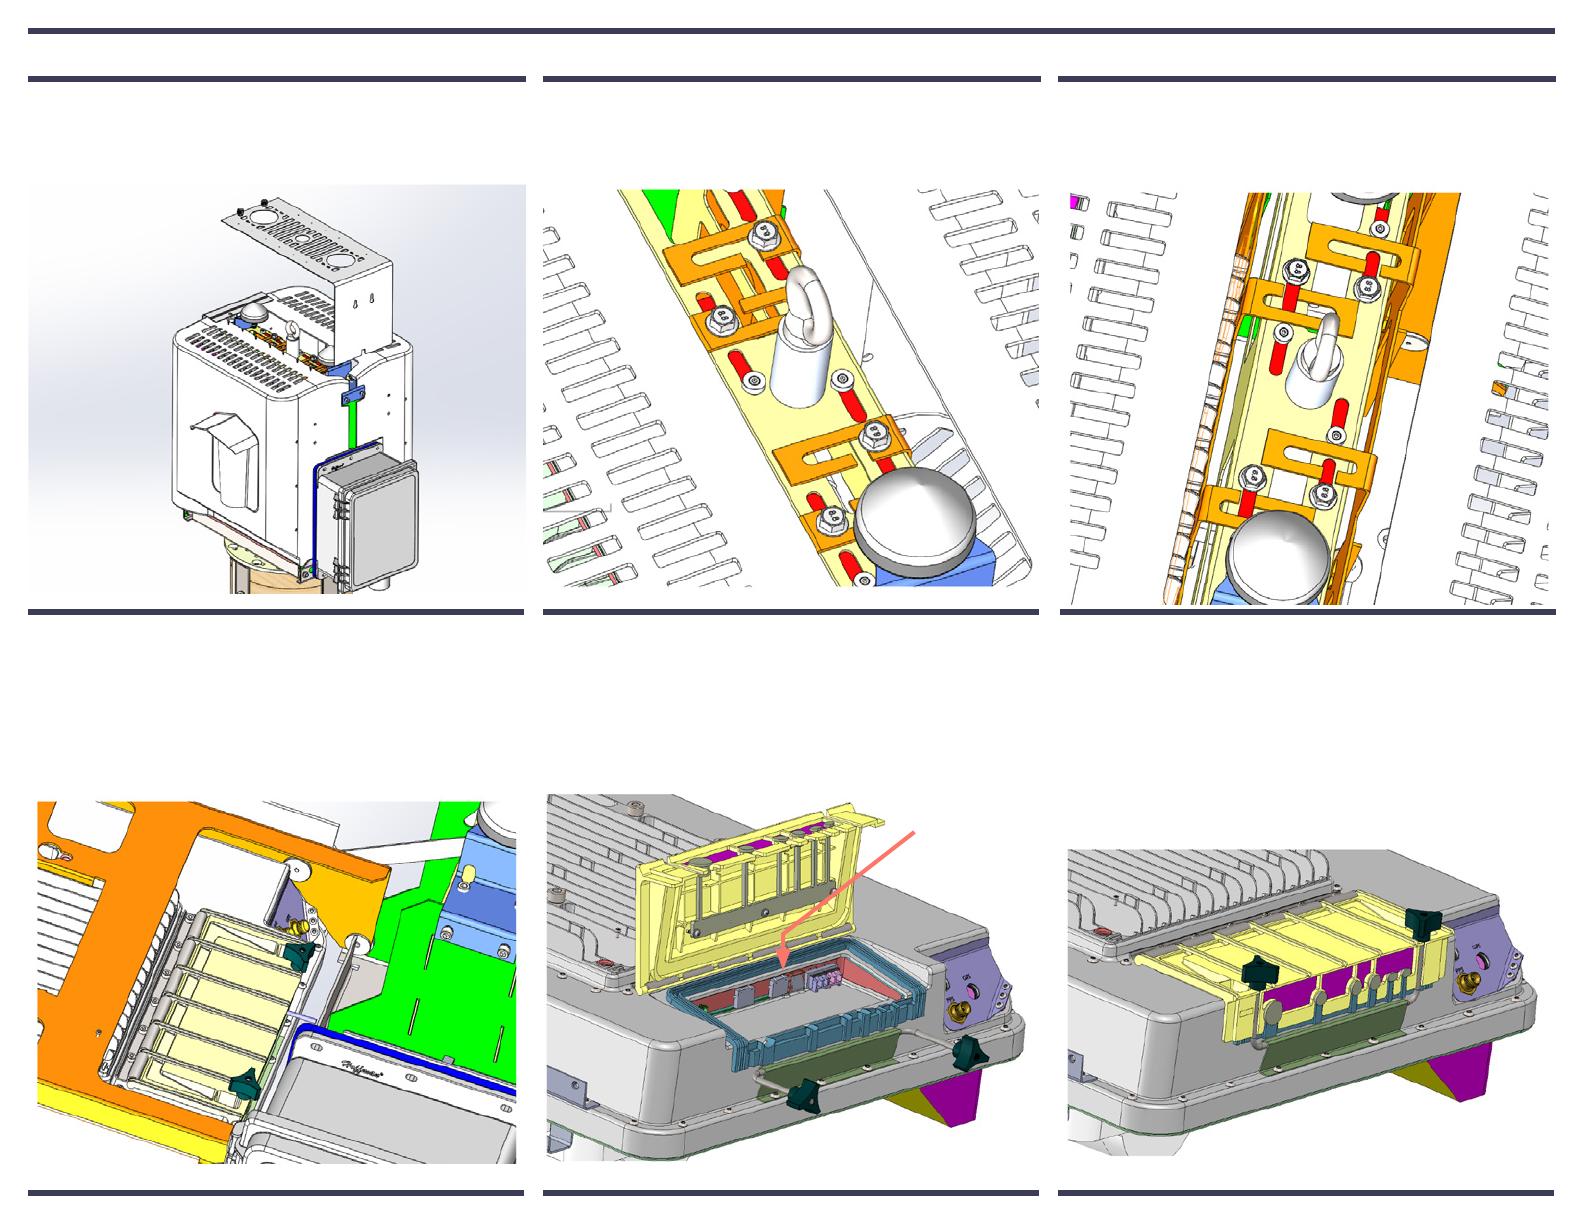
Starry Titan Poletop SFP Replacement
1. Loosen top cover side screws and captive
top screws. Slide up and o the unit.
4. Gently lower radio to horizontal. Cable
door is now accessible. Loosen lock knobs
and swing down.
2. Unlock the side needing replacement:
Loosen two bolts (13mm socket and exten-
sion)
5. Swing locks down. Open cable door.
Pull ber. Unlock and remove SFP.
Replace. Clean ber and replace in socket.
SFPs are here
3. Tilt radio out slightly. Slide bolt carrier
(red) out of engagement with radio frame
(orange)
6. Close door. Ensure all cables and bers
are correctly seated in door slots.(Cables
not shown)
  • Page 1 1
  • Page 2 2
  • Page 3 3
  • Page 4 4

STARRY S01414 User manual

Type
User manual

Ask a question and I''ll find the answer in the document

Finding information in a document is now easier with AI