INSTALLATION INSTRUCTIONS
1625 Surveyor Avenue • Simi Valley, CA 93063 • (805) 527-0987 • (800) 766-VISTA (8478) • FAX: (888) 670-VISTA (8478) •
[email protected] • www.vistapro.com
Vista Professional Outdoor Lighting reserves the right to modify the design and/or construction of the fixture shown without further notification.
IMPORTANT NOTE:
• Luminaire must be installed and grounded in accordance with the National Electrical Code (NEC) and local codes.
• Luminaire is UL listed for above grade installation only.
• Always use UL recognized wire connectors for connections.
MAINTENANCE: To assure proper operation and efficiency, lens must be kept clean and free of dirt, dust,leaves, trash and mineral deposits from water.
A regular scheduled maintenance program is recommended.
SAFETY WARNING: Luminaire can become hot. Take care when locating luminaires.
NOTE: Save these instructions for future reference.
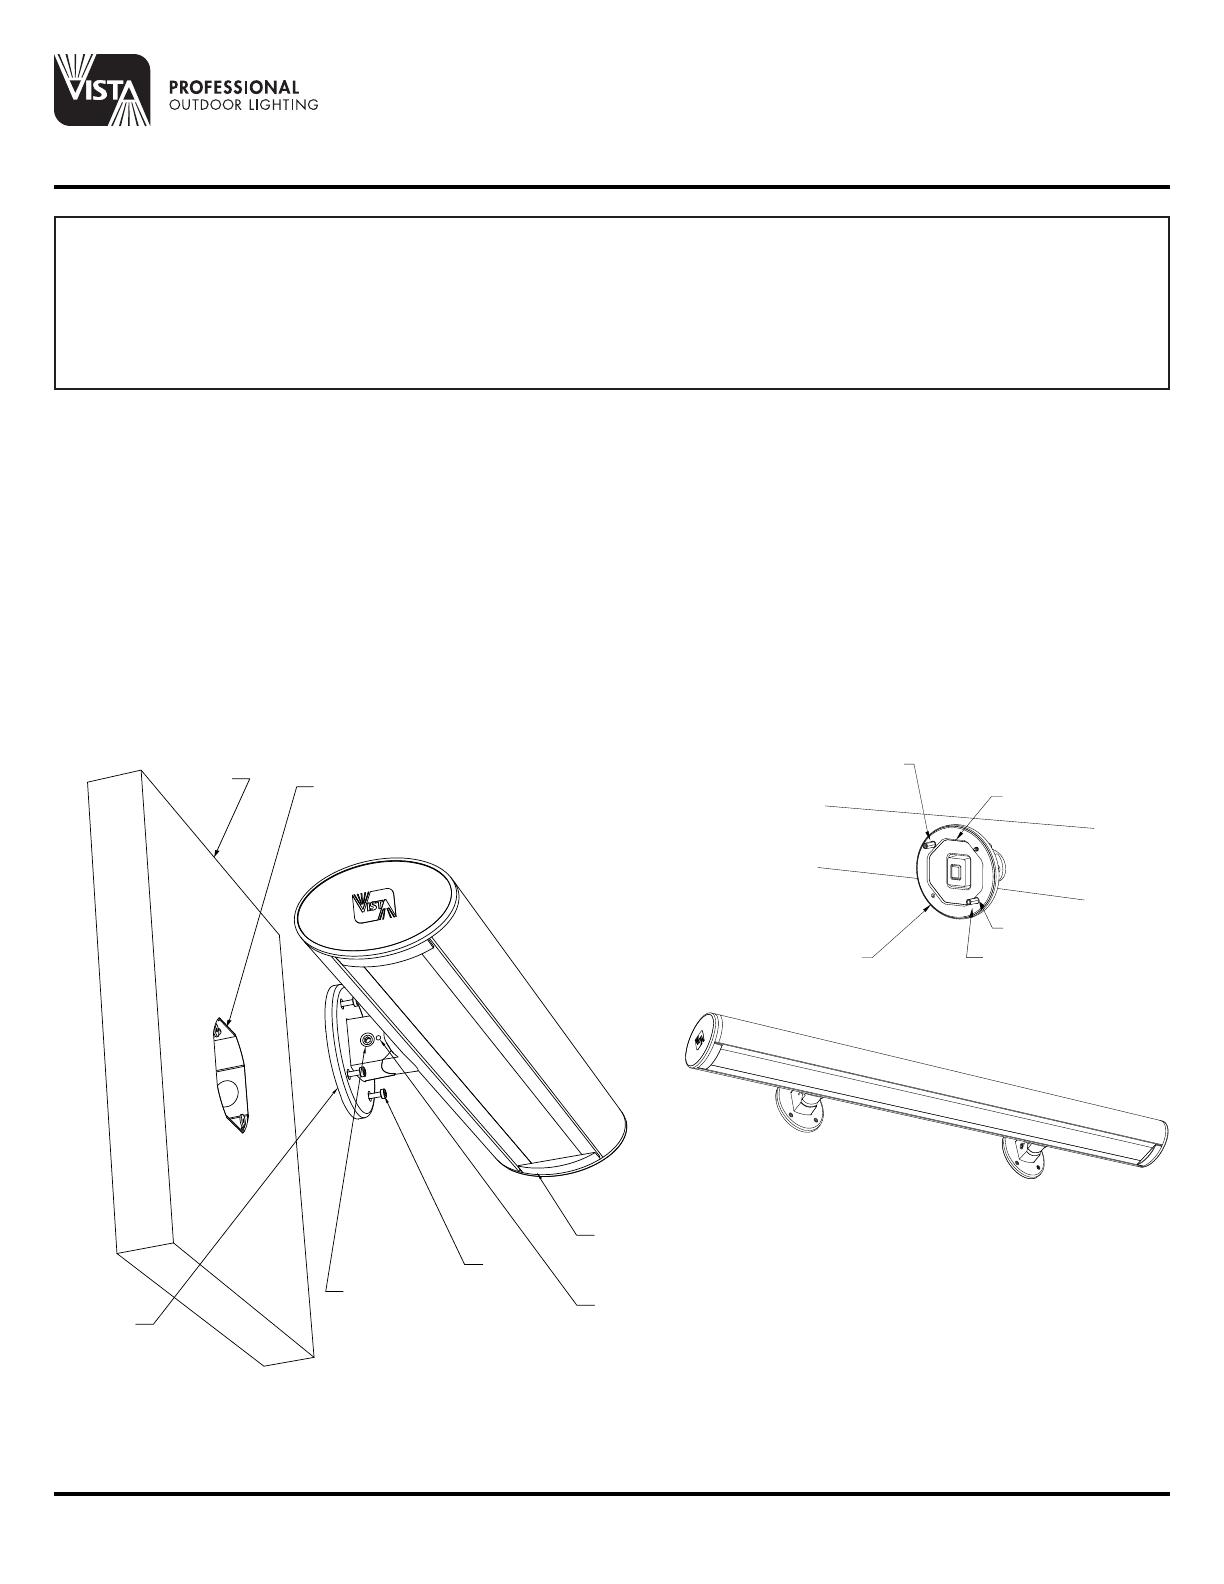
WASHER 2X
STAND-OFF 2X
(HAND TIGHT)
UN-USED MOUNT
HOLE 2X
GASKET 1X
4-0 BOX MOUNT
HOLE 2X
WALL
MOUNT
PLATE
AIMING
ADJUSTMENT
SCREW
8-32
MOUNT
SCREW
(4)
AIM LOCK
SET SCREW
(2)
1050 WM
LUMINAIRE
4-0 BOX
(RECESSED)
WALL
IMAGE OF 1054 WM W/ TWO
WALL MOUNT PLATE ASSEMBLIES
IMAGE OF 1054 WM W/ TWO
WALL MOUNT PLATE ASSEMBLIES
IMAGE FOR STEP 2
DIRECT LUMINAIRE MOUNTING TO STRUCTURAL SURFACE OVER RECESSED 4-0 BOX (by others)
1. Make sure electrical supply is off at circuit breaker before starting luminaire installation or servicing luminaire.
NOTE: The Luminaire can be mounted such that the direction of illumination will be up or down. The Luminaire throw can be adjusted up to +/- 15
degrees from horizontal.
NOTE: The Wall Mount Plate has four mounting holes, two of which will be un-used when mounting over a recessed 4-0 BOX. Determine which holes
will be un-used and plug them by following the image and step 2 below.
2. Install two 8-32 Mount Screws (by Vista) through the Wall Mount Plate and 4-0 Gasket, in the two holes to be un-used, and affix with two Washers (by Vista)
and 8-32 Hex Stand-Offs (by Vista). Firmly tighten by hand.
3. Route luminaire Load conductors (by Vista) into recessed 4-0 Box (by others). Using NEC approved wiring methods, attach Supply conductors (by others)
to the luminaire Load conductors observing polarity: Supply (+) to Load (black), Supply (-) to Load (White), and Supply (Ground) to Load (Green). If 0-10V
dimming is used connect: Dimming Supply (+) to Dimming Load (Purple) & Dimming Supply (-) to Dimming Load (Grey).
4. Affix the Wall Mount Plate to the 4-0 box using the remaining two 8-32 Mount Screws (by Vista). Tighten.
5. Adjust the aim of the luminaire, up to +/- 15 degrees from horizontal, and firmly re-tighten the Aiming Adjustment Screw.
6. Lock the desired aiming of the luminaire by firmly tightening the two Set Screws on both sides of the Wall Mount Plate.
7. Supply power to the luminaire and check for proper operation.
Linear LED Wall Mount
Architectural Series
1051/1052/1054


