
HR9000PKG
Two Vehicle Specific Headrests
With 7” LCD Monitors and Built-In
DVD Player for Rear Seat Entertainment
128-7632B
Operation
Manual
®

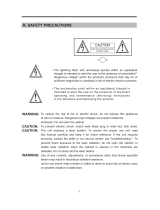
IMPORTANT
An LCD panel and/or video monitor may be installed in a motor vehicle and visible
to the driver if the LCD panel or video monitor is used for vehicle information,
system control, rear or side observation or navigation. If the LCD panel or video
monitor is used for television reception, video or DVD play, the LCD panel or video
monitor must be installed so that these features will only function when the vehicle
is in ‘park’ or when the vehicle’s parking brake is applied.
An LCD panel or video monitor used for television reception, video or DVD play
that operates when the vehicle is in gear or when the parking brake is not applied,
must be installed to the rear of the driver’s seat where it will not be visible, directly
or indirectly, to the operator of the motor vehicle.

3
HR9000PKG System
The HR9000PKG system contains two vehicle specific headrests. Each has a 7" Monitor and built-in DVD Player. This system allows
the users to either watch individual DVD’s or watch the same DVD on both monitors. Both users can also share an A/V source connected
to either the AV2 or AUX inputs. The full function remote control can operate either unit by selecting MI or M2 on the remote.
Quick Start Guide
1. Turn on the M1 monitor, tilt the screen forward using the center tab at the top of the screen.
2. Insert a DVD, CD or MP3 disc into the slot, disc label toward driver.
3. The disc will start playing.
4. Tilt the monitor to a comfortable viewing position (the headrest itself can be tilted forward to help achieve a comfortable viewing
position).
5. Each wireless headphone has a CH A/CH B switch. When sitting in front of the M1 screen, use the CH A switch setting. When sitting
sitting in front of the M2 screen, use the CH B switch setting. Set the headphone to the proper channel and press the Power
On/Off switch. The power indicator will light up red. Turn the volume down to its lowest setting before putting them on your head.
6. When the DVD menu appears, select the menu item using the cursor keys and press the Enter or Play button.
7. If audio playback through the vehicle radio is preferred, use the FM transmitter On/Off button on the remote control. Set the vehicle
radio to the channel selected on the M1 monitor. If interference with a local radio station occurs, set the FM modulator to one of the
other four radio frequencies using the FM channel select button on the remote control.
8. Turn on the M2 Monitor using the power button on the front of the screen or remote control.
9. Tilt the screen to a comfortable viewing position (the headrest itself can be tilted forward to help achieve a comfortable viewing position).
10. Select AV1 using the source button on the front panel or remote control to view program material on M1 or select from the other
available sources DVD, AV2 or AUX/GAME for M2 Monitor.
NOTE: To operate the M1 screen, press M1 on the remote control.
To operate the M2 screen, press M2 on the remote control.

S
AUX
GAME PORT
4
Control Function Descriptions for M1 and M2 Monitor
M1 / M2 Panel Control
1. DVD disc insertion slot
2. EJECT Button
3. Power Indicator LED
4. POWER Button
5. SOURCE Button
6. SCREEN MODE Button
7. PLAY Button
8. STOP Button
9. IR Transmitter LEDS
10. Game Port
11. AUX Input Jack (use with supplied AV adaptor)
1
2
CONTROLS AND INDICATORS DIAGRAM
EJECT
3 4 5
6
7
8
9
10 11

HR9000PKG SYSTEM OVERVIEW
1) The HR9000PKG is a versatile audio / video system which includes two monitors with built-in DVD players. They can accept an
Audio / Video input to either the AV2 or AUX inputs.
2) The M1 Monitor is comprised of a 7" TFT LCD monitor with built-in DVD player that allows the user to select from DVD, A/V1, AV2,
or AUX/GAME sources. The M1 monitor has a built-in infrared audio transmitter (CH A) for use with the supplied two-channel
wireless headphones (CH A). The M1 monitor also has the ability to provide the audio source for output to the wireless FM
Modulator to allow audio playback through the vehicle radio.
3) The M2 monitor is comprised of a 7" TFT LCD monitor with built-in DVD player that allows the user to select from DVD, A/V1, AV2,
or AUX/GAME sources. The M2 monitor has a built-in infrared audio transmitter (CH B) for use with the supplied two channel
wireless headphones (CH B).
4) The monitors will show all of the functions including the FM selection (M1 only) with the comprehensive OSD. FM functions may
also be turned off by pressing the FM ON / OFF button on the Remote Control.
5) The HR9000PKG System supplies two IR Headphone sets (P/N IR2CHS). The headsets have an A-B switch that allow the users to
select the audio from either the M1 (CH A) or the M2 (CH B).
6) Using different IR codes, the M1 Monitor will only respond to the Remote Control unit when press Monitor Select (M1) button on
remote control. And also the M2 Monitor will only respond to the Remote Control unit when press Monitor Select (M2) button on
remote control.
5

7) The M1 and M2 Monitor will accept an audio / video input through either the AV2 input (located on the FMM inter-connect or the
AUX (use with supplied AV adaptor) input located on the front of the unit. The audio / video device could be a video game system,
video camera, or other input device.
Note: If the Game Controller is plugged in and an AUX source is plugged in to the AUX input, the AUX input will override the Game
Controller. To use the Game Controller, unplug the AUX input.
8) Pivot the screen until a comfortable viewing angle reached. The internal lock limits the screen to a maximum adjustment of 30
degrees from closed position, the headrest itself can be tilted forward to help achieve a comfortable viewing position.
6
Game Port
Internal Lock
30 degrees
9) Insert disc 10) Eject disc
(M1/M2 Monitor) (M1/M2 Monitor)
Insert disc
Eject disc
AUX IN
label

REMOTE CONTROL OPERATION
Battery Installation
Before attempting to operate your remote control, install the
batteries as described below.
1) Turn the remote control face down. Using a fingernail, lift the
battery cover off.
2) Install two “AAA” batteries. Make sure that proper polarity
(+/-) is observed.
3) Align the cover tabs with the remote control and press down
until the cover clicks.
Battery Cover
Lift for battery
installation
1
2
3
4
5
7
10
11
9
8
6
13
12
15
14
16
17
18
19
20
21
22
24
23
25
27
26
28
29
30
31
32
33
34
A-B
SOUR CE
1
4
7
PIXMUTE
9
2
5
8
6
3
POWER
M1
M2
MONITO R SELEC T
+
0
––
SET UP
REP EAT
RETUR N
MENU
ENTER
IRT
ON/OFF
DISPLA Y
FMM
ON/OF F
AUDIO ZOO M ANGLE SUB TITLE
CHAN NE L
SELE CT
PLAY
II PAU SE
STOP
M1 ONLY
7

* Function control is available on the unit and remote control.
NOTE: To control the individual units (M1 Monitor / M2 Monitor) press either M1 or M2 before pressing any other button.
For example, to turn M1 Monitor ON, press M1 and then the power button.
1. POWER Button* – Press this button to turn M1 or M2 Monitor on. Press the button again to turn M1 or M2 Monitor OFF.
2. SOURCE Button* – Press this button to select the available sources. On the M1 monitor, the sources are DVD, AV1, AV2 &
AUX/GAME.
On the M2 Monitor, the sources are DVD, AV1, AV2 & AUX/GAME.
NOTE: If AV1 is selected on both units at the same time, there will be no display.
3. Up (p) Button – Use this button to scroll upward in menu options.
4. MUTE Button – Press this button to mute the audio. Pressing the button again restores the audio to the previously set level.
5. ENTER Button – Used to implement a selected setting.
6. LEFT (t) Button – Use this button to shift left in the menu options.
7. MENU Button – Allows the user to access the DVD (DVD MODE) root menu.
8. RETURN Button – Not used on this model.
9. A-B Button – Allow user to repeat the playback from point A to point B.
Press A-B button On-Screen Display DVD player
Once Repeat A- Mark the beginning of the section to repeat (Set point A)
Twice Repeat AB Mark the end of the section to repeat (Set point B)
3 times AB Off Cancel the A-B repeat function
REMOTE CONTROL FUNCTION DESCRIPTIONS
8

10. DISPLAY Button – Press to display the current disc information while the disc is playing. Press the cursor (pqtu) buttons to
highlight the desired option. For title and chapter selection use the number buttons to enter the desired title or chapter number for
angle, audio, and subtitle. Press the ENTER button repeatedly to change the item.
Title
Chapter
Angle
Audio
Subtitle
11. FM ON/OFF Button – Turns FM Modulator power ON/OFF (M1 Monitor Only).
12. AUDIO Button – Press to display and select the AUDIO language in DVD mode. Each time you press the button, the language
changes. (NOTE: The languages for audio vary from disc to disc.)
13. ZOOM Button – Press this button to enlarge the picture when playing a DVD disc.
Press ZOOM button DVD player perform
Once Enlarge the picture 2 times of the original size
Twice Enlarge the picture 3 times of the original size
3 times Enlarge the picture 4 times of the original size
4 times Picture is returned to original size
14. PAUSE (II) Button – Allows the user to pause the playback. Press the Play button to resume normal playback.
15. STOP () Button* – Press to stop playback.
16. PREVIOUS (9) Button – Press to return to the previous chapter or track.
17. NEXT (:) Button – Press to skip to the next chapter or track.
9
DVD
Title
Audio
Subtitle
-/-
Chapter Angle 1/1
00:00:14
Ch ENG
Stop
5.1
Off
1/1
1/1

18. SCAN BACKWARD (7) Button – Press to search in a backward direction. Press repeatedly to change the search speed from 2, 4,
8, 20 times the normal speed.
19. SCAN FORWARD (8) Button – Press to search in a forward direction. Press repeatedly to change the search speed from 2, 4, 8,
20 times the normal speed.
20. PLAY (u) Button* – Press to activate the play mode while a disc is loaded in the disc compartment.
21. ANGLE Button – Press to display and select different camera angles in DVD mode. Each time you press the button, the angle changes.
NOTE: The numbers of angles vary from disc to disc. Not all discs contain this option.
22. SUBTITLE Button – Press to display and select the subtitle language in DVD mode. Each time you press the button, the subtitle
language changes.
NOTE: The type & number of language for subtitles vary from disc to disc.
23. CHANNEL SELECT Button – Selects the FM modulator Frequency (M1 only)
(Frequency 1: 88.3MHz, Frequency 2: 88.7MHz, Frequency 3: 89.1MHz, Frequency 4: 89.5MHz, Frequency 5: 89.9MHz).
24. IRT ON/OFF Button – Press this button to turn the selected unit (M1/M2) IR Transmitter ON/OFF.
25. REPEAT Button – Allows the user to repeat a selected Title, Chapter or Track of a DVD, CD or MP3.
26. Down (q) Button – Use this button to scroll downward in the menu options.
27. SETUP Button – Press to display the Setup Menu which allows the user to change the DVD player options such as TV DISPLAY,
OSD LANGUAGE, PARENTAL CONTROL etc.
Refer to the settings and Adjustments section for more information.
10

28. RIGHT (u) Button – Use this button to shift right in the menu options.
29. PIX Button (PICTURE SELECT) – Each time this button is pressed, the on screen picture adjustment displays the “adjustment bar”
for BRIGHTNESS, CONTRAST, COLOR or TINT. Once the desired adjustment bar is displayed, use the VOLUME(+)/ VOLUME(–)
button to adjust the setting. The display will automatically turn off if no adjustments are made within 6 seconds, or is any other
button is pressed.
30. (–) Button – This is used to make picture adjustments in picture select mode.
31. (+) Button – This is also to make picture adjustments in picture select mode.
32. NUMBER Buttons – Allows the user to enter the numbers 0 to 9 for selection of CD tracks, DVD chapters, and password setting.
33. Monitor Select (M1) – Change the Remote Control code to enable the control of M1 Monitor.
34. Monitor Select (M2) – Change the Remote Control code to enable the control of M2 Monitor.
11

12
OPERATION INSTRUCTION
Button Functions (M1/M2 Unit)
There are six (6) buttons on the front of the HR9000M1 M1 unit
and HR9000M2 M2 unit as below.
1. POWER Button – To turn the unit ON/OFF.
2. SOURCE Button – Press this button will select between
DVD, AV1, AV2 and AUX/GAME.
3. SCREEN MODE Button – Press this button will select
between Wide(16:9), Normal(4:3) aspect ratio or screen off
(display OFF).
4. PLAY Button – Press this button to start playback.
5. STOP Button – Press this button to stop playback.
6. EJECT Button – Press this button to eject the disc.
S
AUX
GAME PORT
1 2 3
4
5
6

13
SETTINGS AND ADJUSTMENTS
The Setup Menu contains features and options that let you customize your DVD player. For example, you can set a language for the on-
screen display, limit playback for children.
Using the Setup Menu
1. Press the SETUP button on the remote. The Setup Menu appears on the screen as shown per diagram.
Language Video Rating
French
Spanish
German
Italian
OSD Menu English
English
Video
Language
Rating
Language Setup
Video Setup
Rating Setup
2. In order to Go to the desired page, move the highlight using the cursor button t or u to the icon indicated.
3. After entering the desired page, highlight the desired item using the cursor button p or q.
4. Press u to move the highlight to the different options for the selected item.
Press p or q to select the desired options, and then press ENTER to confirm the selection.
5. Repeat steps 3~4 to continue setting the items in the same Setup Page.
6. To change to another Setup page, press t until the highlight moves back to the icon on the top part of the Setup Menu. Then,
repeat steps 2~5.
Exiting the Setup Menu
Press the SETUP button again only.

14
LANGUAGE SETUP
Language for On-Screen Display
OSD MENU: The OSD MENU setup allows you to select the language for the on-screen display.
The user can either select English, French, Spanish, German or Italian for the OSD language.
VIDEO SETUP
TV Display
The TV DISPLAY setup allows you to adjust screen setting (aspect ratio).
4:3 PS
This displays the wide picture on the screen with a portion of the left & right side removed.
4:3 LB
This displays the wide picture with black bands on the upper and lower portions of the screen.
16:9
This displays a wide picture with black bands on the upper and lower portion of the screen.
The bandwidth will vary, depending on the aspect ratio of the disc.
TV Type
The TV TYPE setup allows you to select the system to fit to the color system of the TV to
be connected.
NTSC - Select this type for NTSC TV
PAL - Select this type for PAL TV
AUTO - Select this type for multi-system TV
Language Video Rating
French
Spanish
German
Italian
OSD Menu English
English
Language Video Rating
4:3 LB
TV Display
16:9
4:3 PS
TV Type NTSC
16:9
Language Video Rating
PAL
TV Display 16:9
TV Type
NTSC
NTSC
AUTO

15
Language Video Rating
Password
----
Rating Adult
Load Factory
Reset
Language Video Rating
Password
----
Rating Adult
Load Factory
Reset
Language Video Rating
Password
Rating Adult
Load Factory
Reset
****
RATING SETUP
Rating
This item allows you to limit the content of movie playback from G to Adult. The lower the value,
the more strict the control.
G
PG
PG – 3
R
NC – 17
Adult
The rating level can only be changed when the displayed lock is open. For first time use, key in the
default password (3308) and press enter. To set a new password, key in a new four-digit password
and press enter
Load Factory
The Load Factory — Reset allows you to reset all options to factory settings.
* This function will not affect the Rating control settings.
Note: The Default Password is 3308. This password is always effective even after you
have selected your own password and changed it. To avoid the possibility of others
using the default password to set the parental level and change the password, you can
record this default password in another area and delete it from this manual. Some discs
can be limited depending on the age of users while some discs cannot.

16
Playing Audio DVDs
1. When playing an audio CD, the DISPLAY banner appears automatically. It displays the track playing, the total tracks on the disc, and
the elapsed time of the track playing.
2. Selecting a Track
You can skip to a specific track by using the numbers keys. Key in the desired track number and press ENTER.
3. Using the REPEAT feature
The default mode for the Repeat feature is OFF. Pressing REPEAT consecutively changes the repeat options:
• SINGLE – repeat the track that is playing.
• ALL – repeat the entire disc that is playing.
As you toggle through the options, the repeat option changes at that time. The track, for example, repeats once that track has ended.
The selected repeat option loops repeatedly until you turn it off.

Playing MP3 Discs
MP3 is a format for storing digital audio. An audio CD-quality song can be compressed into the MP3 format with very little loss of
quality, while taking up much less space. CD-R discs that have been encoded in MP3 format can be played on your DVD player. The
DVD player plays the songs in the order they were burned on to the disc.
Selecting Folders and Songs
When an MP3 is loaded in the player, the navigation menu appears automatically.
1. Press p or q to move the highlight to the desired folder and press ENTER to display the
songs in the folder.
2. Press p or q to move the highlight to the desired song and press ENTER to begin playback
of the highlighted song.
Skipping Songs
Use the Next (:) button on the remote control to move to the next song. Use the Previous (9) button to move to the previous song.
Selecting a Play Mode
You can choose what order the songs will play on a disc temporarily. The default play mode is FOLDER. Press REPEAT consecutively
to choose the desired play mode. The play mode options are:
• FOLDER Plays the songs in a folder in the order they were recorded.
• SHUFFLE Plays the songs in a folder in random order (from within the selected folder).
• RANDOM Plays the songs in a folder in random order.
• SINGLE Plays a selected song.
• REPEAT ONE Repeat the song that is playing.
• REPEAT FOLDER Repeat the folder that is playing.
Stop1
CD-R MENU
CE_sho
Plant
Scenery
Shangha
879069
879093
894041
7
8
9
Mode Folder Normal
894044 10
ROOT
Animal
17

Program Play
To use the program play option, you must create a play list of songs in the order you want them to play.
NOTE: Once you begin adding songs from a folder to create your play list, you cannot add songs from a different folder.
1. Choose the PROG-PO option for the PLAY MODE.
2. Highlight and enter the folder you want to program.
3. Add songs to the program list by pressing ENTER once the song is highlighted. The song you have chosen and the number of
songs you have chosen appear at the top of the screen. For example, if you choose the number five song within the folder and it is
the first song you have chosen, PROGRAM P01:05 appears.
4. You can continue to add songs to the list from within the same folder by using the up or down arrow button and then pressing
ENTER to add it to the list.
5. When you are done creating the list, press STOP to end the programming, PROG-END is displayed. Then press PLAY to begin the
program play mode.
Deleting the Play list
To delete the entire play list, press STOP while the disc is playing and change to another play mode.
18

19
DVD Basics
To get the optimum use out of the DVD section, make sure you read this section completely.
Regional Coding
Both the DVD player and DVDs are coded by region. These regional codes must match in order for the disc to play. If the codes don’t
match, the disc won’t play. This unit’s code is region 1. Other regional codes cannot be played in this unit. The unit will display
“WRONG REGION”.
Types of Discs your DVD will play
• DVD* disc - DVD discs which contain video.
• Audio discs - Audio CDs contain musical or sound content only.
• MP3 discs - A disc that contains audio files (for example, a CD-R with downloaded MP3 files).
* This system is capable of playing most recordable DVD formats. However, due to the variety of disc manufacturers and software,
playback cannot be guaranteed.
Loading and Playing Discs
Before you load a disc, make sure that it is compatible with the player. Insert the disc with the label facing the driver.
Note: the following Discs CANNOT be used with this player :
• MiniDisc
• Laserdisc
• CD-1, CD-ROM, DVD-ROM, Super Audio CD (SACD), DVD Audio
To load and Play a Disc
Press the Power button to turn the unit ON. Select DVD mode and insert the disc (Label towards driver) into the disc compartment.

20
Audio / Video Inputs and Outputs
AV Output*
The AV output will provide the DVD signal from the M1 unit. This output can be connected to an additional monitor or video display.
* The AV output jack (P/N 112-3678) for the FMM interconnect box is supplied and used for connections.
Source Feature
M1 Sources:
DVD, AV1, AV2, AUX
DVD - Select DVD to view the internal DVD player.
AV1 - Select AV1 to view the source that is selected on the M2 satellite monitor.
AV2 - Select AV2 to view the source that is connected to the AV input on the FMM interconnect box.
AUX - Select AUX to view the source that is connected to the AUX input* on the front of the unit.
M2 Sources:
DVD, AV1, AV2, AUX
DVD - Select DVD to view the internal DVD player.
AV1 - Select AV1 to view the DVD player from the M1 monitor.
AV2 - Select AV2 to view the source that is connected to the AV input on the FMM interconnect Box.
AUX - Select AUX to view the source that is connected to the AUX input* on the front of the unit.
*The AUX input requires the use of the supplied AV adapter cable (1/8-to-RCA).
Page is loading ...
Page is loading ...
Page is loading ...
Page is loading ...
Page is loading ...
-
 1
1
-
2
-
3
-
4
-
5
-
6
-
7
-
8
-
9
-
10
-
11
-
12
-
13
-
14
-
15
-
16
-
17
-
18
-
19
-
20
-
21
-
22
-
23
-
24
-
25
- Category
- Car TFT monitors
- Type
- Specification
- This manual is also suitable for
Ask a question and I''ll find the answer in the document
Finding information in a document is now easier with AI
Related papers
-
Jensen 128-5495E User manual
-
Advent Mobile Video VOD128 Operating instructions
-
-
-
 Action Electronics ATI9R3VOD102 User manual
-
-
Advent ADV10 Operating instructions
-
-
-

Other documents
-
Pyle PLVWR84IR User manual
-
Radio Shack PLVWR84IR User manual
-
Scion 2012 xB Owner's manual
-
-
-
-
 plawa-feinwerktechnik GmbH & Co.KG 7X User manual
-
 Initial IDM-FD10 User manual
-
Audiovox PROVE8 User manual
-

