Page is loading ...

This manual will show you how to use your FUJIFILM DIGITAL CAMERA
FinePix 3800 correctly. Please follow the instructions carefully.
BL00199-200
(
1
)
7
8
Getting Ready
Camera Connection
Using FinePixViewer
Basic Photography
Advanced Features
Photography
Advanced Features
Playback
Software Installation
Settings
3.2

2
Warning
This symbol is intended to alert the user to
the presence of uninsulated “dangerous
voltage” within the product’s enclosure
that may be of sufficient magnitude to
constitute a risk of electric shock to
persons.
This symbol is intended to alert the user
to the presence of important operating
and maintenance
(
servicing
)
instructions
in the literature accompanying the
appliance.
For customers in the U.S.A.
FCC Statement
This device complies with part 15 of the FCC
Rules. Operation is subject to the following two
conditions:
(
1
)
This device may not cause
harmful interference, and
(
2
)
this device must
accept any interference received, including
interference that may cause undesired
operation.
CAUTION: TO REDUCE THE RISK OF ELECTRIC SHOCK.
DO NOT REMOVE COVER (OR BACK).
NO USER-SERVICEABLE PARTS INSIDE.
REFER SERVICING TO QUALIFIED SERVICE PERSONNEL.
The graphical symbols are located on the bottom
of the case.
To prevent fire or shock hazard, do not expose the unit to rain or moisture.

3
CAUTION
This equipment has been tested and found to
comply with the limits for a Class B digital device,
pursuant to Part 15 of the FCC Rules. These limits
are designed to provide reasonable protection
against harmful interference in a residential
installation. This equipment generates, uses, and
can radiate radio frequency energy and, if not
installed and used in accordance with the
instructions, may cause harmful interference to
radio communications. However, there is no
guarantee that interference will not occur in a
particular installation. If this equipment does cause
harmful interference to radio or television
reception, which can be determined by turning the
equipment off and on, the user is encouraged to
try to correct the interference by one or more of
the following measures:
—
Reorient or relocate the receiving antenna.
—
Increase the separation between the
equipment and receiver.
—
Connect the equipment into an outlet on a
circuit different from that to which the receiver is
connected.
Please read the Safety Notes
(
➡
P.131
)
and make sure you understand them
before using the camera.
—
Consult the dealer or an experienced radio/TV
technician for help.
You are cautioned that any changes or
modifications not expressly approved in this
manual could void the user’s authority to operate
the equipment.
Notes on the Grant:
To comply with Part 15 of the FCC rules, this
product must be used with a Fujifilm-specified
ferrite-core USB cable and DC supply cord.
For customers in Canada
CAUTION
This Class B digital apparatus complies with
Canadian ICES
-
003.

4
ADVANCED FEATURES PHOTOGRAPHY
...................
43
■ Photography Mode Specifications
..........................
43
R/W MANUAL
.....................................................
44
E SCENE POSITION
................................................
45
T MOVIE (VIDEO)
....................................................
47
PHOTOGRAPHY MENU OPERATION
...........................
50
y SETTING QUALITY MODE (NUMBER OF
RECORDED PIXELS FOR IMAGES)
...................
51
= SELF-TIMER PHOTOGRAPHY
............................
53
d EV (EXPOSURE COMPENSATION)
....................
55
a
WHITE BALANCE (SELECTING THE LIGHT SOURCE)
...
56
x
FLASH (FLASH BRIGHTNESS ADJUSTMENT)
...
57
K SHARPNESS
........................................................
57
N APERTURE-PRIORITY AUTO
.............................
58
PHOTOGRAPHY MENU
q
MOVIE
q
STILL IMAGE
? Red-Eye Reduction + Slow Synchro
......................
35
Suppressed Flash
.......................................................
36
e MACRO (CLOSE-UP) PHOTOGRAPHY
....................
37
VIEWING YOUR IMAGES (PLAYBACK)
...................
38
Fast Forwarding Images
........................................
38
MULTI-FRAME PLAYBACK
.......................................
39
PLAYBACK ZOOM
.....................................................
40
ERASING SINGLE FRAME
........................................
41
w
PLAYBACK
Contents
PREFACE
.......................................................................
11
Attach the lens cap, strap and adapter ring
................
11
Attaching the Lens Cap
..............................................
12
LOADING THE BATTERY AND xD-Picture Card
...........
14
SWITCHING ON AND OFF
.............................................
17
SETTING THE DATE AND TIME
....................................
18
Changing the date and time
........................................
20
SELECTING THE LANGUAGE
.......................................
21
1 Getting Ready
Warning
........................................................................
2
Preface
.........................................................................
6
Camera Features and Accessories
..............................
7
Nomenclature
...............................................................
8
3 Advanced Features Photography
TAKING PICTURES (AUTO MODE)
...............................
22
■ Indicator Lamp Display
...........................................
27
Number of available frames
........................................
28
USING AF/AE LOCK
.......................................................
29
FRAMING GUIDELINE FUNCTION
................................
31
DIGITAL ZOOM
...............................................................
32
z FLASH
........................................................................
33
cAuto Flash Mode
....................................................
34
nRed-Eye Reduction
................................................
34
z Forced Flash
...........................................................
35
vSlow Synchro
.........................................................
35
2 Basic Photography

5
g LCD BRIGHTNESS/VOLUME
....................................
79
g USING SET–UP
.........................................................
80
■ List of settings
.........................................................
81
■
SET–UP Menu Options (Date/time setting, etc.)
.........
81
POWER SAVE
............................................................
82
SET–UP
6.1 The Software Components
........................................
83
6.2 Installation on a Windows PC
....................................
84
6.2.1 Load the CD-ROM into your PC
.......................
84
6.2.2 From FinePixViewer installation to restart
........
85
6.3 Installation on a Mac OS 8.6 to 9.2
...........................
89
6.3.1 Check the system software settings
.................
89
6.3.2 From FinePixViewer installation to restart
........
89
6.4 Installation on a Mac OS X
........................................
92
6.4.1 From FinePixViewer installation to restart
........
92
4 Advanced Features Playback
5 Settings
6 Software Installation
System Expansion Options
......................................
113
Accessories Guide
...................................................
114
Notes on Using Your Camera Correctly
..................
116
Notes on the Power Supply
.....................................
117
Applicable Batteries
............................................
117
Notes on the Batteries
.........................................
117
Notes on Using the AC Power Adapter
...............
119
Notes on the xD-Picture Card
..................................
120
Warning Displays
.....................................................
122
Troubleshooting
.......................................................
125
Specifications
...........................................................
128
Explanation of Terms
...............................................
130
Safety Notes
............................................................
131
EC Declaration of Conformity
..................................
134
PLAYING BACK MOVIES (VIDEO)
................................
59
p ERASING SINGLE • ALL FRAMES/FORMAT
.......
61
k
PROTECTING IMAGES FRAME/ALL
...................
65
i
HOW TO SPECIFY PRINT OPTIONS (DPOF)
.........
69
iDPOF SET FRAME
...............................................
70
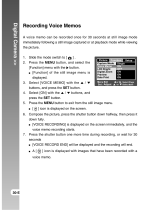
rRECORDING VOICE MEMOS
..............................
74
PLAYING BACK VOICE MEMOS
...............................
77
w
PLAYBACK MENU
1
2
3
4
5
6
7
8
7.1 Using the optional AC Power adapter
.......................
95
7.2 Use at DSC mode
.....................................................
96
7.3 Use at PC-CAM mode
...............................................
99
7.4 Disconnecting the Camera
......................................
102
7 Camera Connection
8.1 Saving Images on Your Computer
..........................
104
8.2 Making a FinePix CD Album
...................................
105
8.3 Using the FinePix Internet Service
..........................
106
8.4 User Registration
.....................................................
106
8.5 Mastering FinePixViewer
.........................................
110
8.6 Uninstalling the Software
.........................................
111
8 Using FinePixViewer

6
Preface
■
Test Shots Prior to Photography
For particularly important photographs (such as weddings and
overseas trips), always take a test photograph and view the
image to make sure that the camera is functioning normally.
h Fuji Photo Film Co., Ltd. cannot accept liability for any
incidental losses (such as the costs of photography or the
loss of income from photography) incurred as a result of
faults with this product.
■
Notes on Copyright
Images recorded using your digital camera system cannot be
used in ways that infringe copyright laws without the consent
of the owner, unless intended only for personal use. Note that
some restrictions apply to the photographing of stage
performances, entertainments and exhibits, even when
intended purely for personal use. Users are also asked to note
that the transfer of memory cards containing images or data
protected under copyright laws is only permissible within the
restrictions imposed by those copyright laws.
■
Liquid Crystal
If the LCD monitor or viewfinder (EVF) is damaged, take
particular care with the liquid crystal in the monitor or
viewfinder. If any of the following situations arise, take the
urgent action indicated.
h If liquid crystal comes in contact with your skin
Wipe the area with a cloth and then wash thoroughly with
running water and soap.
h If liquid crystal gets into your eye
Flush the affected eye with clean water for at least
15 minutes and then seek medical assistance.
h If liquid crystal is swallowed
Flush your mouth thoroughly with water. Drink large quantities
of water and induce vomiting. Then seek medical assistance.
■
Notes on Electrical Interference
If the camera is to be used in hospitals or aircrafts, please
note that this camera may cause interference to other
equipment in the hospital or aircraft. For details, please
check with the applicable regulations.
■
Handling Your Digital Camera
This camera contains precision electronic components. To
ensure that images are recorded correctly, do not subject the
camera to impact or shock while an image is being recorded.
■
Trademark Information
h IBM PC/AT is a registered trademark of International
Business Machines Corp. of the U.S.
h iMac and Macintosh are registered trademarks of Apple
Computer, Inc.
h QuickTime and the QuickTime logo are trademarks used
under license. The QuickTime logo is registered in the
U.S. and other countries.
h Adobe Acrobat
®
Reader
™
is a trademark of Adobe Systems
Incorporated of the U.S.
h Microsoft, Windows, the Windows logo and DirectX are
either trademarks, or registered trademarks of Microsoft
Corporation in the United States and/or other countries.
Windows is an abbreviated term referring to the Microsoft
Windows Operating System.
✽ The “Designed for Microsoft Windows XP” logo refers to
the camera and the driver only.
h xD-Picture Card and other company or product names are
trademarks or registered trademarks of the respective
companies.
■ Exif Print (Exif ver. 2.2)
Exif Print Format is a newly revised digital camera file format that
contains a variety of shooting information for optimal printing.

7
Camera Features and Accessories
h Superb image quality provided by the high-resolution
Fujinon 6× zoom lens and 3.2 million effective pixels
h Maximum number of recorded pixels: 2048 × 1536
pixels (3.15 million pixels)
h Compact and lightweight body
h Wide range of photography applications (includes Macro
function)
h Intelligent Auto White Balance and AE functions built-in
h Built-in automatic flash with precise wide-range flash
control
h 3.2× digital zoom photography (5× for movie shooting)
and up to 12.8× zoom playback functions
h Manual and Scene Position modes that provide an
expanded range of photography options
h 1.8 inches 62,000 pixels amorphous silicon TFT LCD
monitor and 0.33 inches electronic viewfinder (EVF)
h Voice Caption function records up to 30 seconds of
sound.
h Movie shooting function (320 × 240/160 × 120 pixels
with sound)
h Easy high-speed image file transfer via the USB
connection (using the Interface Set provided with sound)
h Accepts tele and wide conversion lenses. (Flash cannot
be used when a conversion lens is mounted.)
h Conforms to the new standard for digital camera file
system
✽
✽ Design rule for Camera File system
Features Accessories
h LR6 AA-size alkaline batteries (4)
h 16MB, xD-Picture Card (1)
Supplied with: Anti-static case (1)
h Adapter Ring (1) h Lens Cap (1)
h Strap
(
1
)
h Interface Set (1)
•
CD-ROM: Software for FinePix SX (1)
•
Special USB cable with Noise Suppression core (1)
h Owner’s Manual
(
this manual
)(
1
)

8
Flash control
sensor
Flash
(P.33)
Self-timer lamp
DC IN 5V(Power input)
socket (P.95)
Shutter button
Strap mount
OPEN(Flash pop-up)
button
Slot cover
xD-Picture Card slot
Microphone
Speaker
Lens
Digital(USB)socket
(P.96,99)
Power switch
Playback mode(P.38)
Photography mode(P.22)
Power-OFF (P.17)
MOVIE(Video)(P.47)
Manual(P.44)
AUTO (P.22)
Scene Position(P.45)
Mode dial
Nomenclature
✽ Refer to the pages in parentheses for information on using the camera features.

9
a( Tele zoom)button
b( Wide zoom) button
BACK button
Indicator lamp
(P.27)
Viewfinder(EVF) (P.23)
EVF/LCD
(monitor selector)
button
(P.23)
LCD monitor(P.23)
Tr ipod mount
MENU/OK button
DISP button
(P.31,39)
Strap mount
Battery cover
(P.15)
d( Macro)button(P.37)
c( Flash)button(P.33)

10
Nomenclature (Sample display)
Playback frame number
Photography mode
Flash
Date
Zoom bar
Battery low warning
Playback mode
Voice captioning
DPOF
Protection
White balance
Macro
Battery low warning
Number of remaining shots
Quality mode(Number of recorded
pixels for images)
AF warning
AF frame
EV(Exposure compensation)
Self-Timer
Camera shake warning
Example of Screen Text Display: Still photography mode
Example of Screen Text Display: Playback mode

11
1
Pull the lens cap cord through the strap mount.
1 Getting Ready
PREFACE
Attach the lens cap, strap and adapter ring
●
!
Attach the lens cap cord to avoid losing the lens cap.
1
●
!
Failure to attach the strap correctly can result in the
camera being dropped.
Attach the strap to the strap mounts on the
camera. Once you have attached both ends of
the strap, check carefully to ensure that the
strap is firmly secured.
2

12
PREFACE
Screw the adapter ring in the direction of the
arrow to mount it on the camera.
3
To prevent the lens cap from appearing in the
shot when you take pictures, attach the lens cap
to the strap.
Fit and remove the lens cap by squeezing the
left and right sides of the cap.
1
Attaching the Lens Cap
Mounting the adapter ring on the camera
protects the lens and allows you to attach the
optional conversion lens. The adapter ring
should be mounted on the camera at all times to
protect the lens.
2

13
1
◆
Conversion Lens Guide
◆
Changes the focal length by a factor of 0.79×
(wide-angle: equivalent to 30 mm) without altering
the F-stop value of the lens.
hWide conversion lens specifications
Magnification : 0.79×
Lens configuration : 3 lenses in 3 groups
Shooting range : Approx. 10 cm to infinity
Dimensions : 32 mm (1.26 in.) × 70 mm
(2.76 in.) dia.
Mass (Weight) : Approx. 185 g (6.5 oz.)
Accessories : Adapter Ring AR-FX9 (see
below for specifications),
Lens caps (front and rear),
Lens pouch
●
!
The enclosed adapter ring (for FinePix 4800/
6900/S602) cannot be used.
●
!
Only use the wide conversion lens at the wide-
angle zoom setting.
●
!
The flash cannot be used when the wide
conversion lens is mounted.
Wide Conversion Lens WL-FX9
Changes the focal length by a factor of 1.5x
(telephoto: equivalent to 340 mm) without altering
the F-stop value of the lens.
hTeleconversion lens specifications
Magnification : 1.5×
Lens configuration : 3 lenses in 3 groups
Shooting range : Approx. 2.4 m to infinity
Dimensions : 55 mm (2.17 in.) × 65 mm
(2.56 in.) dia.
Mass (Weight) : Approx. 100 g (3.5 oz.)
Accessories : Adapter Ring AR-FX9 (see
below for specifications),
Lens caps (front and rear),
Lens pouch
●
!
Only use the tele conversion lens at the telephoto
zoom setting.
●
!
The flash cannot be
used when the
teleconversion lens
is mounted.
Teleconversion Lens TL-FX9
Conversion
lens
●
!
Commercially available filters can be mounted on the lens when the adapter ring is attached, but no more than
one filter should be mounted at a time.

14
LOADING THE BATTERY AND xD-Picture Card
Compatible batteries
Use four AA-size alkaline batteries or four AA-
size nickel-metal hydride (Ni-MH) batteries.
◆
Notes on Handling Batteries
◆
h It is recommended that you use same brand of
alkaline batteries as those supplied with the camera.
h Never use a battery when the
outer casing is split or peeling as
this could result in a short-circuit
and cause major problems due
to battery fluid leakage or
overheating.
h Do not use different types of batteries or old and new
batteries together.
h You cannot use lithium, manganese or nickel-
cadmium (Ni-Cd) batteries.
h The operating lives of alkaline batteries vary between
brands and the life of batteries you purchase may be
shorter than the alkaline batteries provided with the
camera. Note also that due to the nature of alkaline
batteries, the time for which they can be used is
shorter in cold locations (at temperatures of +10°C
(+50°F) or below). Consequently, Ni-MH batteries are
recommended.
h Soiling (fingerprints, etc) on the terminals of batteries
can greatly reduce the time for which the batteries
provide power.
h You will need the optional charger (➡P.114) to recharge
Ni-MH batteries.
h See P.117, 118 for notes on using batteries.
xD-Picture Card
(
sold separately
)
DPC-16 (16MB) DPC-32 (32MB)
DPC-64 (64MB) DPC-128 (128MB)
●
!
Operation of this camera is only guaranteed when it
is used with FUJIFILM xD-Picture Card.
●
!
Because xD-Picture Cards are small, they can be
accidentally swallowed by small children. Be sure to
store xD-Picture Cards out of the reach of small
children. If a child accidentally swallows an xD-
Picture Card, seek medical advice immediately.
●
!
See P.120-121 for more information on xD-Picture
Card.
Outer casing
Front Back

15
1
01
02
03
1Slide the battery cover out and lift it open.
2Insert the batteries correctly as indicated by
the polarity icons.
3Close the battery cover.
●
!
Do not apply excessive force to the battery cover.
Do not open the battery cover while the camera
is still switched on as this could corrupt the
image files on the xD-Picture Card or damage
the xD-Picture Card itself.
◆
Replacing the batteries
◆
Check that the Power switch is set to “OFF”, open
the battery cover and remove the batteries.
●
!
Take care not to drop the batteries when you open
or close the battery cover.

16
LOADING THE BATTERY AND xD-Picture Card
01
02
03
1Open the slot cover.
2Firmly push the xD-Picture Card fully into the
xD-Picture Card slot.
3Close the slot cover.
●
!
If you open the battery cover while the camera is still
switched on, the camera is automatically switched
off to protect the xD-Picture Card.
●
!
The xD-Picture Card will not slide fully into the slot if
it is inserted facing the wrong way. Be careful not to
apply excessive force to the xD-Picture Card.
●
!
When storing the xD-Picture Card, always use the
special anti-static case provided.
◆
Replacing the xD-Picture Card
◆
When you push the xD-Picture
Card into the slot and then
slowly remove your finger, the
lock is released and the xD-
Picture Card is pushed out.
You can then pull the xD-
Picture Card the rest of the
way out.
●
!
Take care not to remove your finger too quickly
after the lock is released, as the card may spring
completely out of the slot.

17
1
SWITCHING ON AND OFF
●
!
To set the date and time later, press the “BACK”
button.
●
!
If you do not set the date and time, this confirmation
message will appear each time you switch the
camera on.
When you first switch the camera on, the date is
cleared. Press the “MENU/OK” button to set the
date and time.
1 2
Turn the Power switch to turn the camera on
and off.
q : Photography mode
w : Playback mode
OFF: Power-OFF
When you switch the camera on, the indicator
lamp lights (green).

18
SETTING THE DATE AND TIME
1 Use “d” and “c” to select Year, Month, Day,
Hour or Minute.
2 Press “a” or “b” to set the number.
●
!
If you hold down “a” or “b”, the numbers change
continuously.
●
!
When the time displayed passes “12:00”, the AM/PM
setting automatically switches.
3
01 02
4
Press “d” when “YEAR” is selected, or press
“c” when “MIN” is selected and select the date
format.

19
1
5
Press “a” or “b” to switch between “YYYY.MM.
DD” (year.month.day) and “MM/DD/YYYY”
(month/day/year).
Once you have set the date and time, press the
“MENU/OK” button. Pressing the “MENU/OK”
button switches the camera to Photography or
Playback mode.
●
!
To set the time more precisely, press the “MENU/OK”
button when the time on your reference clock reaches
zero seconds.
●
!
If at least 2 hours have passed since the AC power
adapter was connected or the batteries inserted and the
date and time set, then those settings will be maintained
for roughly 6 hours even when the camera has no power
supply (when the AC power adapter is disconnected and
the batteries are removed).
6

20
Changing the date and time
1 Press the “MENU/OK” button.
2 Use “d” or “c” to select “gOPTION” and
then use “a” or “b” to select “SET–UP”.
3 Press the “MENU/OK” button.
4 Select “DATE/TIME” and press “c”.
See P.18 for information on setting the date and
time.
0103 0204
◆
Power Save Function
◆
If the camera is not used for 2 minutes, this
function automatically switches it off.
When this function is enabled, the screen
switches off to conserve battery power if the
camera is not used in any way for 30 seconds
(See P.82 for details). To switch the camera
back on, turn the Power switch to “OFF” briefly
and then back to “q”.
◆
Checking the remaining batteries charge
◆
Switch the camera on and check that no battery
level warning (
Z or X) is displayed on the
LCD monitor. If no icon is displayed, there is
ample charge left in the batteries.
i
X Lit red:
Batteries charge low. Replace or recharge the
batteries as they will run out shortly.
i
C Blinking red:
The batteries are exhausted. The display will
shortly go blank and the camera will stop
working. Replace or recharge the batteries.
●
!
Do not reuse batteries that have no remaining
charge (C blinking red) as this can result in faults
such as the camera switching off without retracting
the lens.
●
!
The above estimates are for the Still image modes.
In Playback mode, the transition from “X” to “C”
may take less time.
SETTING THE DATE AND TIME
/