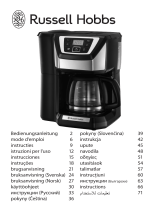
AEG KAM400 User manual

Category
Coffee making accessories
Type
User manual
INSTRUCTION BOOK
KAM400
Combi Coee Maker
GB INSTRUCTION BOOK
DE GEBRAUCHSANWEISUNG
ES LIBRO DE INSTRUCCIONES
FR MODE D’EMPLOI
GR

NL GEBRUIKSAANWIJZING
PT MANUAL DE INSTRUÇÕES
2 www.aeg.com
A
H
B
C
E
O P
Q
F
I
JK
L
M
N
D
G
R
3www.aeg.com
3
7
6
12
13
4 5
10 11
1 2
9
8
15
14
4 www.aeg.com
18
29
22
21
27
28
19 20
16 17
24
30
23
25 26
5www.aeg.com
32
36
35
33
34
31
3837
6 www.aeg.com
Visit our website to:
Get usage advice, brochures, trouble shooter, service information:
www.aeg.com/webselfservice
Register your product for better service:
www.registeraeg.com
Buy accessories and consumables for
your appliance:
www.aeg.com/shop
CONTENTS
ENGLISH 8
DEUTSCH 13
ESPAÑOL 18
FRANÇAIS 23
 28
NEDERLANDS 33
PORTUGUÊS 38
FOR PERFECT RESULTS
Thank you for choosing this AEG product. We have created it to give you impeccable performance for
many years, with innovative technologies that help make life simpler features you might not nd on
ordinary appliances. Please spend a few minutes reading to get the very best from it.
CUSTOMER CARE AND SERVICE
When contacting Service, ensure that you have the following data available:
- Model Number
- PNC number
- Serial number
The information can be found on the rating plate.
7www.aeg.com
8 www.aeg.com
ENGLISH
Thank you for choosing an AEG product. In order to ensure the best results, always use original AEG accessories and
spare parts. They have been designed especially for your product. This product is designed with the environment in
mind. All plastic parts are marked for recycling purposes.
COMPONENTS
A. Coee grinder bean container
B. Finess setting
C. Grinder channel
D. Swivel lter
E. Coee jug and jug lid
F. Coated warming plate
G. Rotatable base
H. Swivel lter open
I. Fresh water tank
J. Display
K. Button for number of cups
L. Button for coee strength
M. Button for programme activation
N. Clock setting button, hour
O. Clock setting button, minute
P. On/O button
Q. Pre-ground coee powder button
R. Aroma button
Picture page 2-5
GETTING STARTED
1 Prior to preparing coee for the rst time, perform one brew with water only. Fill the fresh water tank up to the top
cup marking with cold water. Close the lid. Press the ON/OFF button to switch on the appliance. Allow the water to ow
through into the coee jug. When brewing is nished, empty the coee jug.
2 Fill the water tank with clear, cold tap water. There are cup markings on the coee jug for measuring the required quantity.
Close the lid of the fresh water tank.
3 Swing out the swivel lter. Insert a lter paper. Swing the swivel lter back again.
4 Place the jug with lid on the warming plate.
5 Place coee beans in the bean container. The coee grinder has a container which keeps the beans constantly aroma fresh.
Fill the container to the top and fasten the lid rmly. The bean container holds approximately 250g of coee beans.
6 Turn the Finess settings to the desired position. Change the size of coee ground to suit the strength of roast. It is recom-
mended to begin with a medium setting which is suitable for the types of coee that are usually commercially available.
7 Connect to the main supply. The display will ash the initial time showing: 12:00.
8 Set the time. The appliance has a timer, to set time and pre-programming the start time to 24 hours in advance: (Auto func-
tion).Set hours with the Hours button . Set minutes with the Min button .
9 The appliance will start a 40 minutes keep warm function automatically when brewing. During keep warm function press
ON/OFF button to cancel it. The keep warm function will automatically stop after 40 minutes and the appliance turns
to stand by condition.
OPERATING INSTRUCTIONS
10 It is possible to make coee using ready ground coee either immediately, or by pre -programming the start time, (Auto
function). For preparation using ready ground coee, the settings for coee strength, number of cups and aroma setting will
have no eect.
Pour in water in the fresh water tank.
11 Swing out the swivel lter. Insert a lter paper. Add ground coee. Swing swivel lter back.
12 To make coee instantaneously. Place the coee jug on the warming plate. Press the ON/OFF button . The brewing
procedure will start.
13 Making coee by pre-programming the start time, (Auto function). Long press the Program button. Set the desired start
time using the Hour and Minute button.
14 Short press Program button after nishing the program setup, to activate the Auto function. When activated,
Auto” will show up on the display. Press Program button again to cancel the Auto function. If once pre-programmed,
the start time will not be changed.
15 When reached the pre-set time, the machine will start brewing coee.
16 Prepare coee with beans either immediately or by pre-programming the start time, (Auto function). For preparing
coee with beans, set number of cups, coee strength and where required the aroma setting. Place the coee beans in the
bean container. Close the lid rmly.
17 Preparing coee instantaneously. Pour in water in the fresh water tank. Swing out swivel lter, insert lter paper.
18 Place the jug on the warming plate. Set Aroma setting at 2 or 4 cups. Press the Aroma button .
9www.aeg.com
GB
DE
ES
FR
GR
NL
PT
19 Press the pre-ground coee powder button to close the grinder function. Default setting is open. Once closed, the icon
Grinder closed will show up on the display.
20 Press the ON/OFF button. Brewing will start at once and the keep warm function .
21 How to prepare coee using the coee grinder with pre-programming of the start (Auto function). Long press the
Program button
. Set the desired start time using the Hour and Minute button.
22 Set the desired number of cups to be prepared. The number of cups is indicated in the display: 2, 4, 6, 8 and 10 cups
can be set.
23 Set the coee strength by pressing the Strength coee button. The symbols of coee strength is indicated on the display:
mild, medium, strong.
24 Set Aroma setting at 2 or 4 cups. Press the Aroma button.
25 After nishing program setup, short press Program button to activate the Auto function. When activated, other
buttons will not response if pressed. If once pre-programmed, the start time, number of cups and coee strength are not to be
changed. Press the Program button to activate the Auto function.
26 When reached the pre-set time, the machine will start brewing coee and the keep warm function.
27 If the appliance is pre-programmed using the Auto function, but the coee is requested before the start time. Switch o
the Auto function by pressing the Program button.
Note: When preparing coee with beans: Coee preparation takes place with the settings in normal mode. When the settings
dier from the Auto function, it is needed to change the settings accordingly in the normal mode prior to the start.
28 Deactivating the Auto function.
If the Auto function is activated but the program is not intended to start, press the Program button.
29 Switching o. Press the ON/OFF button.
Warming plate. After brewing, the warming plate keeps the coee in the glass jug warm. Two hours after brewing, the appli-
ance will go into standby mode automatically.
Removing the jug. When the jug is removed, the anti-drip valve prevents dripping.
CLEANING AND CARE
30 The lter insert can be removed for emptying and cleaning. Swing out the swivel lter. Place a nger in the rear handle recess
and pull the bracket up. This unlocks the lter insert and it can be removed for cleaning. Activate the anti-drip valve several times
during cleaning.
31 After cleaning the lter insert, t the swivel lter. Reposition the bracket. The lter insert is now relocked. Please check that it
is positioned and locked correctly!
32 Only clean the appliance using a damp cloth. Never immerse it in water. Only the coee jug and the jug lid are dishwasher safe .
33 Clean the grinder channel every 1 to 2 weeks, or whenever you switch between coee bean containers, to prevent freshly
ground coee and traces in the grinder channel from mixing together.
Note: Traces left of the previously ground type of coee beans can aect the taste of your coee.
Unplug the appliance. Use the special brush to unlock the cover of the grinding channel.
34 Insert a paper lter in the swivel lter. Use the special brush to clean the grinder channel from coee residue. Caution! Do not
drop the special brush into the grinder channel. The coee residue can also be removed using a vacuum cleaner. Then wipe the
grinding channel with a dry cloth. Empty the paper lter.
35 Push the cover of the grinding channel back on until it engages. When doing so, press the catch down with a nger. Check
that the cover is correctly positioned. Lock the cover of the grinding channel. The coee machine is now fully ready for use again.
Always keep the container for the coee beans closed. Clean the coee grinder regularly from oily residues from the coee beans
using a dry cloth .
DECALCIFYING
36 As a precaution we recommend descaling after 70 uses. Use only an environmentally friendly descaling agent and always
follow the manufacturer’s instructions.
37 First ll the fresh water container with water and then add the descaling agent. Place the coee jug with the lid on the
warming plate. Allow the descaling solution to work for approximately 15 minutes, then switch on the appliance. Once the
descaling solution has percolated through, switch the appliance o. If necessary, repeat the descaling procedure. Repeat the
procedure at least twice using clear water.
38 Rinse the coee jug, jug lid and lter insert thoroughly under running water. Activate the anti-drip valve several times as it
is rinsed.
Enjoy your new AEG product!
10 www.aeg.com
SAFETY ADVICE
Read the following instruction carefully before using the appliance for the rst time.
This appliance shall not be used by children. Keep the appliance and its cord out of
reach of children.
Appliances can be used by persons with reduced physical, sensory or mental
capabilities or lack of experience and knowledge if they have been given supervision
or instruction concerning use of the appliance in a safe way and if they understand
the hazards involved.
Children shall not play with the appliance.
Cleaning and user maintenance shall not be made by children unless they are older
than 8 and supervised.
Keep the appliance and its cord out of reach of children less than 8 years.
The appliance may only be connected to a power supply whose voltage and
frequency comply with the specications on the rating plate!
Never use or pick up the appliance if
– the supply cord is damaged,
– the housing is damaged.
The appliance must only be connected to an earthed socket. If necessary an extension
cable suitable for 10 A can be used.
If the appliance or the supply cord is damaged, it must be replaced by the
manufacturer, its service agent or similarly qualied person, in order to avoid hazard.
Always place the appliance on a at, level surface.
Never leave the appliance unattended while connected to the supply mains.
The appliance must be switched o and the mains plug withdrawn each time after
use, before cleaning and maintenance.
The appliance and accessories become hot during operation. Use only designated
handles and knobs. Allow to cool down before cleaning or storage.
Do not immerse the appliance in water or any other liquid.
Do not use or place the appliance on a hot surface or near source of heat.
Warning: Avoid spillage on the connector.
Attention: The heating element surface is subject to residual heat after use.
The mains cable must not come into contact with any hot parts of the appliance.
This appliance is intended for domestic use only. The manufacturer cannot accept
any liability for possible damage caused by improper or incorrect use.
Never operate appliance with open lid.
Always disconnect the appliance from the supply if it is left unattended and before
assembling, disassembling or cleaning.
This appliance is intended to be used in household and similar applications such as:
- sta kitchen areas in shops, oices and others working environments;
- farm houses;
- by clients in hotels, motels and other residential type environments;
- bed and breakfast type environments.
11www.aeg.com
GB
DE
ES
FR
GR
NL
PT
TROUBLESHOOTING
PROBLEM SOLUTION
The appliance does not work. Put the mains plug in the wall socket..
Make sure that the voltage indicated on the appliance corresponds to the local
mains voltage.
Fill the water reservoir with water.
When I use the grinder, the coee is too weak. Make sure the number of cups you select with the 2-10 cups button is
consistent with the amount of water in the water reservoir. Please keep in
mind that the appliance uses all the water in the water reservoir.
Use the STRENGTH button to set the coee strength to ‘strong’.
When you use coee beans, make sure you do not press the preground coee
button, as this switches o the grinder.
Use coee beans of a stronger blend or avour.
To increase the coee strength, select a higher number of cups with the 2-10
cups button than the number of cups you ll the water reservoir with.
When I use pre-ground coee, the coee is
too weak.
Make sure the amount of pre-ground coee in the lter is consistent with the
amount of water in the water reservoir. Please keep in mind that the appliance
uses all the water in the water reservoir.
Use ground coee of a stronger blend or avour.
To increase the coee strength, increase the amount of pre-ground coee or
decrease the amount of water.
I have set the coee strength to ‘strong’ with
the STRENGTH button, but the coee is too
weak.
When the grinder is switched o, you cannot change the coee strength with
the STRENGTH button. In this case you can only increase the coee strength
by increasing the amount of pre-ground coee or decreasing the amount of
water, or by using coee of a stronger blend or avour.
The lter overows when I remove the jug
from the appliance while it is brewing coee.
If you remove the jug for more than 20 seconds during the brewing process,
the drip stop causes the lter holder to overow. Also note that the coee
does not reach its full taste before the end of the brewing process. Therefore
we advise you not to remove the jug and pour out the coee before the end of
the brewing process.
The appliance continues to drip long after the
brewing mprocess has ended.
The dripping is caused by condensation of steam. It is completely normal that
the appliance drips for some time.
If the dripping does not stop, the drip stop may be clogged. To clean the drip
stop, push it to open it and then rinse it under the tap.
If you remove the jug for more than 20 seconds during the brewing process,
the drip stop causes the lter basket to overow.
The coee is not hot enough. Place the jug properly on the hotplate.
Make sure that the hotplate and the bottom of the jug are clean.
Use thin cups, because they absorb less heat from the coee than
thick cups.
Do not use milk that comes directly out of the fridge.
Descale the appliance. See section ‘Descaling’ in chapter ‘Cleaning and
maintenance’.
12 www.aeg.com
DISPOSAL
This symbol on the product indicates that this product contains a battery which shall not be disposed with
normal household waste.
This symbol on the product or on its packaging indicates that the product may not be treated as household
waste. To recycle your product, please take it to an oicial collection point or to an AEG service center that
can remove and recycle the battery and electric parts in a safe and professional way. Follow your country’s
rules for the separate collection of electrical products and rechargeable batteries.
AEG reserves the right to change products, information and specications without notice.
www.aeg.com
3480 A KAM400 02 01 0218
Electrolux Hausgerate GmbH
Further Strasse 246
D-90429 Nurnberg
Germany
Printed on recycled paper
www.aeg.com/shop
  • Page 1 1
  • Page 2 2
  • Page 3 3
  • Page 4 4
  • Page 5 5
  • Page 6 6
  • Page 7 7
  • Page 8 8
  • Page 9 9
  • Page 10 10
  • Page 11 11
  • Page 12 12
  • Page 13 13
  • Page 14 14
  • Page 15 15
  • Page 16 16
  • Page 17 17
  • Page 18 18
  • Page 19 19
  • Page 20 20
  • Page 21 21
  • Page 22 22
  • Page 23 23
  • Page 24 24
  • Page 25 25
  • Page 26 26
  • Page 27 27
  • Page 28 28
  • Page 29 29
  • Page 30 30
  • Page 31 31
  • Page 32 32
  • Page 33 33
  • Page 34 34
  • Page 35 35
  • Page 36 36
  • Page 37 37
  • Page 38 38
  • Page 39 39
  • Page 40 40
  • Page 41 41
  • Page 42 42
  • Page 43 43
  • Page 44 44
  • Page 45 45
  • Page 46 46

AEG KAM400 User manual

Category
Coffee making accessories
Type
User manual

Ask a question and I''ll find the answer in the document

Finding information in a document is now easier with AI