Page is loading ...

MeterView XL Programming Software
Instruction Manual
PRECISION DIGITAL CORPORATION
233 South Street • Hopkinton MA 01748 USA
Tel (800) 343-1001 • (508) 655-7300
www.predig.com
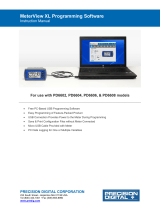
For use with the following Flow Rate/Totalizers:
PD6938-HA/ -EX / -IS
Aluminum & Stainless Steel
PD6938-GP
NEMA 4X Plastic
• Free PC-Based USB Programming Software
• Easy Programming of Feature-Packed Product
• USB Connection Provides Power to the Meter During Programming
• Save & Print Configuration Files without Meter Connected
• Micro USB Cable Provided with Meter
• Download the On-Board Data Log via USB or RS-485 Connection
• PC Data Logging for One or Multiple Variables

MeterView XL Programming Software
Instruction Manual
2
MeterView XL Programming
Software
The easiest and quickest way to program your pulse
input rate/totalizers is with the free, PC-based,
MeterView XL software. The rate/totalizer connects to
the PC with a USB cable that also provides the power
to the rate/totalizer during programming. Programming
files can be saved for later use.
• Free PC-Based USB Programming Software
• Easy Programming of Feature-Packed
Product
• USB Connection Provides Power to the
Meter During Programming
• Save & Print Configuration Files without
Meter Connected
• Micro USB Cable Provided with Meter
• PC Data Logging for One or Multiple
Variables
MeterView XL Software Installation
• Please uninstall previous versions of this
software prior to downloading, installing, and
running the latest version.
1. Download MeterView XL Installation file to your
PC from www.predig.com/meterviewxl
2. Locate the MeterView XL zipped folder on your
PC and double-click to extract and open:
3. Double-click MeterView XL Windows Installer
Package file to open:
4. The MeterView XL Setup Wizard window will
appear. Click “Next” to start the installation
process:
5. The MeterView XL License Agreement window
appears next. Select “I agree” and click “Next”
to continue the installation process:

MeterView XL Programming Software
Instruction Manual
3
6. Choose the folder location where you would
like the software to be installed to and select
options for use. Then click “Next” to continue:
7. Confirmation window will appear. Click “Next”
to confirm the installation:
8. The User Account Control message is
displayed. Click “Yes” to proceed with the
installation:
9. Finally, the Installation Complete window will
appear. Click “Close” to exit:
Now you are ready to open the MeterView XL software
to begin programming your pulse input rate/totalizer.
Connecting to the Computer
The rate/totalizer may be connected to any Windows
10 or Windows 11 PC via the provided USB cable by
following these steps:
1. Open the MeterView XL software.
2. Connect the rate/totalizer to the PC with the
provided USB cable.
3. The software will ask if you would like to
read the meter. Click OK.

MeterView XL Programming Software
Instruction Manual
4
Specifications
Availability
Free download from
www.predig.com/meterviewxl
System
Requirements
Microsoft® Windows® 10 & 11
Communications
USB 2.0 (Standard USB A to Micro USB B)
Cable provided
Configuration
Configure all parameters on the meter.
Configure meters one at a time.
Configuration
Files
Generate with or without meter
connected; Save to file for later use.
USB Power
Connection
The meter is powered by the USB
connection during programming. There
is no need to apply external power.
Note: The meter will not be damaged if
external power is applied to it during
programming.
The meter should only be connected to a computer while it is
located in a safe area.
Compatibility
Programs created for VantageView+ and
ProtEX+ can be run on either meter. No
other program sharing is permissible.
USB Power
Connection
The meter is powered by the USB
connection during programming. There
is no need to apply external power.
Note: The meter will not be damaged if
external power is applied to it during
programming.
Data Logging
Report
The on-board data log can be
downloaded via the USB or the RS-485
connection.
Saved log file as “.csv” file format.
PC Data
Logging
MeterView XL can be used data log
directly to a computer connected to the
meter via the USB or the RS-485
connection. The user can select what to
log and at what interval.
• Rate
• Total
• Grand total
• Open collector triggers
• Relay triggers
• Hold/Unhold outputs
Compatibility
Programs created for VantageView+ and
ProtEX+ can be run on either meter. No
other program sharing is permissible.

MeterView XL Programming Software
Instruction Manual
5
Using MeterView XL Software
Main Screen
The main screen displays a real-time image of the connected meter and includes various information about this
meter. This information includes max and min values, status of open collectors and relays (if option installed), and
value of the input signal and output signal (if option installed). From the main screen the user can also operate the
data logging feature and reset the max and min values.

MeterView XL Programming Software
Instruction Manual
6
Input / Scale Screen
The input / scale screen is used to configure the input signal and scale it appropriately using the multi-point
linearization feature or using the k-factor scaling. The meter can be programmed to display rate and totals, in any
available units using the display screen, without having to change the k-factor or the scaling points.
Function
This Meter
Set the input
Active pulse input
Low gate (Not visible)
1 second
High gate (Not visible)
2 seconds
Scale rate/PV
2 points
Units
Gallons/minute
K-factor
Disabled (Scale points and k-factor are exclusive of each other)
Click the send button at the bottom right of the window to send the new settings to the meter.

MeterView XL Programming Software
Instruction Manual
7
The following screen shows the pulse input type, low and high gate, and the k-factor being used.
Function
This Meter
Set the input
Active pulse input
Low gate
1 second
High gate
2 seconds
Scale rate/PV
Disabled
K-Factor
1.0 pulses/gallon

MeterView XL Programming Software
Instruction Manual
8
Display Screen
The display screen is used to change what is displayed on the meter’s top and bottom display lines. If either display
lines are set to show units or tag, or to alternate between units, tags, and some other parameter, the tag shown, and
the display time may be set in the tag & units time section. The rate, total and grand total sections are used for
setting the units and decimal points. The bargraph section is used for selecting the source and scaling the bargraph
value. The backlight section programs the meter to conserve power when it is powered from a battery. The backlight
can be programmed to stay on for a certain amount of time after a period of front panel keys inactivity or be turned off
entirely. The LCD section programs how long the LCD will stay on after a period of front panel keys inactivity.
Click the send button at the bottom right of the window to send new settings to the meter.

MeterView XL Programming Software
Instruction Manual
9
Open Collector Output Screen
The meter comes with two open collectors as a standard feature. The open collector output screen is used to
program the open collector outputs for a specific output type (pulse, alarm, timer, stopwatch) or set to be disabled.
The two open collectors may be programmed independently using the output 1 and output 2 sections. The following
example shows the open collectors programmed for two high alarms. In addition, when an alarm occurs, the display
is programed to turn red, start to flash and display an alarm message.
Click the send button at the bottom right of the window to send new settings to the meter.

MeterView XL Programming Software
Instruction Manual
10
Relay Output Screen
The meter can be equipped with two solid state relays as an option and these relays can be programmed to satisfy a
wide variety of applications. The relay screen is used to program the relay outputs for
a specific output type (alarm, pump control, timer, stopwatch) or set to be disabled. The two relays may be
programmed independently using the relay 1 and relay 2 sections. The example below shows relays 1 and 2
programmed for batch control:
Click the send button at the bottom right of the window to send new settings to the meter.

MeterView XL Programming Software
Instruction Manual
11
4-20 mA Output Screen
The 4-20 mA out screen allows the optional 4-20 mA analog output to be set up and scaled appropriately. The output
may either be scaled independently of the input, or simply retransmitted in the same scale. In addition, analog output
values can be set for under and overrange input conditions.
.
Note: The “input condition definitions” are not applicable to pulse input meter.
Click the send button at the bottom right of the window to send new settings to the meter.

MeterView XL Programming Software
Instruction Manual
12
Advanced Screen
The advanced screen provides a way to change the meter settings that are rarely changed for most applications. The
cutoff, and filter values can normally be left alone and should only be changed if there is an unsteady or noisy
process signal. The function keys / digital input section is used to set the actions that the three front panel function
keys and the digital input will perform. The total settings section is used to set the total and grand total reset mode,
total with 8 or 13 digits limit, and the initial total value. The data log setup section is used to set what to log and
when: event log, log day & time, log at time interval, log based on hourly or daily schedule, log continuously or stop
when full, download the log to a PC, and erase the log in the meter internal memory.
Click the send button at the bottom right of the window to send new settings to the meter.

MeterView XL Programming Software
Instruction Manual
13
Advanced Screen Continued
Click the send button at the bottom right of the window to send new settings to the meter.

MeterView XL Programming Software
Instruction Manual
14
System Screen
The system screen shows basic meter information such as software number and revision level. It also provides
a means to set a password, set the meter date & time, set the battery saving features, reset the meter to factory
defaults, set a system tag, and the Modbus serial settings. The system tag is a custom message that appears on
meter power up (8 characters max).

MeterView XL Programming Software
Instruction Manual
15
Data Logging File
The log file is saved in .csv file format and it contains all the information selected in the data log setup.
• Information header
• Date & time
• Log sequence
• Log source
• Rate, total, and grand total with units
• Alarm state
• Open collector and relay state
• The function keys and the digital input can be used to log manually at any time.

MeterView XL Programming Software
Instruction Manual
16
Configuration File
A configuration file can be generated with or without a meter connected to the PC. This makes it possible to prepare
meter configurations prior to having the meter in hand. Meter configurations can be saved and re-loaded into other
meters. Meter configurations can also be printed:

MeterView XL Programming Software
Instruction Manual
PRECISION DIGITAL CORPORATION
233 South Street • Hopkinton MA 01748 USA
Tel (800) 343-1001 • (508) 655-7300
www.predig.com
LIMMVXL_Pulse_A
SFT133 Ver 1.000 & up
07/23
Contact Precision Digital
Technical Support
Call: (800) 610-5239 or (508) 655-7300
Email: [email protected]
Sales Support
Call: (800) 343-1001 or (508) 655-7300
Email: sales@predig.com
Place Orders
Email: [email protected]
For the latest version of this manual please visit
www.predig.com
/