Page is loading ...

D2594-01-02 CN5746 ZTT18/19 User Guide
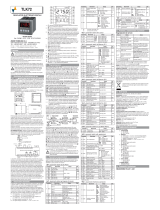
ZTT18/19 USER GUIDE
UNIVERSAL TRANSMITTER USER INSTRUCTIONS
Important - Please read this document before installing.
Every effort has been taken to ensure the accuracy of this document; however, we do
not accept responsibility for damage, injury, loss or expense resulting from errors and
omissions, and we reserve the right of amendment without notice.
IMPORTANT - CE & SAFETY REQUIREMENTS
Product must be mounted inside a suitable enclosure providing environmental
protection to IP54, => IP65 is recommended.
To maintain CE EMC requirements, input wires must be less than 3 metres.
The product contains no serviceable parts, or internal adjustments. No attempt must
be made to repair this product. Faulty units must be returned to supplier for repair.
This product must be installed by a qualified person. All electrical wiring must be
carried out in accordance with the appropriate regulations for the place of installation.
Before attempting any electrical connection work, please ensure all supplies are
switched off.
ABSOLUTE MAXIMUM CONDITIONS (To exceed may cause damage to the unit).
Supply Voltage
± 30 V dc (Protected for over voltage and reverse connection)
Current with over voltage
± 100 mA
Input Voltage
± 3 V between any terminals
Ambient
Temperature (-40 to 85) °C, Humidity (0 to 95) % RH (Non-
condensing)
---------------------------------------------------------------------------------
1~DESCRIPTION.
This head mounted temperature transmitter connects to RTD, thermocouple and other
sensors and converts the linearised temperature to a (4 to 20) mA signal. The
transmitter is a two-wire output device, and is fully configurable by the user, over a
wide temperature range, with the aid of the USB configuration kit and software.
The ZTT-19 is a generic HART device, version 5,6 and 7 compatible.
2~RECEIVING AND UNPACKING.
Please inspect the packaging and instrument thoroughly for any signs of transit
damage. If the instrument has been damaged, please notify your supplier immediately.
3~SPECIFICATION.
Refer to data sheet for full specification.
Factory defaults
Pt100 IEC, (0 to 100) °C, Up-scale burnout
Filter = off, User offset = 0.0 °C, HART address 0
4~INSTALLATION AND WIRING
Mounting holes: two holes 4.8 mm diameter, 33 mm centres. .
Typical installation sequence (reference guide only)
If the ZTT-19 is part of an assembly, steps 1 to 3 may have been completed
1
Configuration (see section 5)
2
Mount transmitter to head (see section 4.1)
3
Wire sensor (see section 4.2 and 4.2.1)
4
Install assembly (see section 4.1)
5
Wire (4 to 20) mA loop (see section 4.2.2)
4.1~MECHANICAL.
The transmitter has been specifically designed to fit inside a DIN standard probe head
enclosure, which provides adequate protection from moisture, dust, corrosive
atmospheres etc. All cable entries must be sealed using the correct size gland.
Likewise, any probe assembly fitted must be sealed.
The device body has a centre hole allowing the sensor wire to enter screw terminals
from the transmitter centre; this is applicable when the sensor is mounted directly
below the transmitter.
Care must be taken when locating the transmitter/assembly to ensure the working
ambient temperature range of (-40 to 85) °C is not exceeded.
4.2~ELECTRICAL.
Electrical connections to the transmitter are made to the screw terminals provided on
the top face.
Note; For RTD sensors, wires must be of equal length and type for the lead
compensation to work correctly.
Note; For thermocouple sensors, the correct compensating cable must be used.
The screw terminals allow for wires to enter either from the inner or outer direction.
The transmitter is protected against reverse connection and over voltage. If no sensor
(input) connection is made the transmitter will go into either up or down-scale output
current, depending on configuration.
The transmitter conforms with EC directive BS EN 61326 when correctly installed in a
termination head providing at least IP54 protection.
4.2.1~Input connections.
Note; Input sensor wires must be less than 3 metres to conform to BS EN 61326.
It is recommended a screened sensor cable is used and grounded at one point only.
The diagrams below show input connection wiring.
4 Wire Resistance (RTD)
USB
2 1
3
4 5
6
3 Wire Resistance (RTD)
USB
2 1
3
4 5
6
2 Wire Resistance (RTD)
USB
2 1
3
4 5
6
Dual RTD (2 wire)
No Redundancy
USB
2 1
3
4 5
6
A B
Thermocouple
USB
2 1
3
4 5
6
-
+
Dual Thermocouple
USB
2 1
3
4 5
6
+
+
A
B
mV
USB
2 1
3
4 5
6
+-
BA
Dual mV
USB
2 1
3
4 5
6
+- +
4.2.2~Two wire (4 to 20) mA output connection.
The diagram below gives output connection details; the output is shown connected to
a VDC supply. The load symbol represents any other device connected in the loop,
such as monitoring equipment, panel indicators and loop isolators. The load value can
range from 0 ohms to the maximum loop load for given supply.
Always ensure the (4 to 20) mA loop is grounded at one point; this would normally be
at the monitoring equipment or loop power supply.
Screened or twisted pair wires are recommended for output wires. Avoid running
signal wires alongside mains or AC power lines.
+
-
USB
21
3
4 5
6
Earth
Load
(10 to 30) VDC
Supply SELV
Resold by Ascon Tecnologic S.r.l.
viale Indipendenza, 56
27029 Vigevano (PV) Italy

D2594-01-02 CN5746 ZTT18/19 User Guide
5~USER CONFIGURATION.
IMPORTANT
READ COMPLETE SECTION BEFORE ATTEMPTING CONFIGURATION.
A USB A to mini B lead is required for connecting the device to the PC. Refer to your
supplier for details.
The device can be configured whilst connected and powered, a battery powered
PC should be used to avoid the effects of ground loops if the (4 to 20) mA loop is
grounded. This may damage the device.
Configuration steps
Install and run the software
Select the correct programming page in the software (follow any on screen
safety precautions)
Connect the USB lead to the PC, connect the USB lead to the device
Read the unit configuration into the software
Re-configure or adjust configuration options as required
Send the new configuration to the unit
5.1~USBSpeedLink software.
Note; When the unit is correctly connected the “Send” and “Receive” menu buttons will
turn black and the “data” section of the screen will open below the configuration
section.
ZTT-19 screen with no device connected.
Note; Work from left to right across the tabs on the configuration software.
ZTT-19 Sensor tab (device connected showing live data reading)
The sensor tab is used to select input type, sensor offset, burnout and can be used to
enter a pre-set input value.
ZTT-19 Process tab
Off; For normal temperature sensor operation.
Scale; For process inputs, to select a straight-line relationship between input and
output values.
Profile; Can be used to enter a user non-linear relationship between input and output
signals.
Note; This can also be used to correct a temperature probe at up to 22 points.
ZTT-19 mA Output tab
Used to set the output range, trim the (4 and 20) mA levels, set damping and set a
pre-set mA output signal.
ZTT-19 Diagnostic tabs
Diagnostic information including maximum and minimum values, run time of the device
and user entered calibration data.
The diagnostic log tab can be set to record a log onto the ZTT-19. A 150-point rolling
log set at time intervals between 5 s up to 1 hr can be recorded for viewing or can be
saved to a text file.
ZTT-19 HART tabs
HART data including polling the address can be entered and read using the two HART
data tabs.
5.2~HART COMMUNICATIONS.
The ZTT-19 is a “Generic” HART device. It can be connected to a HART
communications device as shown below.
Run-time data monitoring in either loop or HART mode is possible.
Basic set up parameters including (4 and 20) mA trim can be performed, for advanced
features use the USB configuration software.
Universal commands
All universal commands are supported
Common practice commands supported
34 Write damping value
35 Write range values
40 Enter/Exit fixed mA mode
41 Perform device self-test
42 Perform master reset
44 Set (Trim) PV zero
45 Trim DAC zero
46 Trim DAC gain
49 Write PV transducer number
59 Write number of response preamble
1 2
Hart
Communicator
Transmitter
Current
Meter
Power
Supply
RL
++ mA
_ _
+
_
1 (+) 2(-)
250 Ω
_
V
Ascon Tecnologic s.r.l.
Viale Indipendenza 56, 27029 Vigevano (PV) - ITALY
Tel.: +39 0381 69871/f aX: +39 0381 698730
www.ascontecnologic.com
e-mail: [email protected]
/