Panasonic Microscope & Magnifier TH-L50EM6Z User manual

Category
Car video systems
Type
User manual

This manual is also suitable for

Model No.
Australia New Zealand
TH-L32XM6A TH-L32XM6Z
TH-L39EM6A TH-L39EM6Z
TH-L50EM6A TH-L50EM6Z
Operating Instructions
LED TV
English
Thank you for purchasing this Panasonic product.
Please read these instructions carefully before operating
this product and retain them for future reference.
The images shown in this manual are for illustrative
purposes only.
Some illustrations are presented as conceptual images
and may be different from the actual products.
Illustrations shown may be different between models
and countries.
Transport only in upright position
CGN
TQB4GC1036-1
XM_EM6AZ.indd 1XM_EM6AZ.indd 1 2/1/2013 2:13:52 PM2/1/2013 2:13:52 PM
2
Manufactured under
license from Dolby
Laboratories. Dolby and
the double-D symbol
are trademarks of Dolby
Laboratories.
Manufactured under license under U.S. Patent
Nos: 5,956,674; 5,974,380; 6,487,535 & other U.S.
and worldwide patents issued & pending. DTS,
the Symbol, & DTS and the Symbol together are
registered trademarks & DTS 2.0+Digital Out is a
trademark of DTS, Inc. Product includes software.
© DTS, Inc. All Rights Reserved.
HDMI, the HDMI Logo, and High-Definition
Multimedia Interface are trademarks or registered
trademarks of HDMI Licensing LLC in the United
States and other countries.
HDAVI Control™ is a trademark of Panasonic
Corporation.
Panasonic does not guarantee operation and
performance of peripheral devices made by other
manufacturers; and we disclaim any liability or
damage arising from operation and/or performance
from usage of such other maker’s peripheral devices.
This product is licensed under the AVC patent
portfolio license for the personal and non-commercial
use of a consumer to (i) encode video in compliance
with the AVC Standard (“AVC Video”) and/or (ii)
decode AVC Video that was encoded by a consumer
engaged in a personal and non-commercial activity
and/or was obtained from a video provider licensed to
provide AVC Video. No license is granted or shall be
implied for any other use.
Additional information may be obtained from MPEG
LA, LLC.
See http://www.mpegla.com.
This product incorporates the following software:
(1) the software developed independently by or for
Panasonic Corporation,
(2) the software owned by third party and licensed to
Panasonic Corporation,
(3) open sourced software
The software categorized as (3) is distributed in
the hope that it will be useful, but WITHOUT ANY
WARRANTY, without even the implied warranty
of MERCHANTABILITY or FITNESS FOR A
PARTICULAR PURPOSE. Please refer to the
detailed terms and conditions thereof shown in the
“Software License” menu on this product.
Even if no special notation has been made of company
or product trademarks, these trademarks have been
fully respected.
S
T
i
n
Contents
Safety Precautions······································3
Setting Up the TV········································4
Connecting the TV ······································6
Initial Setup················································7
Operating the TV ········································8
Watching External Inputs ·····························9
Using TV Guide / Freeview Guide ·················9
Using VIERA TOOLS ································· 10
Using Media Player ··································· 10
Using the Menu Functions ························· 12
Link Functions (VIERA Link) ······················ 17
Additional Information······························· 19
Troubleshooting ······································· 21
Maintenance ············································ 21
Specifications ·········································· 22
Warranty (Australia) ·································· 23
Warranty (New Zealand) ···························· 24
XM_EM6AZ.indd 2XM_EM6AZ.indd 2 2/1/2013 2:13:52 PM2/1/2013 2:13:52 PM
Safety Precautions
3
Safety Precautions
To help avoid risk of electrical shock, fire, damage or
injury, please follow the warnings and cautions below:
Mains plug and lead
Warning
If you detect anything
unusual, immediately
remove the mains plug.
Mains plug types vary
between countries.
This TV is designed to operate on AC 220 - 240 V,
50/60 Hz
Insert the mains plug fully into the socket outlet.
Ensure that the mains plug is easily accessible.
Disconnect the mains plug when cleaning the TV.
Do not touch the mains plug with wet hands.
Do not damage the mains lead.
• Do not place a heavy object
on the lead.
• Do not place the lead near a
high temperature object.
• Do not pull on the lead. Hold
onto the mains plug body
when disconnecting the plug.
• Do not move the TV with the lead plugged into a
socket outlet.
• Do not twist the lead, bend it excessively or stretch it.
• Do not use a damaged mains plug or socket outlet.
• Ensure the TV does not crush the mains lead.
Do not use any mains lead other than that provided
with this TV.
Take care
Warning
Do not remove covers and never modify
the TV yourself as live parts are accessible
when they are removed. There are no user
serviceable parts inside.
Do not expose the TV to rain
or excessive moisture. This TV
must not be exposed to dripping
or splashing water and objects
filled with liquid, such as vases,
must not be placed on top of or
above the TV.
Do not insert foreign objects into the TV through the
air vents.
Do not use an unapproved pedestal / mounting
equipment. Be sure to ask your local Panasonic dealer
to perform the setup or installation of approved wall-
hanging brackets.
Do not apply strong force or impact to the display
panel.
Do not place the TV on sloped
or unstable surfaces, and
ensure that the TV does not
hang over the edge of the base.
Important information
If the TV is not positioned in a sufficiently stable
location, it can be potentially hazardous due to
falling. Many injuries, particularly to children, can be
avoided by taking simple precautions such as:
Using cabinets or stands recommended by the
manufacturer of the TV.
Only using furniture that can safely support the TV.
Ensuring the TV is not overhanging the edge of the
supporting furniture.
Not placing the TV on tall furniture (for example,
cupboards or bookcases) without anchoring both
the furniture and the TV to a suitable support.
Not standing the TV on cloth or other materials
placed between the TV and supporting furniture.
Educating children about the dangers of climbing on
furniture to reach the TV or its controls.
This TV is designed for indoor use.
This TV is designed for table-top use.
Do not expose the TV to direct
sunlight and other sources of
heat.
To prevent the
spread of fire, keep
candles or other
open flames away
from this product at
all times
Dangerous part / Small object
Warning
This product contains possibly dangerous parts such
as plastic bags, that can be breathed in or swallowed
by young children accidentally. Keep these parts out of
reach of young children.
Pedestal
Warning
Do not disassemble or modify the pedestal.
Caution
Do not use any pedestal other than the one provided
with this TV.
Do not use the pedestal if it becomes warped or
physically damaged. If this occurs, contact your
nearest Panasonic dealer immediately.
During setup, make sure that all screws are securely
tightened.
Ensure that the TV does not suffer any impact during
installation of the pedestal.
Ensure that children do not climb onto the pedestal.
Install or remove the TV from the pedestal with at least
two people.
Install or remove the TV by the specified procedure.
XM_EM6AZ.indd 3XM_EM6AZ.indd 3 2/1/2013 2:13:52 PM2/1/2013 2:13:52 PM
Safety Precautions | Setting Up the TV
4
Ventilation
Caution
Allow sufficient space around the TV in order to help
prevent excessive heat, which could lead to early failure
of some electronic components.
Minimum distance (cm)
10
10
10
10
Ventilation should not be
impeded by covering the
ventilation openings with
items such as newspapers,
tablecloths and curtains.
Whether you are using a pedestal or not, always
ensure the vents at the bottom of the TV are not
blocked and there is sufficient space to enable
adequate ventilation.
Moving the TV
Caution
Before moving the TV, disconnect all cables.
Move the TV with at least two
people. Support as shown to
avoid injury by the TV tipping
or falling.
When not in use for a long time
Caution
This TV will still consume some power even in the Off
mode, as long as the mains plug is still connected to a
live socket outlet.
Remove the mains plug from the wall socket when the
TV is not in use for a prolonged period of time.
Battery for the Remote Control
Caution
Incorrect installation may cause battery leakage,
corrosion and explosion.
Replace only with the same or equivalent type.
Do not mix old and new batteries.
Do not mix different battery types (such as alkaline and
manganese batteries).
Do not use rechargeable batteries (Ni-Cd, etc.).
Do not burn or break up batteries.
Do not expose batteries to excessive heat such as
sunshine, fire or the like.
Make sure you dispose of batteries correctly.
Setting Up the TV
Standard accessories
Accessories may not be placed all together. Take care
not to throw them away unintentionally.
Operating Instructions with Warranty
statement
Remote Control
N2QAYB000817
Batteries (R6) × 2
(p. 5)
Mains Lead
(p. 6)
Pedestal
Assembly screws
(M5 × 16) × 4
32” & 39 class: (M4 × 12) × 4
50” class: (M4 × 15) × 4
Bracket
Base
Fall-prevention parts
Screw
Wood screw
Band
Attaching the pedestal
1 Assemble the pedestal
Front
2
I
t
a
B
w
T
1
2
3
N
p
XM_EM6AZ.indd 4XM_EM6AZ.indd 4 2/1/2013 2:13:52 PM2/1/2013 2:13:52 PM
Setting Up the TV
5
2 Attach the TV to the pedestal
Carry out the work on a horizontal and level surface.
Preventing the TV from falling over
It is recommended to secure the pedestal to a furniture
as shown to prevent the TV from falling over.
This information is designed to reduce the risk of
injuries caused by the TV falling over. However, no
measure can guarantee protection in all cases.
Screw
Wood screw
Band
Removing the pedestal from the TV
Be sure to remove the pedestal in the following way
when using the wall-hanging bracket or repacking the
TV.
1 Remove the assembly screws from the TV.
2 Pull out the pedestal from the TV.
3 Remove the assembly screws from the bracket.
Inserting remote’s batteries
Note the correct
polarity (+ or -)
Press the hook and
lift the cover
Wall mounting the TV (optional)
Choosing to wall mount the TV shall be done at the
owner’s risk and expense. Always use a qualified
installer to perform a TV wall bracket installation.
Incorrect installation may cause TV to fall, resulting in
personal injury and product damage that is not covered
by warranty.
a
b
Rear of the TV
Screw for fixing the TV onto the
wall-hanging bracket (not supplied)
Depth of
screw
(View from the side)
Holes for wall-hanging bracket installation
Models a b
TH-L32XM6A/Z 200 mm 100 mm
TH-L39EM6A/Z 200 mm 200 mm
TH-L50EM6A/Z 400 mm 400 mm
Screw specification
Models Type
Depth of screw
Minimum Maximum
TH-L32XM6A/Z M6 23 mm 24 mm
TH-L39EM6A/Z M6 19 mm 20 mm
TH-L50EM6A/Z M6 21 mm 23 mm
Warning
When optional accessories such as wall brackets etc.
are used, always read and follow the manufacturer
installation and usage instructions.
Do not mount the unit directly below ceiling lights (such
as spotlights or halogen lights) which typically give
off high heat. Doing so may warp or damage plastic
cabinet parts.
When installing wall brackets you must ensure the wall
bracket is not electrically grounded to metal wall studs.
Always ensure that there are no electrical cables,
pipes etc. in the wall before you begin the wall bracket
installation.
To prevent fall and injury, remove the TV from its fixed
wall position when it is no longer in use.
XM_EM6AZ.indd 5XM_EM6AZ.indd 5 2/1/2013 2:13:53 PM2/1/2013 2:13:53 PM
Connecting the TV
6
Connecting the TV
Please ensure the TV is disconnected from the mains
socket / power point before attaching or disconnecting
any RF / AV leads.
External equipment and cables are for illustratives
purposes only and not supplied with this TV.
Check the type of terminals and cable plugs are
correct when connecting.
When using an HDMI cable, use the fully wired one.
Keep the TV away from electronic equipment (video
equipment, etc.) or equipment with an infrared sensor.
Otherwise, distortion of image / sound may occur or
operation of other equipment may be interfered.
Also read the manual of the equipment being
connected.
Terminals
ANALOG AUDIO
via AV1
AV1
IN
AUDIO
OUT
DIGITAL
AUDIO
OUT
ANT
AUDIO
VIDEO
COMPONENT
R
R
L
L
P
R
/C
R
P
B
/C
B
Y/VIDEO
USB
AV2
IN
VIDEO
L
AUDIO
R
(ARC)
2
1
3
5
6
7
4
AV2
IN
VIDEO
O
O
L
AU
DI
O
AV
1
IN
AUDI
O
VIDEO
COMPON
ENT
R
L
P
R
/
C
R
P
B
/C
B
Y
/
VIDE
O
(ARC)
AUDI
O
OUT
R
R
L
L
L
1 Aerial terminal
2 DIGITAL AUDIO OUT
3 AUDIO OUT
4 AV1 IN
5 AV2 IN
6 USB port
7 HDMI 1 - 2
Connections
Aerial and mains lead
ANT
RF cable
Mains lead
(supplied)
Aerial
To minimise DTV impulse noise pickup, please ensure
there is separation between mains lead and RF cable.
Do not place the RF cable under the TV.
An aerial, correct cable (75 coaxial) and correct
terminating plug are required to obtain optimum quality
picture and sound.
If a communal aerial system is used, you may require
the correct connection cable and plug between the wall
aerial socket and the TV.
Your local Television Service Centre or dealer may be
able to assist you in obtaining the correct aerial system
for your particular area and the accessories required.
Any matters regarding aerial installation, upgrading
of existing systems or accessories required, and
the costs incurred, are the responsibility of you, the
customer.
If the aerial is placed in the wrong location, interference
might happen.
DTV Recorder / PVR / VCR
ANT
ANT
TV
DTV Recorder / PVR / VCR
Out
In
“F” type Antenna Splitter
Antenna Socket
Wall Plate
RG6Q Fly Lead
RG6Q Fly Lead
RG6Q Fly Lead
To maintain optimum antenna signal quality, use an “F”
type TV signal splitter (as illustrated) when connecting
two or more devices to the same antenna socket.
Set top box
TV
Set top box
HDMI cable
Satellite dish
T
T
T
T
XM_EM6AZ.indd 6XM_EM6AZ.indd 6 2/1/2013 2:13:54 PM2/1/2013 2:13:54 PM
Connecting the TV | Initial Setup
7
y
l
l
m
e
e
t
e
AV / Game equipment
Using HDMI terminal
TV
HDMI cable
Equipment
You can also make similar connection via HDMI 2.
Using COMPONENT terminals
AV1
IN
AUDIO
VIDEO
COMPONENT
RL
P
R
/C
R
P
B
/C
B
Y/VIDEO
Equipment
Audio cable
Component
video cable
TV
Using COMPOSITE terminals
AV1
IN
AUDIO
VIDEO
RL
Y/VIDEO
Equipment
Audio cable
Video cable
TV
You can also make similar connections via AV2 IN.
Speaker system
(ARC)
HDMI cable
Amplifier with
speaker system
TV
Use HDMI 2 for connecting an amplifier that has ARC
(Audio Return Channel) function.
As for an amplifier without ARC function, use DIGITAL
AUDIO OUT or AUDIO OUT.
To enjoy the sound from the external equipment in
multi-channel sound (e.g. Dolby Digital 5.1ch), connect
the equipment to the amplifier. For the connections,
read the manuals of the equipment and amplifier.
Initial Setup
When you first turn on the TV, a series of steps will pop-
up to guide you to setup your TV.
These steps are not necessary if the setup has been
completed by your local dealer.
1 Plug the mains plug into the socket
outlet
AC 220 - 240 V,
50/60 Hz
2 Turn on the TV with the remote control
3 Select [Home]
Please select your viewing environment.
Home Shop
OK
Confirm
Select
[Shop] is for shop display.
To change the viewing environment later on, you
need to initialise all settings by accessing [Shipping
Condition] (p. 15).
4 Select your area
New South Wales / Australian Capital Territory
Victoria
Queensland
South Australia
Western Australia
Northern Territory
Tasmania
Select State / Territory
OK
Confirm
Select
5 Tick the mode to tune, then start Auto
Tuning
TV Signal Selection
Digital TV
Analogue TV
Start Auto Tuning
: tune (search for the available channels)
: skip tuning
OK
Tick
Select
OK
Confirm
Select [Start
Auto Tuning]
Auto Tuning starts
Auto Tuning searches and stores TV channels.
The stored channels and sorted channel order vary
depending on the area, broadcasting system and
conditions of signal reception.
Setup is now complete and your TV is ready for
viewing.
XM_EM6AZ.indd 7XM_EM6AZ.indd 7 2/1/2013 2:13:54 PM2/1/2013 2:13:54 PM
Operating the TV
8
W
t
h
t
o
E
A
R
W
I
1
2
Operating the TV
Using the remote control
MENU
VIERA
TOOLS
TEXT STTL GUIDE
CH
EXIT
POWER
INFO
RETURN
OPTION
INPUT
RGY B
ASPECT
MUTE
STILL
LAST VIEW
VOL
OK
113
14
15
16
17
18
19
20
21
3
2
4
5
6
7
8
9
10
11
12
1
Switches the TV On / Standby
2
VIERA TOOLS (p. 10)
3
Displays [Main Menu] (p. 12)
4
This button is not used for this model
Switches to teletext mode
5
Displays Information banner
6
OK
Confirms selections.
Press after selecting channel positions to quickly
change channel.
Displays the Channel List.
7
Displays [Option Menu]
Shortcuts to settings for some picture / sound
items.
Follow the operation guide to select / change the
settings.
8
Coloured buttons
Performs multiple operations which correspond
to the operation guide displayed on the menu
screen.
9
Volume Up / Down
10
Sound Mute On / Off
11
Numeric buttons
Changes channel.
Changes channel / teletext pages.
Sets characters.
When in Standby mode, switches TV On.
12
Freezes / unfreezes picture
13
Input mode selection
TV - switches Digital TV / Analogue TV.
AV - displays [Input Selection] screen (p. 9) or
press repeatedly to select the AV input mode.
14
TV Guide (p. 9)
Freeview Guide (p. 9)
15
Displays subtitles
Displays favourite page in teletext mode
16
Exits to the TV viewing screen
17
Cursor buttons
Makes selections or adjustments.
18
Returns to the previous menu / page
19
ASPECT
Displays the [Aspect Selection] screen. Follow
the operation guide to select the mode. [16:9] /
[14:9] / [Just] / [4:3] / [Zoom] / [4:3 Full] /
[Sidecut Just] / [Sidecut Zoom] (p. 19)
You can also press the button repeatedly to select
the mode.
20
Channel Up / Down
21
Returns to the last viewed channel
Using the TV controls
CH
INPUT
/
HOLD
for
MENU
VOL
OK
/
1
2
3
4
Indicators on the TV
56 7
1
Displays [Input Selection] screen
When [Input Selection] screen is displayed, select
the mode using buttons 2.
OK
Confirms selection while in the menu system.
Displays [Main Menu] when press and hold for
3 seconds
2
Channel Up / Down
Cursor Up / Down
Makes selections or adjustments when in the
menu system.
3
Volume Up / Down
Cursor Left / Right
Makes selections or adjustments when in the
menu system.
When pressing 1, 2, 3 buttons, the control panel guide
appears on the right side of the screen for 3 seconds
to highlight the pressed button.
4
Mains power On / Off switch
Use to switch the mains power.
5 Remote control signal receiver
6
Ambient sensor
Senses brightness to adjust picture quality when
[Ambient Sensor] in the Picture Menu is set to
[On].
(p. 12)
7
Power LED
Red: Standby
Green: On
The LED blinks when the TV receives a
command from the remote control.
XM_EM6AZ.indd 8XM_EM6AZ.indd 8 2/1/2013 2:13:55 PM2/1/2013 2:13:55 PM
Operating the TV | Watching External Inputs | Using TV Guide / Freeview Guide
9
About operation guide
When operating the TV with the remote control, follow
the operation guide available at the bottom of the screen
to perform the operation you want.
Example: [Aspect Selection]
Aspect Selection
16:9
14:9
Just
Select
RETURN
Change
Operation guide
Referring to the operation guide:
To select the mode
OK
To change to the selected mode
OK
To return to the previous menu
RETURN
Watching External
Inputs
1 Connect the external equipment
(p. 6 - 7)
2 Display the [Input Selection] menu,
then select the input of the connected
equipment
Input Selection
HDMI1
HDMI2
AV1
AV2
AV1 VIDEO COMPONENT
TV
Note
To switch between [COMPONENT] and [VIDEO] in
[AV1], move the indicator by pressing left or right
cursor button.
You can label or skip each input mode
[Input Labels] (p. 14)
Skipped inputs will not be displayed when the AV
button is pressed.
Using TV Guide /
Freeview Guide
The TV Guide / Freeview Guide - Electronic Programme
Guide (EPG), shows a list of the current broadcasts
and forthcoming broadcasts over the next seven days
(depending on the broadcasters).
When this TV is turned on for the first time, or switched
off for more than a week, it may take some time before
the TV Guide / Freeview Guide is completely shown.
Digital TV mode only.
Display the TV Guide
GUIDE
(Press again to change the layout)
Example:
East ender DIY SOS The Bill
11:00am 11:30am 12:00pm 12:30 pm 1:00 pm
The Bill
Red Cap
Good bye NEWS
Hot Wars Holiday Program
Pepsi Char.
Emerald
10 O’ clock News BBC
Business NewsMarket News
Drama 2Drama 1
Drama
Live junction
Sports
Live
Topics NewsShopping
11:30 am - 12:00 pm DIY SOS : We open in the Battersbys
11 Home
World
Jade
Pearl
Sapphire
Ruby
Gold
Home
16
81
84
100
101
102
11D
D
D
D
D
D
D
Coronation Street
2011 10:27 am
Wed 26 Oct
Wed 26 Oct 2011
All Types
All Channels
TV Guide: Landscape
Time:
3
1
2
4
56
1
Current date and time
2
TV Guide date
3
TV Guide time
4
Programme
5
[D]: Digital TV; [A]: Analogue TV
6
Channel position and name
Follow the operation guide to operate the TV
Guide.
Note
There is no programme listings for Analogue channels.
Display the Freeview Guide
GUIDE
(Each press will toggle the screen between the
Freeview Guide Listing and What’s on Now /
Next)
Example: Freeview Guide Listing
Parental Rating captioning Information
Watch TV
Prog
OK
Now/Next
EPG/Guide
20:30 Lost
Wed 6 Apr
Next WeekChnl Next Day
21:30 Dirty Sexy Money
22:30 The Knights Of
Prosperity
22:55 Entourage
23:30 Reality Bites:
Bodyshock - Half Ton...
Sayid confronts Ben's spy on the
freighter, and Ben urges daughter
Alex to flee Locke's camp in order
to survive an impending attack.
TV ONE, 20:00
Current channel’s
programme listing
Current day & date Current programme
Parental rating
& captioning
information
Description
Follow the operation guide to operate the
Freeview Guide.
e
.
c
t
t
XM_EM6AZ.indd 9XM_EM6AZ.indd 9 2/1/2013 2:13:55 PM2/1/2013 2:13:55 PM
Using VIERA TOOLS | Using Media Player
10
Using VIERA TOOLS
You can access some special features easily by using
the VIERA TOOLS function.
Display the icon of the features, then
select the icon you want
VIERA
TOOLS
VIERA Link
VIDEO MUSIC
ECO NAVI
HOTO
Using Media Player
Media Player allows you to enjoy photo, music or video
recorded on a USB Flash Memory.
During the operation, audio signal is output from
AUDIO OUT, DIGITAL AUDIO OUT and HDMI 2 (ARC
function) terminals. To use HDMI 2 with ARC function,
connect an amplifier that has ARC function and set to
use theatre speakers (p. 18).
The picture may not appear correctly on this TV
depending on the digital cameras used.
Display may take some time when there are many files
and folders in the USB Flash Memory.
Partly degraded files might be displayed at a reduced
resolution.
The folder and file names may be different depending
on the digital camera used.
1 Insert the USB Flash Memory
USB
U
SB
TV
Insert or remove
straightly and
completely.
2 Display [VIERA TOOLS]
VIERA
TOOLS
Photo
VIDEO MUSIC
ECO NAVI
VIERA LINK
3 Select the mode
OK
Access
Select
[Photo]: Displays the thumbnail of all photos in the
USB Flash Memory.
[Video]: Displays the thumbnail of video titles in the
USB Flash Memory.
[Music]: Displays the thumbnail of music folders in
the USB Flash Memory.
[Contents Select]
Switching between modes
When you are in the thumbnail view of any mode,
you can change to the other mode by accessing the
[Contents Select] screen.
B
Photo mode
Select
RETURN
Slideshow View Select Drive Select Contents Select
Info
View
Option Menu
USB
Media Player Photo All photos
Operation guide
: Error display
Follow the operation guide to perform
available operations in Photo mode.
To display / hide the operation guide during
[View] and [Slideshow]
INFO
[View]
Enters Single view mode to view photo one at a time
[Slideshow]
Lets you view all photos in the slideshow mode
[View Select]
Lets you toggle between thumbnail view and folder view
To sort by folder, recorded date or recorded month
1 Display the view selection in the thumbnail view
G
2 Select the sort type
[Folder view]: Displays the thumbnail grouped by
folder.
• The files which are not in a folder will be collected to
the folder named “/”.
[Sort by Date] / [Sort by Month]: Displays the
thumbnail grouped by the same date or month.
• The group of the photos without a recorded date is
shown as [Unknown].
[Option Menu]
[Change Size]
Changes the size of photos on a thumbnail screen
[Slideshow Settings]
[Frame]: Selects the frame type of the slideshow
[Off] / [Multi] / [Collage] / [Drift (+ calendar)] / [Drift] /
[Gallery (+ calendar)] / [Gallery] / [Cinema]
[Colour Effect]: Selects the colour effect of photos
on Single view and Slideshow [Off] / [Sepia] / [Gray
scale]
• This function is not available when [Frame] is set to
[Drift], [Gallery] or [Cinema].
[Transition Effect]: Effect for photo switching during
slideshow [Off] / [Fade] / [Dissolve] / [Motion] /
[Random]
[Auto Makeup]: Automatically detects the face in
the photo and improves luminance and contrast
[On] / [Off]
F
a
T
i
n
P
XM_EM6AZ.indd 10XM_EM6AZ.indd 10 2/1/2013 2:13:56 PM2/1/2013 2:13:56 PM
Using Media Player
11
w
o
g
[Screen Mode]: Screen mode for Single view and
Slideshow [Normal] / [Zoom]
• This function is not available when [Frame] is set
to [Collage], [Drift], [Gallery] or [Cinema] or when
[Transition Effect] is set to [Motion].
• Depending on the photo size, it may not be fully
enlarged to fill the screen, e.g. portrait style picture.
[Burst Playback]: Selects whether to display burst
photos in a fast-paced slideshow mode [Off] / [On]
• This function is not available when [Frame] is set
to [Drift], [Gallery] or [Cinema] or when [Transition
Effect] is set to [Motion].
[Interval]: Slideshow interval [Long] / [Normal] /
[Short]
• This function is not available when [Frame] is set
to [Drift], [Gallery] or [Cinema] or when [Transition
Effect] is set to [Motion].
[Repeat]: Slideshow repeat [Off] / [On]
[Back Ground Music]: Background music during
photo viewing [Off] / [Type1] / [Type2] / [Type3] /
[Type4] / [Type5] / [User] / [Auto]
• [User]: Music data in the device registered by
yourself will be played back.
To register the music: Select the music file, then
select [File] or [Folder].
[File]: The selected music file will be registered.
[Folder]: All the music in the folder which contains
the selected music file will be registered.
• [Auto]: Music data stored in the root folder of the
current device will be played back randomly.
Note
Picture quality may suffer depending on the slideshow
settings.
Picture setting may not work depending on the
slideshow settings.
Video mode
OPTION
Title view
Media Player
Video
Trip1
Nature2
2010_9
Trip2
Nature3
Trip3
Nature4
Trip4
Nature5
Trip5
Nature6
Room
2010_4
Nature1
2010_7
USB
Select
RETURN
Play Contents Select
Info
Access
Option Menu
Drive Select
Operation guide
: Error display
Follow the operation guide to perform
available operations in Video mode.
To display / hide the operation guide and
information banner during playback
INFO
[Play]
Playbacks the selected title.
To playback from selected scene of the title [Scene
view]
Select the title Select the scene Play
OK
OK
R
To change aspect
Display the [Aspect Selection] screen, then select
the desired mode
(You can also press the button repeatedly to
select the mode.)
[Aspect1]: Displays the content enlarged without
distortion.
[Aspect2]: Displays the content full-screen.
[Original]: Displays the content original size.
Aspect may not be changed depending on the
content.
[Option Menu]
Contains [Video Setup] menus to set up Video mode.
While in thumbnail view:
[Video Preview]
Sets to start the preview of the title or scene in the
thumbnail view [Off] / [On]
During video playback:
[Audio Selection] / [Dual Mono Audio]
Selects the sound tracks (if available)
[Subtitle]
Selects the subtitle (if available)
[Off] / [Subtitle1] (/ [Subtitle2] ...)
[Subtitle Text]
Selects the font type to display subtitles correctly (if
available)
[Repeat]
Playback repeat within the title [Off] / [On]
Only the selected file will be repeated.
Music mode
My Music_1 My Music_2 My Music_3
Media Player Music Folder view
USB
Select
RETURN
Play Folder Contents Select
Info
Access
Option Menu
Drive Select
Operation guide
Follow the operation guide to perform
available operations in Music mode.
To display / hide the operation guide during
playback
INFO
[Play Folder]
Playbacks all music in the selected folder.
To playback the selected file only
Select the folder Select the file Play
OK OK
R
[Option Menu]
Contains [Music Setup] menu to set up play mode.
[Repeat]
[Folder]: Playback repeat within the selected folder
[One]: Playback repeat on the selected one file
XM_EM6AZ.indd 11XM_EM6AZ.indd 11 2/1/2013 2:13:57 PM2/1/2013 2:13:57 PM
Using the Menu Functions
12
Using the Menu
Functions
1 Display the menu
MENU
Example:
Menu Item Setting
1/2
0
0
0
0
Mode
Standard
Bass
Treble
Equaliser
Auto Gain Control
Surround
Volume Correction
Speaker Distance to Wall
Digital Audio Preference
Off
Off
MPEG
Main Menu
Picture
Sound
Timer
Setup
Help
Select
Selects your favourite sound mode.
Page up
Change
RETURN
Page down
Operation guide Selected item description
S
elec
t
S
elects
y
our
f
avourite sound mode.
Pa
g
e u
p
C
han
ge
R
ET
U
R
N
Pa
g
e dow
n
Main Menu
P
ictur
e
Sound
Timer
Setup
Hel
p
Mode
Bass
Tr
eb
l
e
Equalise
r
Auto
G
ain
C
ontrol
S
urr
ound
Volume
C
orre
ctio
n
S
peaker Distance to Wall
Di
g
ital Audio Preferenc
e
1
/2
0
0
0
0
S
tandar
d
Off
Off
MPEG
Balance
Over 30cm
2 Select the menu
OK
3 Select the item
OK
4 Change the setting
Example:
Change the setting option
Surround
Off
On
OK
Adjust the intensity bar
Bass
OK
Access the submenu
Child Lock
OK
Note
Only available items can be selected.
Picture
[Viewing Mode]
Sets the picture mode for each input [Dynamic] /
[Normal] / [Cinema] / [True Cinema] / [Custom]
[Dynamic]: Improves contrast and sharpness for
viewing in a bright room.
[Normal]: For viewing in a normal lighting condition.
[Cinema]: Improves the performance of contrast,
black and colour reproduction for watching movies in a
darkened room.
[True Cinema]: Reproduces the original image quality
precisely without any revision.
[Custom]:
Allows you to customize the picture settings.
In each Viewing Mode, [Backlight], [Contrast],
[Brightness], [Colour], [Sharpness], [Tint], [Colour
Temperature], [Vivid Colour], [Adaptive Backlight
Control], [Ambient Sensor], [Noise Reduction] and
[MPEG Noise Reduction] can be adjusted and stored.
[Backlight], [Contrast], [Brightness],
[Colour], [Sharpness]
Increases or decreases the levels of these options
according to your personal preference
[Tint]
Adjusts the picture hue to suit your taste
For NTSC signal reception
[Colour Temperature]
Selects the colour temperature of the picture
[Cool2] / [Cool1] / [Normal] / [Warm1] / [Warm2]
[Vivid Colour]
Automatically adjusts colour for a more vivid picture
[On] / [Off]
[Adaptive Backlight Control]
Automatically controls luminance level according to the
images [On] / [Off]
[Ambient Sensor]
Automatically adjusts picture settings depending upon
ambient lighting conditions [On] / [Off]
[Noise Reduction]
Reduces unwanted picture noise [Auto] / [Max] / [Mid] /
[Min] / [Off]
[MPEG Noise Reduction]
Reduces unwanted MPEG block noise [Auto] / [Max] /
[Mid] / [Min] / [Off]
[Advanced Settings]
Available when you set [Viewing Mode] to [True Cinema]
or [Custom].
[Adaptive Gamma Control]
Automatically controls middle level of luminance
according to the images
[Black Expander]
Gradually adjusts the dark shades of the image
[White Balance]
Adjusts the white balance for red, green and blue
signals [R-/G-/B-Gain] / [R-/G-/B-Cutoff] / [Reset
White Balance]
[Colour Management]
Adjusts the hue, saturation and luminance [R-/G-/B-
Hue] / [R-/G-/B-Saturation] / [R-/G-/B-Luminance] /
[Reset Colour Management]
[Gamma]
[Gamma]: Switches the gamma curve [2.6] / [2.4] /
[2.2] / [2.0] / [1.8]
[Reset Gamma]: Resets to the default gamma
settings in this menu
[Reset Picture Defaults]
Resets to the default picture settings in this menu
C
[
O
XM_EM6AZ.indd 12XM_EM6AZ.indd 12 2/1/2013 2:13:58 PM2/1/2013 2:13:58 PM
Using the Menu Functions
13
a
s
.
/
]
[Option Settings]
[Film Cadence Mode]
Improves vertical resolution for movie images [On] /
[Off]
This function is available for the interlaced signal.
[1080p Pixel Direct]
(For 39” & 50” models only)
Reproduces the original image quality in detail for
1080p (HDMI) input signal [On] / [Off]
[HDMI Content Type]
Adjusts the picture settings of each HDMI input
according to the selected content type [Graphics] /
[Photos] / [Auto] / [Off]
[Auto]: Automatically adjusts the picture settings
according to the received HDMI content if the
connected equipment supports HDMI Content Type.
To set the availability of each content type for [Auto]
mode, select [Auto Detail Setting].
For HDMI input.
[HDMI RGB Range]
Adjusts the black level of the image for each HDMI
input [Auto] / [Full] / [Normal]
When the black level is not suitable, select [Full].
For HDMI input.
[3D-COMB]
Makes still or slow motion pictures more vivid [On] /
[Off]
Set to [On] to improve the colours in case patterning
occurs while viewing still or slow motion pictures.
For PAL / NTSC signal reception in TV mode or from
composite.
[Screen Settings]
[16:9 Overscan]
Selects the screen area displaying the image for 16:9
aspect [On] / [Off]
[On]: Enlarges the image to hide its edges. Select
this if noise is generated on the edge of the screen.
[Off]: Displays the image in the original size.
This function can be memorised separately for
SD (Standard definition) and HD (High definition)
signals.
[H-Size]
Switches over horizontal scanning size [H-Size1] /
[H-Size2]
[Zoom Adjustments]
Adjusts the vertical position and size when the aspect
is set to [Just] or [Zoom] mode
[Just]: V-Size max is 3
[Zoom]: V-Size max is 15
[Screen Display]
Turns off / on the TV screen without turning off the TV
[On] / [Off]
The sound is active even if the screen turns off.
Press any buttons (except Standby) to turn the
screen on.
[Copy Adjustment]
Copies picture adjustments to other inputs.
[Option Settings] and [Screen Settings] are not copied.
[Destination Viewing Mode]
Sets the viewing mode for the destination input [True
Cinema] / [Custom]
[Destination Input]
Selects the destination input
[Copy Start]
Select [Yes] to start copying
[Reset Picture Defaults]
Resets the current picture settings to defaults.
Sound
[Mode]
Sets your favourite sound mode [Standard] / [Music] /
[Speech] / [User]
The selected mode affects all input signals.
[Standard]
: Standard sound mode
[Music]
: Improves sound quality for watching music
videos, etc.
[Speech]
: Improves sound quality for watching news,
drama, etc.

In Standard, Music and Speech modes, you can
adjust the [Bass] and [Treble] settings, and those
settings will be stored for each mode.
[User]: Adjusts the sounds manually by using the
equaliser
When you select [User] mode, [Equaliser] is active
instead of [Bass] and [Treble]. Select [Equaliser] and
adjust the frequency. (below)
[Bass], [Treble]
Adjusts the bass / treble level respectively
[Equaliser]
Adjusts the frequency level to suit your favourite sound
quality
This function is available when [Mode] is set to [User].
Select the frequency and change the frequency level
by using the cursor buttons.
To enhance the bass sound, raise the level of the lower
frequency. To enhance the treble sound, raise the level
of the higher frequency.
To reset the levels of each frequency to the default
settings, select [Reset Equaliser Settings] by using the
cursor button, and then press the OK button.
[Balance]
Adjusts volume level of right and left speakers
[Surround]
Surround sound settings [On] / [Off]
[Auto Gain Control]
Automatically regulates large sound level differences
between channels and inputs [On] / [Off]
[Volume Correction]
Adjusts the volume of individual channel or input mode
[Speaker Distance to Wall]
Compensates for the low frequency sound due to the
distance between the speakers and the wall
[Up to 30cm] / [Over 30cm]
If the distance between the TV and wall is over 30 cm,
[Over 30cm] is recommended.
If the distance between the TV and wall is within
30 cm, [Up to 30cm] is recommended.
[MPX]
Selects multiplex sound mode (if available)
[Stereo]: Use this normally.
[Mono]: When stereo signal cannot be received.
[M1] / [M2]: Available while mono signal is transmitted.
For Analogue TV
XM_EM6AZ.indd 13XM_EM6AZ.indd 13 2/1/2013 2:13:59 PM2/1/2013 2:13:59 PM
Using the Menu Functions
14
[Digital Audio Preference]
Selects the initial setting for audio tracks
[Dolby D] / [MPEG]
[Dolby D] / [HE-AAC]
[Dolby D]: The priority is given to Dolby Digital.
[MPEG]: The priority is given to MPEG.
[HE-AAC]: The priority is given to HE-AAC.
Dolby Digital is the method of coding digital signals
developed by Dolby Laboratories. Apart from stereo
(2ch) audio, these signals can be multi-channel audio.
MPEG is an audio compression method that
compresses audio to the smaller size without any
considerable loss of audio quality.
HE-AAC is a perceptual coding method used to
compress digital audio for efficient storage and
transmission.
For Digital TV only
[SPDIF Selection]
SPDIF: A standard audio transfer file format
Selects the initial setting for digital audio output signal
from DIGITAL AUDIO OUT and HDMI 2 (ARC function)
terminals [Auto] / [PCM]
[Auto]: Dolby Digital and HE-AAC multi-channel are
output as Dolby Digital Bitstream. MPEG is output as
PCM.
[PCM]: Digital output signal is fixed to PCM.
For Digital TV or video contents of Media Player
[Audio Description]
Narration settings for visually impaired users
[Audio Description]
Set to [Auto] to activate the narration sound track when
available on the broadcast [Off] / [Auto]
[Volume]
Adjusts the volume of the narration sound track
[Speakers]
Set to [On] to activate the narration sound track from
the TV speakers [Off] / [On]
[HDMI1 / 2 Input]
Selects to fit the input signal [Digital] / [Analogue]
(p. 20)
[Digital]: When sound is carried via the HDMI cable
connection
[Analogue]: When sound is not carried via the HDMI-
DVI adaptor cable connection
For HDMI input
[Reset Sound Defaults]
Resets the current sound settings to defaults.
Timer
[Off Timer]
Sets the duration until the TV automatically goes to
Standby mode [Off] / [15] / [30] / [45] / [60] / [75] / [90]
(minutes)
[Daylight Saving Time]
Selects the time offset from the standard time for
Summer [+1 hour] / [+1/2 hour] / [Off] / [Auto]
[Region Select]
Selects the region where you live to adjust the standard
time [NSW / ACT] / [Victoria] / [Queensland] /
[South Australia] / [Western Australia] / [Northern
Territory] / [Tasmania]
[Auto Standby]
Enables turning the TV off automatically if no button is
pressed for 4 hours [On] / [Off]
[No signal Power off]
Enables turning the TV off if no signal is detected for
10 minutes [On] / [Off]
Setup
[Eco Navigation]
Sets the TV to operate in the most energy-saving mode
You can also access this item by using [VIERA
TOOLS] (p. 10)
[Child Lock] (p. 16)
[Tuning Menu] (p. 15 - 16)
[Language]
[Preferred Audio Language]
Selects the preferred language for digital TV multi
audio (depending on the broadcaster) [English] /
[Maori] / [French] / [German] / [Italian] / [Spanish] /
[Korean] / [Chinese-Mandarin] / [Chinese-
Cantonese] / [Japanese] / [Hindi]
[Preferred Subtitles]
Selects the default language for Digital TV subtitles
(depending on the broadcaster)
[Display Settings]
Teletext
Selects the Teletext display mode [FASTEXT] / [List]
This item is available only if the TV detects a Teletext
broadcast.
[ Input Labels]
Accesses the input labels list to select the label of
each input mode or set to skip unconnected one for
easier identification and selection in [Input Selection]
(p. 9) or banner
To name each input mode freely, select [User input]
and set the characters (maximum 10 characters).
To skip the input mode, select [Skip].
[ Banner Display Timeout]
Sets how long the Information banner stays on screen
(p. 8) [0 (No display)] / [1] / [2] / [3] / [4] / [5] / [6] /
[7] / [8] / [9] / [10] (seconds)
[VIERA Link Settings]
[VIERA Link]
Sets to use VIERA Link functions [On] / [Off]
[Power on Link]
When an HDMI connected equipment starts playback,
the TV is turned on and input mode is switched
automatically [On] / [Off]
Only when the TV is in Standby mode.
[Power off Link]
When the TV is set to Standby mode, the HDMI
connected equipment is also automatically set to
Standby [On] / [Off]
M
D
[
T
f
a
C
b
T
C
s
1
2
XM_EM6AZ.indd 14XM_EM6AZ.indd 14 2/1/2013 2:13:59 PM2/1/2013 2:13:59 PM
Using the Menu Functions
15
x
t
[Standby Power Save]
Controls the connected equipment to reduce power
consumption in Standby [On] / [Off]
This function is available when [VIERA Link] is set to
[On] and [Power off Link] is set to [On].
[Intelligent Auto Standby]
Makes non-watched or non-used HDMI connected
equipment go into Standby mode to reduce the power
consumption [On] / [Off]
This function is available when [VIERA Link] is set
to [On].
[System Menu]
[Shipping Condition]
Resets all settings, including tuning data, to the original
condition.
Access this function and follow the on-screen
instructions to complete the procedures.
Initial Setup (p. 7) will automatically start after
[Shipping Condition] completes.
[System Update] (p. 16)
[Licence Menu]
Displays the software licence information
[Other Settings]
[Power Save]
Reduces brightness of picture to economise on power
consumption [Off] / [On]
Help
[TV Self Test]
Makes a diagnosis of picture or sound problems
Follow the on-screen instructions.
[System Information]
Displays the system information of this TV
Using [Tuning Menu
]
[Tuning Menu
] lets you retune your TV, create your
favourite channel lists, skip unwanted channels, etc.

The settings in [Tuning Menu] are applicable only
for the selected TV mode. The menu name varies
depending on the TV mode ([Digital TV Tuning Menu] /
[Analogue TV Tuning Menu]).
[Favourites Edit] (Digital TV)
Create your favourite channel lists from various
broadcasters (up to 4: [Favourites1 to 4]).
The Digital TV Favourites lists are available from
“Category” in the Information banner and the TV Guide
screen.
1 Select a channel to list ( : Encrypted channel)
2 Add it to the Favourites list
1 TEN Digital
2 ABC TV Sydney
3 SBS DIGITAL1
FTV guide4
7 7 Digital
9
70
79
NINE DIGITAL
7 HD Digital
7 Guide
1 TEN Digital
Digital TV Favourites Editor
All Digital Channels Favourites1
A channel is
added
1
TEN Di
gital
g
g
g
g
Favourit
[Select favourites]: To select other Favourites
[Add all]: To add all channels to the list
[Channel List]
You can hide (skip) unwanted channels.
The hidden channels cannot be displayed except in this
function.
Select a channel and reveal / hide
70 CBBC Channel
72 Cartoon Nwk
105 BBCi
719 BBC Radio Wales
Digital TV Channel List
: [Reveal]
: [Hide]
[Tune]: To retune each channel (Manual Tuning)
[Swap] / [Move]: To swap / move the channel
position (if available)
[Reveal all]: To reveal all channels
[Rename]: To rename the channel (Analogue TV)
[Auto Tuning]
Automatically retune all channels received in the area.
Example: Digital TV
Digital TV Auto Tuning
All digital TV tuning data will be erased
[Manual Tuning] (Digital TV)
Normally use [Auto Tuning] or [Update Channel List] to
retune Digital TV channels.
If tuning has not been done completely or for adjusting
the direction of the aerial or dish, use this function.
All channels found will be added to the Channel List.
474.00
[CH21]
MHz
0
0
10
10
Digital TV Manual Tuning
Physical Channel
Signal Quality
Signal Strength
No. Channel Name Type New
1 Select physical channel
2 Select offset
3 Start tuning
[Manual Tuning] (Analogue TV)
Set Analogue TV channel manually after Auto Tuning.
If a VCR is connected only with the RF cable, select
channel position [0].
CH 84
1 120
Analogue TV Manual Tuning
Manual Tuning
Store
1 Select the channel
position
2 Select the channel
3 Search 4 Select [Store]
[Update Channel List] (Digital TV)
You can add new RF channels, delete removed RF
channels, update RF channel name and position
automatically to the channel list.
CH 6 69
Digital TV Update Channel List
Scan
This will take about 3 minutes.
RF Ch Channel Name Type Quality
The channel list is updated while keeping your settings
in [Favourites Edit], [Channel List], [Child Lock], etc.
Depending on the signal condition, the update may not
work properly.
XM_EM6AZ.indd 15XM_EM6AZ.indd 15 2/1/2013 2:13:59 PM2/1/2013 2:13:59 PM
Using the Menu Functions
16
[New Channel Message] (Digital TV)
Selects whether to give a notification message when a
new Digital TV channel is found.
New channels found!
Press OK to update channel list.
Press EXIT to ignore.
Selecting OK will perform [Update Channel List].
Sometimes, mainly during summer at night, the TV
may pickup distant TV stations outside your broadcast
due to favourable short term ionosphere conditions.
In such circumstances, the TV does not add any new
channel when you press OK. This is normal.
[Signal Condition] (Digital TV)
Select a channel and check its signal condition.
A good Signal Strength is not an indication of suitable
signal for Digital TV reception.
Use the Signal Quality indicator as follows.
Green bar: Good
Yellow bar: Poor
Red bar: Bad (Check the aerial)
Example:
These bars show the maximum signal value of the
selected channel.
101 DZFinfokanal
Wenvoe
[CH32] 562.00 MHz
10
10
0
0
Digital TV Signal Condition
Signal Quality
Channel Name
Signal Strength
Network Name
Parameter
[Add TV Signal]
Adds TV mode.
This function is available if you skip to tune any mode
in Auto Tuning during Initial Setup. (p. 7)
Setting [Child Lock]
You can lock specific channels / AV input terminals and
control who watches them.
When the locked channel / input is selected, a message
appears. Enter the PIN number to watch.
1 Enter the PIN number (4 digits)
* * * *
Please enter PIN for access
PIN
Child Lock-PIN Entry
“0000” has been stored as the default PIN number.
Enter the PIN number twice at first setting.
2 Select [Child Lock List]
No Block
Change PIN
Child Lock List
Parental Rating
Child Lock
3 Select the channel / input to be locked
101 BBC 1 Wales
7 BBC THREE
14 E4C
1 BBC1
2 *****
Child Lock List - TV and AV
Name Input
Digital TV
Digital TV
Digital TV
Analogue TV
Analogue TV
Analogue TV
External
Type
Digital TV
Digital TV
Digital TV
Analogue TV
Analogue TV
Analogue TV
Lock
AV1 AV
VCR
: Indicates
locked input /
channel
In Digital TV, additional lock item will appear.
[Freeview Players]: Applies access control for some
MHEG services.
[Lock all]: To lock all channels and inputs
[Next input]: To jump to the top of the next input
To change the PIN number
(1) Select [Change PIN]
Change PIN
Child Lock
(2) Enter a new PIN number twice
Write your PIN number here in
case you forget it.
To set Parental Rating
To watch the Digital TV programme that has rating
information over the selected age, enter the PIN number
(depending on the broadcaster).
Select [Parental Rating], then select the block setting
No Block
Parental Rating
Child Lock
Note
Setting [Shipping Condition] (p. 15) erases the PIN
number and all settings.
If you have forgotten your changed PIN, input “6969”
as the PIN number.
Performing [System Update]
To update automatically
Select [Auto Update Search in Standby]
Auto Update Search in Standby
System Update Search Now
System Update
Off
Every time you set, the TV automatically performs
a search in Standby and downloads any available
update.
The automatic updating is performed when the TV is in
Standby (TV turned off with the remote control).
If System Update is performed, the software will be
updated (it may change TV functions).
If you do not want to do so, set [Auto Update
Search in Standby] to [Off].
To update immediately
1 Select [System Update Search Now]
Auto Update Search in Standby
System Update Search Now
System Update
Off
2 Searches for an update (several minutes) and
displays a corresponding message, if any
3 Download
Note
Download may take more than 60 minutes.
During software download and update, DO NOT switch
off the TV.
The notification message might be a reminder. In this
case, the schedule information (the date that the new
version can be used) will appear. You can set the
reservation for update. The update will not start when
the TV is off.
L
(
V
e
c
e
T
P
XM_EM6AZ.indd 16XM_EM6AZ.indd 16 2/1/2013 2:13:59 PM2/1/2013 2:13:59 PM
Link Functions (VIERA Link)
17
r
n
h
Link Functions
(VIERA Link)
VIERA Link (HDAVI Control™) connects the TV and the
equipment with VIERA Link function, and enables easy
control, playback, energy saving, creating home theatre,
etc., without complicated setting.
This TV supports “HDAVI Control 5” function. But
available features are depending on the connected
equipment’s version of HDAVI Control. Please read the
manual of the equipment to confirm the version.
VIERA Link features may be available even with other
manufacturers’ equipment supporting HDMI CEC.
VIERA Link “

Enjoy additional HDMI Inter-Operability with Panasonic
products which have “HDAVI Control” function.
These features are limited to models incorporating
“HDAVI Control” and “VIERA Link”.
Some functions are not available depending on the
equipment’s version of HDAVI Control.
VIERA Link “HDAVI Control”, based on the control
functions provided by HDMI which is an industry
standard known as HDMI CEC (Consumer Electronics
Control), is a unique function that we have developed
and added. As such, its operation with other
manufacturers’ equipment that supports HDMI CEC
cannot be guaranteed.
Please refer to individual manuals for other
manufacturers’ equipment supporting VIERA Link
function.
About applicable Panasonic equipment, consult your
local Panasonic dealer.
Preparations
Connect the equipment supporting VIERA Link to the
TV’s HDMI 1 or HDMI 2 terminal.
Use fully wired HDMI compliant cable. Non-HDMI-
compliant cables cannot be utilised.
Use an optical digital audio cable or RCA cable for
audio output from the TV.
Set up the connected equipment. Read the manual of
the equipment.
Set [VIERA Link] to [On] in the Setup Menu. [VIERA
Link] (p. 14)
Set up the TV.
After connection, turn the equipment on and then
switch the TV on.
Select the input mode from HDMI1 or HDMI2, and
make sure that an image is displayed correctly.
This setup should be done each time when the
following conditions occur:
for the first time
when adding or reconnecting equipment
when changing setup
VIERA Link (HDMI connection)
Connected
equipment
Features
DIGA
Recorder
DVD Player,
Blu-ray Disc
Player
HD Video
Camera,
LUMIX
Camera
Easy playback
Power on link
Power off link
Reduce
unnecessary power
consumption in
Standby
2
2
-
Auto standby
for unnecessary
equipment
2
2
-
Control the menu
of the connected
equipment by VIERA
remote control
1
1
1
VIERA Link (HDMI and Audio out connections)
Connected
equipment
Features
Player
theatre
Blu-ray Disc
theatre
Amplifier
Easy playback
3
3
-
Power on link
-
Power off link
Reduce
unnecessary power
consumption in
Standby
-
2
-
Auto standby
for unnecessary
equipment
2,4
2,4
2
Control the menu
of the connected
equipment by VIERA
remote control
1
1
-
Speaker control

For equipment with “HDAVI Control 2 or later”.

For equipment with “HDAVI Control 4 or later”.

While playing a disc.

Except for watching a disc.
Easy playback
Automatic input switching - When the connected
equipment is operated, input mode is switched
automatically.
XM_EM6AZ.indd 17XM_EM6AZ.indd 17 2/1/2013 2:14:00 PM2/1/2013 2:14:00 PM
Link Functions (VIERA Link)
18
VIERA Link Control of compatible
equipment
Table below shows maximum number of compatible
equipment that can be controlled by VIERA Link
Control. This includes connections to equipment already
connected to the TV.
For example, DIGA Recorder connected to Amplifier
which is connected to the TV via an HDMI cable.
Type of the equipment Maximum number
Recorder (DIGA Recorder, etc.) 3
Player (DVD Player, Blu-ray Disc
Player, HD Video Camera, LUMIX
Camera, Digital Camera, Player
theatre, Blu-ray Disc theatre, etc.)
3
Audio system (Player theatre, Blu-ray
Disc theatre, Amplifier, etc.)
1
Tuner (Set top box, etc.) 4
VIERA Link Menu
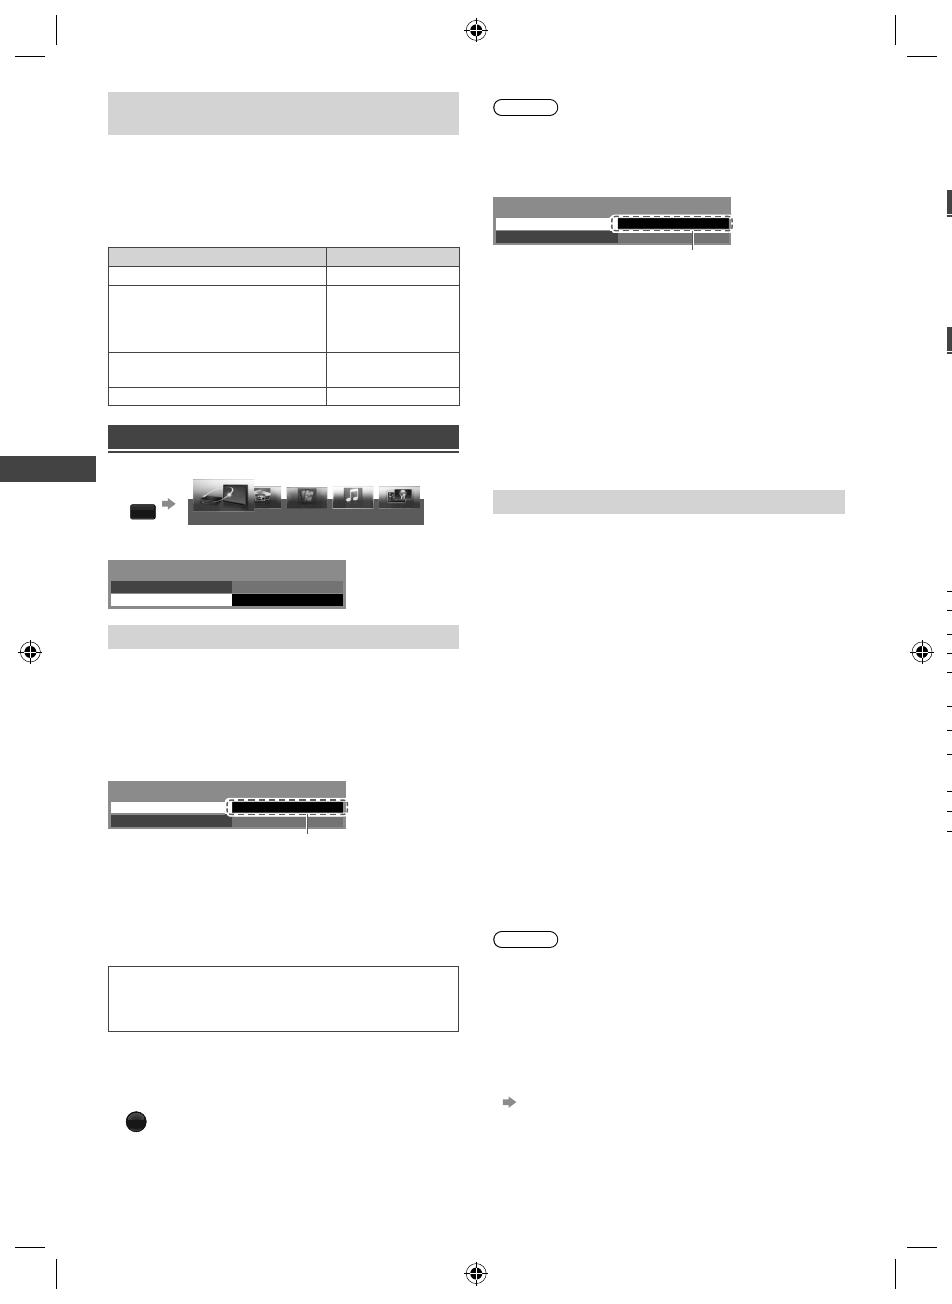
1 Display [VIERA TOOLS] and select [VIERA Link]
VIERA
TOOLS
VIERA Link
VIDEO MUSIC
ECO NAVI
HOTO
2 Select the function you want to use
VIERA Link Menu
VIERA Link Control
Speaker Selection Home Cinema
Recorder
[VIERA Link Control]
You can control some functions of the connected
equipment with this TV remote control by pointing at the
TV’s signal receiver.
For details of the operations for the connected
equipment, read the manual of the equipment.
1 Select [VIERA Link Control]
2 Select the equipment to access
VIERA Link Menu
VIERA Link Control
Speaker Selection Home Cinema
Recorder
Reco
r
de
r
[Recorder] / [Player] / [Home Cinema] / [Video
Camera] / [LUMIX] / [Digital Camera] / [Other]
The displayed item may vary depending on the
connected equipment.
[Home Cinema] means Player theatre, Blu-ray Disc
theatre or Recorder theatre.
[Other] means Tuner set top box.
The menu of the accessed equipment will be
displayed.
(Input mode will be changed automatically.)
3 Operate the menu of the equipment
Follow the operation guide.
To display the operation guide
OPTION
Note
Some operations may not be available depending on
the equipment. In this case use its own remote control
to operate the equipment.
If multiple recorders or players are connected
VIERA Link Menu
VIERA Link Control
Speaker Selection Home Cinema
Recorder2
Reco
r
de
r
2
[Recorder1-2] / [Player1-2]
The number is given from the TV’s lower number
of HDMI terminal connected to the same type of
equipment. For example, when two recorders are
connected to HDMI 1 and HDMI 2, the recorder
connected to HDMI 1 is displayed as [Recorder1],
and the recorder connected to HDMI 2 is displayed as
[Recorder2].
If you access non-VIERA Link equipment
The type of the connected equipment is displayed.
Although you can access the connected equipment, you
cannot operate it. Use its own remote control to operate
the equipment.
[Speaker Selection]
You can control the theatre speaker with this TV remote
control by pointing at the TV’s signal receiver.
1 Select [Speaker Selection]
2 Set to [Home Cinema] or [TV]
[Home Cinema]: The sound is from theatre speakers.
Player theatre, Blu-ray Disc theatre or Amplifier will be
automatically turned on if it is in Standby mode.
• You could use the Volume Up / Down and MUTE
buttons.
• The sound of TV speakers is mute.
• When the equipment is turned off, TV speakers will
be active.
[TV]: TV speakers are active.
Multi-channel sound
If you want to enjoy the multi-channel sound (e.g. Dolby
Digital 5.1ch) via an Amplifier, connect it with HDMI
cable and optical digital audio cable, and then select
[Home Cinema]. If your Amplifier has “HDAVI Control 5”
function, you only need to connect it with HDMI cable to
the TV’s HDMI 2 terminal.
To enjoy the sound from the DIGA Recorder in multi-
channel sound, connect an HDMI cable from the DIGA
Recorder to the Amplifier.
Note
These functions may not work properly depending on
the connected equipment.
Image or sound may not be available for the first few
seconds when input mode is switched.
“HDAVI Control 5” is the newest standard (as of
December, 2011) for HDAVI Control compatible
equipment. This standard is compatible with
conventional HDAVI equipment.
To confirm this TV’s version of HDAVI Control
[System Information] (p. 15)
A
I
T
f
o
E
XM_EM6AZ.indd 18XM_EM6AZ.indd 18 2/1/2013 2:14:00 PM2/1/2013 2:14:00 PM
Additional Information
19
u
.
e
Additional
Information
Auto power standby function
The TV will automatically go into Standby mode in the
following conditions:
No signal is received and no operation is performed for
30 minutes in Analogue TV mode.
[Off Timer] is active in the Timer Menu (p. 14).
[Auto Standby] is set to [On] (p. 14).
Information banner
Example : Digital TV
: PG
1
BBC ONE WALES
Coronation Street
8:00 pm - 8:55 pm
8:35 pm
Now
All Digital Channels
Rating
1
23 645
1
BB
C
O
NE WA
LES
1 Channel position and name
2 Channel type ([Radio], [Data], etc.) /
Encrypted channel (
) / TV mode ( , )
3 Programme
4 Programme Start / Finish time (Digital TV)
Channel number, etc. (Analogue TV)
5 Category
6 Current time
Icon / Message Meaning
Sound mute On
[Rating] Rating information
[Bad signal] Poor TV signal quality
[AD] Audio Description service available
(p. 14)
Subtitle service available
Multiple image or audio available
Teletext service available
, ,
II
,
Audio mode
1 - 90 Off Timer remaining time
To watch the channel
listed in the banner
OK
To confirm another
tuned channel name
OK
Information on the
next programme
(Digital TV)
OK
Extra information
(Digital TV)
INFO
(Press again to
hide the banner)
To update the TV
software (if available)
R
To select a favourite list
(Digital TV)
B
(if the favourite
list is created in
[Favourites Edit])
Rating (Digital TV)
Rating Meaning Rating Meaning
- (No Block) Not classified M Mature
P Pre school MA 15+ Mature Adult 15+
C Children AV 15+
Adult strong
Violence 15+
G General R Restricted 18+
PG Parental Guidance recommended
Rating Meaning
- (No Block) Not classified
G General
PGR Parental Guidance Recommended
AO Adults Only
Aspect
[16:9]
Directly displays the image at 16:9 without distortion
(anamorphic).
[14:9]
Displays the image at the standard 14:9 without
distortion.
[Just]
Displays a 4:3 image full-screen. Stretching is only
noticeable at the left and right edges.
[4:3]
Displays the image at the standard 4:3 without
distortion.
[Zoom]
Displays a 16:9 letterbox or 4:3 image without
distortion.
[4:3 Full]
Displays a 4:3 image enlarged horizontally to fit the
screen.
For HD (High definition) signals
[Sidecut Just]
Displays a 16:9 letterbox (anamorphic) image full-
screen. Stretching is only noticeable at the left and
right edges.
For HD (High definition) signals
[Sidecut Zoom]
Displays a 16:9 letterbox (anamorphic) image full-
screen without distortion.
For HD (High definition) signals
Input signal that can be displayed
Signal name COMPONENT HDMI
525 (480) / 60i, 60p
625 (576) / 50i, 50p
750 (720) / 60p, 50p
1,125 (1,080) / 60i, 50i
1,125 (1,080) / 60p, 50p, 24p
Mark : Applicable input signal
Signals other than the above may not be displayed
properly.
The above signals are reformatted for optimal viewing
on your display.
XM_EM6AZ.indd 19XM_EM6AZ.indd 19 2/1/2013 2:14:01 PM2/1/2013 2:14:01 PM
Additional Information
20
Supported file format in Media Player
Photo
JPEG (.jpg, .jpeg)
Supported resolution: 8 × 8 to 30,719 × 17,279
DCF and EXIF standards
Sub-sampling: 4:4:4, 4:2:2, 4:2:0
Progressive JPEG is not supported.
Music
MP3 (.mp3) / AAC (.m4a)

/ WMA (.wma)

/
LPCM (.wav) / FLAC (.flac)
Video
AVI (.avi)

/ MKV (.mkv)

/ ASF (.asf, .wmv)

/
MP4 (.f4v, .m4v, .mp4)

/ FLV (.flv) /
3GPP (.3gp, .3g2) / TS (.mts, .m2ts, .tp, .trp, .ts, .tts) /
PS (.mod, .mpg, .mpeg, .vob, .vro)

Copy-protected files cannot be played back.

WMA Pro and WMA Lossless are not supported.

Some subtitles or chapter functions may not be
available.

This TV supports this container recorded with
Panasonic products. For details, read the manual of
the products.
Subtitles
MicroDVD, SubRip, TMPlayer (.srt, .sub, .txt)
The video file and subtitles text file are inside the
same folder, and the file names are the same except
for the file extensions.
If there are more than one subtitles text file inside
the same folder, they are displayed in the following
order of priority: “.srt”, “.sub”, “.txt”.
Note
Even if these conditions are fullfilled, some files may
not play depending on how they are encoded.
Do not use two-byte characters or other special codes
for data.
Connected devices may become unusable with this TV
if the file or folder names are changed.
HDMI connection
This TV incorporates HDMI™ technology. HDMI
(high-definition multimedia interface) is the world’s first
complete digital consumer AV interface complying with
a non-compression standard.
HDMI allows you to enjoy high-definition digital images
and high-quality sound by connecting the TV and the
equipment.
Applicable HDMI features
Input audio signal:
2ch Linear PCM (sampling frequencies - 48 kHz,
44.1 kHz, 32 kHz)
Input video signal:
“Input signal that can be displayed” (p. 19)
Match the output setting of the digital equipment.
Audio Return Channel
(HDMI 2 terminal only)
Content Type
VIERA Link (HDAVI Control 5)
DVI connection
If the external equipment has only a DVI output, connect
to the HDMI terminal via a DVI to HDMI adaptor cable.
When the DVI to HDMI adaptor cable is used, connect
the audio cable to the audio input terminal (use AV1
audio terminals).
Note
Audio settings can be made on [HDMI1 / 2 Input] in the
Sound Menu.
These HDMI connectors are “type A”.
These HDMI connectors are compatible with HDCP
(High-Bandwidth Digital Content Protection) copyright
protection.
Equipment having no digital output terminal may be
connected to the input terminal of component or video
to receive analogue signals.

Audio Return Channel (ARC) is a function to send
digital sound signals via an HDMI cable.
USB Flash Memory
For playing back in Media Player
Format: FAT16, FAT32
Compliance:
Supports only USB1.1 or USB2.0 standard.
Maximum USB capacity supported is 16GB.
USB Hub or card adapter is not supported.
Note
Data modified with a PC may not be displayed.
Do not remove the device while the TV is accessing
data. Otherwise this can damage the device or TV.
Do not touch the pins on the device.
Insert the device in the correct direction. Otherwise this
can damage device or TV.
Electrical interference, static electricity, or erroneous
operation may damage the data or device. Panasonic
is not liable for any deterioration or damage of data or
device during operations with the TV.
It is recommended to connect the USB Flash Memory
directly to the TV’s USB port.
Some USB devices or USB HUB may not be used with
this TV.
You cannot connect any devices by using USB card
reader.
Additional information for USB devices may be on the
following website. (English only)
http://panasonic.jp/support/global/cs/tv/
T
B
t
h
I
f
i
n
I
f
P
XM_EM6AZ.indd 20XM_EM6AZ.indd 20 2/1/2013 2:14:01 PM2/1/2013 2:14:01 PM
1 / 1

Panasonic Microscope & Magnifier TH-L50EM6Z User manual

Category
Car video systems
Type
User manual
This manual is also suitable for

Ask a question and I''ll find the answer in the document

Finding information in a document is now easier with AI

Ask the document