Vess A8020/Vess A8021 Quick Start Guide
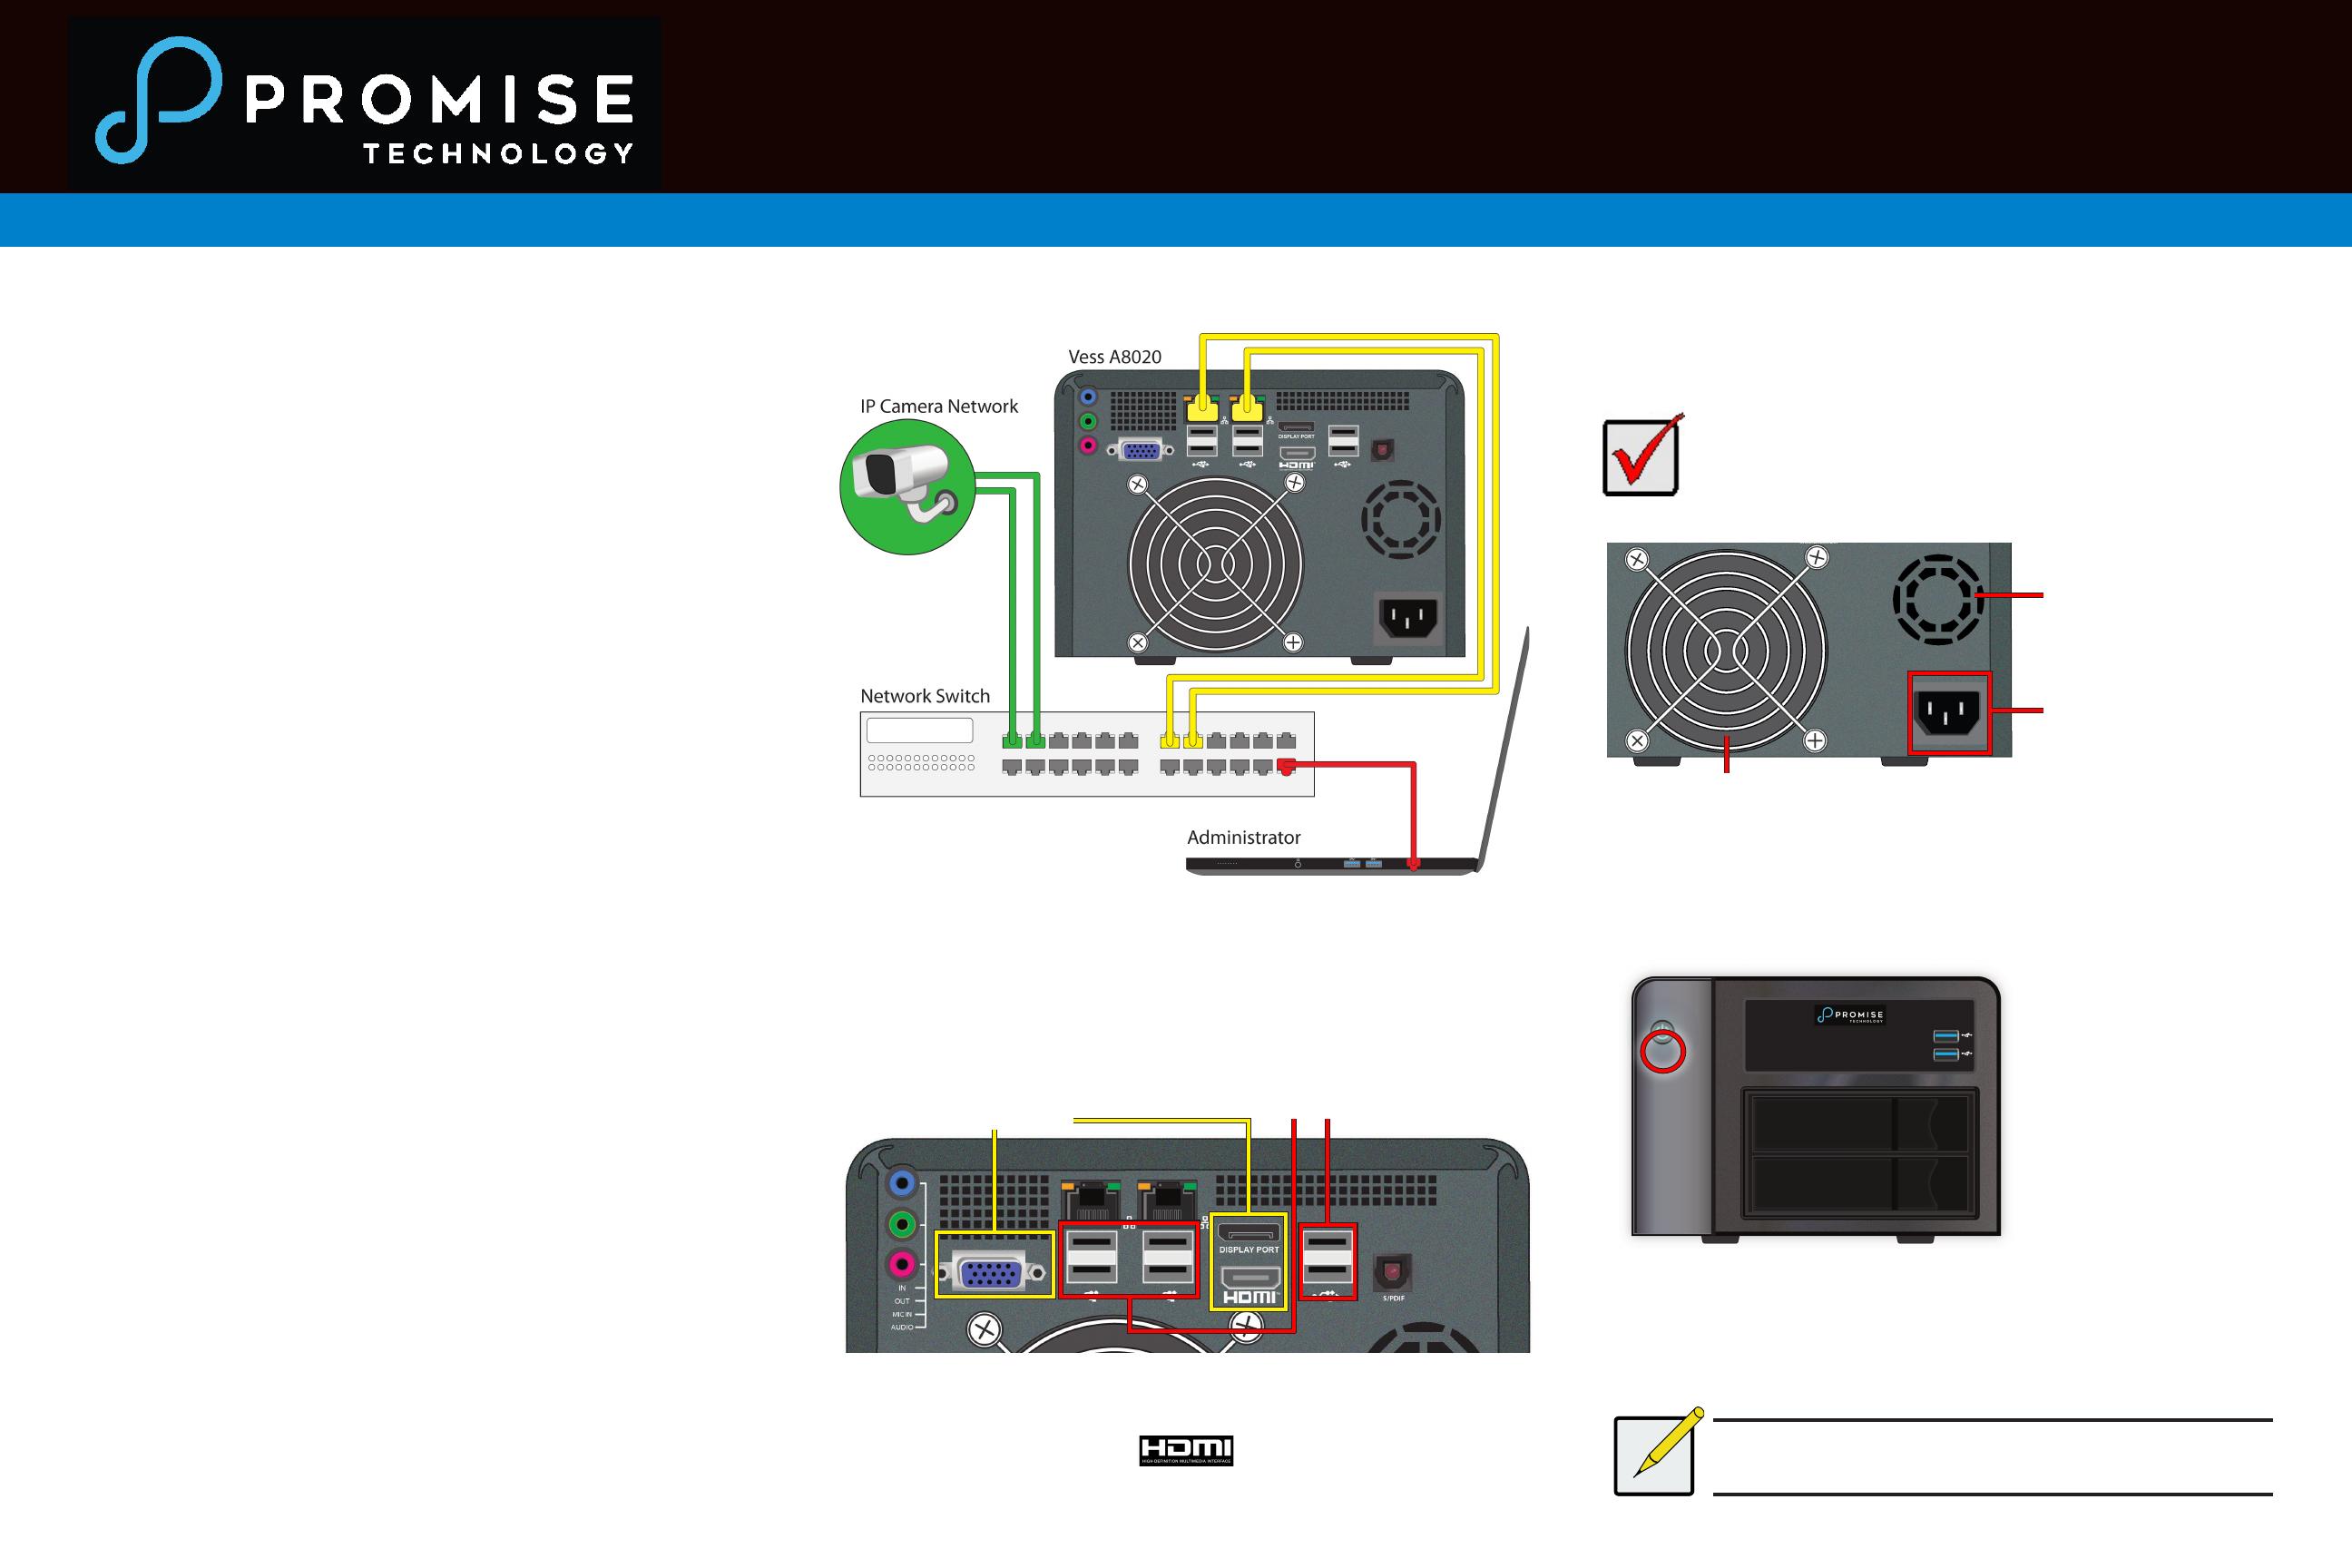
Make sure the system fan and power supply fan are
not obstructed to allow adequate air ow for cooling.
Please read the Product Manual for information about
using WebPAM Pro for system conguration.
* The terms HDMI, HDMI High-Denition Multimedia Interface, HDMI Trade
dress and the HDMI Logos are trademarks or registered trademarks of HDMI
Licensing Administrator, Inc.
Power on enclosure
With the power supply connected, the system can now be powered on. Press the Power button
near the upper left corner of the front panel.
Access user management interface
When the system has booted up, access the WebPAM Pro management user interface for
conguration. Access the system using the connected keyboard and monitor, look for the
WebPAM Pro icon on the desktop and double-click on it. The management interface appears.
Login and begin managing the system.
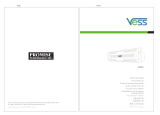
Network connections
The Vess A8020/Vess A8021 Series controller has two 1000BASE-T Ethernet ports. These IO
ports are used for the surveillance network, and also used for management via remote computer.
The administrator’s computer (Host PC) should be on the same network as the network of IP
cameras (i.e. same IP domain and subnet).
To establish the management path network connection:
1. Attach one end of an Ethernet cable to the network port in the Host PC, attach the
other end of the Ethernet cable to a port on a network switch. The switch, Host PC and
IP camera network should all be on the same IP domain and subnet.
2. Attach one end of another Ethernet cable to the same network switch and attach the
other end to either network port on the Vess A8020/Vess A8021.
3. Make sure the Vess A8020/Vess A8021, network switch, Host PC, and IP cameras are
all on the same IP domain and subnet.
Connect directly to Vess A8020/Vess A8021
The Vess A8020/Vess A8021 is running Windows operating system. To access the user interface,
connect to the device using a USB keyboard and monitor. Use a VGA, DisplayPort of HDMI monitor.
Connect power
Insert the power cable into the power receptacle on the power supply; connect the cord to a
suitable power source.
About this guide
This Quick Start Guide provides a brief overview hardware on the Vess A8020/Vess A8021
Storage Appliance for Video Surveillance, including instructions to make the necessary network
and I/O device connections.
Installation overview
There are two methods to establish the physical connection used for management of the device.
Management through the Gigabit network connection is done using WebPAM PROe, a web
browser based GUI. Alternatively you can use an out-of-band connection using a VGA or HDMI
monitor and USB keyboard to access the embedded text-based CLI interface.
The general steps for setting up the Vess A8020/Vess A8021 are:
1. Establish management access through network; or connect directly to device using a
monitor and USB keyboard.
2. Connect unit to power source, power on.
3. Boot up system and access management interface.
Unpacking
The Vess A8020/Vess A8021 box contains the following items:
• Vess A8020/Vess A8021 Enclosure
• 1.83 m (6 ft) Power cord
introduction
The Vess A8020/Vess A8021 Storage Appliance for Video Surveillance is shipped ready for
use, with Windows operating system. The user can install their preferred VMS software on the
system. The Vess A8020/Vess A8021 is specially engineered for small scale IP video surveillance
deployment. The subsystems are capable of continuous recording and playback operation without
dropping frames.
Network connecons to management PC and IP camera network
System fan
Connect power cord on back
Power receptacle
Power supply fan
Power buon on front
Connecons to keyboard and monitor on back
Connect to USB keyboardConnect to monitor
(VGA, DisplatPort, HDMI*)