Page is loading ...

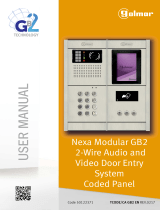
USER MANUAL
GB2 Video Door Entry
System Kit
2-wire installation
Nexa Modular

NEXA MODULAR GB2 VIDEO DOOR ENTRY SYSTEM KIT - VILLAS
INTRODUCTION
First and foremost we would like to thank you for purchasing this product.
Our commitment to satisfying our customers can be seen from our ISO-9001 certification and from the manufacturing of
products like this one.
Its advanced technology and exacting quality control will ensure that customers and users enjoy the many features this
system offers.To obtain the maximum benefit from these features and a properly wired installation, we kindly
recommend that you spend a few minutes of your time reading this manual.
CONTENTS
2
SET-UP WARNINGS
- Do not use excessive force when tightening the power supply connection block screws.
-Always disconnect the power supply before making modifications to the device.
- installationThe and handling of these devices must be carried out by .authorised personnel
- The wiring must run at least 40 cm away from any other wiring installations.
- Before connecting the device to the mains, check the connections between the door panel, power supply, distributors,
camera unit, GSM interface, monitors and telephones.
- Use Golmar cable (2x1mm ).RAP-2150 2
- Always follow the instructions contained in this manual.
Introduc n........................................................................................................................................................ .......... 2tio . ..
Contents . .................................................................................................................................................................... .... 2.
Set-up warnings ......................................................................................................................................................... .... 2.
Safety precautions ....................................................................... ...................................................................................3
Characteristics............................................................................................................................................................... 3.
System operation ................................................. .......................................................................................................... 3.
Description of the EL632 GB2 sound module .......................................................A ..... .................................................4.
Description of the Nexa Modular door panel .. ............................................................................................................5... ...
Panel ........................................ ........................................................................................................................................
Positioning the embedding box .. ..................................................................................................... ............................ . 5.
Preparing the cable entry .................. ....... ...................................................................................... .............................. . 6
Fastening the frame to the embedding box .. ...................................................................... .......................................... . 6.
Codes assigned to the call buttons ....................... ..................................................................... ................................... .7.
Description of the configuration dip switch ................................................................ .................................................. ..7.
Description of the configuration jumper . ................................................. .................................................................. .. ..8.
Description of the LED lights (low light conditions) ............................................ ............................................................ 8.
Description of the visual indications on the door panel . ....................................................................................... .......... .8
Description of the vocal synthesis (audible indications on the door panel).................................................................8
Adjusting the door panel communication volume........................................................................................................9
Selecting the vocal synthesis language .................................................................................................................... ..9
Adjusting the vocal synthesis volume......................................................................................................................... 9.
Configuring the contact type for Relay 1 and Relay 2 (lock release) .. ................................................................... ... 10.
Closing the frame . .................................................................................................................................................... . 10.
Inserting the button identification labels .............................................................................................................. ......10.
Closing the door panel..............................................................................................................................................10.
FA-GB2/A power supply installation ........................................................................................................... .................. 11.
Lock release installation .............................................................................................................................................. .11..
Wiring diagrams ..................................................................................................................................................... .12-19.

CHARACTERISTICS
- Video door entry system with simplified installation (non-polarised 2 wire bus).
- Up to 4 access panels (DP-GB2Adistributor required for more than one access panel) per installation.
- Up to 2 apartments (N5110 Vesta2 1-apartment kit and N5220 Vesta2 2-apartment kit) per installation.
- Maximum 23 Vesta2 monitors per installation.
- Maximum 16 Vesta2 monitors in one apartment.
- Maximum 4 Vesta2 monitors in parallel (without distributors) per installation.
- Call confirmation tone.
- Visual indications on the door panel for people with impaired hearing (indicating call process, communication, door
open and channel busy).
- is you can speak now,Audible indications on the door panel for people with impaired vision (indicating call in progress,
resident unavailable is ommunication is finished system is busy, try later), door open, c and .
- Door opening timeable at 1 or 5 seconds.
- 2 outputs for independently activated lock releases.
- Relay 1 output to activate the DC orAC lock releases actuated by relay.
- Relay 2 output to activate the DC orAC lock releases actuated by relay.
- Input for external door opening button (Relay 1 output).
- Input for external door opening button (Relay 2 output).
- :Maximum distance between the power supply and the furthest door panel 80m with a cross-section of 1mm .
2
- .Maximum distance between the power supply and the last distributor: 80m with a cross-section of 1mm2
- .Maximum distance between the distributor and monitor: 40m with a cross-section of 1mm2
SYSTEM OPERATION
3
SAFETY PRECAUTIONS
-Always disconnect the power supply before making modifications to the device.
- installationThe and handling of these devices must be carried out by .authorised personnel
- The wiring must run at least .40 cm away from any other wiring
- :In the power supply unit
wDo not overtighten the screws on the connection block.
wInstall the power supply in a dry and protected .whithout risk of drip or water projections
wAvoid locations that are humid, dusty or near heat sources.
wDo not block ventilation holes of the unit so that air can circulate freely.
wTo avoid damage, the power supply must be firmly secured in place.
wTo prevent electric shock, do not remove the cover or handle the wiring connected to the terminals.
- To make a call, the visitor must press the button of the apartment; an audible sound indicates that the call is being
made and LED will turn on If vocal synthesis is a “Call is in progress” message will indicate a call is being. activated,
made. At this moment the apartment's monitor(s) receives the call. During the call the visitor can correct his call by
pressing a push button corresponding to a different apartment, in which case the original call is cancelled.
- In systems with several access doors, the other door panel(s) will be automatically disconnected. If another visitor
tries to call, a telephone tones will be heard to indicate that the system is busy and LED will illuminate. If vocal
synthesis is activated, the message “System is busy, try later” will be indicated on the door panel.
- The call lasts for 40 seconds. The image appears on the monitor (with code 0 “apartment 1” or monitor 16 if the call is in
“apartment 2”) when receiving the call without the visitor knowing.
If the call is not answered within 40 seconds, LED will turn off and the channel will be freed.
- To establish communication, press button on any monitor in the apartment. Door panel LED will turn on. If the
vocal synthesis is the message “you can speak now” will be eard confirming the communication is activated.activated h
- .Communication will last for one and a half minutes or until button is pressed again When communication has
finished, LEDs and will turn off and the channel will be freed. If the vocal synthesis is activated, a "Communication
is finished" message will indicate that the call is over on the door panel.
- To open the door, press button during the call or communication processes: one press will activate the lock
release for five seconds and LED will also turn on for five seconds If vocal synthesis is activated, a “. Door is
open”message will be indicated on the door panel.
- For a description of the functioning and setup of the monitor, see the monitor’s user manual.
NEXA MODULAR GB2 VIDEO DOOR ENTRY SYSTEM KIT - VILLAS

DESCRIPTION OF THE EL632 GB2 SOUND MODULEA
4
Microphone.
Speaker.
Front.
Sound module push buttons (x2).
Connection block (GB2 bus).
Push button connector (in unused).villas
Back.
Positive, negative (12Vdc output for Golmar DC lock ).: release
: lock releaseContact “C”for (Relay 1).
: lock releaseContact “NO”for (Relay 1).
: Input for external door opening button (Relay 1).
: releaseContact “NO”for lock (Relay 2).
: releaseContact “C”for lock (Relay 2).
: Input for external door opening button (Relay 2).
: Input for external call button (push button 1).
: Input for external call button (push button 2).
: .Connection BUS (non-polarised)
: Connection BUS (non-polarised).
Push button number.
Color camera.
+,
C1
NA1
AP ,AP+
NA2
C2
AP+,AP
P1
P2
BUS
BUS
_
Connection terminals:
Note: See wiring diagrams for connections (pages 12-19).
Configuration dip switch.
Do not use (in unused)villas .
LEDs (visual indications for people with impaired hearing).
LEDs (activation in low light conditions).
Internal use.
_
_
Do not use (internal use).
Description of the EL632 GB2 sound module:A
NEXA MODULAR GB2 VIDEO DOOR ENTRY SYSTEM KIT - VILLAS
Do not use (in unused)villas .
Do not use (in unused)villas .

DESCRIPTION OF THE NEXA MODULAR DOOR PANEL
5
Sound module
EL632 GB2 video door entry system with colour camera.A,
Door panel component assembly drawing:
Aluminium panel
Sound module
Frame moduleEmbedding box
Description of the door panel:
DOOR PANEL INSTALLATION
NCEV-90CS embedding box: 99(W) x 13 5(H) x (D) mm.2, 56,5
1650
1850
1450
Make a hole in the wall to position the top of the door panel at a height of 1.65m.
Hole dimensions:
The door panel has been designed to be used under most environmental conditions. It is
however advisable to take extra precautions to prolong its service life (shields, covered areas, etc.).
To obtain optimum video door entry system image quality, avoid direct contact from light
sources (sunshine, street lights, etc.).
Positioning the embedding box:
NEXA MODULAR GB2 VIDEO DOOR ENTRY SYSTEM KIT - VILLAS

6
Preparing the cable entry:
DOOR PANEL INSTALLATION INSTALLATION
Break the flange to allow entry of cables through
the bottom part of the embedding box.
Pass the cable through the hole made
in the embedding box.
Embed the box and ensure that it is level and flush.
Once embedded, remove the protective stickers
from the screw holes.
Fastening the frame to the embedding box:
Insert the spring hinge which attaches to the product in
the embedding box, as shown in the drawing.
To fasten the frame to the embedding box, insert the spring
hinge into the housings provided for this purpose
in the frame, as shown in the drawing.
The frame can now be tilted horizontally to enable
sound module connection and setting.
NEXA MODULAR GB2 VIDEO DOOR ENTRY SYSTEM KIT - VILLAS

7
DOOR PANEL INSTALLATION
Codes assigned to the call buttons of the sound module:
C 16 31odes - C s 0 15ode -
P1P2 P2
The sound module’s P1 and P2 push buttons are assigned with factory codes.
- : .Apartment 1, push button “P1” Assigned with codes 0-15
Monitors in this apartment must be set with codes in order of allocation of 0-15.
When push button “P1”on the door panel is pressed, all of the monitors in apartment 1 will receive the call and
only the monitor assigned with code 0 will show the door panel image If the call is answered from any other.
monitor in the apartment, the image on the monitor assigned with code 0 will disappear and audio and video
communication will be established with the door panel.
- :Apartment 2, push button “P2” Assigned with codes 16-31 ( ).only kits with 2 push buttons
Monitors in this apartment must be set with codes in order of allocation of 16-31.
When push button “P2”on the door panel is pressed, all of the monitors in apartment 2 will receive the call and
only the monitor assigned with code 16 will show the door panel image If the call is answered from any other.
monitor in the apartment, the image on the monitor assigned with code 0 will disappear and audio and video
communication will be established with the door panel.
C s 16 31ode -
Description of the configuration dip switch of the sound module:
1 2 3 4 5 6
ON
+C1
_
1
The configuration dip switch is located on the left side of the rear part of the module.
1 2 3 4 5 6
ON
Door Panel Address:
Dip switches 1 and 2 OFF (address 1), 1 ON and 2 OFF (address 2), 1 OFF and:
2 ON (address 3), 1 and 2 ON (address 4).
1 2 4 5 6
3
ON
Set to OFF.
1 2 3 5 6
4
ON
Set to OFF for use with door panels in and set to ON for use in apartmentvillas
buildings.
1 2 3 4 6
5
ON
Set to ON to configure the door release time to 5 seconds Set to OFF to.
configure the door release time to 1 second.
1 2 3 4 5 6
ON
Set to ON to configure: see pages 9-10( )
The vocal synthesis language elay 1 and Relay 2 of, rvocal synthesis volume,
the lock release will be NO or NC Set to OFF when configuring is complete..
*
( )
*
( ) Factory default setting.
*
( )
*
( )
*
( )
*
( )
*
( )
NEXA MODULAR GB2 VIDEO DOOR ENTRY SYSTEM KIT - VILLAS
EL632 GB2A
1 2 3 4 5 6
ON
NA2
+AP-
C1 NA1 AP+ C2 AP+ AP- P1 P2 BUSBUS
Relé 2
Relé 1
_
12Vdc
12

8
DOOR PANEL INSTALLATION
Description of the configuration jumper:
1 2 3 4 5 6
ON
+C1
_
1
Important: Do not change the factory default position of the configuration jumper.
Description of the door panel LED lights (for low light conditions):
The door panel LED lights will turn on during a call if there is low light, allowing the
person who called to be seen on the apartment's monitor.
*
( )
*
( ) Factory default setting.
Description of the visual indications on the door panel:
Visual indications on the door panel for people with impaired hearing :
- :While calling LED will turn on during the call and while in communication.
- : .During communication LED will turn on during the communication process
- :During door release LED will turn on during door release.
- :End of communication LEDs and will turn off.
- :Calling at one door panel while another door panel is communicating LED will turn on for 3 seconds.
- :While calling and the monitor is in “Do not disturb”mode LED will turn on for 4 seconds.
- :While calling (apartment with no monitor or telephone) LED will turn on for 4 seconds.
Description of the vocal synthesis (audible indications on the door panel):
Audible indications from the door panel for people with impaired vision.
If the vocal synthesis in the sound module is activated (see pages 7 and 9 for setup), a voice with the following
messages can be heard from the door panel:
- While calling: “Call is in progress”.
- Start communication: “You can speak now”.
- During door release: “Door is open”.
- End of communication: “Communication is finished”.
- Calling at one door panel while another door panel is communicating:“System is busy, try later”.
- While calling and the monitor is in "Do not disturb" mode: “Resident unavailable”.
- While calling (apartment with no monitor or telephone): “Resident unavailable”.
NEXA MODULAR GB2 VIDEO DOOR ENTRY SYSTEM KIT - VILLAS

9
DOOR PANEL INSTALLATION
Adjusting the door panel communication volume:
If after starting the system the door panel audio volume seems inadequate, follow these steps:
- Call an apartment.
- The call is received in the apartment. Establish communication by pressing the push button on the monitor.
- Next, press the push button used to call the apartment for 3 seconds until a number of confirmation tones are
heard and the door panel communication LED starts to blink.
- Each press on the same call button will increase the door panel volume and LED blink speed.
.
There are 5 volume settings and the blink speed of LED will increase for each. Slow to fast blink - low to
high volume. After reaching “setting 5”, that is, maximum blink speed and volume, the next setting is “setting
1”, that is, minimum blink speed and volume (carousel mode).
-To save the volume setting keep the push button used to call the apartment pressed until a number of
confirmation tones are heard and the door panel communication LED turns off.
NEXA MODULAR GB2 VIDEO DOOR ENTRY SYSTEM KIT - VILLAS
Selecting the vocal synthesis language:
To activate the voice synthesis of the door panel, follow these steps:
- door panel.Remove the power supply in the
- 7 .Set dip 6 of the sound module's configuration dip switch to ON (see page )
- .Connect the power supply in the door panel
- Press the sound module' s P2 push button for 6 seconds (until finish the confirmation tones).
- Each press will change the language. Continue doing this until the desired language is
heard.
- fOnce finished set dip 6 o the configuration dip switch to OFF. A confirmation tone will be
heard.
P2
Adjusting the voc synthesis volumeal :
If after starting the system the voc synthesis volume of the door panel seems inadequate,al
follow these steps:
- door panel.Remove the power supply in the
- 7 .Set dip 6 of the sound module's configuration dip switch to O (see page )FF
- .Connect the power supply in the door panel
- Set dip 6 of the sound module´s configuration dip switch to ON.
- Press the sound module's P2 push button for 6 seconds (until the sysnthesis volume is
heard and led ).the door panel starts to blink.
P2
- led .Each press will increase the synthesis volume and the blink speed
There are 5 volume settings and the blink speed will vary for each. Slow to fast blink - low to high volume.Afterled
reaching “setting 5”, that is maximum blink speed and volume, the next setting is “setting 1”, that is minimum blink
speed and synthesis volume (carousel mode). Stop pressing P2 when the desired synthesis volume is selected.
- f and the door panelOnce finished set dip 6 o the configuration dip switch to OFF. A confirmation tone will be heard
led turns off.

10
DOOR PANEL INSTALLATION
Closing the frame:
Configuring the contact type for Relay 1 and Relay 2 (lock release):
Inserting the push button identification labels:
Open the label holder.
Insert the label and close.
Closing the door panel:
Finish the door panel assembly by placing the closing
heads, put the head on one side and then make a slight
pressure on the other end, to its correct placement.
Fix the door panel to the embedding box using the
screws supplied.
Once the wiring and configuration work is done, fix the
frame to the embedding box using the screws supplied.
Important: Before closing the door panel, make a test call
to any apartment to ensure that everything works
correctly.
NEXA MODULAR GB2 VIDEO DOOR ENTRY SYSTEM KIT - VILLAS
P1
To change the contact type for door release activation of Relay 1 and Relay 2 of the door
panel, follow these steps:
- door panel.Remove the power supply in the
- 7 .Set dip 6 of the sound module's configuration dip switch to ON (see page )
- .Connect the power supply in the door panel
- Press the sound module' s P1 push button for 6 seconds (until finish the confirmation tones and
the door panel starts to blink.led ).
- Each press will change the contact type, the door panel led will quick blink if the selected
contact is N.O (factory default) or slow blink if the selected contact is N.C. Stop pressing P1 when
the desired .contact type is selected
- fOnce finished set dip 6 o the configuration dip switch to OFF. A confirmation tone will be
heard and the door panel led turns off.
Description:
Normally open: N.O
Normally close: N.C
Important: The selected contact type will apply to both Relay 1 and Relay 2.

11
POWER SUPPLY UNIT INSTALLATION
FA-GB2/A power supply installation instructions:
Replace the protective cover once the input terminals have been wired.
Please note that current regulations stipulate that the power
supply must be protected by a circuitthermo-magnetic
breaker.
Connect the FA-GB2/A power supply to the earth connection.
Mount the DIN rail to the wall with the plugs and screws
supplied.
Then attach the power supply by applying slight
pressure.
The power supply can be installed on a DIN 46277 rail.
.
To remove the power supply from the DIN rail, use a flat
screwdriver to lever it off, as shown in the drawing.
The FA-GB2/Amodel requires 8 elements on the rail.
the maximum number of units that can be connected to an FA-GB2/A power supply is 23 VESTA 2IMPORTANT:
GB2 monitors.
Install the power supply in a dry and protected place free from the risk of water .drip or projections
To prevent electric shock, do not remove the protective cover of the primary or handle the wiring.
The and handling of this device must be carried out by in the absence ofinstallation authorised personnel
electrical current.
To avoid damage, the power supply .has to be firmly fixed
Lock release installation instructions:
LOCK RELEASE INSTALLATION
DIN rail.
DIN rail.
DIN rail.
DIN 46277
DIN rail latch release.
M 4 x 8
3.5 x 25
DIN-7972
DIN-963
IMPORTANT:
- The lock release must be 12V DC orAC (Golmar).
(See page 19 forAC lock releases and pages 12-19 for DC lock releases).
- .The kit is supplied with two varistors If connecting an AC lock release to one of the outputs, fit the varistor
supplied directly to the lock release terminals to ensure the device functions correctly.
If the lock release is to be fitted to a metal door, use a Ø3.5mm drill bit and
thread the hole made. For wooden doors, use a Ø3mm drill bit.
NEXA MODULAR GB2 VIDEO DOOR ENTRY SYSTEM KIT - VILLAS

WIRING DIAGRAMS:
One apartment kit (N5110 VESTA2 kit) and Golmar DC lock release.
12
NA2
+AP-
C1 NA1 AP+ C2 AP+ AP- P1 P2 BUSBUS
Relay 2
Relay 1
_
12Vdc
Lock release
max. 12 Vdc/270mA.
ON
1 2 3 4 5 6
AP
SW1
( )1
( )1
Access paneldoor
VESTA2
BUS
CODE 0
Two apartment kit (N5220 VESTA2 kit) and Golmar DC lock release.
Configuring the end of line
in the last monitor.
Dip 6 to On.
NA2
+AP-
C1 NA1 AP+ C2 AP+ AP- P1 P2 BUSBUS
Relay 2
Relay 1
_
12Vdc
Lock release
max. 12 Vdc/270mA.
ON
1 2 3 4 5 6
*
AP
SW1
( )1
( )1
Important: For AC lock releases or a second lock release, see diagram “Connection of Golmar AC and DC lock releases”on page 19.
( )1
Access paneldoor
VESTA2
BUS
CODE 0
Distances and ections:S
Twisted pair 2x0.75mm2
Twisted pair 2x1mm2
60m
A
60m
B
10m
C
80m 80m 15m
Cable
VESTA2
BUS
CODE 16
FA- 2GB /A
VESTA2
A
B
C
VESTA2
APARTMENT 1APARTMENT 2
*
*
Configuring the end of line
in the last monitor.
Dip 6 to On.
*
Distances and Sections:
VESTA2
A
B
Twisted pair 2x0.75mm2
Twisted pair 2x1mm2
60m
A
60m
B
10m
C
80m 80m 15m
Cable
C
APARTMENT 1
Mains
100~240Vac
N L
CN
BUS (M) BUS(PL)
FA- 2GB /A
L
FA- 2GB /A
Mains
100~240Vac
N L
CN
BUS (M) BUS(PL)
FA- 2GB /A
L
NEXA MODULAR GB2 VIDEO DOOR ENTRY SYSTEM KIT - VILLAS

WIRING DIAGRAMS:
One apartment kit (N5110 VESTA2 kit) with monitors in parallel (In-Out) and Golmar DC lock release.
13
Two apartment kit (N5220 VESTA2 kit) with monitors in parallel (In-Out) and Golmar DC lock release.
Configuring the end of line
in the last monitor.
Dip 6 to On.
*
Important: For AC lock releases or a second lock release, see diagram “Connection of Golmar AC and DC lock releases”on page 19.
( )1
Distances and Sections:
Twisted pair 2x0.75mm2
Twisted pair 2x1mm2
60m
A
60m
B
10m
C
80m 80m 15m
Cable
A
B
C
Configuring the end of line
in the last monitor.
Dip 6 to On.
*
A
B
60m
A
60m
B
10m
C
80m 80m 15m
Cable
C
Distances and Sections:
NA2
+AP-
C1 NA1 AP+ C2 AP+ AP- P1 P2 BUSBUS
Relay 2
Relay 1
_
12Vdc
Lock release
max. 12 Vdc/270mA.
ON
1 2 3 4 5 6
AP
SW1
( )1
( )1
Access paneldoor
BUS
CODE 1
BUS
CODE 2
BUS
CODE 3
BUS
CODE 0
VESTA2
NA2
+AP-
C1 NA1 AP+ C2 AP+ AP- P1 P2 BUSBUS
Relay 2
Relay 1
_
12Vdc
Lock release
max. 12 Vdc/270mA.
ON
1 2 3 4 5 6
AP
SW1
( )1
( )1
Access paneldoor
BUS
CODE 1
BUS
CODE 16
BUS
CODE 17
BUS
CODE 0
APARTMENT 1APARTMENT 2
*
*
IMPORTANT: Maximum 4 monitors in parallel (without distributors) per installation.
IMPORTANT: Maximum 4 monitors in parallel (without distributors) per installation.
APARTMENT 1
FA- 2GB /A
VESTA2
VESTA2 VESTA2 VESTA2
CN
Mains
100~240Vac
N L
BUS (M) BUS(PL)
FA- 2GB /A
L
VESTA2 VESTA2 VESTA2 VESTA2
CN
Mains
100~240Vac
N L
BUS (M) BUS(PL)
FA- 2GB /A
L
FA- 2GB /A
VESTA2
VESTA2
Twisted pair 2x0.75mm2
Twisted pair 2x1mm2
NEXA MODULAR GB2 VIDEO DOOR ENTRY SYSTEM KIT - VILLAS

WIRING DIAGRAMS:
One apartment with 16 VESTA2 monitors, 4 DP-GB2 distributors and Golmar DC lock release.A
14
Configuring the end of line
in the last monitor.
Dip 6 to On.
Access paneldoor
**
Lock release
max. 12 Vdc/270mA.
BUS
BUS
BUS
BUS
BUS BUS
BUS BUS
D
C
B
A
DP- 2GB A
BUS
BUS
BUS
BUS
End of line
ON
End of line
OFF
CODE 3 CODE 2
CODE 1 CODE 0
CODE 15 CODE 14
CODE 13 CODE 12
** **
** **
** **
** **
Configuring the end of line
in the last distributor.
Switch to On.
*
*
AP
Distances and Sections:
DP-GB2A VESTA2
A
C
B
C
Important: For AC lock releases or a second lock release, see diagram “Connection of Golmar AC and DC lock releases”on page 19.
(1)
(1)
NA2
+AP-
C1 NA1 AP+ C2 AP+ AP- P1 P2 BUSBUS
Relay 2
Relay 1
_
12Vdc
ON
1 2 3 4 5 6
SW1
(1)
BUS BUS
BUS BUS
D
C
B
A
DP- 2GB A
D
Twisted pair 2x0.75mm2
Twisted pair 2x1mm2
60m
A
60m
B
30m
C
80m 80m 40m
Cable
10m
D
15m
Mains
100~240Vac
N L
CN
BUS (M) BUS(PL)
FA- 2GB /A
L
VESTA2
FA- 2GB /A
VESTA2 VESTA2
VESTA2 VESTA2
VESTA2 VESTA2
VESTA2VESTA2
NEXA MODULAR GB2 VIDEO DOOR ENTRY SYSTEM KIT - VILLAS

WIRING DIAGRAMS:
One apartment with 16 VESTA2 monitors, 8 D2L-GB2 distributors and Golmar DC lock release.
15
Configuring the end of line
in the last monitor.
Dip 6 to On.
**
NA2
+AP-
C1 NA1 AP+ C2 AP+ AP- P1 P2 BUSBUS
Relay 2
Relay 1
_
12Vdc
Lock release
max. 12 Vdc/270mA.
BUS BUS
BUS BUS
D2
D1
D2L- 2GB
ON
1 2 3 4 5 6
BUS
BUS
BUS BUS
BUS BUS
D2
D1
D2L-GB2
BUS
BUS
End of line
ON
CODE 3 CODE 2
** **
Remove the jumper from all
of the distributors except
the last.
*
*
AP
SW1
BUS BUS
BUS BUS
D2
D1
D2L- 2GB
BUS
BUS
CODE 1 CODE 0
** **
Do not change the factory
default position of the
configuration jumper.
(1)
OFF
(1)
End of line
OFF
End of line
(1)
(1)
Distances and Sections:
D2L- 2GB
A
C
B
C
(2)
(2)
Twisted pair 2x0.75mm2
Twisted pair 2x1mm2
60m
A
60m
B
30m
C
80m 80m 40m
Cable
10m
D
15m
D
Important: For AC lock releases or a second lock release, see diagram “Connection of Golmar AC and DC lock releases”on page 19.
( )2
CODE 15 CODE 14
** **
Access paneldoor
VESTA2VESTA2
VESTA2VESTA2
VESTA2VESTA2
VESTA2VESTA2
FA- 2GB /A
Mains
100~240Vac
N L
CN
BUS (M) BUS(PL)
FA- 2GB /A
L
NEXA MODULAR GB2 VIDEO DOOR ENTRY SYSTEM KIT - VILLAS

WIRING DIAGRAMS:
Two apartments with 23 VESTA2 monitors, 6 DP-GB2 distributors and Golmar DC lock release.A
16
Configuring the end of line
in the last monitor.
Dip 6 to On.
Access paneldoor
**
Lock release
max. 12 Vdc/270mA.
BUS
BUS
BUS BUS
BUS BUS
D
C
B
A
DP- 2GB A
BUS
BUS
End of line
End of line
OFF
CODE 3
CODE 0
CODE 11
CODE 8
**
**
**
**
Configuring the end of line
in the last distributor.
Switch to On.
*
AP
Distances and Sections:
DP-GB2A
A
C
B
C
Important: For AC lock releases or a second lock release, see diagram “Connection of Golmar AC and DC lock releases”on page 19.
(1)
(1)
NA2
+AP-
C1 NA1 AP+ C2 AP+ AP- P1 P2 BUSBUS
Relay 2
Relay 1
_
12Vdc
ON
1 2 3 4 5 6
SW1
(1)
BUS BUS
BUS BUS
D
C
B
A
DP- 2GB A
D
Twisted pair 2x0.75mm2
Twisted pair 2x1mm2
60m
A
60m
B
30m
C
80m 80m 40m
Cable
10m
D
15m
MONITOR 9
MONITOR 10
**
**
MONITOR 1
MONITOR 2
**
**
BUS
BUS
BUS BUS
BUS BUS
D
C
B
A
DP- 2GB A
BUS
BUS
End of line
End of line
CODE 24
CODE 26
CODE 16
CODE 19
**
**
**
**
*
BUS BUS
BUS BUS
D
C
B
A
DP- 2GB A
MONITOR 18
MONITOR 17
**
**
MONITOR 25
**
OFF
ON
OFF
APARTMENT 2 APARTMENT 1
VESTA2
VESTA2
VESTA2
VESTA2VESTA2
VESTA2
VESTA2
VESTA2
VESTA2
VESTA2
VESTA2
VESTA2
VESTA2
VESTA2 VESTA2
FA- 2GB /A
Mains
100~240Vac
N L
CN
BUS (M) BUS(PL)
FA- 2GB /A
L
NEXA MODULAR GB2 VIDEO DOOR ENTRY SYSTEM KIT - VILLAS

WIRING DIAGRAMS:
Dos viviendas 3 VESTA2 12 2L GBcon 2 monitores , distribuidores D - 2 y abrepuertas de continua Golmar.
17
Configurar final de línea en
el último monitor.
Dip 6 to On.
**
NA2
+AP-
C1 NA1 AP+ C2 AP+ AP- P1 P2 BUSBUS
Relay 2
Relay 1
_
12Vdc
Lock release
max. 12 Vdc/270mA.
ON
1 2 3 4 5 6
BUS BUS
BUS BUS
D2
D1
D2L-GB2
Remove the jumper from all
of the distributors except
the last.
*
AP
SW1
BUS BUS
BUS BUS
D2
D1
D2L- 2GB
Do not change the factory
default position of the
configuration jumper.
(1)
OFF
(1)
End of line
(1)
Distances and Sections:
D2L- 2GB
A
C
B
C
(2)
(2)
Twisted pair 2x0.75mm2
Twisted pair 2x1mm2
60m
A
60m
B
30m
C
80m 80m 40m
Cable
10m
D
15m
D
Important: For AC lock releases or a second lock release, see diagram “Connection of Golmar AC and DC lock releases”on page 19.
( )2
Access paneldoor
BUS
BUS BUS
BUS
CODE 1
CODE 0
CODE 11
CODE 10
**
**
**
**
BUS BUS
BUS
CODE 26
CODE 16
CODE 17
**
**
**
APARTMENT 2 APARTMENT 1
BUS BUS
BUS BUS
D2
D1
D2L-GB2
End of line
ON
*
BUS BUS
BUS BUS
D2
D1
D2L- 2GB
(1)
OFF
End of line
(1) OFF
End of line
VESTA2 VESTA2
VESTA2 VESTA2
VESTA2 VESTA2
VESTA2
Mains
100~240Vac
N L
CN
BUS (M) BUS(PL)
FA- 2GB /A
L
VESTA2 VESTA2
FA- 2GB /A
NEXA MODULAR GB2 VIDEO DOOR ENTRY SYSTEM KIT - VILLAS

WIRING DIAGRAMS:
18
BUSBUS
BUS BUS
D C B A
DP- 2GB A
End of line
OFF
AP AP
Access paneldoor 2
ON
1 2 3 4 5 6
SW1
Access paneldoor 1
ON
1 2 3 4 5 6
SW1
AP AP
Access paneldoor 3
ON
1 2 3 4 5 6
SW1
Access paneldoor 4
ON
1 2 3 4 5 6
SW1
(1) (1)
(1) (1)
Lock release
max. 12 Vdc/270mA.
Lock release
max. 12 Vdc/270mA.
Lock release
max. 12 Vdc/270mA.
Lock release
max. 12 Vdc/270mA.
NA2
+AP-
C1 NA1 AP+ C2 AP+ AP- P1 P2 BUSBUS
Relay 2
Relay 1
_
12Vdc
NA2
+AP-
C1 NA1 AP+ C2 AP+ AP- P1 P2 BUSBUS
Relay 2
Relay 1
_
12Vdc
NA2
+AP-
C1 NA1 AP+ C2 AP+ AP- P1 P2 BUSBUS
Relay 2
Relay 1
_
12Vdc
NA2
+AP-
C1 NA1 AP+ C2 AP+ AP- P1 P2 BUSBUS
Relay 2
Relay 1
_
12Vdc
Important: For AC lock releases or a second lock release, see diagram “Connection of Golmar AC and DC lock releases”on page 19.
(1) (1)
(1) (1)
(1)
Video door entry system with 4 access panels, DP- distributor for door panels and Golmar DC lock release.GB2A
or or
or or
Mains
100~240Vac
N L
CN
BUS (M) BUS(PL)
FA- 2GB /A
L
NEXA MODULAR GB2 VIDEO DOOR ENTRY SYSTEM KIT - VILLAS
Villa with distributors
Villa without distributors (up to 4 monitors)
Villa with distributors:
Placed to OFF the end of line.
(up to 4 monitors):Villa without distributors
Set to ON the end of line.
( )
*Important: (in this distributor).
( )
*

Access paneldoor
ON
1 2 3 4 5 6
SW1
NA2
+AP-
C1 NA1 AP+ C2 AP+ AP- P1 P2 BUSBUS
_
AP1
NA2
+AP-
C1 NA1 AP+ C2 AP+ AP- P1 P2 BUSBUS
Relay 2Relay 1
_
12Vdc
Connection of 2 DC lock releases without “AP”:
Important: With 2 DC lock releases, it is not possible to use the “AP”door opening buttons.
(1)
Mains
230Vac
SEC
~~ ~~
PRI
TF-104
Lock release
max. 12 Vac/850mA.
Connection of 1 AC lock release with “AP”:
NA2
+AP-
C1 NA1 AP+ C2 AP+ AP- P1 P2 BUSBUS
Relay 2Relay 1
_
12Vdc
(1)
To the FA-GB2/A
power supply
(1)
Lock release
max. 12 Vdc/270mA.
Connection of 2 AC lock release with “AP”:
SEC PRI
TF-104
or
Access paneldoor
ON
1 2 3 4 5 6
SW1 or
Access paneldoor
ON
1 2 3 4 5 6
SW1 or
WIRING DIAGRAMS:
19
Relay 2Relay 1
12Vdc
Lock release
max. 12 Vac/850mA.
~~ ~~
AP1 AP2
Mains
230Vac
Connection of Golmar AC and DC lock releases.
Important: Fit the varistor supplied with the kit directly to the terminals of the lock release.
Important: Fit the varistors supplied with the kit directly to the terminals of each o the 2 lock releases.f
*
*
*
*
*
To the FA-GB2/A
power supply
To the FA-GB2/A
power supply
NEXA MODULAR GB2 VIDEO DOOR ENTRY SYSTEM KIT - VILLAS

1095 Budapest, Mester utca 34.
Tel.: *218-5542, 215-9771, 215-7550,
216-7017, 216-7018 Fax: 218-5542
Mobil: 30 940-1970, 30 959-0930
www.golmar.hu
1141 Budapest, Fogarasi út 77.
Tel.: *220-7940, 220-7814, 220-7959,
220-8881, 364-3428 Fax: 220-7940
Mobil: 30 531-5454, 30 939-9989
/
