Important safety information
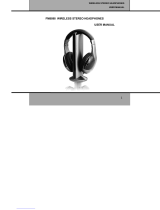
2 | RS 195
Important safety information
왘 Read this instruction manual carefully and completely before using the
product.
왘 Always include this instruction manual when passing the product on to
third parties.
왘 Do not use an obviously defective product.
Preventing damage to health and accidents
왘 Protect your hearing from high volume levels. Permanent
hearing damage may occur when headphones are used at high
volume levels for long periods of time. Sennheiser headphones
sound exceptionally good at low and medium volume levels.
왘 Note that these headphones allow you to adjust a higher volume than
conventional headphones. This can cause hearing damage in persons
with healthy hearing and especially in children.
왘 Do not use the product in an environment that requires your special
attention (e.g. in traffic or when performing skilled jobs).
왘 The product generates stronger permanent magnetic fields
that could cause interference with cardiac pacemakers,
implanted defibrillators (ICDs) and other implants. Always
maintain a distance of at least 3.94"/10 cm between the product com-
ponent containing the magnet and the cardiac pacemaker, implanted
defibrillator, or other implant.
왘 Do not use the product near water. To reduce the risk of fire or electric
shock, do not expose the product to rain or moisture.
왘 Keep the product, accessories and packaging parts out of reach of chil-
dren and pets to prevent accidents. Swallowing and choking hazard.
왘 Only use the power supply units supplied by Sennheiser.
Preventing damage to the product and malfunctions
왘 Always keep the product dry and do not expose it to extreme tempera-
tures to avoid corrosion or deformation. The normal operating tem-
perature is from 0 to 40 °C/41 to 104 °F.
왘 Use the product with care and store it in a clean, dust-free environ-
ment.
왘 Do not use the product if it is obviously defective, if it has been dropped
or if liquids or objects have gotten inside the product. In this case, con-
tact a qualified specialist workshop or your Sennheiser service partner
to have the product checked.
왘 Switch off the product after use to conserve battery power. When not
using the product for extended periods of time, remove the recharge-
able batteries.
왘 Unplug the power supply unit from the wall socket
– to completely disconnect the product from the power source,
– during lightning storms or
– when not using the product for long periods of time.
왘 Always ensure that the power supply unit is
– in a safe operating condition and easily accessible,