POLAR AXIS FINDERSCOPE CGX & CGX-L
INSTRUCTION SHEET
#
94239
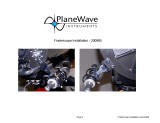
What’s in the Box?
• Polar finderscope and bracket
• Plastic dust covers for both ends of finderscope
• Dovetail mounting bracket (attached to base
of bracket)
• Hex head screws (x2)
• Hex keys (x4)
• Phillips screwdriver
Solar Warning
• Never look directly at the Sun with the naked eye
or with a telescope (unless you have the proper
solar filter). Permanent and irreversible eye damage
may result.
• Never use your telescope to project an image of
the Sun onto any surface. Internal heat build-up can
damage the telescope and any accessories attached
to it.
• Never use an eyepiece solar filter or a Herschel
wedge. Internal heat build-up inside the telescope
can cause these devices to crack or break, allowing
unfiltered sunlight to pass through to the eye.
• Do not leave the telescope unsupervised, either
when children are present or adults who may not
be familiar with the correct operating procedures of
your telescope.
Installing the Polar Finder
1. Loosen the two thumb knobs on the base of the
finderscope and slide the dovetail base plate off
the bottom of the finder bracket.
2. Locate the polar finder bracket mount on the
CGX or CGX-L mount. This will be a rectangular
plate located on the right-side mount’s Right
Ascension axis, just below the declination motor
housing. Remove the two Phillips head screws
and the cover plate.
3. Install the dovetail bracket into these holes using
the two hex head screws provided with packaging.
Make sure the thinner part of the dovetail bracket is
facing the north side of the mount with the broader
side facing south.
4. Slide the polar finder and bracket assembly onto the
dovetail mount and tighten the two thumb knobs to
secure it in place.
5. The position of the polar finder can be adjusted to
make the polar finder more easily accessible. To
do this, loosen the large hand knob in the middle
of the bracket, set the angle of the finder to the
desired position and tighten the knob.
Focusing the Polar Finderscope
To focus the finderscope, simply look through the
finderscope and rotate the eyepiece clockwise or
counterclockwise until the reticle is sharp.
Aligning the Polar Finderscope
Before the polar finderscope can be used, you must
align the finderscope with the mechanical polar axis of
your CGX or CGX-L mount.
1. Set the mount up during the day, but without the
counterweight bar, counterweight or telescope tube.
2. Locate a stationary object at least ¼ mile away or
as far away as possible.
3. Loosen the Right Ascension clutch lever and rotate
the mount in R.A. until you reach one of the hard stops.
4. Center your chosen object in the crosshairs of the
polar finderscope reticle using the latitude and
azimuth adjustment knobs on the mount. These
are the knobs which you would normally use for
polar alignment.
5. Rotate the mount 180° in R.A. and tighten the
clutch levers.
6. Look through the finderscope for your target.
If the crosshair reticle is still on the same target after
the rotation, no further adjustment is required. If
the crosshairs have moved off your target, you will
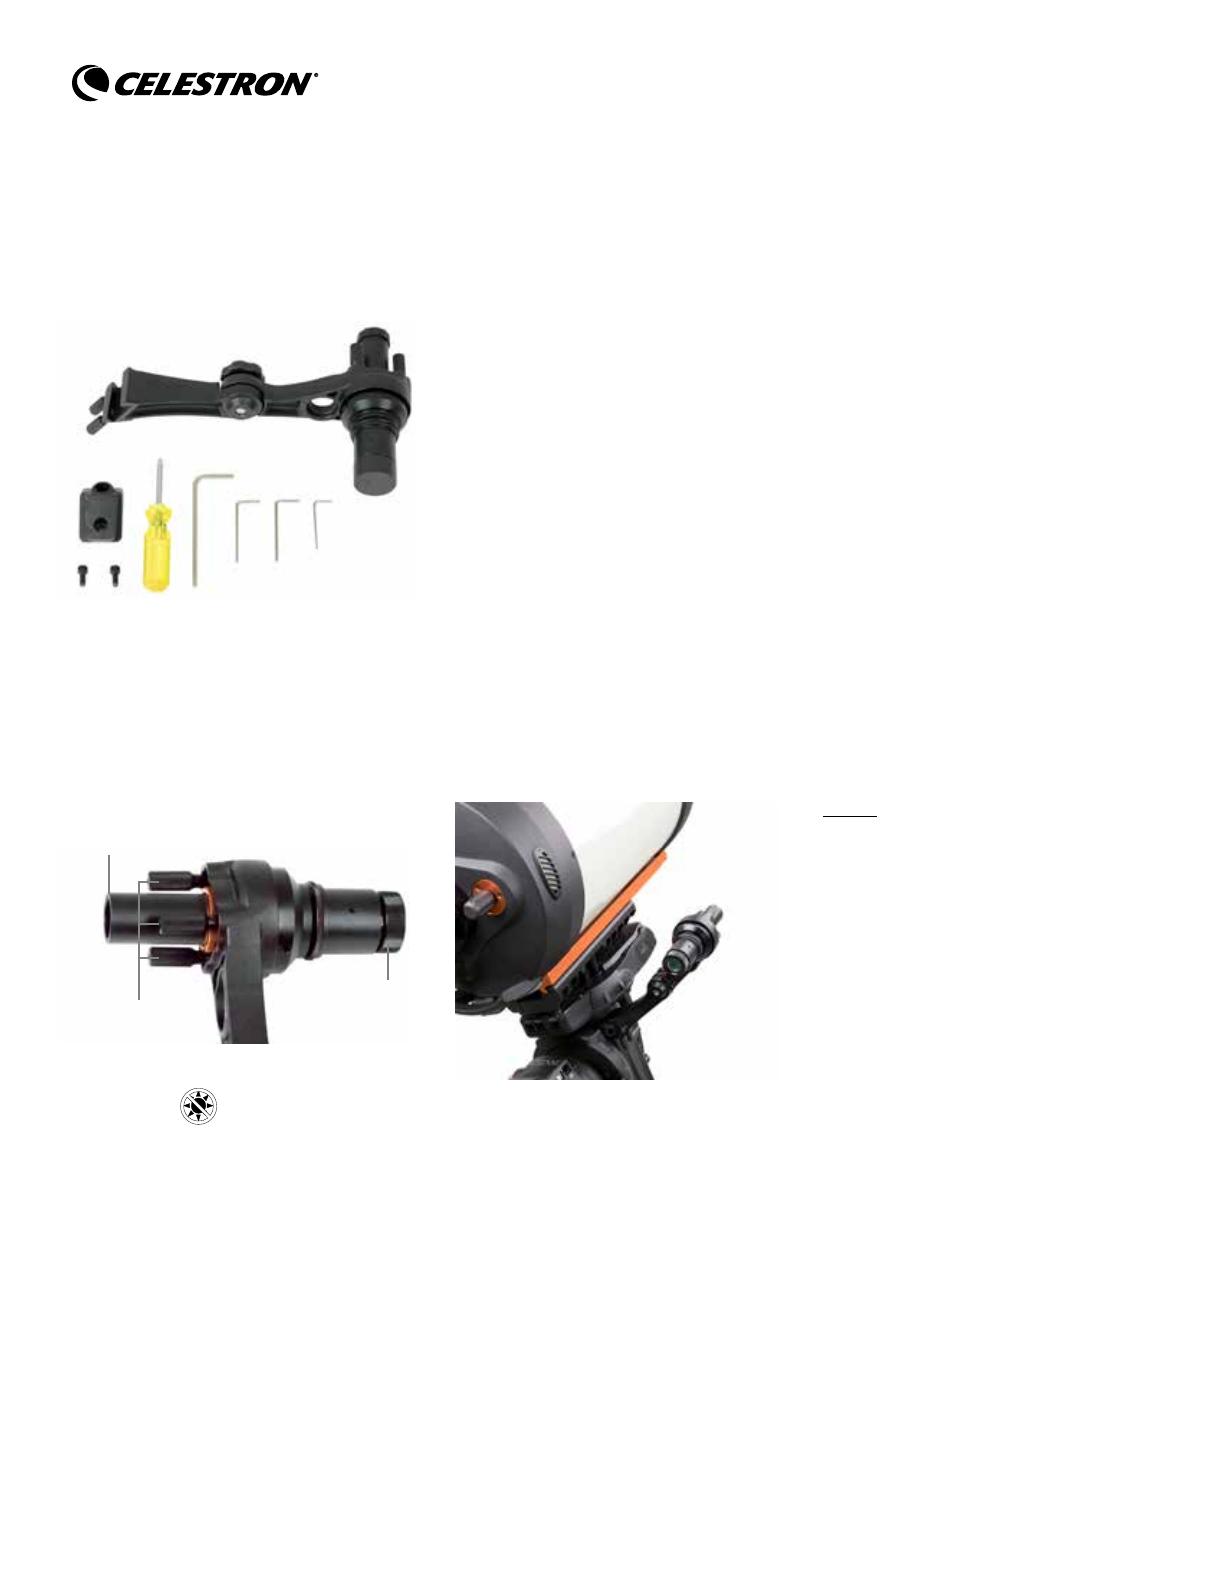
need to adjust the three knobs surrounding the
finderscope’s objective lens.
1. Without moving the equatorial mount, start by
backing off the three hex head screws recessed
in the finder bracket next to the three finder
adjustment knobs.
2. Loosen one of the finder adjustment knobs by a
half turn, then tighten one or both of the remaining
finder adjustment knobs to keep even pressure on
the finderscope. As you adjust the knobs, the aiming
point of the finderscope will shift slightly.
3. Move the crosshairs back towards the target, but
do not center the crosshairs over the target.
Instead, only move the crosshairs halfway back
toward the target.
4. Gently tighten the three recessed hex head
screws until they are snug. Do not overtighten.
5. Use the latitude and azimuth adjustment knobs on
the equatorial mount to re-center the crosshairs
on your distant target.
6. Unlock the R.A. clutch knob on the mount and
rotate the mount 180° back the other direction.
7. Look through the finderscope for your target.
8. The alignment should be close. Repeat this procedure
as necessary until the crosshair stays on target
after rotating the mount 180°.
While a daytime alignment is easier, it is possible to
do this alignment at night. Simply use Polaris as your
target to center the crosshairs of the finderscope.
NOTE: You should only need to do this alignment
procedure once, unless the finderscope is
bumped or dropped. Your polar finderscope is
mounted to the CGX or CGX-L mount using a
dovetail bracket that will allow you to attach and
remove the finderscope for storage or travel. It
should maintain its alignment with repeated use.
If you adjust the angle of the finder bracket arm
after aligning the finder, you may want to check
the alignment once again before use to verify
the finder is still aligned to the polar axis of
the mount.
Alignment Knobs
Objective Lens
Eyepiece &
Focuser