Page is loading ...

Image acquisition, managing and processing software
ISCapture
Instruction Manual
Key to the Instruction Manual
IS is shortened name used for ISCapture
Square brackets are used to indicate items such as menu
names, button names and window names that appear on the
computer screen.
>> indicates the selection procedure from the menu. Example:
[Capture] >> [Main Control] >> [FlatFielding]
: Marks tips for using the software.
: Marks information that should be read before use.
: Marks additional useful information.
Help
Refer to [Help] >> [About ISCapture] menu for software
information and technical support.
Provide the following information when it is required to obtain
the technical support:
1
Camera model and S/N (serial number);
2
Software version number;
3
Description of the problem. Screenshots of the problem would
be useful.

MAIN FEATURES OF IS
...............................................................................................................................
3
SYSTEM REQUIREMENTS
...........................................................................................................................
3
CHAPTER1: GETTING STARTED
..................................................................................................................
4
WHAT YOU NEED
.......................................................................................................................................
4
STARTING ISCAPTURE
..................................................................................................................................
5
CHAPTER2: IMAGE ACQUISITION
..............................................................................................................
8
BASIC CONTROL
.........................................................................................................................................
9
TAKING STILL IMAGES AND VIDEOS
..............................................................................................................
11
Capturing and Saving Individual Images
.........................................................................................
12
Capturing and Saving a set of Images
.............................................................................................
13
Video recording
................................................................................................................................
13
File Save Destination
........................................................................................................................
15
EXPOSURE CONTROL
.................................................................................................................................
15
Auto Exposure
..................................................................................................................................
16
Manual Exposure
.............................................................................................................................
17
Gain, Frame Speed & Data Width
...................................................................................................
18
COLOR CONTROL
......................................................................................................................................
19
Flat Fielding Function
.......................................................................................................................
19
FLUORESCENCE SETTINGS
...........................................................................................................................
21
Black Level
.......................................................................................................................................
21
Levels
...............................................................................................................................................
22
Capture Mode
..................................................................................................................................
23
PARAMETER GROUP
..................................................................................................................................
24
LIVE IMAGE MEASUREMENT
.......................................................................................................................
24
Edit Scale Line
..................................................................................................................................
27
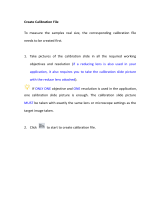
Create Calibration File
.....................................................................................................................
29
Calibration Table
..............................................................................................................................
32
Measurement List
............................................................................................................................
33
Measurement
..................................................................................................................................
34
Annotate
..........................................................................................................................................
35
Layer
................................................................................................................................................
37
LIVE IMAGE SHORTCUT
...............................................................................................................................
40
CHAPTER3: IMAGE MANAGEMENT
........................................................................................................
41
CHAPTER4: IMAGE PROCESSING
.............................................................................................................
43
IMAGE PROCESSING
..................................................................................................................................
44
Extend depth of focus
......................................................................................................................
46
Image stitching
................................................................................................................................
47
MEASURE
................................................................................................................................................
49
LABEL
.....................................................................................................................................................
50
HDR IMAGE
............................................................................................................................................
51
FLUORESCENCE
.........................................................................................................................................
52

Main Features of IS
Advanced camera control
Acquisition of still images and video. Available image types: JPEG,
BMP, TIFF and RAW.
Fluorescence imaging settings
Live image measurements
Image management
Extend depth of focus (Focus Stacking)
Image Stitching
Fluorescence combination function for still images
High dynamic range (HDR) function
Still image measurements
System requirements
OS Windows XP/ Vista/ 7/ 8 (32 & 64bit)
CPU Intel processor (Core2 Duo or higher is recommended)
Memory 2GB or More is recommended
USB ports USB2.0 Hi-Speed port

Chapter1: Getting Started
This chapter explains preparatory steps and basic ISCapture (hereinafter,
“IS”) operations.
What You Need
To use the camera, you need to install the camera driver and ISCapture
application software:
1. Find the ISCapture Setup.exe file from the CD, double-click on it to
start the installation and hit “Next”.
2. The installer package selects the “C:\Program Files\” as the default
file destination.
3. After the installation is finished, the IS shortcut will be created
on the desktop.
Driver installation:
1. Double-click on the driver “Camera Driver Setup.exe” to start the
installation.
2. Follow the steps to finish the installation.
4. After the installation is finished, please go to the Device Manager to
check if the driver was installed properly. When the driver is installed
correctly, there is
no yellow mark with the camera under the Imaging

Device in Device Manager. Please see the picture below:
Starting ISCapture
After installation, a software shortcut will be created on the
desktop. Double-click on it to start ISCapture.
When IS starts up, a live image window appears. Parameters to get
proper images can be set up, save still pictures or videos. The [Capture
tab] window provides image acquisition settings. [Browse tab] window
allows management of all the images. The [Image tab] window provides
advanced image processing functions.

[Capture] window-typical appearance
[Browse] window-typical appearance

[Image] window-typical appearance

Chapter2: Image Acquisition
Adjust camera parameter settings to get proper live image; live image
measurement and save still pictures and videos.
.
Start IS with the camera attached to a PC, the live image begins
automatically. If IS is run first before the camera is connected, click
to start the preview.
IS supports multiple camera functions (Only for H series or later).
Stopping the current preview enables the selection of cameras
connected to the system via the dropdown menu.

Basic Control
Provide basic camera settings:

After setting the brightness live images, it is recommended to apply
White Balance to correct the live image color. To get better white
balance effects, please follow the following steps:
1. Move the sample to the blank area;
2. Unselect [Color Enhancement] (It is unselected by default in
[Color Control] panel);
3. Push [White Balance];
4. Move the sample back.
Or you can follow the [WB Wizard] to get better white balance result.

Taking Still Images and Videos
In the [File format] dropdown menu , 4 file formats are available:
JPEG, BMP, TIFF and RAW.
Raw image file contains minimally processed data from the camera.
It needs to be read in imaging software, for example, Photoshop, ImagJ
etc. If the image is in the color camera raw file format, color information
only can be seen after decoding the Bayer matrix
In [Use File Save Dialog] mode , a pop up file save
configure window will appear when the [Capture] or [Video] button
is pushed. Enter the desired file name and directory path at this
pop-up window.

[Use File Save Config] , allows the file save name
to be pre-set, format, image quantity, capturing interval time and the
file save directory. Upon executing [Capture] or [Video] , IS will save
files as set.
Capturing and Saving Individual Images
Enter preferred name in the [File Name] field .
If do not key in anything, “IS” is used by default.
Select [Use Time-stamped] to name the image by the
capture time automatically. The time-stamp file name will be in the
form of “MMDDHHmmSS”. Here “MM” indicates the month; “DD”
indicates the day; “HH” indicates the hour; “mm” indicates the
minutes; and “SS” indicates the seconds.
Click [Capture] to take one image with the pre-set file name.

Capturing and Saving a set of Images
Click [Continuous Shooting] checkbox , the software
will automatically save a set of images after a single [Capture] is
executed.
Click [Config] to set continuous capturing image numbers and the
interval time .
This set of image file names follows the same format as set for
individual image capturing. If [File Name] is used, image names will
be in the form “X”, “X-1”, “X-2” (where X is the character/s you
entered or “IS” by default).
Video recording
Click [Video]
/ ,
start/ stop video recording.
Click [Rec Config] to get video recording configure window.

It provides [Manual] and [Auto] modes to stop the recording.
In [Manual] mode, you need to click on [Video] button to start and
stop the recording.
In [Auto] mode, pre-set the number of frames or the time for videos
and click on [Video], IS will stop the recording automatically after
pre-set number of frames are saved or pre-set time is up.
[Rec Config]>>[Codec] will also list all the available video
compressors in PC.
The video taken without compression will be very large size. IS
will automatically search the installed video compressors on the PC.

File Save Destination
Click [Browse...] to change file save destination. The default path is the
software installation folder. Usually it is “C:\Program Files\ISCapture\”.
This default destination might NOT be allowed storing files if the
user is not logged in as Administrator in Windows Vista, 7 or later. Image
may not save if the default path is used. We recommend either to
change the file saving path or release this folder “Write” authority for
other user accounts.
Exposure Control
Change the Exposure time and Gain to adjust the image brightness.

Select frame speed to get different live image frame rate. Set 8-bit or
16-bit data width for captured images.
Auto Exposure
Check [Auto Exposure] checkbox, software start to adjust the
exposure time automatically to get proper brightness of live images.
Auto exposure target value: Set the reference exposure time for auto
exposure adjustment. It helps the auto exposure to find the proper
exposure time faster. For example, if the imaging target is quite
bright, a lower target value is set it will indicate a shorter exposure
time to the software.
Lock: will stop the auto exposure calculation. While auto exposure is
working, it will keep on calculating the image brightness to get
proper exposure time. During this, if you already see a good live
image for you, you can push to lock it.

Manual Exposure
Adjust the exposure time manually. Two ways to change the exposure
time:
Key in the exposure time in the edit box directly , then click
to confirm it.
Pull the slide bar to change the exposure time.
[Extend] is used to get longer exposure time. This
function is ONLY available for CCD cameras. For other cameras especially
the CMOS camera, the maximum exposure time is shorter than 1 second,
then [Extend] will be gray out.
[Update] appears after [Extend] is selected. Click on
to stop the previous exposure time and restart the new one
immediately. For long exposure applications, we strongly recommend
that [Update] is used to start a new setting. This will help to get the new
exposed image earlier. If the exposure time is less than 2-3 seconds, it is

not necessary to use it.
Gain, Frame Speed & Data Width

Color Control
Is used for adjusting image color, gamma, contrast and saturations.
Flat Fielding Function
Flat fielding function is used to correct the uneven background
brightness.
Click on [FlatFielding] to start the flat fielding parameter
calculation and apply it to the live images.
When the check box is unchecked, the calculated flat
fielding parameter is NOT applied to the live images.
To get better flat fielding result, Move the sample to a blank area

first, apply the flat fielding, then move back the sample.
When the lighting is changed, re-do the [FlatFielding] to correct the
uneven brightness or when using a different objective.
/