Page is loading ...


WARNING: Failure to read and follow these warnings and instructions may result in serious injury, including damaged
property, so please pay close attention and exhibit the utmost care.
• The Digital Backup Camera is designed as an aid to the driver in detecting potentially hazardous driving conditions,
obstructions, and large stationary objects. You, the driver, must also remember to drive safely and properly. Use of the
Digital Backup Camera is not a substitute for safe, proper and legal driving practices.
• Never back up while looking only at the screen. You should always check behind and around the vehicle when backing
up just as you would if the vehicle did not have the Digital Backup Camera. Always make sure your driving area is clear.
Always back up slowly and with caution.
• Never depend on the Backup Camera entirely when backing up. The image on the screen is different from actual and
real-time conditions. Objects viewed in the rear view monitor differ from actual distances because a wide-angle lens is
used. So use the camera as an aid and always follow intended driving practices to properly judge distances from objects.
• The Backup Camera's assisted low lux lighting performance feature is also an aid to a driver. Always use your own eyes
to confirm the vehicle’s surroundings, as the displayed image may be not well lit or not entirely visible. Always proceed
with caution and perform double-checks before proceeding.
• The area displayed by the Backup Camera is limited. It does not display objects that are close to or just below the
bumper, underneath the vehicle, or objects out of the camera’s view. The camera's view can change according to your
vehicle's orientation on the road or changing road conditions.
• Be sure to always check the camera is properly functioning, is properly positioned and securely mounted.
• Make sure your trunk or hatch operates correctly, as intended, before and after installation.
• Proceed with caution when cleaning your vehicle around the camera. Avoid excess water exposure around the camera
especially with spraying or a power washer.
• Please make sure to keep the camera clean and unobstructed from any debris
• Follow all traffic laws and motor vehicle regulations.
• Consult local laws and regulations for any restrictions on installation or use.
• Using a Backup Camera System is not adequate enough to completely eliminate a vehicle’s blind spot. Always remember
to drive with caution, following all traffic laws.
Please read all of the installation instructions carefully before installing the product. Improper installation will void
manufacturer’s warranty. The installation instructions do not apply to all types of vehicles, and are written as
guidelines to assist in installing the system. Please consult an experienced technician if you are not comfortable
installing the product. Prior to using and installing the Backup Camera System, please read the safety information
provided in this user manual. Be sure to use the product as outlined in this user manual. Altercation or modifications
carried out without appropriate authorization may invalidate the user's right to operate the equipment.

System Installation and Wiring
Camera System installation on diesel vehicles may require a slightly different wiring install. These installation instructions do not apply
to all types of vehicles. They are meant only as a general guide due to the large number of vehicle makes and models. Consult your
local motor vehicle laws on the use of this product to be sure it is permitted. Through installation of this backup camera system, you
should be sure as to not degrade, damage or compromise the safety of any system or device on your vehicle. Improper installation
and wiring of the vehicle back-up camera system may damage the vehicle's electrical system, including vital vehicle computer and
operating systems. That could lead to an accident or fire, causing property damage and /or serious personal injury. It is highly
recommended to seek professional installation advice from a qualified auto electrician or, in the alternative, to have the installation
performed by a qualified auto electrician.
Please ensure that your monitor is secured and mounted where it would NOT obstruct any OEM vehicle safety features. In an event of
an accident, manufacturer is not responsible for bodily injury caused by the monitor being a projectile. Select location for mounting
the monitor in desired location. Ensure monitor location will not obstruct your vision while driving. The manufacturer assumes no
liability for damage caused to your vehicle due to improper installation or use.
Quick Installation:
The backup camera system is compatible with a wide range of vehicles and video display monitors.
This kit includes necessary wiring and cable connector accessories sufficient for typical connections. However,
additional accessory cables and installation materials may be necessary for a completely secure and
operational backup camera performance system.
Connect the camera, using the red cable, of the DC 12V power cable, to the positive 12V reverse tail light in the
rear of your car. You may need to temporarily remove an interior panel or other cover. Then, connect the black
wire, of the DC 12V power cable, and ground properly. This connected power and ground cable connects to the
camera, and will supply power to the camera directly. (Red wire is positive, black wire is negative)
Then use the included yellow RCA video connector cable, and run that cable to the yellow RCA video connector
jack of the camera, to the RCA video connector of a compatible video display monitor.
*The system includes an additional video input connection, so you will have the ability to connect an additional
video input source. The input source is then selectable via button on the mirror monitor assembly. (V1/V2)
Connect the monitor using the included power and video wiring harness. Using the red cable, of the power and
video wiring harness, connect to your vehicle's fuse panel (preferably to the 12V ignition switch) - which will only
be powered when your vehicle is on, or activated by key. Then connect the black wire, of the DC 12V input, and
ground properly. The green wire, on the power and video wiring harness, is the 12V reverse gear positive
trigger, which will provide a picture, to the mirror video monitor assembly, when the gear is placed in reverse.
The power and video wiring harness then connects to the mirror video monitor assembly. This connection will
supply power to the monitor directly.
*Refer to the installation / wiring diagram in the manual
Caution: This unit is designed to operate on a 12V/24V DC NEGATIVE GROUND electrical systems. Connecting to other types of electrical
systems will cause damage to your vehicle. Please contact the manufacturer if you are unaware of the system type in your vehicle.

Notes
- Determine the best location for the camera (The camera is preferably mounted just above the license plate).
- Be sure when running the connection cables to leave a small amount of slack so you can still move the camera around the license
plate, if you decide to slightly adjust the camera's positioning at a later time.
- After installation test the camera before use. Placing your vehicle in reverse should provide a picture in the monitor within the
rearview mirror assembly.
-Never connect the car monitor to cigarette lighters in vehicles with 24V DC power
-Do not expose the monitor to high humidity levels, dust, steam, smoke or excessive direct sunlight.
-Turn the power OFF when not in use.
-Please refer to service from a qualified and professional service engineer when needed.
Mount the camera in the desired location, then connect the included RCA video cable, from the camera, and run the cable through to
your video display's RCA connection. Make sure to route all cables and wiring in the least obtrusive route possible as to avoid confict
with other vehicle circuitry and to ensure a safe and stable installation/connection.
Interface Display
The rearview backup mirror monitor assembly provides soft touch button controls. Gain access to menu and power
options by touching the desired buttons. Access the 'Menu' and make adjustments to Brightness, color, contrast and
volume. ON/OFF switch controls power to the LCD display screen monitor. The 'Input Selection' button allows you to
switch the LCD display source from connected inputs V1 / V2 (if an optional and compatible input source is connected).
Bluetooth Connectivity
Use your compatible smart device to search for the Bluetooth Network named 'car BT'.
Bluetooth Password: '0000' (Four zeroes) Enter if prompted
Remote Control
Display Monitor Color Adjustment: Brightness, Contrast, Saturation, Hue adjustable via the remote control. Press the
MENU button on the remote to navigate to the desired setting, and use the VOL - and VOL + to adjust values.
Controls
A
Remote Window
B
Increase / Next
C
Menu / Enter
D
Decrease / Previous
E
Input Selection (V1/V2/USB/SD
F
ON/OFF

Remote Control
System Features:
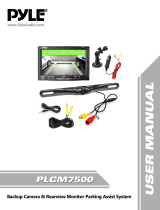
Backup Camera & Rearview Mirror Monitor System
7'' LCD Display Screen Built into Mirror
Bluetooth Wireless Streaming Ability
Visual Parking Assist for Safer Driving
Reverse Signal Sense Priority
(*Automatically Activates Once Car is Placed in Reverse)
Distance Scale Line Display
Front Panel Touch Button Controls
USB Flash & SD Memory Card Readers
Digital Audio, Video & Image File Compatibility
Dual RCA Video Input Connector Jacks
Ability to Connect An Additional Video Source
RCA (L/R) Audio Output Jacks
Includes Remote & All Necessary Cables/Wiring
Bluetooth Connectivity:
Hands-Free Talking & Music Streaming Ability
Built-in Microphone and Speakers
Easily Pairs to your Smartphone Device
Works with iPhone, Android, Smartphones, Tablets, etc.
Bluetooth Version: BT.2.0 +EDR
Bluetooth Wireless Range: Up to 30' Ft
Bluetooth Network Name: 'CAR BT'
Bluetooth Network Password: '0000'
Camera:
Waterproof & Fog Resistant Construction
Marine Grade IP-67 Rating
Night Vision Illumination, 0.2 LUX
Built-in Distance Scale Lines
Preferably Mounted Above the Rear License Plate
Tilt Adjustable Camera Lens Angle
420 TVL Horizontal Resolution
True Color Reproduction
Total Pixels: 656 x 492
Resolution: 420 TV Lines
Viewing Angle: 170 Degree
Auto White Balance
Video Output: 1.0V PP-75 Ohm
Power Supply: DC 12V 200mA
Camera Size (L x W x H): 10.0'' x 1.2'' x 1.3''
Mirror Monitor:
7'' LCD Display Screen
Monitor Built-into Rearview Mirror Assembly
Universal Size Clips onto Existing Mirrors
Display Ratio 16:9/4:3, Wide Screen
Resolution: 480 x 234, RGB
FM Transmitter
Auto Switch PAL/NTSC
Anti Glare Coating
Contrast: 400 cd/m2
Maximum USB/SD Support: 32GB
Power Consumption: 7W
Mirror Assembly Size: (L x W x H): 10.0'' x 1.5'' x 4.2''

/