
Large Capacity Coffeemakers
Instruction Manual
Register this and other West Bend® Housewares products through our website:
www.westbend.com
Important Safeguards...............................................................................................2
Heat Precautions......................................................................................................2
Electricity Precautions..............................................................................................3
Precautions For Use Around Children......................................................................4
Instructions for Making Coffee...............................................................................4-5
Cleaning Your Coffeemaker..................................................................................6-7
Warranty...................................................................................................................8
SAVE THIS INSTRUCTION MANUAL FOR FUTURE REFERENCE

Important Safeguards
To prevent personal injury or property damage, read and follow all instructions
and warnings.
When using electrical appliances, basic safety precautions should always be
followed including the following:
• Read all instructions, including these important safeguards and the care and use
instructions in this manual.
• Do not use appliance for other than intended use.
• Do not place on or near a hot gas or electric burner, or in a heated oven.
• Do not operate when the appliance is not working properly or when it has been
damaged in any manner. For service information see warranty page.
• The use of accessory attachments not recommended by West Bend®
Housewares may cause injuries.
• Do not attempt to repair this appliance yourself.
• Do not use this appliance on the stovetop, under a broiler, in the oven, or in the
refrigerator or freezer.
• Model 43536 is household and commercial rated.
• Models 13500, 33600 and 59055 are commercial rated.
To prevent burns, personal injury or property damage, read and follow all
instructions and warnings.
Heat Precautions
• Do not touch hot surfaces. Use handles or knobs and hot pads or oven mitts.
• Extreme caution must be used when moving an appliance containing hot oil or
other hot liquids.
• Make sure cover, basket and stem are properly attached before coffeemaker is
plugged in (see Instructions For Making Coffee section). No part of the
coffeemaker should be removed during the brewing cycle as scalding could
occur.
2

To prevent electrical shock, personal injury or property damage, read and
follow all instructions and warnings.
Electricity Precautions
• To protect against electric shock, do not immerse cord, plugs, or other electric
parts in water or other liquids.
• Do not operate any appliance with a damaged cord or plug.
• Do not use this appliance outdoors.
• Be sure switch is turned to “OFF” before plugging cord into wall outlet. If
coffeemaker does not have a switch, be sure coffeemaker contains water or
brewed coffee before plugging in. Do not leave coffeemaker plugged in when it
is not being used.
• Always unplug from outlet when not in use and before cleaning. Allow to cool
before putting on or taking off parts.
• Your appliance has a short cord as a safety precaution to avoid pulling, tripping
or entanglement. Position the cord so that it does not hang over the edge of the
counter, table or other area or touch hot surfaces.
• Plug coffeemaker into 120 volt AC grounded electric outlet only. The cord has a
three-prong plug which mates with a standard three-prong gounded wall outlet.
Do not cut or remove the third prong from the plug. If an adaptor is used, be sure
adaptor wire and wall outlet is grounded. If there is any doubt as to whether the
outlet is properly grounded, check with a qualified electrician.
• While use of an extension cord is not recommended, if you must use one, make
sure the cord has the same or higher wattage as the coffeemaker (wattage is
stamped on the underside of the base). To avoid pulling, tripping or
entanglement, position the extension cord so that it does not hang over the edge
of the counter, table or other area.
• Do not use an outlet or extension cord if the plug fits loosely or if the outlet or
extension cord feels hot.
• Keep the cord away from hot parts of the appliance and hot surfaces during
operation.
3

To prevent burns or other personal injuries to children, read and follow all
instructions and warnings.
Precautions For Use Around Children
• Always supervise children.
• Do not allow children to operate or be near the appliance, as the outside surfaces
are hot during use.
• Do not allow cord to hang over any edge where a child can reach it. Arrange
cord to avoid pulling, tripping or entanglement.
SAVE THESE INSTRUCTIONS
Instructions for Making Coffee
1. Before using coffeemaker for the first time, clean it thoroughly. Refer to
Cleaning Instructions.
2. Always use coffeemaker on a dry level, heat-resistant surface, away from any
edge. Be sure hands are dry.
3. With basket and stem removed, fill coffeemaker with COLD water to desired cup
level. Marks on inside of coffeemaker show cup leves. Do not fill past
maximum cup level.
4. Place stem into heating unit, well in bottom of coffeemaker, then put basket on
stem. Add electric perk or regular grind coffee to basket using chart below for
amount to use depending on cup level. Spread grounds evenly in basket. Use
standard measuring cups to measure grounds. Do not let any grounds fall into
stem opening. Do not use “Drip” or finely ground coffee as basket can flood.
The amount of ground coffee recommended will make mild-strength coffee
which most people prefer. The amount of coffee used can be adjusted to suit
your preference.
5. Place cover on the coffeemaker and turn to secure in place inside handles.
Note arrows on cover for correct turning. To reduce coffee spills, especially if
coffee maker is tipped over, make sure cover has been turned clockwise until
the cover is completely secured into the handle slots. NOTE: While moving an
appliance containing hot liquids is not recommended, if you must move the
coffeemaker, extreme caution should be used as the cover only temporarily
reduces coffee from spilling if coffeemaker is tipped over.
6. Plug cord into a 120 volt AC grounded electric outlet ONLY. turn switch “ON”
for models 13500 and 33600.
7. Coffeemaker will stop perking automatically (each cup requires no longer than
1 minute brewing time). Coffee is ready when light in base glows. Coffee will
remain serving temperature as long as coffeemaker is plugged in (and switch is
“ON”). Before serving turn cover to remove basket and stem. Using a hot pad,
remove coffee basket, and stem. If coffee basket and stem are not removed,
bitter oils from the extracted grounds will drip into coffee. Replace cover
making sure it is completely secured into the handle slots.
4

8. For cup-on-saucer filling, press faucet handle down. Release handle when
filled. For continuous flow when filling coffee server, lift handle straight up until
it locks into open position. Lower handle when server is filled.
9. When about 3 cups of coffee remain in coffeemaker, or when coffee can no
longer be seen in the view tube, turn switch “OFF” and unplug cord from
electrical outlet.
SPECIAL NOTE ON GRINDING COFFEE BEANS: If grinding your own coffee
beans, grind to medium coarseness for best results. DO NOT grind too fine
(powder-like) as this can cause basket to flood.
100-CUP MODEL #33600
Water Level Measure of Ground Coffee
100 cups 6 ¼ cups
80 cups 5 cups
60 cups 4 cups
40 cups 2½ cups
Do not make less than 40 or more than 100 cups of coffee at one time.
60-CUP MODEL #59055
Water Level Measure of Ground Coffee
60 cups 3½ cups
50 cups 3 cups
40 cups 2½ cups
30 cups 2 cups
55-CUP MODEL #13500
Water Level Measure of Ground Coffee
55 cups 3½ cups
45 cups 2¾ cups
35 cups 2 cups
25 cups 1½ cups
Do not make less than 25 cups or more than 55 cups of coffee at any one time.
36-CUP MODEL #43536
Water Level Measure of Ground Coffee
36 cups 2 cups
30 cups 1¾ cups
24 cups 1½ cups
18 cups 1¼ cups
12 cups 1 cup
Do not make less than 12 cups or more than 36 cups of coffee at one time.
• A small amount of smoke and/or odor may occur upon heating due to the
release of manufacturing oils – this is normal.
• Some minor expansion/contraction sounds may occur during heating and
cooling – this is normal.
5

6
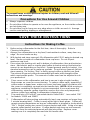
Instructions For Heating Water For Instant Beverages
Plain water may be heated in your coffeemaker for use with instant beverages.
Simply fill the clean coffeemaker with cold water to the desired cup level and place
stem and clean empty basket into position as for making coffee. Secure cover in
place and plug coffeemaker in. Also turn switch to “ON” position for models 13500
and 33600. Heat water until perking stops and light on base glows. Remove cover,
lift out basket and stem, with a hot pad, and replace cover, making sure it is secured
in place. Unplug coffeemaker when less than 3 cups of water remain. Inside of
coffeemaker may darken after heating water which is normal and does not affect the
coffeemaker or the water heated.
Other than making coffee or heating water, no other liquid should be heated in
coffeemaker as damage to heating unit can occur.
When a coffeemaker is used to heat water only, it must be cleaned well after each
use in addition to special weekly cleaning with white distilled vinegar for removal of
mineral deposits. If these deposits are not removed, pitting of the metal can occur
and result in damage to the coffeemaker. See Special Cleaning Instructions in this
booklet.
Improper cleaning of coffeemaker, especially the heating well, will affect the
performance, resulting in weak, lukewarm coffee and may even cause
coffeemaker to stop perking. To keep coffeemaker working properly, it is very
important to follow the regular and special cleaning instructions.
Regular cleaning—after each use
1. Unplug coffeemaker and allow to cool. Drain any coffee out of the
coffeemaker.
2. Wash basket, stem and cover in hot soapy water with a dishcloth or sponge.
Rinse and dry. Coffee stains on metal can be removed with a scouring pad.
Do Not Clean These Parts In Dishwasher As They Can Discolor.
3. Clean inside of coffee maker by filling with hot water about one-third its
capacity. Add dish soap and wash with sponge or cloth. Scour heating unit well
(into which stem fits) with special cleaning tool provided and scouring pad such
as Scotch Brite® or Brillo®. Twist pad inside unit well to clean. Heating unit
well must be kept clean for coffeemaker to work properly. Rinse with hot
water after cleaning and dry.
4. Clean outside of coffeemaker with damp cloth and dry with soft cloth. Do not
use abrasive metal scouring pads or cleansers on outside of coffeemaker as
scratching will occur.

Special Cleaning – every two weeks
If coffeemaker is used daily, a special cleaning every 2 weeks OR every week if
used for heating water, is necessary to thoroughly clean the heating unit well.
If not kept clean, coffeemaker will not work properly.
1. Fill coffeemaker with 1 quart EACH of water and white distilled vinegar. (If a
white mineral buildup has formed on inside of coffeemaker, use an additional 2
cups of vinegar). Place stem and empty basket in place and secure cover onto
coffeemaker. Plug cord into outlet and turn switch ON for models 13500 and
33600. Allow coffeemaker to complete perking cycle, then let stand 20
minutes.
2. Turn OFF and unplug cord from outlet. Drain coffeemaker and allow to cool.
Then wash the inside and the parts following the regular cleaning instructions,
making sure to clean heating unit well thoroughly.
3. On occasion, clean coffee level view tube on models 13500 and 33600 with a
soft brush. Unscrew gauge cap and lift out tube. Wash in hot soapy water with
brush and rinse. Replace tube, secure with gauge cap.
4. To clean faucet, unscrew handle. Move a small brush up and down through
faucet, then insert brush through opening inside coffeemaker to clean faucet
connection. Wash faucet handle in hot soapy water and rinse. Replace faucet.
DO NOT USE BAKING SODA TO CLEAN COFFEEMAKER AS IT CAN
DISCOLOR AND PIT THE METAL
7

Product Warranty
Appliance 1 Year Limited Warranty
West Bend® Housewares, LLC warrants this appliance from failures in the material and
workmanship for 1 year from the date of original purchase, provided the appliance is operated
and maintained in conformity with the West Bend® Housewares, LLC Instruction Manual. Any
failed part of the appliance will be repaired or replaced without charge at West Bend®
Housewares, LLC discretion. This warranty applies to indoor household use only.
The West Bend® Housewares, LLC warranty does not cover any damage, including
discoloration, to any non-stick surface of the appliance. The West Bend® Housewares, LLC
warranty is null and void, as determined solely by West Bend® Housewares, LLC, if the
appliance is damaged through accident, misuse or abuse, scratching, overheating, or if the
appliance is altered in any way or if used outside of an indoor household setting.
This warranty gives you specific legal rights. You may also have other rights, which may vary
from state to state.
THIS WARRANTY IS IN LIEU OF ALL IMPLIED WARRANTIES, INCLUDING WARRANTIES
OF MERCHANTABILITY, FITNESS FOR A PARTICULAR PURPOSE, PERFORMANCE, OR
OTHERWISE, WHICH ARE HEREBY EXCLUDED. IN NO EVENT SHALL WEST BEND®
HOUSEWARES, LLC BE LIABLE FOR ANY DAMAGES, WHETHER DIRECT, IMMEDIATE,
INCIDENTAL, FORESEEABLE, CONSEQUENTIAL, OR SPECIAL, ARISING OUT OF OR IN
CONNECTION WITH ITS APPLIANCE.
If you think the appliance has failed or requires service within its warranty period, return it to the
original place of purchase. For further details please contact the West Bend® Housewares
Customer Service Department at (262) 334-6949 or e-mail us at [email protected].
Return shipping fees are non-refundable. Hand-written receipts are not accepted. West Bend
Housewares, LLC is not responsible for returns lost in transit.
Valid only in USA and Canada
Replacement Parts
Replacement parts may be ordered direct from West Bend® Housewares, LLC by ordering
online at www.westbend.com: Replacement Parts. Or you may call or e-mail the service
department at the number/e-mail address listed above, or by writing to us at:
West Bend Housewares, LLC
Attn: Customer Service
P.O. Box 2780
West Bend, WI 53095
Be sure to include the catalog/model number of your appliance (located on the bottom/back of
the unit) and a description and quantity of the part you wish to order. Along with this include
your name, mailing address, Visa/MasterCard number, expiration date and the name as it
appears on the card. Checks can be made payable to West Bend Housewares, LLC. Call
Customer Service to obtain purchase amount. Your state’s sales tax and a shipping/processing
fee will be added to your total charge. Please allow two (2) weeks for delivery.
This manual contains important and helpful information regarding the safe use and care of your new West
Bend® Housewares, LLC product. For future reference, attach dated sales receipt for warranty proof of
purchase and record the following information:
Date purchased or received as gift: _______________________________________________________
Where purchased and price, if known: _____________________________________________________
Item Number and Date Code (shown bottom/back of product): ______________________________________
8
Page is loading ...
Page is loading ...
Page is loading ...
Page is loading ...
Page is loading ...
Page is loading ...
Page is loading ...
Page is loading ...
Page is loading ...
Page is loading ...
Page is loading ...
Page is loading ...
Page is loading ...
Page is loading ...
Page is loading ...
Page is loading ...
-
 1
1
-
 2
2
-
 3
3
-
 4
4
-
 5
5
-
 6
6
-
 7
7
-
 8
8
-
 9
9
-
 10
10
-
 11
11
-
 12
12
-
 13
13
-
 14
14
-
 15
15
-
 16
16
-
 17
17
-
 18
18
-
 19
19
-
 20
20
-
 21
21
-
 22
22
-
 23
23
-
 24
24


West Bend 33600 User manual
- Category
- Coffee makers
- Type
- User manual
Ask a question and I''ll find the answer in the document
Finding information in a document is now easier with AI
in other languages
- français: West Bend 33600 Manuel utilisateur
- español: West Bend 33600 Manual de usuario
Related papers
-
West Bend 59055 User manual
-
West Bend Coffeemaker User manual
-
-
-
-
West Bend 58036 User manual
-
-
-
-
Other documents
-
DeLonghi DCU70-70B User manual
-
-
Adexa CCU15 User manual
-
Cuisinart DCC-1400C User manual
-
-
GE 840092300 User manual
-
Black & Decker CM9050C User manual
-
 Black and Decker Appliances CM9050C User guide
-
Hamilton Beach 40117 - Eclectrics Coffeemaker - Licorice Owner's manual
-
