STEP 3 - FITTING YOUR LAMP
Connect the Lazer wiring harness as shown below and mount the relay close to the battery:
Test for a 12V signal at the back of the high beam headlight plug to identify if you will require a CAN
Interface or not.
STEP 4 - WIRING UP YOUR LAMP
CAN
HI
BATT
+VE
BATT
-VE
CAN
LO
CANCCR-LZR
(SOLD SEPERATELY)
CAN-LZR
(SOLD SEPERATELY)
CONNECT TO MATCHING
WIRES ON THE LAZER
WIRING HARNESS
CAN
HI CAN
LO
BATTERY (-VE)
BATTERY (+VE)
SWITCH
(Ø20MM)
20A
87
86
85
30
CAN-LZR
12V RELAY
IGN
SWITCH CAN BE
REMOVED IF
DESIRED
STEP 5 - TEST LIGHT
Ensure the light bar(s) are working correctly before re-assembling vehicle and re-connecting the
battery.
Page 2
STEP 1 - PRE-INSTALLATION CHECKS
Ensure battery is disconnected.
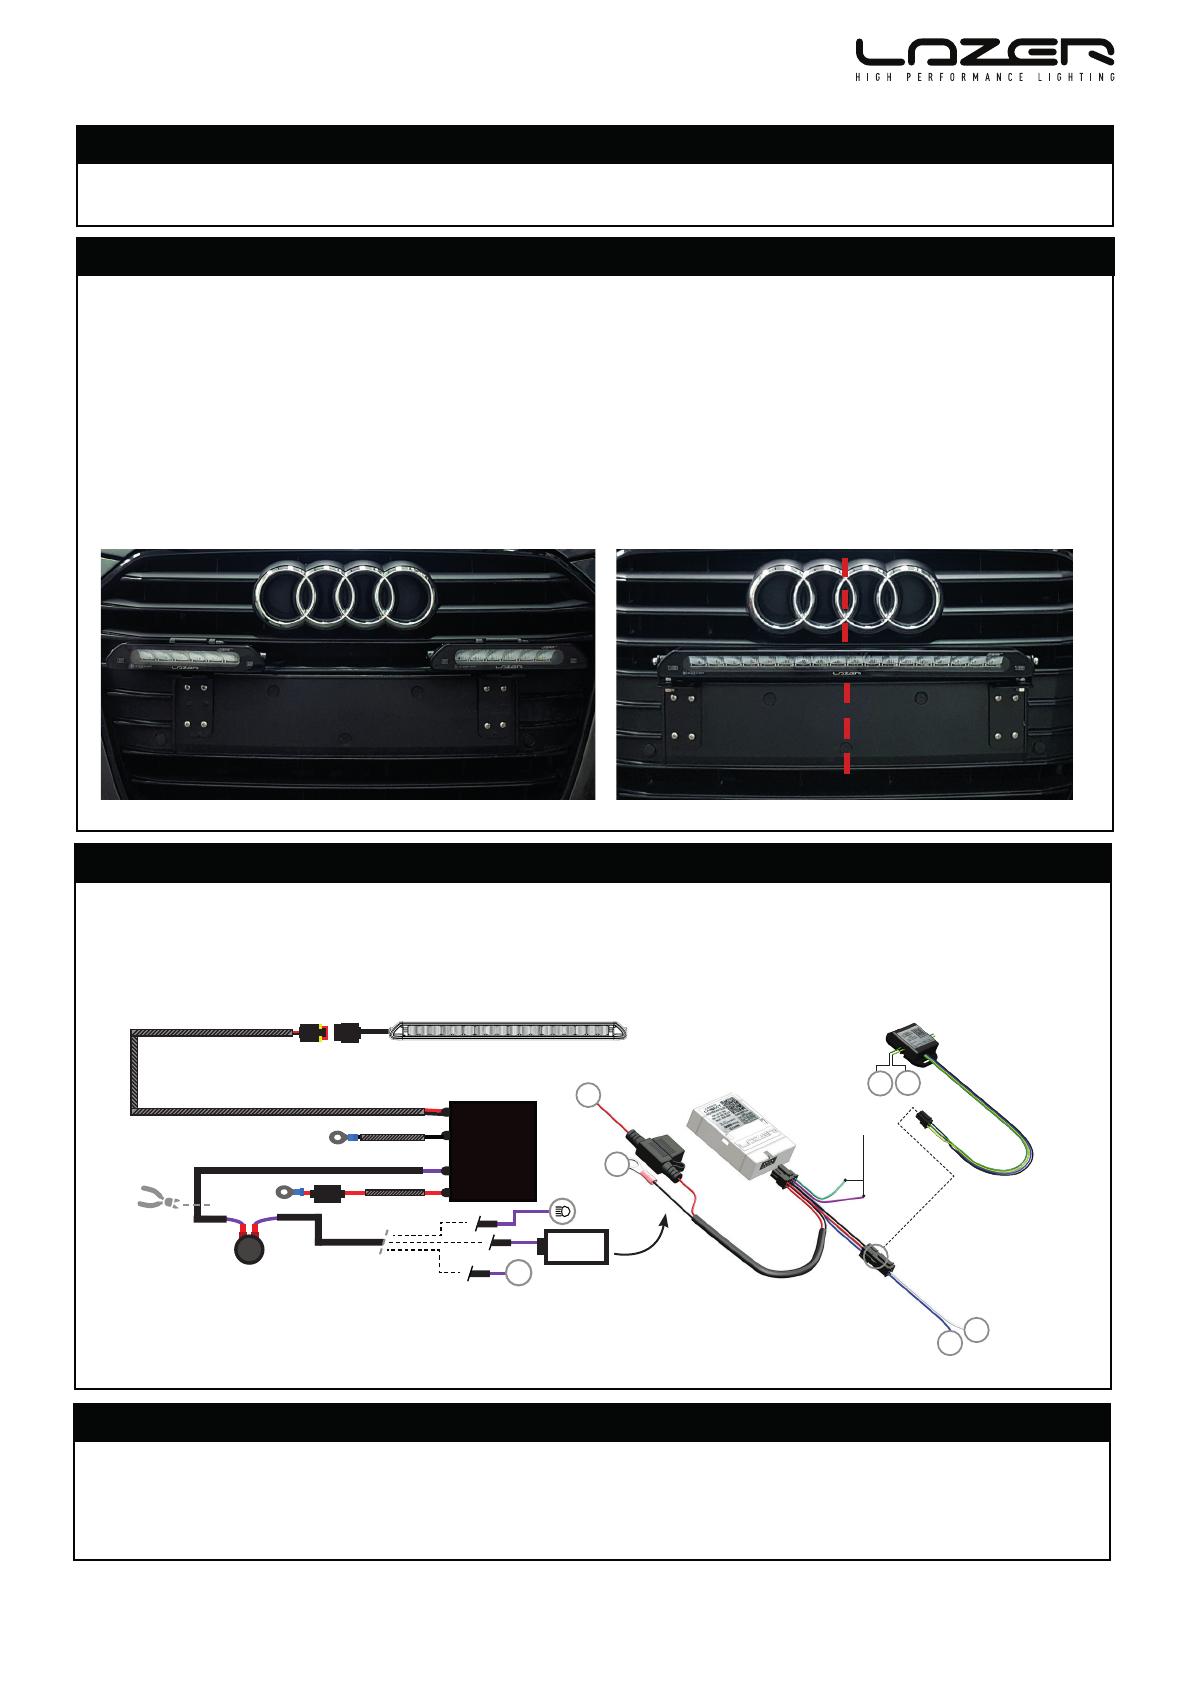
Using the included bolts, nuts and washers or self-tapping screws, secure the brackets and lamp
to the licence plate holder on the vehicle, ensuring you are lining the centre of the lamp with the
centre of the licence plate holder (if you are mounting a single lamp).
Self-tapping screws can be used on bumpers which are manufactured from a strong engineered
material such as PC-ABS, however, in case of a Polypropylene bumper, it is recommended to use
the supplied nuts, bolts and washers to secure the product.


