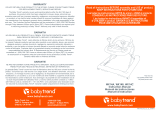
Baby Trend WK03XXXA User manual

Category
Baby furniture
Type
User manual

Baby Trend WK03XXXA is a versatile 4-in-1 activity center walker that offers a safe and fun environment for your child to play and learn. With its adjustable height positions, this activity center can be used from infancy to toddlerhood. The 360-degree rotating seat allows your child to explore all the interactive toys and activities, which include a rattle, rocket, button board, and mirror. The removable tabletop provides a convenient surface for snack time or playtime.

Baby Trend WK03XXXA is a versatile 4-in-1 activity center walker that offers a safe and fun environment for your child to play and learn. With its adjustable height positions, this activity center can be used from infancy to toddlerhood. The 360-degree rotating seat allows your child to explore all the interactive toys and activities, which include a rattle, rocket, button board, and mirror. The removable tabletop provides a convenient surface for snack time or playtime.

Instruction Manual
Manual de Instrucciones
WK03XXXA
Read all instructions BEFORE assembly and USE
of product.
KEEP INSTRUCTIONS FOR FUTURE USE.
Lea todas las instrucciones ANTES de armar y
USAR el producto.
CONSERVE LAS INSTRUCCIONES
PARA USO FUTURO.
WK03XXXA_2L_052323
4m+
Bounce N’ Dance 4-in-1
Activity Center Walker
Baby Trend, Inc. 13048 Valley Blvd. Fontana CA 92335
1-800-328-7363 (8:00 a.m. ~ 4:30 p.m. PST) www.babytrend.com
WARRANTY
DO NOT RETURN YOUR PRODUCT TO THE STORE. PLEASE
CONTACT BABY TREND® FOR REPLACEMENT PARTS, SERVICE
AND REPAIR.
The Baby Trend® warranty covers workmanship defects within 1
year of purchase. Any product which has been subjected to misuse,
abuse, abnormal use, excessive wear and tear, improper assembly,
negligence, environmental exposure, alteration or accident, or has had
its serial number altered or removed invalidates all claims against the
manufacturer. Any damage to property during installation is the sole
responsibility of the end user.
Customer Service Department can be contacted at 1 (800) 328-7363
Monday through Friday between 8:00 a.m. and 4:30 p.m. (PST). Return
Authorizations are required prior to returning product(s) to Baby Trend®.
Please visit http://babytrend.com/pages/limited-warranty for complete
warranty details.
GARANTIA
NO DEVUELVA SU PRODUCTO A LA TIENDA. POR FAVOR
CONTACTE A BABY TREND® PARA PIEZAS DE REPUESTO,
SERVICIO Y REPARACION.
La garantía de Baby Trend® cubre defectos de fábrica por 1 año
después de la compra. Cualquier producto que haya sido sometido
a uso inadecuado, abuso, uso anormal, desgaste excesivo, montaje
incorrecto, negligencia, exposición ambiental, alteración o accidente,
o cuyo número de serie haya sido alterado o removido, anula todos
los reclamos contra el fabricante. Cualquier daño a la propiedad
durante la instalación es la exclusiva responsabilidad del usuario nal.
El Departamento de Servicio al Cliente está disponible llamando al 1
(800) 328-7363, de lunes a viernes de 8:00 a. m. a 4:30 p. m. (PST). Se
requiere una Autorización de Devolución antes de poder devolver el o
los productos a Baby Trend®. Visite http://babytrend.com/pages/limited-
warranty para conocer todos los detalles de la garantía.
F
R
O
N
T
WARNING WARNING
Copyright © 2023, Baby Trend Inc., All Rights Reserved. Todos los derechos reservados. Copyright © 2023, Baby Trend Inc., All Rights Reserved. Todos los derechos reservados.
21
Do not use the stationary activity center if it is
damaged or broken.
Discontinue use should any part become
damaged. Please contact our customer service
at 1-800-328-7363 to order replacement parts or
arrange for repairs.
Read all instructions before assembly and use of
the stationary activity center.
Keep instructions for future use.
IMPORTANT! To ensure safe operation
of your product, please follow these instructions
carefully. Please keep these instructions for future
reference.
IMPORTANT! Before assembly and each
use, inspect this product for damaged hardware,
loose joints, missing parts or sharp edges. NEVER
use if any parts are missing or broken.
IMPORTANT! Adult assembly is required.
WARNING: Use only on at surfaces
free of objects that could cause the walker to tip
over.
• DO NOT USE UNTIL BABY CAN SIT UP BY
ITSELF.
Periodically inspect seat pad plastic tabs to be sure
they are secured in the body. DO NOT USE THE
WALKER IF IT IS DAMAGED OR BROKEN.
• Clean the stoppers on the walker base regularly
to maintain stopping performance.
• Clean the wheels on walker regularly to maintain
rotating performance.
WARNING: To avoid burns, keep the
child away from hot liquids, ranges, radiators,
space heaters, replaces, etc.
WARNING-STAIR HAZARD:
Avoid serious injury or death, block stairs/ steps
securely before using walker.
WARNING: Younger infants between
4 to 6 months are right at the critical age to be
considered safe while playing in a seated style
activity center. Your child MUST ALREADY be
able to hold their head upright and steadily
unassisted before being placed in the activity
center. DO NOT use the activity center if they
cannot.
STRANGULATION HAZARD
Strings can cause STRANGULATION!
• DO NOT place items with a string around child’s
neck, such as hood strings or pacier cords.
• DO NOT suspend strings over product or attach
strings to toys. The Stationary Activity Center is:
Only for use by infants at least 4 months old and
who can hold their head up unassisted.
FALL HAZARD!
Babies can FALL from unit resulting in head
injuries.
• Never leave child unattended. Always keep child
in view while in product.
• Never use near stairs, stoves or ovens, heaters,
replaces, swimming pools, or other dangerous
areas.
• To avoid tip over, place product on a at, level
surface.
• NEVER lift this product with your child in it.
• NEVER place product on counter tops, tables, or
any other elevated surface.
ALWAYS make sure to lock the seat before using
the walker mode. Refer to the corresponding
Fig. 9b.
IMPORTANT! Discontinue use in any
mode if child can climb out, begins to walk,
reaches 30 pounds in weight or 32 inches in
height.
Baby walkers are not designed to be used on
carpets and rugs.
ADVERTENCIA ADVERTENCIA
43
Copyright © 2023, Baby Trend Inc., All Rights Reserved. Todos los derechos reservados. Copyright © 2023, Baby Trend Inc., All Rights Reserved. Todos los derechos reservados.
ADVERTENCIA: Los bebés
más pequeños, entre 4 y 6 meses, están en una
edad crítica para que se considere seguro que
jueguen en un centro de actividades donde están
sentados. Su hijo YA DEBE poder mantener la
cabeza erguida y sostenerse rmemente sin
ayuda antes de ser colocado en el centro de
actividades. NO use el centro de actividades si
el bebé no puede mantenerse de esta forma.
PELIGRO DE ESTRANGULAMIENTO
¡Las cuerdas pueden causar estrangulamiento!
• NO coloque artículos con cuerdas alrededor del
cuello del niño, como por ejemplo cordones de
capuchas o sonajeros.
• NO suspenda cuerdas por encima del producto
ni sujete cuerdas a los juguetes. El centro de
actividades jo es para uso exclusivo de bebés
mayores de 4 meses que pueden mantener la
cabeza erguida sin ayuda.
¡PELIGRO DE CAÍDA!
Los bebés se pueden CAER de la unidad y sufrir
lesiones en la cabeza.
• Nunca pierda de vista al niño. Siempre mantenga
al niño a la vista mientras esté en el producto.
• Nunca lo use cerca de escaleras, estufas o
calentadores, chimeneas, piscinas u otras áreas
peligrosas.
• Para evitar vuelcos, coloque el producto sobre
una supercie plana y pareja.
• NUNCA levante este producto con su hijo
encima.
• NUNCA coloque el producto sobre mesadas,
mesas o cualquier otra supercie elevada.
• SIEMPRE asegúrese de bloquear el asiento
antes de usar el modo andador. Consulte la
Fig. 9b correspondiente.
¡IMPORTANTE! Deje de usar el modo
si el niño puede salirse o comienza a caminar,
si pesa 13,5 kg (30 lb) o mide 80 cm o si puede
caminar sin ayuda.
No utilice el centro de actividad estacionario si
está dañado o roto.
Deje de utilizarlo si alguna pieza se daña.
Comuníquese con nuestro servicio al cliente al
1-800-328-7363 para pedir piezas de remplazo o para
su reparación.
Lea todas las instrucciones antes de armar y usar
el centro de actividades jo.
Conserve las instrucciones para su uso futuro.
¡IMPORTANTE! Para asegurar el
funcionamiento seguro de su producto, siga
estas instrucciones c uidadosamente. Por favor,
conserve estas instrucciones para referencia
futura.
¡IMPORTANTE! Antes de armar y cada
vez que vaya a usar este producto, revise que no
tenga piezas de metal dañadas, uniones ojas,
piezas ausentes o bordes puntiagudos. NUNCA
utilice el producto con piezas ausentes o rotas.
¡IMPORTANTE! Se requiere el montaje
por parte de un adulto.
ADVERTENCIA: Utilicelo
solamente en superces planas libres de objectos
que puedan hacer que el andador tropiece y se
caiga.
• NO USAR HASTA QUE EL BEBE SE PUEDA
SENTAR POR SÍ MISMO.
Periódicamente inspeccione las lengüetas plásticas
del cojin del asiento para vericar que estén bien
adjustadas al cuerpo. NO USAR EL ANDADOR SI
ESTÁ DAÑADO O ROTO.
• Limpie los tapones de goma en la base del
andador
regularmente para mantener la acción de
frenado.
• Limpie las ruedas del andador regularmente para
mantener el rendimiento de rotación.
ADVERTENCIA: Para evitar
quemaduras, mantenga al niño alejado de líquidos
calientes, cocinas, radiadores, calentadores de
ambientes, chimeneas, etc.
ADVERTENCIA-PELIGRO
CON LAS ESCALERAS: Evite
lesiones graves o la muerte bloqueando las
escaleras o los escalones de manera segura antes
• Los andadores para bebés no están diseñados para
usarse en alfombras y tapetes.
PARTS PIEZAS
6
Copyright © 2023, Baby Trend Inc., All Rights Reserved. Todos los derechos reservados.
5
BABY TREND®
Copyright © 2023, Baby Trend Inc., All Rights Reserved. Todos los derechos reservados.
Check that you have all the parts for this model
before assembling the Activity Center.
Verique que tenga todas las piezas para este
modelo antes de montar El Centro de Actividades.
Toy Bar
Barra de juguetes
Tippy Tap Dance Board
Base para Bailar en
Puntas de Pie
Base
Base
Button Board
Tablero de botones
Mirror
Espejo
Rocket
Cohete
Rattle
Sonaja
Seat and cover
Asiento y sostén
Tabletop
Tapa superior
3 Table Legs
3 patas de mesa
BABY TREND® CUSTOMER SERVICE
The Customer Service Department can be
contacted at 1 (800) 328-7363 Monday through
Friday between 8:00 a.m. and 4:30 p.m. (PST).
Return Authorizations are required prior to returning
product(s) to Baby Trend®.
BABY TREND® SERVICIO AL CLIENTE
El Departamento de Servicio al Cliente puede ser
contactado a 1 (800) 328-7363 Lunes a viernes
entre 8:00 a.m. y 4:30 p.m. (PST).Un numero de
autorizacion es requerido antes de la devolución
de los producto(s) a Baby Trend®.
FRON
FRON
T
T
ASSEMBLYASSEMBLY
87
Copyright © 2023, Baby Trend Inc., All Rights Reserved. Todos los derechos reservados. Copyright © 2023, Baby Trend Inc., All Rights Reserved. Todos los derechos reservados.
TABLE LEGS
1 Insert each leg into the
base until it is securely
attached (Fig. 1a).
• Insert the tabletop into
all 3 legs (Fig. 1b).
NOTE: Ensure that each
pin clicks into position and
secure all legs into place.
Be sure to lineup the
tabletop tray logo with
the base that has the
imprinted “FRONT”
lettering (Fig. 1c).
Fig. 1a
Fig. 1b Fig. 1c
“Click” Fig. 2b
Fig. 2a
Fig. 2c
SWIVEL SEAT MODE
2 Push the tabs inward to
detach the seat from the
top plate before assembling
(Fig. 2a).
Align the seat to the center
opening and press it down
rmly. The seat must
completely click into to the
tabletop (Fig. 2b).
NOTE: Rotate the seat
to ensure the swivel function
is active.
• To adjust the seat strap,
push up on the strap to
tighten. Flip the clip to
loosen the seat (Fig. 2c).
F
R
O
N
T
F
R
O
N
T
F
R
O
N
T
ASSEMBLYASSEMBLY
109
Copyright © 2023, Baby Trend Inc., All Rights Reserved. Todos los derechos reservados. Copyright © 2023, Baby Trend Inc., All Rights Reserved. Todos los derechos reservados.
Fig. 4Fig. 3
NOTE: To activate the Button Board,
use the ON / OFF Switch.
LIGHT AND SOUND BOARD DIAGRAM
Door
ON/OFF
Power Switch
Place / remove
the screw
OO
NN
//
OO
FFFF
WARNING:
• Requires three AAA (LR03) batteries (not included) for toy operation.
• Non-rechargeable batteries are not to be recharged.
• Different types of batteries or new and used batteries are not to be
mixed. Batteries need to be inserted with the correct polarity.
• Exhausted batteries are to be removed from the toy.
• The supply terminals are not be short-circuited.
• Rechargeable batteries are to be removed from the toy before
being charged.
• Rechargeable batteries are only to be charged under adult
supervision.
BATTERY INSTRUCTION
4 • Reference the diagram below.
The Light and Sound Board
requires 3 AAA batteries.
Reference (Fig. 4) for battery
installation. Unscrew the
battery door and pull outward.
Install batteries as shown.
Secure battery door with
screw and push until it clicks
into place.
BATTERY INSTRUCTION
3 • Reference the diagram
below. The Tippy Tap Dance
Board requires 3 AAA
batteries. Reference
(Fig. 3) for battery installation.
Unscrew the battery door and
pull outward. Install batteries
as shown. Secure battery
door with screw and push
until it clicks into place.
TIPPY TAP DANCE BOARD DIAGRAM
NOTE: To activate the Tippy Tap
Dance Board, use the ON / OFF
Switch.
Place / remove
the screw
Door
ON/OFF
Power Switch
WARNING:
• Requires three AAA (LR03) batteries (not included) for toy
operation.
• Non-rechargeable batteries are not to be recharged.
• Different types of batteries or new and used batteries are not to
be mixed. Batteries need to be inserted with the correct polarity.
• Exhausted batteries are to be removed from the toy.
• The supply terminals are not be short-circuited.
• Rechargeable batteries are to be removed from the toy before
being charged.
• Rechargeable batteries are only to be charged under adult
supervision.
ASSEMBLYASSEMBLY
1211
Copyright © 2023, Baby Trend Inc., All Rights Reserved. Todos los derechos reservados. Copyright © 2023, Baby Trend Inc., All Rights Reserved. Todos los derechos reservados.
TOY ATTACHMENT
5 Place toys in this order
as shown. Toys must be
properly attached before
use (Fig. 5a).
NOTE: ONLY the rattle
and the rocket toys are
interchangable.
All toys must be aligned
with their single or double
tab housings on the activity
center tray (Fig. 5b). Set the
toy base in alignment with
the tabletop tting. From
underneath the tabletop
push the lock up and turn it
left to lock.
• Use the diagram below
(Fig. 5c) to lock the toys
onto the tabletop. (1) Push
the tab up and rotate it left
to lock. (2) Rotate the tab
right to release the toy. (3)
Always put the small tab
lock back into the tabletop
when not in use.
Fig. 5a
Fig. 5b
Fig. 5c
3
1
2
Align
Align
Fig. 6
HEIGHT POSITIONS
IMPORTANT: Never change the
height when the baby is in the
walker.
6 To adjust the height
position(s), push the button
on the table leg to the
desired position. Repeat
for the other sides.
NOTE: Each leg has 3
adjustable height levels.
ALWAYS adjust all 3 legs
to the same level (Fig. 6).
ASSEMBLYASSEMBLY
1413
Copyright © 2023, Baby Trend Inc., All Rights Reserved. Todos los derechos reservados. Copyright © 2023, Baby Trend Inc., All Rights Reserved. Todos los derechos reservados.
REAR WHEELS
8 Locate the two rear
wheels on the diagram
(Fig. 7a).
• Pull the wheel out from
the base, and straighten
the wheel (Fig. 8a).
• Push the wheel upward
until it clicks into the base
(Fig. 8b). Repeat for the
other side.
HIDE WHEELS: To tuck
away the wheels, pull the
wheel out from the base
and reverse the steps
above. Repeat for the
other side.
Fig. 8a
Fig. 8b
“Click”
7Locate the two front
wheels under the
base shown on the
diagram (Fig. 7a).
• Pull the wheel out
from the base, and
straighten the wheel
(Fig. 7b).
• Push the wheel
upward until it clicks
into the base (Fig. 7c).
Repeat for the other
side.
HIDE WHEELS: To
tuck away the wheels,
pull the wheel out
from the base and
reverse the steps
above. Repeat for the
other side.
FRONT WHEELS
This product converts into (4) Modes: Walker Mode, Tippy
Dance Mode, Stationary Activity Center Mode, and Tummy Time
Mode. See pages 15-16 to use the different modes.
Fig. 7a
Fig. 7b
Fig. 7c
“Click”
Front Wheels
Rear Wheels
MODESMODES
1615
Copyright © 2023, Baby Trend Inc., All Rights Reserved. Todos los derechos reservados. Copyright © 2023, Baby Trend Inc., All Rights Reserved. Todos los derechos reservados.
WALKER MODE
WARNING:
For 4 months up to 30lb. use ONLY.
STATIONARY ACTIVITY CENTER MODE
WARNING:
For 4 months up to 30lb. use ONLY.
TUMMY TIME MODE
WARNING:
For 3 months up to 30lb. use ONLY.
9ATTENTION: MUST remove
Tippy Tap Dance Board.
• To use the wheels, refer to
steps 7 & 8.
• Ensure the seat is aligned
with the front tray and front of
the base (Fig. 9a).
LOCKING SWIVEL SEAT
TO FRONT POSITION: To
lock the seat in place, locate
the lever underneath the
tabletop. The seat tab should
be aligned with the lever.
Push in, to lock (Fig. 9b).
LOCK UNLOCK
Fig. 9a
10 Tuck away the front
and rear wheels before
inserting. Reverse steps
7 & 8.
Insert the Tippy Tap Dance
board into the bottom
platform (Fig. 10).
NOTE: Ensure to push
down once it lays at.
Fig. 10
TIPPY TAP DANCE MODE
11 ATTENTION: MUST
remove Tippy Tap
Dance Board and Tuck
wheels in to set into
“Stationary” Mode.
• Tuck in the wheels, refer
to steps 7 & 8.
To remove, gently lift the
walker up, and remove
the Tippy Tap Dance
Board (Fig. 11).
Fig. 11
FRONT
Fig. 9b
Fig. 12
12 The Tippy Tap Dance
Board can be used on its
own (Fig. 12). Ensure to
keep the board on a at
surface in a safe area.
FRONT
FRONT
ALWAYS make sure to lock the seat before using the walker
mode. Refer to the corresponding Fig. 9b.
MAINTENANCE
18
Copyright © 2023, Baby Trend Inc., All Rights Reserved. Todos los derechos reservados.
UNFOLD
17
Copyright © 2023, Baby Trend Inc., All Rights Reserved. Todos los derechos reservados.
Fig. 13a
lift from edge
13 SEAT REMOVAL:
To remove the seat, use
the edge of the seat to
lift it off the tabletop
(Fig. 13a).
Ensure all the toys are
removed, and the seat.
TABLETOP:
To remove, push the 3
pins located on each
table leg (Fig. 13b).
Repeat the process for
the other table legs.
3 TABLE LEGS:
To remove, locate
the tab underneath
the base. Pull the
tab towards you and
remove the leg
(Fig. 13c). Repeat
for the other sides.
DISASSEMBLING THE ACTIVTY CENTER
Ensure all the toys are removed from the tabletop
before disassembling.
F
R
O
N
T
Fig. 13b
Fig. 13c
Fig. 14a
Fig. 14b
SEAT FABRIC
DO NOT MACHINE WASH. For
metal and plastic parts, use only
lukewarm water and mild soap.
14 To remove the seat fabric for
maintenance, pull out all the
plates from the tab on the seat
base (Fig. 14a).
To reattach the fabric, insert the
warning label side towards the
backrest of the seat base. Fold
the fabric over and insert the
rear center plate into the tab.
Continue to connect all plates
around the seat base tabs.
All plates and tabs must be
secured before use (Fig. 14b).
15 The Stoppers are there for
Stair Safety reasons, do
NOT remove the stoppers
unless for replacement
purposes.
REMOVAL: To remove, pull
out the stopper
(Fig. 15a).
REATTACH: Push the
stopper into the housing
completely (Fig. 15b).
Ensure to apply enough
pressure when inserting
the stoppers.
STOPPER REPLACEMENT
For replacement, if lost or damaged ONLY.
Fig. 15a
Fig. 15b
20
BABY TREND®
Copyright © 2023, Baby Trend Inc., All Rights Reserved. Todos los derechos reservados.
MAINTENANCE
19
Copyright © 2023, Baby Trend Inc., All Rights Reserved. Todos los derechos reservados.
FCC Statement
This device complies with Part 15 of the FCC rules. Operation is subject
to the following two conditions:
1 this device may not cause harmful interference, and
2 this device must accept any interference received, including interfer-
ence that may cause undesired operation.
WARNING: Changes or modications to
this unit not expressly approved by the party responsible
for compliance could void the user’s authority to operate
the equipment.
NOTE: This equipment has been tested and found to comply with the
limits for a Class B digital device, pursuant to Part 15 of the FCC Rules.
These limits are designed to provide reasonable protection against
harmful interference in a residential installation. This equipment gener-
ates, uses and can radiate radio frequency energy and, if not installed
and used in accordance with the instructions, may cause harmful inter-
ference to radio communications.
However, there is no guarantee that interference will not occur in a
particular installation. If this equipment does cause harmful interference
to radio or television reception, which can be determined by turning the
equipment off and on, the user is encouraged to try to correct the inter-
ference by one or more of the following measures:
• Reorient or relocate the receiving antenna.
• Increase the separation between the equipment and receiver.
• Connect the equipment into an outlet on a circuit different from that to
which the receiver is connected.
• Consult the dealer or an experienced radio/TV technician for help.
WHEEL REPLACEMENT
16 REMOVAL: (1) Pull the
small tab away from the pin.
(2) Pull the pin out of the
slots (Fig. 16a).
NOTE: May require a
screwdriver to completely
remove the pin.
Release the wheel from the
housing (Fig. 16b). Repeat
for the other sides.
RE-INSTALL: To re-attach
the wheels, reverse the
steps above. Ensure the
holes on the wheels are
aligned with the holes on
the base (Fig. 16c).
2
Fig. 16b
Fig. 16c
1
Fig. 16a
MONTAJEMONTAJE
2221
Copyright © 2023, Baby Trend Inc., All Rights Reserved. Todos los derechos reservados. Copyright © 2023, Baby Trend Inc., All Rights Reserved. Todos los derechos reservados.
PATAS DE MESA
1 Inserte cada pata en la
base hasta que esté bien
sujeta (Fig. 1a).
• Inserte la tapa superior
en las tres patas
(Fig. 1b).
NOTA: Asegúrese de que
cada pasador encaje en
su posición y asegure
todas las patas en su
lugar.
Procure alinear el
logotipo de la bandeja
de la tapa superior
con la base que diga
“FRENTE” (Fig. 1c). Fig. 1a
Fig. 1b Fig. 1c
“Clic”
F
R
O
N
T
Fig. 2b
2 Empuje las pestañas
hacia adentro para
separar el asiento de la
placa superior antes de
ensamblar (Fig. 2a).
Alinee el asiento con
la abertura del centro
y presione con fuerza.
El asiento debe jarse
por completo en la tapa
superior (Fig. 2b).
NOTA: Gire el asiento
para asegurarse de que la
función giratoria funciona.
Para ajustar la correa
del asiento, tírela hacia
arriba para tensarla. Gire
el gancho para soltar el
asiento (Fig. 2c).
MODO ASIENTO GIRATORIO
F
R
O
N
T
Fig. 2c
F
R
O
N
T
Fig. 2a
MONTAJEMONTAJE
2423
Copyright © 2023, Baby Trend Inc., All Rights Reserved. Todos los derechos reservados. Copyright © 2023, Baby Trend Inc., All Rights Reserved. Todos los derechos reservados.
DIAGRAMA DE TABLERO DE LUCES Y SONIDOS
NOTA: Para activar la tablero
de botones, use el interruptor
de ENCENDIDO / APAGADO.
Puerta
Encendido/
Apagado
Interruptor de
encendido
Agregar / Extraer
Tornillo
OO
NN
//
OO
FFFF
Fig. 4Fig. 3
ADVERTENCIA:
• Necesita tres pilas AAA (LR03) (no están incluidas) para el
funcionamiento del juguete. • Las pilas que no son recargables
no deben cargarse. No deben mezclarse los diferentes tipos de
pilas o pilas nuevas y usadas. Las pilas deben colocarse con la
polaridad correcta. • Debe retirar las pilas gastadas del juguete.
• Las terminales de alimentación no están en cortocircuito.
• Debe retirar las pilas recargables del juguete antes de empezar
a cargarlas. • La recarga de pilas debe realizarse solo bajo
supervisión de un adulto.
INSTRUCCIONES PARA LAS PILAS
4Consulte el siguiente
diagrama. El tablero de luces
y sonidos lleva 3 pilas AAA.
Consulte (Fig. 4) para conocer
la instalación de las pilas.
Desatornille la tapa de las
pilas y retírela. Coloque las
pilas como se indica. Asegure
la puerta de la batería con un
tornillo y empújela hasta que
encaje en su lugar.
INSTRUCCIONES PARA LAS PILAS
3Consulte el siguiente
diagrama. El base para
bailar en puntas de pie
lleva 3 pilas AAA. Consulte
(Fig. 3) para conocer la
instalación de las pilas.
Desatornille la tapa de las
pilas y retírela. Coloque
las pilas como se indica.
Asegure la puerta de la
batería con un tornillo y
empújela hasta que encaje
en su lugar.
ADVERTENCIA:
• Necesita tres pilas AAA (LR03) (no están incluidas) para el
funcionamiento del juguete. • Las pilas que no son recargables
no deben cargarse. No deben mezclarse los diferentes tipos de
pilas o pilas nuevas y usadas. Las pilas deben colocarse con la
polaridad correcta. • Debe retirar las pilas gastadas del juguete.
• Las terminales de alimentación no están en cortocircuito.
• Debe retirar las pilas recargables del juguete antes de empezar
a cargarlas. • La recarga de pilas debe realizarse solo bajo
supervisión de un adulto.
DIAGRAMA DE BASE PARA BAILAR EN
PUNTAS DE PIE
NOTA: Para activar Base para
Bailar en Puntas de Pie, use el
interruptor de ENCENDIDO /
APAGADO.
Encendido/Apagado
Interruptor de
encendido
Puerta
Agregar / Extraer
Tornillo
MONTAJEMONTAJE
2625
Copyright © 2023, Baby Trend Inc., All Rights Reserved. Todos los derechos reservados. Copyright © 2023, Baby Trend Inc., All Rights Reserved. Todos los derechos reservados.
ACCESORIOS DEL JUGUETE
5Coloque los juguetes en este
orden como se muestra.
Los juguetes deben estar
correctamente sujetos antes
de su uso (Fig. 5a).
NOTA: Los juguetes
intercambiables son SÓLO
la sonaja y el cohete.
Todos los juguetes deben
estar alineados con sus
cajas de lengüetas individual
o dobles en la bandeja del
centro de actividades (Fig.
5b). Alinee la base para
juguetes con la tapa superior.
Desde abajo de la tapa
superior, empuje la traba
hacia arriba y gírela hacia la
izquierda para trabar.
Fig. 5a
Fig. 5b
Fig. 5c
3
1
2
Alinee
Alinee
• Utilice el diagrama para jar los
juguetes en la tapa superior. (1)
Empuje la lengüeta hacia arriba
y gírela hacia la izquierda para
trabar. (2) Gire la lengüeta hacia
la derecha para destrabar el
juguete. (3) Siempre coloque la
traba de la lengüeta pequeña en
la tapa superior cuando no se
utilice (Fig. 5c).
6Para ajustar la(s)
posición(es) de altura,
oprima el botón en la pata
de la tabla hasta lograr la
posición deseada. Repita
para los otros lados.
NOTA: Cada pierna
tiene 3 niveles de altura
ajustables. SIEMPRE
ajuste las 3 patas al
mismo nivel (Fig. 6).
Fig. 6
POSICIONES DE ALTURA
IMPORTANTE: Nunca cambie la altura si
el bebé está en el andador.
MONTAJEMONTAJE
2827
Copyright © 2023, Baby Trend Inc., All Rights Reserved. Todos los derechos reservados. Copyright © 2023, Baby Trend Inc., All Rights Reserved. Todos los derechos reservados.
Ruedas
Delantera
Ruedas
Traseras
7Ubique las dos ruedas
delanteras debajo de la
base como se muestra en
el diagrama (Fig. 7a).
• Tire de la rueda hacia
afuera desde la base y
enderece la rueda
(Fig. 7b).
• Tire de la rueda hacia
arriba hasta que haga
clic en la base (Fig. 7c).
Repita por el otro lado.
REMOCIÓN: Para
guardar las ruedas, tire
de la rueda hacia afuera
de la base e invierta los
pasos anteriores. Repita
por el otro lado.
RUEDAS DELANTERAS
Este producto se convierte en (4) modos: Modo Caminante,
Modo bailar en puntas del pie, Modo de centro de actividades
estacionario, Modo de Tiempo de la panza. Consulte las páginas
29-30 para utilizar los diferentes modos.
Fig. 7a
Fig. 7b
Fig. 7c
“Clic”
8Localice las dos ruedas
traseras en el diagrama
(Fig. 7a).
• Tire de la rueda hacia
afuera desde la base y
enderece la rueda (Fig. 8a).
• Tire de la rueda hacia
arriba hasta que haga clic
en la base (Fig. 8b). Repita
por el otro lado.
REMOCIÓN: Para
desplegar las ruedas, tire
de la rueda hacia afuera
desde la base y revierta los
pasos anteriores. Repita
por el otro lado.
Fig. 8a
Fig. 8b
“Clic”
RUEDAS TRASERAS
MODESMODES
3029
Copyright © 2023, Baby Trend Inc., All Rights Reserved. Todos los derechos reservados. Copyright © 2023, Baby Trend Inc., All Rights Reserved. Todos los derechos reservados.
12 La Base para bailar en
puntas de pie se puede
usar por separado.
(Fig. 12). Asegúrese de
mantener la tabla sobre
una supercie plana en
un área segura.
9ATENCIÓN: DEBE quitar
Tippy Tap Dance Board.
• Para usar las ruedas, consulte
los pasos 7 y 8.
Asegúrese de que el asiento
esté alineado con la bandeja
frontal y el frente de la base
(Fig. 9a).
BLOQUEO DEL ASIENTO
GIRATORIO EN LA
POSICIÓN DELANTERA:
Para trabar el asiento en
su lugar, ubique la palanca
debajo de la tapa superior.
La lengüeta del asiento debe
estar alineada con la palanca.
Presione para trabarlo
(Fig. 9b).
CERRADURA ABRIR CERRADURA
Fig. 9a
Fig. 10
10 Quite las ruedas delanteras
y traseras antes de insertar.
Invierta los pasos 7 y 8.
Inserta la tabla Tippy Tap
Dance en la plataforma
inferior (Fig. 10).
NOTA: Asegúrese de empujar
hacia abajo una vez que esté
plano.
Fig. 9b
FRONT
Fig. 12
11 ATENCIÓN: DEBE
quitar base para bailar
en puntas de pie y
meta las ruedas para
ponerlas en el modo
“estacionario”.
• Para quitar las ruedas,
consulte los pasos 7 y 8.
Para quitarlo, levante
suavemente el andador y
retire la Base para bailar
en puntas de pie (Fig.
11).
Fig. 11
FRONT
FRONT
MODO CAMINANTE
ADVERTENCIA
:
Durante 4 meses hasta 30lb.
usar solamente.
MODO DE CENTRO DE ACTIVIDADES ESTACIONARIO
ADVERTENCIA
:
Durante 4 meses hasta 30lb. usar
solamente.
MODO DE TIEMPO DE LA PANZA
ADVERTENCIA
:
Durante 3 meses hasta 30lb.
usar solamente.
MODO BAILAR EN PUNTAS DE PIE
SIEMPRE asegúrese de bloquear el asiento antes de usar
el modo andador. Consulte la Fig. 9b correspondiente.
MANTENIMIENTO
32
Copyright © 2023, Baby Trend Inc., All Rights Reserved. Todos los derechos reservados.
DESPLEGAR
31
Copyright © 2023, Baby Trend Inc., All Rights Reserved. Todos los derechos reservados.
Fig. 14a
Fig. 14b
TELA DEL ASIENTO
NO LAVAR EN MÁQUINA .
Para lavar partes de plástico o
metal, use solo agua tibia y jabón
neutro.
14 • Para extraer la tela del
asiento para acondicionarlo,
retire todas las hebillas de
la lengüeta en la base del
asiento (Fig. 14a).
Para volver a colocarla,
coloque el lado de la
etiqueta de advertencia
hacia el respaldar de la base
del asiento. Pliegue la tela
y coloque la hebilla central
trasera en la lengüeta.
Conecte todas las hebillas
alrededor de las lengüetas
de la base del asiento. Se
deben asegurar todas las
lengüetas y hebillas antes
de usar el producto
(Fig. 14b).
Fig. 13a
DESMONTAJE DEL CENTRO DE ACTIVIDADES
Asegúrese de que todos los juguetes se retiran de la mesa antes
de desmontar.
F
R
O
N
T
Fig. 13b
Fig. 13c
elevación desde
el borde
13 EXTRACCIÓN DEL
ASIENTO: Para extraer
el asiento, use el
borde del asiento para
despegarlo de la tapa
superior (Fig. 13a).
• Procure retirar todos
los juguetes y el
asiento.
TAPA SUPERIOR:
Para retirarla, presione
las 3 chavetas
ubicadas en cada pata
de la mesa (Fig. 13b).
Repite el proceso con
las otras patas de la
mesa.
PATAS DE MESA:
Para retirarla, ubique
la lengüeta debajo
de la base. Tire de la
lengüeta hacia usted y
retire la pata (Fig. 13c).
Repita para los otros
lados.
15 Los tapones están ahí por
razones de seguridad en
las escaleras, NO quite los
tapones a menos que sea
para reemplazarlos.
REMOCIÓN: Para quitar,
saque el tapón (Fig. 15a).
REINSTALAR: Empuje
el tope en la carcasa
completamente (Fig. 15b).
Asegúrese de aplicar
suciente presión al insertar
los tapones.
REMOCIÓN TAPONES DE GOMA
Para reemplazo, si se pierde o daña SOLAMENTE.
Fig. 15a
Fig. 15b
34
BABY TREND®
Copyright © 2023, Baby Trend Inc., All Rights Reserved. Todos los derechos reservados.
MANTENIMIENTO
33
Copyright © 2023, Baby Trend Inc., All Rights Reserved. Todos los derechos reservados.
Declaración de la FCC
Este dispositivo cumple con las normas de la Parte 15 de la Comisión
Federal de Comunicaciones (FCC). El funcionamiento está sujeto a las
siguientes dos condiciones:
1 este dispositivo no puede producir interferencias perjudiciales y
2 este dispositivo debe aceptar cualquier interferencia que reciba, in-
cluyendo las que puedan provocar un funcionamiento no deseado.
ADVERTENCIA: Los cambios o
modi caciones realizados a esta unidad, sin la aprobación
expresa de la parte responsable del cumplimiento, podrían
invalidar la autorización del usuario para operar el equipo.
NOTA: este equipo ha sido probado y se ha encontrado que cumple con
los límites de dispositivos digitales de Clase B, de conformidad con las
Normas de la Parte 15 de la FCC. Estos límites han sido establecidos
para brindar una protección razonable contra interferencias perjudiciales
en una instalación residencial. Este equipo genera, utiliza y puede irra-
diar frecuencias de radio y, de no instalarse y utilizarse de conformidad
con las instrucciones, podría causar interferencias perjudiciales en las
comunicaciones de radio.
Sin embargo, no es posible garantizar que en una determinada in-
stalación no se producirán interferencias. Si este dispositivo provoca
interferencias dañinas a la recepción de radio o televisión, cuestión que
puede determinarse encendiendo y apagando el dispositivo, se insta al
usuario a que intente corregir la interferencia realizando uno o más de
los procedimientos siguientes:
• Vuelva a orientar o colocar la antena de recepción.
Aumente la separación entre el dispositivo y el receptor.
• Conecte el dispositivo a una toma de corriente diferente a la que se
encuentra conectado el receptor.
• Consulte al distribuidor o a un técnico de radio o TV experimentado
para pedirle ayuda.
16 REMOCIÓN: (1) Retire
la pequeña lengüeta de
la chaveta. (2) Saque el
pasador de la ranura (Fig.
16a).
NOTA: Puede requerir
un destornillador para
quitar completamente el
pasador.
Soltar la rueda de la
carcasa (Fig. 16b). Repita
para los otros lados.
REINSTALAR: Para
volver a colocar las
ruedas, invierta los pasos
anteriores. Asegúrese de
que los oricios de las
ruedas estén alineados
con el cubo de la base
(Fig. 16c).
2
Fig. 16a
Fig. 16b
Fig. 16c
1
REEMPLAZO DE RUEDAS
  • Page 1 1
  • Page 2 2
  • Page 3 3
  • Page 4 4
  • Page 5 5
  • Page 6 6
  • Page 7 7
  • Page 8 8
  • Page 9 9
  • Page 10 10
  • Page 11 11
  • Page 12 12
  • Page 13 13
  • Page 14 14
  • Page 15 15
  • Page 16 16
  • Page 17 17
  • Page 18 18

Baby Trend WK03XXXA User manual

Category
Baby furniture
Type
User manual

Baby Trend WK03XXXA is a versatile 4-in-1 activity center walker that offers a safe and fun environment for your child to play and learn. With its adjustable height positions, this activity center can be used from infancy to toddlerhood. The 360-degree rotating seat allows your child to explore all the interactive toys and activities, which include a rattle, rocket, button board, and mirror. The removable tabletop provides a convenient surface for snack time or playtime.

Ask a question and I''ll find the answer in the document

Finding information in a document is now easier with AI

in other languages