
1
Mailbox
ENGLISH
OBSERVE THE FOLLOWING STATEMENTS AND WARNINGS TO
REDUCE THE LIKELIHOOD OF SERIOUS OR FATAL INJURY.
SAVE THIS SHEET FOR FUTURE REFERENCE.
WARNING:
- Choking Hazard: Small parts. Sharp points. Adult assembly required.
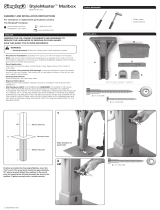
- Required for Installation: Standard 4”x4” post cut to 48-inch length (not included)
- Note: with normal solid conditions and level ground, a standard 4”x4” post cut into 48
inch length is adequate for mounting your Simplay3 StyleMaster Mailbox with 26 inches in
ground and 22 inches above ground.
- Decal Application:
Clean and dry area thoroughly. Center decal in area. Apply pressure from center to
outer edge.
- To minimize risks posed by drill shavings, screws are designed to pierce the plastic
and form their own threads. Use caution not to over-tighten screws or they will not hold
parts together appropriately.
- Cleaning Instructions:
General Cleaning: Use mild soapy water.
- Disposal Instructions:
Please recycle when possible. Disposal must be in compliance with all government
regulations.
- USA Residents ONLY: CUSTOMERS ARE REQUIRED TO CONTACT THE LOCAL
POST OFFICE BEFORE INSTALLING THE MAILBOX TO ENSURE ITS CORRECT
PLACEMENT AND HEIGHT AT THE STREET. GENERALLY, MAILBOXES ARE INSTALLED
AT A HEIGHT OF 41-45 INCHES FROM THE ROAD SURFACE TO EITHER THE INSIDE
SURFACE OF THE MAILBOX THAT THE MAIL IS PLACED ON BY THE CARRIER OR TO
THE LOWEST EDGE OF MAIL ENTRY (FOR LOCKED MAIL SLOT DESIGNS) AND ARE
SET BACK 6-8 INCHES FROM THE FRONT FACE OF CURB OR ROAD EDGE TO THE
MAILBOX DOOR.
TOOLS REQUIRED
- Phillips Head
- Socket Wrench
PARTS LIST A
A
B
C
D E
x2
2 x 3” (7,62 CM)
6 x 2” (5,08 CM)
ASSEMBLY AND INSTALLATION INSTRUCTIONS
1
2
3
x2
22”
4’
Ground Level
Above Ground
Below Ground
26”
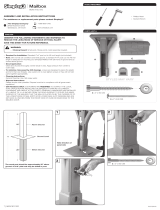
Position and slide the Homestyle Mailbox down the
4”x4” post. (The wood post should be approximately
22” above ground) Attach the mailbox to the wood
post by inserting the (2) bolts through the slots in the
mailbox. Tighten securely with a socket wrench.
A
Street
Note direction of
panel side
2 x 3” (7,62 CM)
| 56241610102
STYLES MAY VARY
Styles may vary
For assistance or replacement parts please contact Simplay3
®
The Simplay3 Company
9450 Rosemont Drive
Streetsboro, OH 44241
| 1-866-855-0100
| www.simplay3.com
07/24/2017

2
4 5 6
x2
2 x 2” (5,08 CM)
8
7A
x2
7B
Be sure to assemble door with ag facing the street.Repeat to other side for part (E).
B
A
D
C
A
9
x4
10
Flush
Flush
4 x 2” (5,08 CM)
11. Decal Application
Peel and adhere your address to the recessed area
on either side of the mailbox. (It is recommended
that you adhere the numbers when the plastic is at
average room temperature).
| 56241610102
07/24/2017
-
 1
1
-
 2
2
Ask a question and I''ll find the answer in the document
Finding information in a document is now easier with AI
Related papers
-
 Simplay3 419090-04 User manual
-
 Simplay3 416070-04 Operating instructions
-
 Simplay3 417050-01 User manual
-
 Simplay3 419020-01 User manual
-
 Simplay3 419110-01 User manual
-
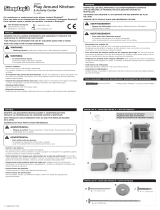 Simplay3 216070-01 User manual
-
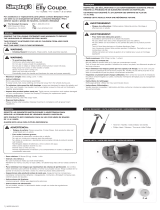 Simplay3 216040-01 User guide
-
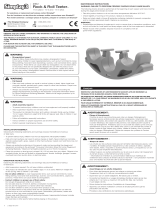 Simplay3 218120-01 Operating instructions
-
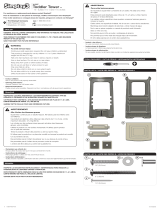 Simplay3 418070-02 User manual
-
 Simplay3 218110-01 Operating instructions
Other documents
-
 Simplay3 Company 416070-04 Owner's manual
-
Step2 566900 User manual
-
Step2 MailMaster XL Mailbox™- Mocha Operating instructions
-
Step2 5A2000 Installation guide
-
Step2 520900 User manual
-
Step2 534299 User manual
-
Step2 MailMaster® Express Mailbox - Black™ Quick start guide
-
Step2 534299 Operating instructions
-
Step2 543600 User manual
-
 Step 2 MailMaster 541200 Installation guide


