Toro 122cm TITAN HD 1500 Series Riding Mower User manual

Category
Lawnmowers
Type
User manual

This manual is also suitable for

FormNo.3414-620RevB
122cmTITAN
®
HD1500Series
RidingMower
ModelNo.74447TE—SerialNo.400000000andUp
ModelNo.74451TE—SerialNo.400000000andUp
Registeratwww.Toro.com.
OriginalInstructions(EN)
*3414-620*B
ThisproductcomplieswithallrelevantEuropean
directives;fordetails,pleaseseetheseparateproduct
specicDeclarationofConformity(DOC)sheet.
ThissparkignitionsystemcomplieswithCanadian
ICES-002.
WARNING
Removingstandardoriginalequipmentparts
andaccessoriesmayalterthewarranty,
traction,andsafetyofthemachine.Failureto
useoriginalToropartscouldcauseserious
injuryordeath.Makingunauthorizedchanges
totheengine,fuelorventingsystem,may
violateregulations.
Replaceallpartsincluding,butnotlimited
to,tires,belts,blades,andfuelsystem
componentswithoriginalToroparts.
Important:IfyouareusingamachinewithaToro
engineabove1500m(5,000ft)foracontinuous
period,ensurethattheHighAltitudeKithasbeen
installedsothattheenginemeetsCARB/EPA
emissionregulations.TheHighAltitudeKit
increasesengineperformancewhilepreventing
spark-plugfouling,hardstarting,andincreased
emissions.Onceyouhaveinstalledthekit,attach
thehigh-altitudelabelnexttotheserialdecalon
themachine.ContactanyAuthorizedToroService
DealertoobtaintheproperHighAltitudeKitand
high-altitudelabelforyourmachine.Tolocate
adealerconvenienttoyou,accessourwebsite
atwww.Toro.comorcontactourToroCustomer
CareDepartmentatthenumber(s)listedinyour
EmissionControlWarrantyStatement.
Removethekitfromtheengineandrestorethe
enginetoitsoriginalfactorycongurationwhen
runningtheengineunder1500m(5,000ft).Do
notoperateanenginethathasbeenconverted
forhigh-altitudeuseatloweraltitudes;otherwise,
youcouldoverheatanddamagetheengine.
Ifyouareunsurewhetherornotyourmachinehas
beenconvertedforhigh-altitudeuse,lookforthe
followinglabel(Figure3).
decal127-9363
Figure3
Introduction
Thisrotary-blade,ridinglawnmowerisintendedtobe
usedbyresidentialhomeownersorprofessional,hired
operators.Itisdesignedprimarilyforcuttinggrasson
well-maintainedlawnsonresidentialorcommercial
properties.Itisnotdesignedforcuttingbrushorfor
agriculturaluses.
Readthisinformationcarefullytolearnhowtooperate
andmaintainyourproductproperlyandtoavoid
injuryandproductdamage.Youareresponsiblefor
operatingtheproductproperlyandsafely.
YoumaycontactTorodirectlyatwww.Toro.com
forproductsafetyandoperationtrainingmaterials,
accessoryinformation,helpndingadealer,orto
registeryourproduct.
Wheneveryouneedservice,genuineToroparts,or
additionalinformation,contactanAuthorizedService
DealerorT oroCustomerServiceandhavethemodel
andserialnumbersofyourproductready.Figure1
identiesthelocationofthemodelandserialnumbers
ontheproduct.Writethenumbersinthespace
provided.
g036742
Figure1
1.Modelandserialnumberlocation
ModelNo.
SerialNo.
©2018—TheToro®Company
8111LyndaleAvenueSouth
Bloomington,MN55420
2
Contactusatwww.Toro.com.
PrintedintheUSA
AllRightsReserved
Thismanualidentiespotentialhazardsandhas
safetymessagesidentiedbythesafety-alertsymbol
(Figure2),whichsignalsahazardthatmaycause
seriousinjuryordeathifyoudonotfollowthe
recommendedprecautions.
g000502
Figure2
1.Safety-alertsymbol
Thismanualuses2wordstohighlightinformation.
Importantcallsattentiontospecialmechanical
informationandNoteemphasizesgeneralinformation
worthyofspecialattention.
Contents
Safety.......................................................................4
GeneralSafety...................................................4
SlopeIndicator...................................................5
SafetyandInstructionalDecals..........................6
ProductOverview...................................................12
Controls...........................................................12
Specications..................................................14
BeforeOperation.................................................14
BeforeOperationSafety...................................14
RecommendedFuel.........................................15
UsingStabilizer/Conditioner.............................15
FillingtheFuelTank..........................................15
CheckingtheEngine-OilLevel..........................16
BreakinginaNewMachine..............................16
UsingtheRollover-ProtectionSystem
(ROPS).........................................................16
ThinkSafetyFirst..............................................17
UsingtheSafety-InterlockSystem....................18
PositioningtheSeat..........................................19
ChangingtheSeatSuspension.........................19
UsingAttachmentsandAccessories.................19
DuringOperation.................................................19
DuringOperationSafety...................................19
OperatingtheParkingBrake.............................20
OperatingtheMowerBlade-ControlSwitch
(PTO)............................................................21
OperatingtheThrottle.......................................21
OperatingtheChoke.........................................21
OperatingtheIgnitionSwitch............................22
StartingandShuttingOfftheEngine.................22
UsingtheMotion-ControlLevers.......................24
DrivingtheMachine..........................................24
AdjustingtheHeight-of-Cut...............................26
AdjustingtheAnti-ScalpRollers........................26
StoppingtheMachine.......................................27
UsingtheSideDischarge.................................27
OperatingTips.................................................27
AfterOperation....................................................28
AfterOperationSafety......................................28
UsingtheFuel-ShutoffValve.............................28
UsingtheDrive-Wheel-ReleaseValves............29
TransportingtheMachine.................................30
LoadingtheMachine........................................30
Maintenance...........................................................32
RecommendedMaintenanceSchedule(s)...........32
Pre-MaintenanceProcedures..............................33
MaintenanceandStorage.................................33
ReleasingtheMower-DeckCurtain..................33
RemovingtheSheet-MetalGuard.....................33
Lubrication..........................................................35
GreasingtheMachine.......................................35
EngineMaintenance...........................................36
EngineSafety...................................................36
ServicingtheEngine.........................................36
CheckingtheSparkArrester.............................41
3
ReplacingtheEmissions-AirIntake
Filter..............................................................41
FuelSystemMaintenance...................................41
ReplacingtheFuelFilter...................................41
ServicingtheFuelT ank.....................................42
ElectricalSystemMaintenance...........................42
ElectricalSystemSafety...................................42
ServicingtheBattery.........................................42
ServicingtheFuses..........................................44
DriveSystemMaintenance..................................45
CheckingtheSeatBelt.....................................45
CheckingtheRoll-BarKnobs............................45
AdjustingtheTracking......................................46
CheckingtheTirePressure...............................46
CheckingtheWheelLugNuts...........................46
CoolingSystemMaintenance..............................47
CleaningtheEngineScreen.............................47
BrakeMaintenance.............................................47
AdjustingtheParkingBrake..............................47
BeltMaintenance................................................49
InspectingtheBelts..........................................49
ReplacingtheMowerBeltforSideDischarge
MowerDecks................................................49
ReplacingtheHydraulic-Pump-Drive
Belt................................................................50
ControlsSystemMaintenance.............................51
AdjustingtheControl-HandlePosition..............51
AdjustingtheMotion-ControlLinkage...............51
HydraulicSystemMaintenance...........................53
HydraulicSystemSafety...................................53
ServicingtheHydraulicSystem........................53
ChangingtheHydraulic-SystemFiltersand
Fluid..............................................................54
MowerDeckMaintenance....................................57
LevelingtheMowerDeck..................................57
ServicingtheCuttingBlades.............................58
RemovingtheMowerDeck...............................61
ReplacingtheGrassDeector..........................61
Cleaning..............................................................62
CleaningundertheMower................................62
DisposingofWaste...........................................62
Storage...................................................................62
CleaningandStoringtheMachine....................62
Troubleshooting......................................................64
Schematics.............................................................66
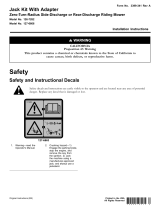
Safety
Thismachinehasbeendesignedinaccordancewith
ENISO5395:2013.
GeneralSafety
Thisproductiscapableofamputatinghandsand
feetandofthrowingobjects.Alwaysfollowallsafety
instructionstoavoidseriouspersonalinjury.
Usingthisproductforpurposesotherthanitsintended
usecouldprovedangeroustoyouandbystanders.
Readandunderstandthecontentsofthis
Operator’sManualbeforeyoustarttheengine.
Ensurethateveryoneusingthisproductknows
howtouseitandunderstandsthewarnings.
Donotputyourhandsorfeetnearmoving
componentsofthemachine.
Donotoperatethemachinewithoutallguards
andothersafetyprotectivedevicesinplaceand
workingonthemachine.
Keepclearofanydischargeopening.Keep
bystandersasafedistancefromthemachine.
Keepchildrenoutoftheoperatingarea.Never
allowchildrentooperatethemachine.
Stopthemachineandshutofftheenginebefore
servicing,fueling,oruncloggingthemachine.
Improperlyusingormaintainingthismachinecan
resultininjury.Toreducethepotentialforinjury,
complywiththesesafetyinstructionsandalwayspay
attentiontothesafety-alertsymbol,whichmeans
Caution,Warning,orDanger—personalsafety
instruction.Failuretocomplywiththeseinstructions
mayresultinpersonalinjuryordeath.
Youcanndadditionalitemsofsafetyinformationin
theirrespectivesectionsthroughoutthismanual.
4
SlopeIndicator
g011841
Figure4
Thispagemaybecopiedforpersonaluse.
1.Themaximumslopeyoucansafelyoperatethemachineonis15degrees.Usetheslopecharttodeterminethedegreeofslope
ofhillsbeforeoperating.Donotoperatethismachineonaslopegreaterthan15degrees.Foldalongtheappropriateline
tomatchtherecommendedslope.
2.Alignthisedgewithaverticalsurface,atree,building,fencepole,etc.
3.Exampleofhowtocompareslopewithfoldededge.
5
SafetyandInstructionalDecals
Safetydecalsandinstructionsareeasilyvisibletotheoperatorandarelocatednearanyarea
ofpotentialdanger.Replaceanydecalthatisdamagedorlost.
decaloemmarkt
Manufacturer'sMark
1.Indicatesthebladeisidentiedasapartfromtheoriginal
machinemanufacturer.
decal93-7818
93-7818
1.Warning—readtheOperator'sManualforinstructionson
torquingthebladebolt/nutto115-149N∙m(85-110ft-lb).
decal106-5517
106-5517
1.Warning—donottouchthehotsurface.
decal107-3069
107-3069
1.Warning–thereisnorolloverprotectionwhentherollbaris
down.
2.Toavoidinjuryordeathfromarolloveraccident,keepthe
rollbarintheraisedandlockedpositionandweartheseat
belt.Lowertherollbaronlywhenabsolutelynecessary;do
notweartheseatbeltwhentherollbarisdown.
3.ReadtheOperator'sManual;driveslowlyandcarefully.
decal109-6014
109-6014
6
decal112-3858
112-3858
1.ReadtheOperator's
Manual.
3.Removetheignitionkey
beforeadjustingtheheight
ofcut.
2.Readtheinstructions
beforeservicingor
performingmaintenance.
4.Height-of-cutsettings.
decal112-9028
112-9028
1.Warning—stayawayfrommovingparts;keepallguardsin
place.
decalhourmessagedisplay-116-5610
MessageDisplay
1.Hour4.Neutral
2.PTO5.Operatorpresenceswitch
3.Parkingbrake6.Battery
decal116-8588
116-8588
1.ReadtheOperator’smanual.
2.Rotatethedrivereleaseknobtoloosen,slidetheknob,
andtighten.
3.Pushthemachine.
decal117-1194
117-1194
1.Engine
7
decal117-3848
117-3848
1.Thrownobjecthazard—keepbystandersasafedistance
fromthemachine.
2.Thrownobjecthazard,mower—donotoperatethemachine
withoutdeector,dischargecover,orgrasscollection
systeminplace.
3.Cutting/dismembermentofhandorfoot—stayawayfrom
movingparts;keepallguardsandshieldsinplace.
decal126-4363
126-4363
1.Cutting/dismembermenthazard,fanandentanglement
hazard,belt.Shutofftheengineandremovekeybefore
adjusting,servicingorcleaning.
decal126-7816
126-7816
1.Height-of-cut
decal126-8161
126-8161
1.ReadOperator’smanual
3.Pressdownonlatchto
unlockseat
2.Slideseatforward
4.Rotateseat
8
decal126-8172
126–8172
1.Parkingbrakedisengaged2.Parkingbrakeengaged
decal126-9939
126-9939
1.ReadtheOperator’s
Manual
2.Filltobottomofllerneck;
warning–donotoverllthe
tank
decal131-1097
131-1097
ToroEnginesOnly
1.Oildrain
decal132-0904
ToroEngineOnly
1.Shutdownengineatfullthrottle
decalptosymbols
PTOSwitchSymbols
1.PTO–disengage2.PTO–engage
decaltransportlock
TransportLock
1.Heightofcut
2.Pulluptounlockthe
transportlock
decalmotioncntrllh-126-6194
LeftMotionControl
1.Machinespeed4.Neutral
2.Fast5.Reverse
3.Slow
9
decalmotioncntrlrh-126-6183
RightMotionControl
1.Machinespeed4.Neutral
2.Fast5.Reverse
3.Slow
decalbatterysymbols
BatterySymbols
Someorallofthesesymbolsareonyourbattery.
1.Explosionhazard
6.Keepbystandersasafe
distancefromthebattery.
2.Nore,opename,or
smoking
7.Weareyeprotection;
explosivegasescan
causeblindnessandother
injuries.
3.Causticliquid/chemical
burnhazard
8.Batteryacidcancause
blindnessorsevereburns.
4.Weareyeprotection.9.Flusheyesimmediately
withwaterandgetmedical
helpfast.
5.ReadtheOperator's
Manual.
10.Containslead;donot
discard
decal136-1305
136-1305
1.Fast
4.Choke
2.Continuousvariablesetting5.Worklight(optional)
3.Slow
6.Powerpoint
10
decal126-8151
126-8151
1.Readtheinstructionsbeforeservicingorperforming
maintenance
4.RefertotheOperator'smanualforgreaseinstructions
2.Timeinterval
5.CheckhydraulicoillevelandrefertotheOperator'smanual
forfurtherinstructions
3.Checkoillevel6.Checktirepressure
decal126-8383
126-8383
MachineswithoutMyRideOnly
Note:Thismachinecomplieswiththeindustrystandardstabilitytestinthestaticlateralandlongitudinaltestswiththemaximum
recommendedslopeindicatedonthedecal.ReviewtheinstructionsforoperatingthemachineonslopesintheOperatorsManualas
wellastheconditionsinwhichyouwouldoperatethemachinetodeterminewhetheryoucanoperatethemachineinthoseconditions
onthatdayandatthatsite.Changesintheterraincanresultinachangeinslopeoperationforthemachine.Ifpossible,keepthe
cuttingunitsloweredtothegroundwhileoperatingthemachineonslopes.Raisingthecuttingunitswhileoperatingonslopescan
causethemachinetobecomeunstable.
1.Warning—readtheOperator’sManual;donotoperatethis
machineunlessyouaretrained;wearhearingprotection.
4.Bodilyharmhazard—donotcarrypassengers;lookbehind
youwhenmowinginreverse.
2.Cutting,dismembering,andentanglementhazard—keep
handsawayfrommovingparts;keepallguardsandshieldsin
place.
5.Thrownobjecthazard—keepbystandersaway.
3.Ramphazard—whenloadingontoatrailer,donotusedual
ramps;onlyuseasingularrampwideenoughforthemachine
andthathasaninclinelessthan15°;backuptheramp(in
reverse)anddriveforwardofftheramp.
6.Tippinghazardonslopes—donotuseonslopesnearopen
water;donotuseonslopesgreaterthan15°.
11
ProductOverview
g036854
Figure5
1.Height-of-cutdeck-lift
pedal
7.Seatbelt
2.Height-of-cutpositions
8.Fuelcap
3.Transportlock9.Parking-brakelever
4.Controls
10.Mowerdeck
5.Motion-controllevers
11.Casterwheel
6.Rollbar
Controls
Becomefamiliarwithallthecontrolsbeforeyoustart
theengineandoperatethemachine(Figure5and
Figure6).
g037119
Figure6
1.Powerport
5.PTOSwitch
2.Chokecontrol
6.Ignitionswitch
3.Throttlecontrol
7.Switchpositionforoptional
lightkit
4.Hourmeter
IgnitionSwitch
Usethisswitchtostartthemowerengine.Ithas3
positions:START,RUN,andOFF.
ChokeControl
Usethechoketostartacoldengine.Pullthechoke
knobuptoengageit.Pushthechokeknobdownto
disengageit(Figure6).
ThrottleControl
Thethrottlecontrolstheenginespeed,andithasa
continuous-variablesettingfromtheSLOWtoFAST
position(Figure6).
Blade-ControlSwitch(Power
Takeoff)
Theblade-controlswitch(PTO)engagesand
disengagespowertothemowerblades(Figure6).
HourMeter
Thehourmeterrecordsthenumberofhoursthe
enginehasoperated.Itoperateswhentheengine
isrunning.Usethesetimesforschedulingregular
maintenance(Figure6).
Safety-InterlockIndicators
Therearesymbolsonthehourmeterthatindicate
withablacktrianglethattheinterlockcomponentis
positionedcorrectly(Figure7).
Battery-IndicatorLight
IfyouturntheignitionkeytotheONpositionfora
fewseconds,thebatteryvoltagedisplaysinthearea
wherethehoursarenormallydisplayed.
Thebatterylightturnsonwhentheignitionisturned
onandwhenthechargeisbelowthecorrectoperating
level(Figure7).
12
g187133
Figure7
1.Safety-interlocksymbols
3.Batterylight
2.Hourmeter
Motion-ControlLevers
Usethemotion-controlleverstodrivethemachine
forward,reverse,andturneitherdirection.
Neutral-LockPosition
UsetheNEUTRAL-LOCKpositionwiththe
safety-interlocksystemtodeterminetheNEUTRAL
position.
Fuel-ShutoffValve
Closethefuel-shutoffvalve(behindtheseat)when
transportingorstoringthemower.
Attachments/Accessories
AselectionofT oroapprovedattachmentsand
accessoriesisavailableforusewiththemachineto
enhanceandexpanditscapabilities.Contactyour
AuthorizedServiceDealerorDistributororgoto
www.T oro.comforalistofallapprovedattachments
andaccessories.
13
Specications
Note:Specicationsanddesignaresubjecttochangewithoutnotice.
Width—SideDischargeMowerDecks:
122cmmowerdeck132cmmowerdeck
Withoutmowerdeck
121cm(47-1/2inches)124cm(49inches)
Deectorup133cm(53inches)144cm(56-3/4inches)
Deectordown160cm(63-1/4inches)171cm(67-1/4inches)
Length—SideDischargeMowerDecks:
122cmmowerdeck132cmmowerdeck
Length
208cm(82inches)208cm(82inches)
Height:
RollBar-UpRollBar-Down
179cm(70-1/2inches)125cm(49inches)
Weight:
MachinesWeight
122cmsidedischargemachines849-937lb
(385-425kg)
132cmsidedischargemachines862-957lb
(391–434kg)
Operation
Note:Determinetheleftandrightsidesofthe
machinefromthenormaloperatingposition.
BeforeOperation
BeforeOperationSafety
GeneralSafety
Neverallowchildrenoruntrainedpeopleto
operateorservicethemachine.Localregulations
mayrestricttheageoftheoperator.Theowner
isresponsiblefortrainingalloperatorsand
mechanics.
Becomefamiliarwiththesafeoperationofthe
equipment,operatorcontrols,andsafetysigns.
Knowhowtostopthemachineandenginequickly.
Checkthatoperator-presencecontrols,safety
switches,andshieldsareattachedandfunctioning
properly.Donotoperatethemachineunlessthey
arefunctioningproperly.
Beforemowing,alwaysinspectthemachineto
ensurethattheblades,bladebolts,andcutting
assembliesareingoodworkingcondition.
Replacewornordamagedbladesandboltsinsets
topreservebalance.
Inspecttheareawhereyouwillusethemachine
andremoveallobjectsthatthemachinecould
throw.
Evaluatetheterraintodeterminetheappropriate
equipmentandanyattachmentsoraccessories
requiredtooperatethemachineproperlyand
safely.
FuelSafety
Toavoidpersonalinjuryorpropertydamage,use
extremecareinhandlingfuel.Fuelvaporsare
ammableandexplosive.
Extinguishallcigarettes,cigars,pipes,andother
sourcesofignition.
Useonlyanapprovedfuelcontainer.
Donotremovethefuelcaporaddfueltothefuel
tankwhiletheengineisrunningorwhilehot.
Donotrefuelthemachineindoors.
Donotstorethemachineorfuelcontainerwhere
thereisanopename,spark,orpilotlight,such
asonawaterheateroronotherappliances.
14
Donotllcontainersinsideavehicleoronatruck
ortrailerbedwithaplasticliner.Alwaysplace
containersontheground,awayfromyourvehicle
beforelling.
Removetheequipmentfromthetruckortrailer
andrefuelitwhileitisontheground.Ifthisisnot
possible,thenrefuelfromaportablecontainer
ratherthanafuel-dispensernozzle.
Donotoperatethemachinewithouttheentire
exhaustsysteminplaceandinproperworking
condition.
Keepthefuel-dispensernozzleincontactwith
therimofthefueltankorcontaineropeningat
alltimesuntilfuelingiscomplete.Donotusea
nozzlelock-opendevice.
Ifyouspillfuelonyourclothing,changeyour
clothingimmediately.Wipeupanyfuelthatspills.
Neveroverllthefueltank.Replacethefuelcap
andtightenitsecurely.
Storefuelinanapprovedcontainerandkeepit
outofthereachofchildren.Neverbuymorethan
a30-daysupplyoffuel.
Donotllthefueltankcompletelyfull.Addfuelto
thefueltankuntilthelevelis6to13mm(1/4to
1/2inch)belowthebottomofthellerneck.This
emptyspaceinthetankallowsfueltoexpand.
Avoidprolongedbreathingofvapors.
Keepyourfaceawayfromthenozzleandgas
tankopening.
Avoidcontactwithskin;washoffspillswith
soapandwater.
RecommendedFuel
Forbestresults,useonlyclean,fresh(lessthan
30daysold),unleadedgasolinewithanoctane
ratingof87orhigher((R+M)/2ratingmethod).
Ethanol:Gasolinewithupto10%ethanol
(gasohol)or15%MTBE(methyltertiarybutyl
ether)byvolumeisacceptable.Ethanoland
MTBEarenotthesame.Gasolinewith15%
ethanol(E15)byvolumeisnotapprovedforuse.
Neverusegasolinethatcontainsmorethan
10%ethanolbyvolume,suchasE15(contains
15%ethanol),E20(contains20%ethanol),orE85
(containsupto85%ethanol).Usingunapproved
gasolinemaycauseperformanceproblemsand/or
enginedamagewhichmaynotbecoveredunder
warranty.
Donotusegasolinecontainingmethanol.
Donotstorefueleitherinthefueltankorfuel
containersoverthewinterunlessyouuseafuel
stabilizer.
Donotaddoiltogasoline.
Using
Stabilizer/Conditioner
Useafuelstabilizer/conditionerinthemachineto
providethefollowingbenets:
Keepsfuelfreshduringstorageof90daysorless
(drainthefueltankwhenstoringthemachinefor
morethan90days)
Cleanstheenginewhileitruns
Eliminatesgum-likevarnishbuildupinthefuel
system,whichcauseshardstarting
Important:Donotusefueladditives
containingmethanolorethanol.
Addthecorrectamountoffuelstabilizer/conditioner
tothefuel.
Note:Afuelstabilizer/conditionerismost
effectivewhenmixedwithfreshfuel.T ominimize
thechanceofvarnishdepositsinthefuelsystem,
usefuelstabilizeratalltimes.
FillingtheFuelTank
1.Parkthemachineonlevelground.
2.Shutofftheengineandengagetheparking
brake.
3.Cleanaroundthefuel-tankcap.
4.Fillthefueltanktothebottomofthellerneck
(Figure8).
15
Note:Donotllthefueltankcompletelyfull.
Theemptyspaceinthetankallowsthegasoline
toexpand.
g036751
Figure8
CheckingtheEngine-Oil
Level
Beforeyoustarttheengineandusethemachine,
checktheoillevelintheenginecrankcase;referto
CheckingtheEngine-OilLevel(page37).
BreakinginaNewMachine
Newenginestaketimetodevelopfullpower.Mower
decksanddrivesystemshavehigherfrictionwhen
new,placingadditionalloadontheengine.Allow
40to50hoursofbreak-intimefornewmachinesto
developfullpowerandbestperformance.
Usingthe
Rollover-ProtectionSystem
(ROPS)
WARNING
Toavoidinjuryordeathfromrollover:keep
therollbarinthefullyraisedlockedposition
andusetheseatbelt.
Ensurethattheseatissecuredtothe
machine.
WARNING
Thereisnorolloverprotectionwhentheroll
barisinthedownposition.
Lowertherollbaronlywhenabsolutely
necessary.
Donotweartheseatbeltwhentherollbar
isinthedownposition.
Driveslowlyandcarefully.
Raisetherollbarassoonasclearance
permits.
Checkcarefullyforoverheadclearances
(i.e.,branches,doorways,electricalwires)
beforedrivingunderanyobjectsanddo
notcontactthem.
Important:Lowertherollbaronlywhen
absolutelynecessary.
1.Tolowertherollbar,applyforwardpressureto
theupperpartoftherollbar.
2.Pullbothknobsoutandrotatethem90degrees
sotheyarenotengaged(Figure9).
3.Lowertherollbartothedownposition(Figure
9).
16
g036746
Figure9
1.Rollbarintheupright
position
4.RotatetheROPSknob90
degrees.
2.ROPSknobinthelatched
position
5.ROPSknobinthe
unlatchedposition
3.PulltheROPSknobout.6.Rollbarinthefolded
position
4.Toraisetherollbar,raisetherollbartothe
operatingpositionandrotatetheknobsuntil
theymovepartiallyintothegrooves(Figure9).
5.Raisetherollbartothefulluprightpositionwhile
pushingontheupperrollbarsothatthepins
snapintopositionwhentheholesalignwiththe
pins(Figure9).
Important:Alwaysusetheseatbeltwiththe
rollbarintheraisedposition.
6.Pushontherollbarandensurethatbothpins
areengaged.
ThinkSafetyFirst
Pleasereadallsafetyinstructionsandsymbolsinthe
safetysection.Knowingthisinformationcouldhelp
youorbystandersavoidinjury.
DANGER
Operatingthemachineonwetgrassorsteep
slopescancauseslidingandlossofcontrol.
Donotoperateonslopesgreaterthan15
degrees.
Reducespeedanduseextremecautionon
slopes.
Donotoperatethemachinenearwater.
DANGER
Wheelsdroppingoveredgescancause
rollovers,whichmayresultinseriousinjury,
death,ordrowning.
Donotoperatethemachineneardrop-offs.
DANGER
Operatingthemachinewhiletherollbaris
downmayleadtoseriousinjuryordeathin
theeventofarollover.
Alwayskeeptherollbarinthefullyraisedand
lockedpositionandusetheseatbelt.
g000963
Figure10
1.SafeZone—usethe
machinehereonslopes
lessthan15degreesor
atareas.
3.Water
2.DangerZone—usea
walk-behindmowerand/or
ahandtrimmeronslopes
greaterthan15degrees
andneardrop-offsor
water.
17
CAUTION
Thismachineproducessoundlevelsin
excessof85dBAattheoperatorsearand
cancausehearinglossthroughextended
periodsofexposure.
Wearhearingprotectionwhenoperatingthis
machine.
Useprotectiveequipmentforyoureyes,ears,hands,
feet,andhead.
g009027
Figure11
1.Weareyeprotection.2.Wearhearingprotection.
UsingtheSafety-Interlock
System
WARNING
Ifsafety-interlockswitchesaredisconnected
ordamaged,themachinecouldoperate
unexpectedlycausingpersonalinjury.
Donottamperwiththeinterlockswitches.
Checktheoperationoftheinterlock
switchesdaily,andreplaceanydamaged
switchesbeforeoperatingthemachine.
Understandingthe
Safety-InterlockSystem
Thesafety-interlocksystemisdesignedtopreventthe
enginefromstartingunless:
Theparkingbrakeisengaged.
Theblade-controlswitch(PTO)isdisengaged.
Themotion-controlleversareintheNEUTRAL-LOCK
position.
Thesafety-interlocksystemisalsodesignedtoshutoff
theenginewhenthetractioncontrolsaremovedfrom
thelockedpositionwiththeparkingbrakeengagedor
ifyourisefromtheseatwhenthePTOisengaged.
Thehourmeterhassymbolstonotifytheuserwhen
theinterlockcomponentisinthecorrectposition.
Whenthecomponentisinthecorrectposition,a
trianglelightsupinthecorrespondingsquare.
g187670
Figure12
1.Triangleslightupwhentheinterlockcomponentsareinthe
correctposition
TestingtheSafety-Interlock
System
ServiceInterval:Beforeeachuseordaily
Testthesafety-interlocksystembeforeyouusethe
machineeachtime.Ifthesafetysystemdoesnot
operateasdescribedbelow,haveanAuthorized
ServiceDealerrepairthesafetysystemimmediately.
1.Sittingontheseat,engagetheparkingbrake
andmovetheblade-controlswitch(PTO)tothe
ONposition.Trystartingtheengine;theengine
shouldnotstart.
2.Sittingontheseat,engagetheparkingbrake
andmovetheblade-controlswitch(PTO)tothe
OFFposition.Moveeithermotion-controllever
(outoftheNEUTRAL-LOCKposition).Trystarting
theengine;theengineshouldnotstart.Repeat
fortheothercontrollever.
3.Sittingontheseat,engagetheparkingbrake,
movetheblade-controlswitch(PTO)totheOFF
position,andmovethemotion-controllevers
totheNEUTRAL-LOCKposition.Nowstartthe
engine.Whiletheengineisrunning,disengage
theparkingbrake,engagetheblade-control
switch(PTO),andriseslightlyfromtheseat;the
engineshouldshutoff.
4.Sittingontheseat,engagetheparkingbrake,
movetheblade-controlswitch(PTO)totheOFF
position,andmovethemotion-controllevers
totheNEUTRAL-LOCKposition.Nowstartthe
engine.Whiletheengineisrunning,center
eithermotioncontrolandmove(forwardor
reverse);theengineshouldshutoff.Repeatfor
othermotioncontrol.
5.Sittingontheseat,disengagetheparkingbrake,
movetheblade-controlswitch(PTO)totheOFF
position,andmovethemotion-controllevers
totheNEUTRAL-LOCKposition.Trystartingthe
engine;theengineshouldnotstart.
18
PositioningtheSeat
Theseatcanmoveforwardandbackward(Figure13).
Positiontheseatwhereyouhavethebestcontrolof
themachineandaremostcomfortable.
g028272
Figure13
ChangingtheSeat
Suspension
Theseatisadjustabletoprovideasmoothand
comfortableride.Positiontheseatwhereyouare
mostcomfortable.
Toadjustit,turntheknobinfronteitherdirectionto
providethebestcomfort(Figure14).
g024881
Figure14
1.Seat-suspensionknob
UsingAttachmentsand
Accessories
UseonlyT oroapprovedattachmentsandaccessories.
Ifmorethanoneaccessory-mountkit(i.e.bucketkitor
universalmountkit)isaddedtoanyofthe4locations
showninFigure15,addafront-weightkit.Contact
yourauthorizedservicedealerforthefront-weightkit.
g037417
Figure15
1.Addafront-weightkitwhen2ormoreaccessory-mountkits
areinstalledatthesepositions.
DuringOperation
DuringOperationSafety
GeneralSafety
Theowner/operatorcanpreventandisresponsible
foraccidentsthatmaycausepersonalinjuryor
propertydamage.
Wearappropriateclothing,includingeye
protection;slip-resistant,substantialfootwear;and
hearingprotection.Tiebacklonghairanddonot
wearjewelry.
Donotoperatethemachinewhileill,tired,or
undertheinuenceofalcoholordrugs.
Nevercarrypassengersonthemachineandkeep
bystandersandpetsawayfromthemachine
duringoperation.
Operatethemachineonlyingoodvisibilitytoavoid
holesorhiddenhazards.
Avoidmowingonwetgrass.Reducedtraction
couldcausethemachinetoslide.
Ensurethatalldrivesareinneutral,theparking
brakeisengaged,andyouareintheoperating
positionbeforeyoustarttheengine.
Keepyourhandsandfeetawayfromthecutting
units.Keepclearofthedischargeopeningatall
times.
Lookbehindanddownbeforebackinguptobe
sureofaclearpath.
19
Usecarewhenapproachingblindcorners,shrubs,
trees,orotherobjectsthatmayobscureyour
vision.
Donotmowneardrop-offs,ditches,or
embankments.Themachinecouldsuddenlyroll
overifawheelgoesovertheedgeoriftheedge
givesway.
Stopthebladeswheneveryouarenotmowing.
Stopthemachineandinspectthebladesafter
strikinganobjectorifthereisanabnormal
vibrationinthemachine.Makeallnecessary
repairsbeforeresumingoperation.
Slowdownandusecautionwhenmakingturns
andcrossingroadsandsidewalkswiththe
machine.Alwaysyieldtheright-of-way.
Disengagethedrivetothecuttingunitandshut
offtheenginebeforeadjustingtheheightof
cut(unlessyoucanadjustitfromtheoperating
position).
Neverrunanengineinanareawhereexhaust
gasesareenclosed.
Neverleavearunningmachineunattended.
Beforeleavingtheoperatingposition(including
toemptythecatchersortounclogthechute),do
thefollowing:
Stopthemachineonlevelground.
Disengagethepowertake-offandlowerthe
attachments.
Engagetheparkingbrake.
Shutofftheengineandremovethekey.
Waitforallmovingpartstostop.
Donotoperatethemachinewhenthereistherisk
oflightning.
Donotusethemachineasatowingvehicle.
Donotchangethegovernorspeedoroverspeed
theengine.
Useaccessoriesandattachmentsapprovedby
Toroonly.
RolloverProtectionSystem
(ROPS)Safety
Donotremovetherollbarfromthemachine.
Ensurethattheseatbeltisattachedandthatyou
canreleaseitquicklyinanemergency.
Alwayswearyourseatbeltwhentherollbarisup.
Checkcarefullyforoverheadobstructionsanddo
notcontactthem.
Keeptherollbarinsafeoperatingconditionby
thoroughlyinspectingitperiodicallyfordamage
andkeepingallthemountingfastenerstight.
Replaceadamagedrollbar.Donotrepairoralter
it.
SlopeSafety
Slowdownthemachineanduseextracareon
hillsides.Travelupanddownonhillsides.Turf
conditionscanaffectthestabilityofthemachine.
Avoidturningthemachineonslopes.Ifyoumust
turnthemachine,turnitslowlyandgradually
downhill,ifpossible.
Donotturnthemachinesharply.Usecarewhen
reversingthemachine.
Useextracarewhileoperatingthemachinewith
attachments;theycanaffectthestabilityofthe
machine.
OperatingtheParking
Brake
Alwaysengagetheparkingbrakewhenyoustopthe
machineorleaveitunattended.
EngagingtheParkingBrake
WARNING
Theparkingbrakemaynotholdthemachine
parkedonaslopeandcouldcausepersonal
injuryorpropertydamage.
Donotparkonslopesunlessthewheelsare
chockedorblocked.
g036754
Figure16
20
  • Page 1 1
  • Page 2 2
  • Page 3 3
  • Page 4 4
  • Page 5 5
  • Page 6 6
  • Page 7 7
  • Page 8 8
  • Page 9 9
  • Page 10 10
  • Page 11 11
  • Page 12 12
  • Page 13 13
  • Page 14 14
  • Page 15 15
  • Page 16 16
  • Page 17 17
  • Page 18 18
  • Page 19 19
  • Page 20 20
  • Page 21 21
  • Page 22 22
  • Page 23 23
  • Page 24 24
  • Page 25 25
  • Page 26 26
  • Page 27 27
  • Page 28 28
  • Page 29 29
  • Page 30 30
  • Page 31 31
  • Page 32 32
  • Page 33 33
  • Page 34 34
  • Page 35 35
  • Page 36 36
  • Page 37 37
  • Page 38 38
  • Page 39 39
  • Page 40 40
  • Page 41 41
  • Page 42 42
  • Page 43 43
  • Page 44 44
  • Page 45 45
  • Page 46 46
  • Page 47 47
  • Page 48 48
  • Page 49 49
  • Page 50 50
  • Page 51 51
  • Page 52 52
  • Page 53 53
  • Page 54 54
  • Page 55 55
  • Page 56 56
  • Page 57 57
  • Page 58 58
  • Page 59 59
  • Page 60 60
  • Page 61 61
  • Page 62 62
  • Page 63 63
  • Page 64 64
  • Page 65 65
  • Page 66 66
  • Page 67 67
  • Page 68 68

Toro 122cm TITAN HD 1500 Series Riding Mower User manual

Category
Lawnmowers
Type
User manual
This manual is also suitable for

Ask a question and I''ll find the answer in the document

Finding information in a document is now easier with AI