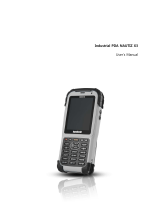
User‟s Manual
Nautiz X3

NAUTIZ X3
User Manual
Product Notices
©2010 by Handheld Group AB. All rights reserved.
No part of this manual can be reproduced or transmitted in any form or by any means,
electronic, mechanical or otherwise, without prior written consent from Handheld. The
contents of this manual are subject to change without prior notice.
Software will be provided literally “as is." All software including firmware, applications,
etc. have been appropriately licensed. Handheld assigns the user with a non-transferable,
non-exclusive license for the software supplied. Users may not transfer the license to any
third party, in the form of sublicensing or by other means, except in those instances
outlined below. Full or partial modification, merging and integration of the software is
prohibited unless explicitly allowed under copyright law. Hereby, the user shall agree to
not violate laws regarding decompilation, disassembly, decoding and reverse engineering
of all or part of the licensed software without the prior consent of Handheld.
Handheld has the right to modify the product or the software in order to improve the
stability, features and design of the product.
Handheld does not accept any liability whatsoever for any incidental or consequential loss
or damage arising from the use of applications, products, circuits or other software
mentioned in this manual.
Handheld and its logo and Nautiz and its logo are trademarks. Microsoft, Windows CE,
Windows Mobile, Bluetooth, Wi-Fi, GSM, etc. are the property of their respective owners.
Nautiz ™
http://www.Nautiz.com/x3

CONTENTS
Technical Support
Safety Information
About the Product
Unpacking Product
Status Indicators
Components and Buttons
Working with Your Unit
Inserting/Removing SIM Card
Battery Information
Performing Initial Startup
Attaching Hand Strap
Installing Screen Protector
Using Expansion Port
Entering Data/Using Stylus Pen
Password Protecting
Resetting
Memory
Settings/Applications
Connections
USB Port
Connecting to a PC
Bluetooth
Wi-Fi (802.11)
Wireless WAN
Camera
Barcode Scanner
GPS
Phone Features
Calling
Text Messaging
Troubleshooting
Caring for your Unit/Safe Use
Environmental Specification
Hardware Specification
Regulatory Information

TECHNICAL SUPPORT
The contents of this manual are based upon the current version of Windows Mobile 6.5
running on NAUTIZ X3.
The illustrations contained in this manual may differ from the actual screen images for
your device.
Please contact your reseller for product support.
If you discover any problems with the product, please contact Handheld‟s Technical
Support Team on +46 510 54 71 70.
Alternatively, you can view the FAQ by visiting our website at
http://www.handheldgroup.com for more information.
When making an inquiry, please have the following information at hand:
1. Serial number of the product
2. Model number
3. Supplier information, user contacts
Handheld does not accept liability for any damages resulting from improper return
packaging when the user sends the product to Handheld.

SAFETY INSTRUCTIONS
The following information is for the safety of users and to prevent the product from being damaged.
Please read the followings carefully and use the product accordingly.
Power
In the event of abnormal sounds, smells, or smoke, please contact Customer Support after unplugging the product
from the power outlet and removing the battery.
Do not touch the power plug with wet hand.
Do not charge the battery during a lightening storm, and unplug the cradle from the power outlet.
When the surface of the product is wet, turn off the product and remove the battery from the product, then wipe
off water with a cloth or a dry towel before use.
Use the cradle when you charge the battery, if possible.
Communication
Do not use PDA or make call without a Bluetooth device while driving a car
Do not touch the product or its power plug with wet hand or you may get shocked.
Turn off the product in aircraft or in hospital. The electromagnetic waves of the product may interfere with
electric aviation devices or medical equipment.
Turn off the product in the areas exposed to the risk of explosion.
It is safest to power off the product while gassing up a car.
Be wary of using a headset (earphones). The use of headphones at high volume for prolonged periods of time
may impair hearing ability.
If the product has features like laser or flash, do not level them at the eyes of people or animals. Laser and flash
can impair eyesight.

Product
When you use the battery for the first time, fully charge before using the device
Before resetting the device, backup programs and data in advance.
Before proceeding with software reset, backup programs and data to a safer place. As the saved data will be safe,
data or files currently being used may be deleted.
Do not place any heavy object on the product.
If the touch screen gets dirty with foreign materials, clean it before use.
When using the touch screen, do not use sharp objects (pens, steel wires, and screwdrivers), and only use the
stylus and dedicated accessories coming with the products
Only use the provided batteries, power adapter, and cradle.
Handheld is not responsible for damages to the unit resulting from other software installed by a user after
purchasing the product.
Do not allow the surface of a battery to come in contact with metal objects.
Although the product is fully ruggedized, take care to not purposely damage the unit through extreme shock, or
immersion in water. Refer to product specifications.
Installation and Storage
Do not store the product inside a car to avoid possible theft.
Keep PDA and its stylus out of the reach of children to avoid injury.
If PDA is not going to be used for prolonged periods of time, insert it into the cradle for continuous power supply.
Warranty
Please do not arbitrarily attempt to disassemble, repair, and modify the main unit of the product. In such cases,
warranty of the product will be invalidated.

ABOUT THE PRODUCT
UNPACKING PRODUCT
The images in this user manual may not reflect the color and shape of the actual product.
Please check to make sure there are no missing components. Contact our Customer Care
Center if you wish to purchase any additional or optional products
Main Unit Hand strap Stylus and Stylus Lanyard
Li-ion Ion Battery Travel Charger
Data Sync Cable Earphones

STATUS INDICATORS
Following are some of the status indicators seen on your unit.
The backup battery levels are low.
More than one instant message
received.
More than one e-mail or text
message received.
More than one voice message
received.
The speakerphone is on.
There are more notifications than
those shown. Tap this icon to display the
rest of the notifications.
Notification of upcoming
appointments.
Connected.
Not connected.
Synchronisation in progress.
Wi-Fi is available.
Wi-Fi connected.
HSDPA is available.
3G is available.
GPRS is available.
EGPRS is available.
Missed calls.
Dialling without a SIM Card.
Call in progress.
Calls are being forwarded.
Call placed on hold
Antenna/Signal icons: Connected to
a wireless network and signal strength is
okay.
Antenna/Signal icons: Not connected
to a wireless network
Antenna/Signal icons: No service or
signal search is not available
Connecting to HSDPA.
HSDPA is in use.
Connecting to 3G.
3G is in use.
Connecting to GPRS.
GPRS is in use.
Roaming in progress.
No SIM card installed.
All sound is on
All sound is off
Vibration mode is on

Main battery is charging.
Main battery is fully charged
Main battery is charged sufficiently
for use.
Main battery is half full
Main battery is low
Main battery is very low

COMPONENTS AND BUTTONS
Front View and Keypad Buttons
Top View
Ref
Component
Description
1
Speaker
Omits sound when using cellular function
2 Upper
Indication LED´s
Flashes slow blue to indicate cellular network coverage
Flashes quick blue while searching for cellular networks
2 Lower
Power LED
Turned off means battery is not charging
Red indicated battery is charging
Green indicates charging is complete
3
Scan Key
Hold down to enable scanner
4
Power Button
Hold down to turn device on/off
6
Reset Button
Use stylus to trigger reset
7
Microphone
Audio for cellular function or record
8
20Pin Universal
Connector
Charging, USB Data, Handsfree.
9
Volume Keys
Use to turn volume up and down
10
Misc. Keys
(←)Backspace (1aA/FN)key (keypad function
change)

Component
Description
Laser Scanner
Used to read 1D barcodes
Imager Scanner
Used to capture data in 2D barcodes
Ref
Component
Description
12
Stylus Pen
Use to tap touch screen to make selections
13
Camera and Flash
Takes still pictures and records video clips, flash (above)
provides light for pictures
14
Hand Strap Holder
The hand strap attaches here
15
Battery Latch
Keeps battery cover in place, flip to unlock to release battery
a
Micro SD Card Slot
Micro SD is used to store data
b
U-SIM Card Slot
SIM Card enables cellular function

WORKING WITH YOUR UNIT
INSERTING/REMOVING SIM CARD
If you wish to enable cellular functions insert your SIM card while battery is not attached
as seen in the diagram below.
Insert:
1. 2.
You can remove the SIM card anytime you do not wish to use cellular function as seen
below.
Remove:
1. 2.
After installing a SIM card for the first time or after replacing it,
1. Turn on the device.
2. Press tap on Wireless Manager on Today Screen.
3. Make sure the phone is turned on.
4. Make a call for checking cellular connection.

BATTERY INFORMATION
Your unit comes with one li-ion Polymer Battery. Insert the battery as seen below:
Insert:
1. 2.
Remove:
1. 2.
Before using the battery for the first time, please fully charge the battery until yellow
LED light is on, which indicates charging status. See power LED description on page 9
for all LED indicators relating to battery. Use only handheld approved chargers and
cables. In order to charge the backup battery inside the product, we recommend that
you charge the battery more than 12 hours before using the product for the first time.
Charging may take longer if the device is turned on.
Charging temperature ranges from 0°C to 40°C (32°F to 104°F)
Checking remaining battery power
To check the charging status of the NAUTIZ X3: Tap Start > Settings > Systems >
Power and open the Power Screen.
Charge battery fully before using device for the first time.

You can select automatic power-off after a certain period of time by tapping the
Advanced tab, this will prolong battery life.
Optimizing battery life
Please follow the battery saving instructions below:
1. Leave the NAUTIZ X3 connected to the charger when it is not in use OR remove the
battery.
2. Set the device to power down when it has not been used for a certain period of time.
3. Set the backlight to power down when it has not been used for a certain period of
time.
4. Turn off all wireless tasks when the device is not in use.
5. The device will charge faster if turned off.
High usage of camera, barcode scanner, GPS, expansion ports or using device in
extreme temperatures will also shorten battery life.
Power Settings:
Set the device to power down when it has not been used for a certain period of time.
1. Start > Settings > Power Icon > Advanced tab.
2. On Battery Power: Turn off the screen if the device has not been used for
a. (When battery power is used: turn the device off when it has not been
used for the following time periods.)
b. Select the X option and choose a time period between 1 and 5 minutes
from the dropdown menu.
3. Tap OK.
Backlight Settings:

Set the backlight to power down when it has not been used for a certain period of time.
1. Start > Settings > System > Backlight Icon > Battery Power tab.
2. On Battery Power: Disable the backlighting if the device has not been used for
a. (When battery power is used: turn the backlighting off when it has not
been used for the following time periods.)
b. Select the X option and choose a time period between 1 and 5 minutes
from the dropdown menu.
3. Tap OK.
Turn off all wireless radios when the they are not being used
Microsoft Windows Mobile 6.5 includes the Wireless Manager that allows you to control
all the wireless functions of the device in one place (this includes activating, deactivating
and checking the status of the wireless connections).
To open the Wireless Manager, tap Wireless Manager or the Connectivity Icon on the
home screen then select Communication Icon, then Wireless Manager
Press the specified button to activate or deactivate the wireless network.
Press the ALL button to activate or deactivate all the wireless connections.
Press Menu to configure connectivity settings.
PERFORMING INITIAL STARTUP
When turning on your device for the very first time, you will be guided through a setup
process.
1. Make sure that your device is either connected to AC power or the battery has power.

2. Press the power button to turn on your device. The backlight of the keypad will light
up and, after a few seconds, the setup screen appears.
3. Follow the on-screen instructions to complete the setup wizard.
4. For models with the phone function only: If a SIM card has been inserted and the
mobile phone network operator (or you) has set the PIN, you will be prompted to enter
the PIN. Enter the PIN and tap Enter.
If a SIM card has not been inserted yet, a message of an invalid or missing SIM card will
appear on the screen. You can tap Cancel to continue the startup procedure.
5.After the setup is completed, the Today Screen appears. You can now use your device.
ATTACHING HAND STRAP
Adjust the Hand Strap for convenient and comfortable use of the device
1. Connect the Hand Strap to the end of the device, underneath the battery cover.
2. Adjust the length of the Hand Strap by passing the Velcro through the hole.
3. Press both side of strap together to affix.
INSTALLING SCREEN PROTECTOR
Use of a screen protector is high encouraged. Screen damage caused by misuse of screen
protector may not be covered under warranty
The protective screen cover is installed at the factory to minimise damage that may
occur during shipment. Remove the protective screen cover before use. After removing
the screen cover, attach protective film to the screen.
USING SD SLOT
The MicroSD card slot is used for additional data storage and can be used to transfer
information. The slot is located underneath the battery.
It is recommended to follow the appropriate ESD preventative measures relating to
static electricity.
Take care when inserting and removing the MicroSD card as
damage from static electricity could occur.

1. 2.
ENTERING DATA/USING STYLUS PEN
When entering data using the keypad, you can use just one hand or both hands
Using Stylus Pen
Use can use the stylus to navigate and select objects on the screen. Pull the stylus out of
the slot and extend it for ease of use. Store it in the slot when not in use.
Tap
Touch the screen once with the stylus to open items and select options.
Drag
Hold the stylus on the screen and drag across the screen to select text and images. Drag in
a list to select multiple items.
Tap and hold
Tap and hold the stylus on an item to see a list of actions available for that item. On the
shortcut menu that appears, tap the action you want to perform.

PASSWORD PROTECTING/LOCKING
Password Protecting
Password protecting your device will prevent unauthorized use.
To password protect go to Start > Setting > Lock > Password tab.
Password window and password tab Enter the password to unlock device
1. Activate password protection by checking confirm column, if the device is not going
to be used for a specified period of time.
2. Select time value that forces protective function to be activated, if the device is not
used for a specific period of time from the drop-down menu.
3. Password type: Select simple PIN or a complicated PIN of letters and numbers.
a. Simple passwords can be created by entering 4 digit numbers.
b. How to create a complicated password
i. Password: Enter 7 digit numbers to create a complicated password. A
complicated password must be composed of more than 7 characters, including
at least 3 elements out of uppercase letters, lowercase letters, numbers, and a
punctuation mark.
4. Confirm: Reenter the password.
5. Tap Confirm.
6. If you want to enter a hint to easily recall the password in the future, tap Hint column
a. Enter a hint for recalling the password into the text box.
Do not use other tools except for the stylus provided by Handheld in order
to avoid damage on the screen.

7. Tap Confirm.
When a user tries to access NAUTIZ X3 after a certain period of unused time, a password
screen will be prompted. This window is also prompted when NAUTIZ X3 is connected
with a host computer via the cradle or via the communication cable.
Locking
You can lock the device to prevent unintended pressing of buttons or activation of screen.
When locked, NAUTIZ X3 will not respond to input from the screen or keyboard.
To lock NAUTIZ X3, tap Lock icon that looks like a lock beneath the Start.
To unlock NAUTIZ X3, slide the lock button to the left or to the right.
RESETTING
There are two kinds of resets: Soft rest and hard reset. A soft reset will restart NAUTIZ
X3 after closing all running programs. A hard reset, also, restarts NAUTIZ X3 along with
resetting the clock. The data stored in flash memory or storage card will remain intact.
If NAUTIZ X3 is not working properly, perform a soft reset first. If the problem persists,
perform a hard reset.
How to perform a soft reset:
Press the reset button at the front with a stylus.
Emergency phone calls can be made even when device is locked

How to perform a hard reset:
Quickly press the reset button at front of the device with a stylus while pressing power
button at the same time.
Please note that a hard reset deletes all programs, documents and settings in the memory
(RAM). The manufacturer takes no responsibility for loss of data or programs. Therefore,
you should back up critical data and programs before making a hard reset of the terminal.
How to perform Suspend mode and Wakeup mode
Press power button at top of front side for 2 second.
Turning backlight on and off
Press power button at the front of the device for a short while.
MEMORY
Copy the data in the Nautiz X3 and keep it in a separate place. Data stored in the Nautiz
X3 may be deleted during repair or upgrade. So make sure to take a back up of important
data. (Ringtones, sounds, text or voice messages and font sets are part of the standard
software.)
Removing the memory card or shutting off the power while using a memory card may
result in loss of data, or malfunction of the card and the terminal.
Once a program or file is deleted it cannot be recovered. Windows Mobile 6.5 does not
support a recycle bin application.
How to Back Up Data
There are many ways data can be transferred or backed up.
Critical data can be backed up by:
1. Using the data sync cable to connect and transfer info from device to PC.
2. Downloading and storing information on the MicroSD card or transferring it to a
PC.
3. Using Bluetooth to connect to another device (wirelessly).
SETTINGS/APPLICATIONS
Home Screen
The Home Screen showing the list of applications and information status indicating bar is
scrollable. The application and its additional information are highlighted in Information
status bar.
Documents not saved prior to resetting may be lost
Page is loading ...
Page is loading ...
Page is loading ...
Page is loading ...
Page is loading ...
Page is loading ...
Page is loading ...
Page is loading ...
Page is loading ...
Page is loading ...
Page is loading ...
Page is loading ...
Page is loading ...
Page is loading ...
Page is loading ...
Page is loading ...
Page is loading ...
Page is loading ...
Page is loading ...
Page is loading ...
Page is loading ...
Page is loading ...
Page is loading ...
Page is loading ...
Page is loading ...
Page is loading ...
Page is loading ...
Page is loading ...
Page is loading ...
Page is loading ...
Page is loading ...
Page is loading ...
Page is loading ...
Page is loading ...
Page is loading ...
Page is loading ...
Page is loading ...
Page is loading ...
Page is loading ...
Page is loading ...
Page is loading ...
Page is loading ...
Page is loading ...
Page is loading ...
Page is loading ...
Page is loading ...
/