Page is loading ...

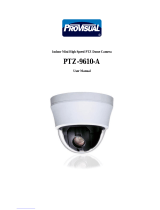
High Speed Dome User’s Manual

2
Table of contents
1 FEATURES AND FUNCTIONS ....................................................................................8
1.1 Features ...............................................................................................................................................................8
1.2 Function................................................................................................................................................................8
1.2.1 On-Screen Menu............................................................................................................................................8
1.2.2 Support multiple protocols function .............................................................................................................8
1.2.3 Proportional Pan and Tilt...............................................................................................................................8
1.2.4 On-screen Tips ...............................................................................................................................................8
1.2.5 Preset Setup and Recall ...............................................................................................................................8
1.2.6 Auto Scan........................................................................................................................................................8
1.2.7 Auto Touring ...................................................................................................................................................8
1.2.8 Auto Pattern ....................................................................................................................................................9
1.2.9 Window Blanking............................................................................................................................................9
1.2.10 Action on Alarm .........................................................................................................................................9
1.2.11 Auto Flip and IS (Camera support needed)...........................................................................................9
1.2.12 Self-diagnosis ............................................................................................................................................9
1.2.13 Day/Night Mode.........................................................................................................................................9
1.2.14 Auto Focus .................................................................................................................................................9
1.2.15 Backlight Compensation...........................................................................................................................9
1.2.16 Pan Tilt and Zoom.....................................................................................................................................9
1.2.17 3D Location ................................................................................................................................................9
1.2.18 Idle Status...................................................................................................................................................9
1.3 Specification ......................................................................................................................................................10
2 DOME FUNCTION SETUP ........................................................................................ 11
2.1 Dome Address...................................................................................................................................................11
2.2 PTZ Control........................................................................................................................................................11
2.2.1 Pan and Tilt Movement ...............................................................................................................................11
2.2.2 Proportional Pan and Tilt.............................................................................................................................11
2.2.3 Auto Flip.........................................................................................................................................................11
2.2.4 3D Location...................................................................................................................................................11

3
2.3 Lens Control ......................................................................................................................................................11
2.3.1 Lens Control..................................................................................................................................................11
2.3.2 Focus Control ...............................................................................................................................................11
2.3.3 Aperture Control ...........................................................................................................................................11
2.3.4 Auto Backlight Compensation ....................................................................................................................12
2.3.5 Auto White Balance .....................................................................................................................................12
2.3.6 Day/Night Switch..........................................................................................................................................12
2.4 Preset and Recall..............................................................................................................................................12
2.5 Auto Touring ......................................................................................................................................................12
2.6 Auto Scan...........................................................................................................................................................12
2.7 Auto Pattern.......................................................................................................................................................12
2.8 Window Blanking (Privacy Mask) ...................................................................................................................12
2.9 Alarm Input and Output....................................................................................................................................12
3 PROTOCOL、BAUD RATE、ADDRESS SETUP...................................................... 13
3.1 Protocol and Baud Rate Setup .......................................................................................................................13
3.2 Address Setup...................................................................................................................................................14
4 CABLE CONNECTION............................................................................................... 16
4.1 RS485 and Power Cable Connection ............................................................................................................16
4.2 Alarm Cable Connection...............................................................................................................................16
4.2.1 System Layout..............................................................................................................................................17
4.2.2 Alarm Connection.........................................................................................................................................18
4.2.3 Keyboard Connection..................................................................................................................................19

4
5 INSTALLATION .......................................................................................................... 21
5.1 Surface Dome Installation............................................................................................................................21
5.2 In-ceiling Dome Installation .........................................................................................................................24
5.3 Pendant Dome Installation...........................................................................................................................25
6 MENU......................................................................................................................... 30
6.1 Screen Menu Index.........................................................................................................................................30
6.2 System Information........................................................................................................................................32
6.3 Main Menu ........................................................................................................................................................32
6.3.1 For DH-SD.....................................................................................................................................................32
6.3.2 For PELCO-P/D............................................................................................................................................33
6.4 Menu Operation...............................................................................................................................................33
6.4.1 Dome Information Setup .............................................................................................................................33
6.4.2 Camera Setup...............................................................................................................................................35
6.4.3 Dome Function Setup..................................................................................................................................35
6.4.4 Alarm Setup ..................................................................................................................................................41
6.4.5 Device Control ..............................................................................................................................................41
6.5 Dome abnormal Phenomenon Operation.................................................................................................42
6.5.1 Restore to Factory Default Setup ..............................................................................................................42
6.5.2 PTZ Movement is not so Smoothly............................................................................................................42
6.5.3 Focus is Blur .................................................................................................................................................42
7 DVR CONNECTION AND SETUP ............................................................................. 43
7.1 Cable Connection...........................................................................................................................................43
7.2 PTZ Setup.........................................................................................................................................................43
7.2.1 3D intelligent positioning Key .....................................................................................................................45
7.3 Preset/ Patrol/Pattern/Scan Function........................................................................................................45
7.3.1 Preset Setup .................................................................................................................................................46
7.3.2 Activate Preset .............................................................................................................................................46
7.3.3 Patrol Setup (Tour setup)............................................................................................................................47
7.3.4 Activate Patrol (tour) ....................................................................................................................................47
7.3.5 Pattern Setup................................................................................................................................................47
7.3.6 Activate Pattern Function............................................................................................................................47
7.3.7 Auto Scan Setup ..........................................................................................................................................47

5
7.3.8 Activate Auto Scan.......................................................................................................................................48
7.4 Dome Menu Control.......................................................................................................................................48
8 NETWORK KEYBOARD OPERATION (BASED ON DH-SD) .................................... 49
8.1 Dome and Network Keyboard Connection...............................................................................................49
8.2 Network Keyboard Setup before Operation.............................................................................................49
8.3 Menu and Key Introduction..........................................................................................................................49
8.4 Network Keyboard Operation......................................................................................................................51
8.4.1 Direction Setup.............................................................................................................................................51
8.4.2 Preset.............................................................................................................................................................51
8.4.3 Scan ..............................................................................................................................................................51
8.4.4 Tour ................................................................................................................................................................52
8.4.5 PATTERN......................................................................................................................................................53
8.4.6 Pan Rotation .................................................................................................................................................53
9 FOR PELCO-P/D/P1/D1 PROTOCOL........................................................................ 54
9.1 DVR Menu Setup.............................................................................................................................................54
9.1.1 PTZ Control...................................................................................................................................................54
9.1.2 3D Intelligent Positioning key .....................................................................................................................55
9.1.3 Preset Setup and Operation.......................................................................................................................56
9.2 From DVR Menu to Dome Menu..................................................................................................................57
9.3 Network Keyboard Operation for PELCO-P/D/P1/D1.............................................................................57
9.3.1 Keyboard Setup............................................................................................................................................57
9.3.2 Menu Operation............................................................................................................................................58
9.4 Scan/Tour/Pattern for PELCO-P/D/P1/D1..................................................................................................59
9.4.1 Via Preset......................................................................................................................................................59
9.4.2 Via Dome Menu............................................................................................................................................60
10 FAQ ............................................................................................................................ 63
10.1 Daily Maintenance..........................................................................................................................................63
10.2 Problems and Solutions................................................................................................................................63

6
Welcome
Thank you for purchasing our integrated speed dome system!
This operating manual is designed to be a reference tool for the installation and
operation of your system.
Here you can find information about this speed dome features and functions, as
well as a detailed menu tree.
Before installation and operation please read the following safeguards and
warnings carefully!

7
Important Safeguards and Warnings
1.Electrical Safety
All installation and operation should conform to local electrical safety codes.
We assume no liability or responsibility for all the fires or electrical shock caused
by improper handling or installation
2.Transportation Security
No heavy stress, violent vibration or water splash are allowed during
transportation, storage and installation. The camera could be damaged by
improper handling.
3.Installation
Keep upwards. Handle with care.
Do not apply power to the dome before completing installation.
4.Qualified Engineers Needed
All installation here should be done by the qualified engineers.
All the examination and repair should be done by the qualified service engineers.
We are not liable for any problems caused by unauthorized modifications or
attempted repair.
6.Environment
This product has been tested and found to comply with the IP67 standard of
Degrees of protection provided by enclosure (IP Code).
The dome should be installed in a cool, dry place away from direct sunlight,
inflammable, explosive substances and etc.
7.About Camera
Camera should be installed away from direct sunlight or other strong artificial
lights to avoid blooming and smear.
Only use mild detergent or dry cloth to clean the camera.
8. About Accessories
Be sure to use all the accessories recommended by manufacturer.
Before installation, please open the package and check that all the components
listed below are included in the package:
z Dome
z Power adapter
z Bracket anchor
z Camera holder
z A pair of white gloves
z CD for user’s manual
Contact you local retailer ASAP if something is missing in your package.

8
1 Features and Functions
1.1 Features
Integrated dome system has the following features:
z High resolution integrated digital processing camera.
z Build in PTZ and digital decode card.
z RJ485 data port for software update.
z Digital control and programmable
z Simple and effective transmission system
z Locate, trace and scan object easily.
z Support DH-SD and Pelco-P and Pelco-D protocol
z Simple and user-defined interface.
z On-screen display menu for setup of programmable functions.
z Working with DVR to realize auto touring and auto pattern.
1.2 Function
Integrated dome system has the following functions:
1.2.1 On-Screen Menu
It is easy for you to view dome information and configure dome, camera
parameters.
1.2.2 Support multiple protocols function
This series speed dome support Chinese national industrial standard and
universally used protocols PELCO-P and PELCO-D. You can use various
devices and protocols to operate speed dome.
1.2.3 Proportional Pan and Tilt
This function keeps the image from moving too fast when there is a large amount
of zoom.
Dome continually decrease or increase pan and tilt speeds in proportion to depth
of zoom. When zooms speed is increasing, the camera moving speed becomes
slow. When zooms speed is decreasing, the camera moving speed becomes fast.
1.2.4 On-screen Tips
Here you can view:
z Dome title and system version (Software and hardware)
z Dome system temperature
z Dome protocol, baud rate, address
z Dome pan/tilt coordinate, preset ID
1.2.5 Preset Setup and Recall
Preset function is to save the address information (such as PTZ pan/tilt, focus
and etc) to the memory so that you can quickly adjust the dome and PTZ to the
correct position. This series speed dome supports 80 presets.
1.2.6 Auto Scan
Camera scans back and forth regularly in a horizontal field. Here you need to set
left and right limit and scan speed. You can set 5 scanning paths.
1.2.7 Auto Touring

9
Add addresses into a routine in a desired order and then set time and stop
duration for each address. The dome will begin an auto touring between these
addresses. You can set 8 touring paths.
1.2.8 Auto Pattern
Memorize dome operation such as pan, tilt, and zoom to repeat. Focus and iris
are in auto mode during auto pattern. For each pattern, the time should be less
than 60 seconds. You can set 5 pattern paths.
1.2.9 Window Blanking
Window blanking is a user-defined, four-sided area that can not be viewed by
you. The blank area will move with pan and tilt functions and automatically adjust
in size as the lens zooms. You can set 8 blanking zones.
1.2.10 Action on Alarm
This series speed dome support three alarm modes. There are 7 alarm inputs
and 1 alarm output. Alarms can be individually programmed to initiated pattern,
or go to an associated preset, scanning, touring when received. Dome will return
to a previously programmed state after alarm acknowledgement or to its previous
position before alarm.
1.2.11 Auto Flip and IS (Camera support needed)
As long as you continue to hold the joystick in the down position, the dome
rotates 180 degrees and repositions itself for uninterrupted viewing of any
subjects that passes directly beneath the dome.
IS (Image stabilizer) allows you to get stable video.
1.2.12 Self-diagnosis
There is a self diagnosis procedure when dome boots up.
z Tilt and vertical engine check
z Camera diagnostics
z Display dome information and diagnosis information
1.2.13 Day/Night Mode
Auto/manual switches in low illumination.
z Auto: camera will automatically adjust CCD light level.
z Manual: use menu or function keys to select day/night mode.
1.2.14 Auto Focus
Auto focus allows the lens to remain in focus during zoom-in, zoom-out and
motion functions to get vivid image. You can use FAR or NEAR button to adjust
focus manually.
1.2.15 Backlight Compensation
Balance the brightest and darkest sections of a scene to produce a more vivid
picture.
1.2.16 Pan Tilt and Zoom
Supports zoom in and zoom out during tilt and pan movement.
In this period focus and iris are both in auto mode to get vivid image.
1.2.17 3D Location
Working with DVR, just click part of the current scene will be displayed in the
central window and automatically zooms. All of these allow you to trace precisely.
1.2.18 Idle Status

10
When there is no available order, you can use menu to set dome idle status after
specified duration. The idle status includes turn to specified preset or go to scan,
tour or pattern function.
1.3 Specification
Power
AC 24V/3A(±20%)(Includes temperature control
circuit)
Core Consumption
11W
Heater Consumption
30W
Decode Card
Build-in
Engine
stepper motor
Preset Point
80
Auto Tour
8
Auto Pattern
5
Auto Scan
5
Window Blanking
Maximum 24 zones (according to camera core type )
Alarm Input/Output
7/1
Information
Address, dome title, status, temperature, alarm, fan
abnormal alarm
Lens
Adjust speed in accordance with lens
Auto Rotation
Tilt 90º rotates to pan 180 º
Auto Pan
0 º -360º continuously
Manual Pan Motion
Speed
0.5º—180º/S
Preset Maximum
Speed
300º
Manual Tilt Motion
0.5º—90º/S
Manual Tilt Scan
Section
-2º—180º
Control Port
RS485
Baud Rate
1200/2400/4800/9600 (Optional)
PTZ Scan Accuracy
0.06 ± 0.015º
Signal Format
PAL/NTSC (camera mode)
S/N Ratio
> 50dB
Effective Pixel
768(H)*494(V) 795(H)*596(V)
Horizontal Resolution
480TVL/540TVL
Fan and Heater
Auto/Manual (Auto mode has the priority)
Humidity
<90%
Environment
-40℃—60℃(outdoor)

11
2 Dome Function Setup
There are two ways to implement dome setup:
z Keyboard or Matrix
z On screen display menu
If you are using keyboards or matrix, please make sure the following items in
dome and keyboard (matrix) are the same:
z Address
z Baud rate
z Parity
z Protocol
Please check the connection lines before the setup.
Note: All the instructions here are based on the general keyboard.
2.1 Dome Address
Dome only responds to the order of the same address
Hard address: Please refer to 3.2 address setup.
2.2 PTZ Control
2.2.1 Pan and Tilt Movement
Move joystick to control the PTZ movement.
2.2.2 Proportional Pan and Tilt
Continually decrease (or increase) pan and tilt speeds in proportion to depth
of zoom.
2.2.3 Auto Flip
Rotates dome 180 degrees at the bottom of tilt travel.
2.2.4 3D Location
Click one point; current video will be displayed in screen centre.
Drag current section to zoom in or zoom out. (DVR needed here)
2.3 Lens Control
2.3.1 Lens Control
Use control key (usually are TELE and WIDE) to adjust image focus.
2.3.2 Focus Control
Use Far and Near key to adjust focus.
Focus will go back to auto mode after initialized or pan/tilt movement or
zoom.
Note: auto focus function is off in the following conditions:
z Object is not at the centre
z Near and far objects are not clear at the same time
z Objects with strong rays (such as neon light or spotlight)
z Fast moving object
z Large barren section (such as wall)
z Object is dark or blur
2.3.3 Aperture Control
Aperture control is to control image light. Click OPEN or CLOSE key to modify.

12
Aperture will go back to auto mode after initialized or pan/tilt movement or
zoom.
2.3.4 Auto Backlight Compensation
This function allows you to balance brightness and darkness sections of the
image to produce a more vivid picture.
2.3.5 Auto White Balance
Automatically change color in accordance with environment light. Here you can
also modify manually.
2.3.6 Day/Night Switch
Automatically change camera mode between day/night to get vivid resolution.
In daytime camera is in color model and at night camera is in black and white
mode.
2.4 Preset and Recall
Preset function is to save the address information (such as PTZ pan/tilt, focus
and etc) to the memory so that users can quickly adjust the dome and PTZ to the
correct position. Here dome supports 80 presets.
2.5 Auto Touring
Add addresses into a routine in a desired order. Set time and stop duration for
each address. The dome will begin an auto touring between these addresses.
Here you can input maximum 80 presets in one touring.
2.6 Auto Scan
Auto scan is to scan selected area at the same frequency. Here you needs to set
left and right limit and interval. There are maximum five auto scan channels.
2.7 Auto Pattern
Auto pattern is to memorize PTZ movement and camera focus. From the starting
point, camera move around from the started point at the same interval.
2.8 Window Blanking (Privacy Mask)
Window blank is to hide some zones for privacy reasons. Please use OSD menu
to setup.
2.9 Alarm Input and Output
Here users can set 7 alarm input, alarm time and alarm clearance time.

13
3 Protocol、Baud Rate、Address setup
3.1 Protocol and Baud Rate Setup
Please configure the following settings before begin controlling dome:
z Protocol
z Baud rate
z Address
Note: All the setup will only become activated after restart system!
Open the lower dome, the image is shown as below.
Protocol Baud rate Parity
1 2 3 4 5 6 7 8
Figure 1 Protocol baud rate and parity
1-4 is for protocol, 5 -6 for baud rate and 7-8 for parity. Please refer to Figure 2 to
Figure 4 for detail information.
1
2 3 4 Protocol
OFF
OFF
OFF OFF
DH-SD
ON
OFF OFF OFF DAHUA
OFF
ON OFF OFF PELCO-D
ON
ON
OFF OFF PELCO-P

14
X X X X Reserved
Figure 2 protocol sheet
5 6 Baud Rate
OFF OFF 9600bps
ON
OFF 4800bps
OFF
ON
2400bps
ON ON
1200bps
Figure 3 Baud Rate sheet
7 8 Parity
OFF OFF NONE
ON
OFF EVEN
OFF ON ODD
ON ON NONE
Figure 4 Parity sheet
3.2 Address Setup
Address
1 2 3 4 5 6 7 8
Figure 5 Address setup
Address coding mode adopts binary system.
The address value is between 0~255.
Address 1 2 3 4 5 6 7 8
1
OFF OFF OFF OFF OFF OFF OFF OFF
1 ON
OFF OFF OFF OFF OFF OFF OFF
2
OFF
ON
OFF OFF OFF OFF OFF OFF
3 ON ON
OFF OFF OFF OFF OFF OFF
4
OFF OFF
ON
OFF OFF OFF OFF OFF
5 ON
OFF
ON
OFF OFF OFF OFF OFF
6
OFF
ON ON
OFF OFF OFF OFF OFF

15
7 ON ON ON
OFF OFF OFF OFF OFF
8
OFF OFF OFF
ON
OFF OFF OFF OFF
…… …………………………………………………………………
254
OFF
ON ON ON ON ON ON ON
255 ON ON ON ON ON ON ON ON
Figure 6 Address sheet

16
4 Cable Connection
4.1 RS485 and Power Cable Connection
There are three cable groups here: power cable, RS 485 and Video cable. Draw
out the cables from the dome to connect with main control devices (such as
monitor, control keyboard, DVR and etc.) and power adapter. Please refer to
Figure 7 Connection sheet.
Red (2-pin) AC 24V(polarity free)
Power
Black GND
Yellow 485-A
Green 485-B
RS485
Black
485-GND
Video
Video port
Video
Figure 7 Connection sheet
4.2 Alarm Cable Connection
Open the dome cover and take PTZ chip core out. Turn the core upside down;
you can see the alarm port. See Figure 8.
Figure 8 PTZ chip core
In Figure 8, please note:
• Numeral 1 to 7 is corresponding to alarm input 1 to 7.
• In alarm out: NO/COM/NC is a normal close/ normal open linkage
output(Open/close );
• GND is grounding cable.

17
Speed dome alarm signal adopts grounding connection mode.
This series speed dome support two alarm input types: normal open/normal
close. You can refer to 5.4.4 for the setup.
Please follow the procedures below. :
a) Parallel connect the GND with com (please use out sourcing power to
alarm detector.);
b) parallel connect grounds of alarm detector and speed dome ;
c) connect alarm detector NC port with dome alarm in port
d) In dome alarm setup, if contact type is normal open (NO), low voltage will
activate alarm.
e) In dome alarm setup, if contact type is normal close (NC), high voltage
will activate alarm.
Please refer to Figure 9.
Figure 9 alarm connection
4.2.1 System Layout
4.2.1.1 General connection

18
Figure 10 General connection-1
Figure 11 General connection-2
4.2.1.2 Star connection
Figure 12 Star connection
4.2.2 Alarm Connection

19
Figure 13 Alarm connection
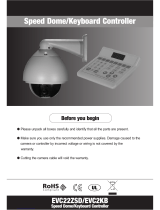
4.2.3 Keyboard Connection
You can use a keyboard to control the Dome. The display and control can
work simultaneously. One keyboard can control maximum 255 speed domes.
Figure 14 Keyboard connection-1
Speed dome protocol is open and support multiple system platforms. Please
contact us if some matrix systems do not support dome camera communication
protocol. The most direct and easy way is to use current system to process video
signal and add some control keyboards to control speed dome.

20
Figure 15 Keyboard connection-2
/