Page is loading ...

1
QUICKSTART GUIDE
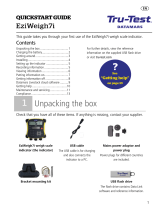
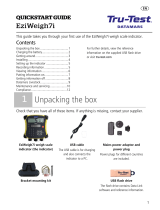
This guide takes you through your first use of the EziWeigh7i weigh scale indicator.
Contents
Unpacking the box .................................. 1
Charging the battery ................................ 2
Getting around ........................................ 3
Installing ................................................. 4
Setting up the indicator ........................... 5
Recording information ............................. 5
Viewing information ................................ 6
Putting information on ............................. 7
Getting information off ............................ 8
Maintenance and servicing ...................... 9
Compliance ........................................... 10
For further details, view the reference
information on the supplied USB flash drive or
visit www.tru-test.com
1
Unpacking the box
Check that you have all of these items. If anything is missing, contact your supplier.
EziWeigh7i weigh scale
indicator (the indicator)
USB cable
The USB cable is for charging
and also connects the indicator
to a PC.
Mains power adaptor and
power plug
Power plugs for different countries
are included.
Bracket mounting kit USB flash drive
The flash drive contains Data Link
software and reference information.

2
2
Charging the battery
Use the mains power adaptor to charge the indicator’s internal battery from the
mains power supply.
For best results, do not charge the battery if the temperature is less than
0 °C (32 °F), or greater than 40 °C (104 °F).

3
3
Getting around

4
4
Installing
Before you can weigh animals, you need to connect the indicator to some load bars or
load cells. To identify animals using electronic (EID) tags, you also need to connect
the indicator to an EID reader.
Installing the indicator and load bars
Connecting the indicator to an EID reader
Connecting via
Bluetooth
®
1. First, switch on the indicator.
2. Then, switch on the EID reader.
For further instructions on pairing the EID reader, see the EID Reader User
Manual.
Connecting via serial cable
Connect the EID reader to the indicator’s power/serial connector using a serial cable,
available from Tru-Test as an optional accessory.

5
5
Setting up the indicator
The first time that you turn on the indicator, follow the step by step instructions to set
the language.
When shipped, the indicator is set up to manually record animal weights and IDs,
without drafting. You should change the way the indicator is set up to suit the task
that you are about to perform.
Changing the indicator setup
To change the way that the indicator is set up:
Press
, scroll down
to Setups... and press
.
6
Recording information
Sessions
When you record information such as weight, it is stored in a ‘session’. A session is
like a file on a computer. We recommend that you start a new session each day or for
each group of animals.
Press
, scroll down
to sessions, and press
twice.
The indicator will display "Started".
Press
twice to navigate out of the menu.

6
Weighing an animal
Ensure that the indicator is displaying 0.0. If not, press
.
1. Move the animal onto the platform.
2. If recording IDs, enter the animal’s VID or scan the EID tag using an EID reader.
VID EID
3. If desired, press
to enter a comment about the animal, using the alpha
numeric keypad.
4. When the stable light illuminates, press
.
The indicator will record the weight along with any other information entered.
5. Move the animal off the platform.
If the indicator is not displaying 0.0 between animals or there are
problems with inaccurate or unstable weights, make sure that the bars are
firmly secured to the concrete floor and free from stones or dirt and that
the load bars are properly connected to the indicator.
7
Viewing information
After weighing, you can view statistics for the weighing session. Press
to display
the Statistics option.
Press
and press
to scroll through the statistics.

7
8
Putting information on
You can transfer session files or a cross reference file containing EID/VID pairs from a
PC to your indicator using the Data Link for PC software application.
If you haven't done so already, install Data Link on your PC. To do this,
insert the supplied USB flash drive into a USB port on your PC and follow
the instructions.
1. Connect the indicator to a PC using the cable supplied.
2. Launch Data Link on your PC.
3. Once Data Link has connected to the indicator, all the information on the
indicator will be displayed by Data Link.
4. Click
to transfer session files or a cross reference file onto the indicator.

8
9
Getting information off
There are two ways to get information off the indicator.
Data Link for PC
Data Link app for mobile
devices
You can:
save session files
save cross reference information
You can:
email a session file
register a transaction with
NAIT or NLIS
To do this:
1. Connect the indicator to a PC using the cable
supplied.
2. Launch Data Link on your PC.
3. Click
to get information off the indicator.
To do this:
Launch the Data Link app on
your mobile device and follow
the instructions.
Smartphone app
The Tru-Test Data Link app is available to download for free from the Google Play*
store (Android* devices) or the Apple App store* (Apple iOS*).

9
10
Maintenance and servicing
Backing up your information
We strongly recommend that you regularly back up the data on your indicator by
transferring it to a PC using Data Link.
Updating your software
We recommend that you regularly update the indicator software so that you keep up
with the latest features and improvements.
To update the indicator's software:
1. Connect the indicator to a PC using the cable supplied.
2. Launch Data Link on your PC.
3. Click Tools / Updates.
4. Follow the step-by-step instructions.
For more information, see the Data Link help.
When updating software, the data on your indicator will remain intact.
However, we strongly recommend that you transfer the information on
your indicator onto a PC
before
updating.
Caring for the indicator
Do not leave the indicator or load bars submerged in water. Store the indicator in a
cool, dry place.
Wipe the indicator using a damp cloth, warm water and soap. Other cleaners may
damage the case.
Fit the dust caps when there are no cables connected to the indicator. This will
prevent moisture and dirt from entering the connectors.

10
Europe – Instructions for disposal of product
This symbol on the product or its packaging indicates that this product (and
its battery) must not be disposed of with other waste. Instead, it is your
responsibility to dispose of your waste equipment by handing it over to a
designated collection point for the recycling of waste electrical and
electronic equipment. The separate collection and recycling of your waste
equipment at the time of disposal will help conserve natural resources and
ensure that it is recycled in a manner that protects human health and the
environment. For more information about where you can drop off your
waste equipment for recycling, please contact your local city recycling office
or the dealer from whom you purchased the product.
This product incorporates a lithium-ion (IFpR27/66) rechargeable battery.
For instructions on how to dismantle this product for recycling, email
contact@trutest.co.nz
11
Compliance
EU declaration of conformity
Datamars Limited hereby declares that the EziWeigh7i indicator is in compliance with the essential requirements and other
relevant provisions of Directive 2014/53/EU. The declaration of conformity may be consulted at
http://livestock.tru-test.com/en/compliance
The
Bluetooth
®
word mark and logos are registered trademarks owned by Bluetooth SIG, Inc and any use of such marks by Datamars
SA and its subsidiaries is under license. Other trademarks and trade names are those of their respective owners.
All trademarks with an * are neither owned by nor licensed to Datamars SA and belong to their respective owners.
"Made for iPhone" means that an electronic accessory has been designed to connect specifically to iPhone, and has been certified by
the developer to meet Apple performance standards. Apple is not responsible for the operation of this device or its compliance with
safety and regulatory standards. Please note that the use of this accessory with iPhone may affect wireless performance.
1/40


