Page is loading ...

OXIBD
OXIBD/A
Nice
Radio receiver
EN - Instructions and warnings for installation and use
made in Italy
www.ApolloGateOpeners.com | (800) 878-7829 | [email protected]

1 - English
EN
1
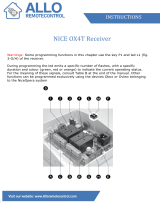
PRODUCT DESCRIPTION
OXIBD (OXIBD/A) is a radio receiver designed for being installed on a control unit for automating gates, garage doors
and road barriers.
– All uses other than the intended use described and use in environmental conditions other than those
described in this manual should be considered improper and forbidden!
WARNINGS
This device must be professionally installed. The only permitted antenna is a 17 cm whip included.
Changeable antenna that must be professionally installed.
For the OXIBD/A do not use the coaxial cable but connect the whip cable included.
• One-way and two-way radio communication
In one-way radio communication, the two devices involved (equipped with one-way radio technology) have a clearly
dened and unambiguous role within the system: there is a transmitter that simply transmits and a receiver that only
receives without any further role. The radio communication, therefore, is one-way.
Instead in two-way communication, the two devices (equipped with two-way radio technology) play a different role each
time within the system, as each one is capable of receiving and transmitting information from/to another device. There-
fore, even the transmitters can turn into “receivers” of information coming from the receiver mounted in the control unit.
The OXIBD (OXIBD/A) receiver has both the radio technologies, thus it can interface with both one-way and two-way
transmitters.
Throughout this manual, “two-way” refers to the “two-way technology” of receiver-transmitter radio devices, while the
ENGLISH
Instructions translated from Italian
www.ApolloGateOpeners.com | (800) 878-7829 | [email protected]

EN
term “BD” denotes a specic radio encoding protocol adopted by OXIBD (OXIBD/A) and by transmitters featuring this
encoding protocol.
“BD” encoding, unlike the other one-way encoding systems compatible with OXIBD (OXIBD/A) (see further below), offers
the following additional functions:
– the sending of the conrmation (on the transmitter) that the transmitted command was received;
– the sending of the status (on the transmitter) of the transmitter (for example, if the door, gate, etc., is open or closed).
• Other product characteristics
– The OXIBD receiver is compatible with the “O-Code”, “FloR”, “TTS”, “Smilo” and “Flo” one-way radio encoding sys
-
tems, and with the “BD” two-way encoding system. In particular, the “O-Code” and “BD” encoding systems allow for
exploiting all the advanced and exclusive functions of the “NiceOpera” system.
–
The OXIBD/A receiver is compatible with the “O-Code/A”, “FloR/A” one-way radio encoding systems, and with the
“BD” two-way encoding system.
– The receiver, if it contains one-way transmitters only, can manage 1024 memory locations at the most: one location
can alternatively memorise a single transmitter (if its keys are memorised as a “single set”, with the Mode 1 proce-
dures – read Paragraph 3.1), or a single key (if memorised with the Mode 2 procedures – read Paragraph 3.2). If the
receiver contains two-way transmitters only, a maximum of 750 two-way transmitters can be memorised.
– Each receiver has its own identication number, known as the “Certicate”. This allows for accessing several opera-
tions, such as, for example: the memorisation of new transmitters without having to access the receiver, and the use
of the O-View programmer through its “BusT4” connection to the control unit.
– This receiver can be used solely with control units equipped with “SM”-type plug connector (verify the most suitable
control units on the Nice product catalogue or on the www.niceforyou.com website).
– This receiver automatically recognises the characteristics of the control unit on which it is installed and self-sets in the
following way:
- If the control unit manages the “BusT4”, the receiver makes available up to 15 different commands.
- If the control unit DOES NOT manage the “BusT4”, the receiver makes available up to 4 different commands.
Important! – In both cases, the number and diversity of the available commands depend on the type and model of
the control unit adopted. The “Table of commands” of each control unit is shown in the respective instruction manual.
www.ApolloGateOpeners.com | (800) 878-7829 | [email protected]

EN
2
INSTALLATION AND CONNECTION
The receiver must be connected to the control unit by inserting it through the relevant slot:
01.
Before inserting (or removing) the receiver,
disconnect the power supply to the control unit.
OFF
02. Connect the antenna supplied to terminal 1 of the re-
ceiver, as shown in Fig. A. Alternatively, if the radio
signal reception must be improved through the instal-
lation of an external antenna with a coaxial cable with
50Ω impedance (type RG58), the coaxial cable must
be connected directly to terminals 1 and 2 of the
receiver (Fig. B), ignoring the “antenna” terminal (if
present) on the control panel.
1
2
1
2
1
2
Fig. A Fig. B
03. Insert the receiver through the relevant opening on
the control unit.
R
L1L2L3
Close
Open
Stop/Set
Flash
Photo
Photo Test
Stop
GND
SbS
24 V
Aerial
www.ApolloGateOpeners.com | (800) 878-7829 | [email protected]

EN
04. Restore the power supply to the control unit.
ON
3
MEMORISING / DELETING TRANSMITTERS IN THE RECEIVER
The rst one-way transmitter to be memorised in the receiver also denes the encoding system (“O-Code”
(“O-Code/A”) or “FloR” or “TTS” or “Smilo” or “Flo”) that each successive one-way transmitter to be memorised
must have. Transmitters with “BD” encoding can instead be memorised freely, as they are compatible with one-
way transmitters inside the receiver’s memory.
Each single coding allows for exploiting only the functions linked to that specic encoding system.
To verify to which encoding system the transmitters already memorised in the receiver belong, proceed as fol-
lows (Warning! – The receiver must already be connected to the control unit):
Verification of the TYPE OF ENCODING system adopted by the transmitters already memorised
01. Disconnect the power supply to the control unit and then restore
the power.
LED B of the receiver will light up green first then orange. When the
orange LED switches off, count the number of subsequent flashes:
OFF
ON
•1greenash = transmitters with O-Code or FloR or TTS encod-
ing system
x 1
•1greenashand1orangeash = transmitters with O-Code or
FloR or TTS + BD encoding system
x 1+1
www.ApolloGateOpeners.com | (800) 878-7829 | [email protected]

EN
•2greenashes = transmitters with O-Code (O-Code/A) or FloR
or TTS encoding system
x 2
•2greenashesand1orangeash = transmitters with O-Code
(O-Code/A) or FloR or TTS + BD encoding system
x 2+1
•3greenashes = transmitters with Smilo encoding system
x 3
•3greenashesand1orangeash = transmitters with Smilo +
BD encoding system
x 3+1
•5greenashes = no transmitter memorised
x 5
•5greenashesand1orangeash = transmitters with BD tech-
nology
x 5+1
To change the coding assigned to the rst one-way transmitter memorised, it is necessary to delete from the
memory all the transmitters present (one-way and two-way), by strictly adopting Procedure 5 (Paragraph 3.6)
and choosing the option, “ALL THE RECEIVER MEMORY”.
WARNINGS for carrying out the programming procedures
• During the execution of the programming procedures, refer to Fig. 1 to identify key
A and LED B on the receiver. • To understand the meaning of the icons featured in the
procedure, refer to the table, “Key to the symbols used in the manual”. • The proce-
dures have a limit time; therefore, before implementing them, it is important to read and
understand all the steps to be completed.
1
2
AB
1
www.ApolloGateOpeners.com | (800) 878-7829 | [email protected]

EN
KEY TO THE SYMBOLS USED IN THE MANUAL
Symbol Description
(on the receiver) LED “B” STEADY LIT
(on the receiver) LED “B” LONG FLASH
(on the receiver) LED “B” QUICK FLASH
(on the receiver) LED “B” OFF
OFF
ON
Disconnect power supply / Restore power supply
5 s
Wait ...
> 5 sec < Perform the operation within 5 seconds ...
1
2
Hold down key “A” of the receiver
www.ApolloGateOpeners.com | (800) 878-7829 | [email protected]

7 - English
EN
1
2
Press and release key “A” of the receiver
1
2
Release key “A” of the receiver
Press and release the desired transmitter key
Hold down the desired transmitter key
Release the desired transmitter key
Read the control unit’s instruction manual
...
Observe when LED “B” emits signals
The system can be programmed in Mode 1 or in Mode 2: see Paragraphs 3.1 and 3.2.
3.1 - Memorisation in “Mode 1”
While Procedure 1 is being carried out, the receiver memorises all the keys present on the transmitter, auto-
matically assigning command 1 of the receiver to the 1
st
key, command 2 to the 2
nd
key, and so forth. Once the
www.ApolloGateOpeners.com | (800) 878-7829 | [email protected]

EN
procedure terminates, the memorisation will occupy a single memory location and the command associated
with each key will depend on the “List of commands” present on the automation’s control unit.
PROCEDURE 1 - Mode 1 memorisation
01. On the receiver: hold down key A and wait for the green LED
B to light up. Subsequently, release key A.
1
2
1
2
02. On the transmitter being memorised:
• If the transmitter is a one-way device:
(within 10 seconds) on the transmitter: hold down any key and
release it once LED B (on the receiver) emits the 1
st
of 3 green
flashes (=memorisation completed correctly). (*1)
• If the transmitter is a two-way device:
(within 10 seconds) on the transmitter: press and immediately
release any key; LED B (on the receiver) will flash green 3 times
(=memorisation completed correctly). (*1)
(*1) Note - If there are other transmitters to be memorised, repeat step 02 within the next 15 seconds
after the first 10. The procedure will terminate automatically once this time elapses.
3.2 - Memorisation in “Mode 2”
While Procedure 2 is being carried out, the receiver memorises a single key among those present on the trans-
mitter, associating it with the receiver output chosen by the installer. To memorise further keys, repeat the pro-
cedure from the beginning for each key to be memorised. Once the procedure terminates, the memorisation
will occupy a single memory location and the command associated with the memorised key will be that chosen
www.ApolloGateOpeners.com | (800) 878-7829 | [email protected]

9 - English
EN
by the installer from the “List of commands” of the automation’s control unit. Note - A key can be associated
with only one output, while the same output can be associated with multiple keys.
PROCEDURE 2 - Mode 2 memorisation (and extended Mode 2)
01. In the control unit manual: choose the command to be memo-
rised and remember its “identification number”.
02. On the receiver: press and release key A for a number of times
matching the number that identifies the command chosen at
step 01: LED B will flash the same number of times.
1
2
x No. ....
=
...
03.
On the transmitter with the key to be memorised:
• If the transmitter is a one-way device:
(within 10 seconds) on the transmitter: hold down the key to be
memorised and release it once LED B (on the receiver) emits
the 1
st
of 3 green flashes (=memorisation completed correctly).
(*2)
• If the transmitter is a two-way device:
(within 10 seconds) on the transmitter: press and immediately
release the key to be memorised; LED B (on the receiver) will
flash green 3 times (=memorisation completed correctly). (*2)
(*2) Note - If there are other keys to be memorised (belonging to other transmitters) with the same com-
mand, repeat step 03 within the next 15 seconds for each further key to be memorised (the procedure
terminates once this time elapses).
3.3 - Memorising a new transmitter “near the receiver” - only for one-way transmitters
This procedure allows for memorising a new transmitter by means of a second functioning transmitter, already
memorised in the same control unit. This enables the new transmitter to receive the same settings as the
www.ApolloGateOpeners.com | (800) 878-7829 | [email protected]

EN
transmitter already memorised. The procedure does not entail any direct action on key A of the receiver, only
the presence of the transmitter within the receiver’s reception range.
• The memorisation “near the receiver” can be prevented by blocking the receiver’s function through Procedure
7 (Paragraph 3.8). Alternatively, the receiver can also be blocked with the O-Box programmer.
PROCEDURE 3 - Memorising a new transmitter “near the receiver”
01.
On the NEW transmitter: hold down the key to be memorised;
wait at least 7 seconds then release it.
x 7 sec
1
3
2
4
1
2
1
NEW
02. On the transmitter ALREADY MEMORISED: slowly press
and release 3 times the memorised key to be copied.
1
3
2
4
1
2
1
OLD
03. On the NEW transmitter: press and release once the same
key pressed at step 01.
1
3
2
4
1
2
1
NEW
If there are other transmitters to be memorised, repeat the procedure from the beginning for each new
transmitter.
3.4 - Memorising a new transmitter using the “enabling code” of an old transmitter already memo-
rised in the receiver - only for transmitters with “O-Code” and “BD” encoding system
The memory of transmitters with O-Code and BD encoding contains an “enabling code” (secret) which can
be used to enable a new transmitter to be memorised in the receiver. To perform this enabling procedure, read
the transmitter’s instruction manual and get an old transmitter already memorised in the same receiver in which
the new transmitter is to be memorised. Warning! - The enabling code can only be transferred between two
identical transmitters that have the same radio coding.
Subsequently, when the new enabled transmitter will be used, it will send to the receiver (in the rst 20 transmis-
www.ApolloGateOpeners.com | (800) 878-7829 | [email protected]

EN
sions) the command, its own identication code and the “enabling code” received. At this point, the receiver
will recognise the enabling code of the old transmitter and automatically memorise the identication code of
the new transmitter.
• The undesired memorisation of transmitters through the “enabling code” can be prevented by blocking the
receiver’s function through Procedure 7 (Paragraph 3.8). Alternatively, the receiver can be blocked also with the
O-Box programmer, by intervening on the receiver or on the transmitters already memorised.
3.5 - Memorising (in the receiver) the control unit Series/Address, for the BusT4 network
The OXIBD (OXIBD/A) receiver can interact with a single control unit through the “BusT4” network. If the system
contains multiple control units connected to each other via “BusT4”, before carrying out the following procedure
the cable of the “BusT4” network must be disconnected from the control unit on which the Series/Address will
be memorised.
PROCEDURE 4 - Memorising (in the receiver) the control unit Series/Address, for the BusT4
network
01. Disconnect the power supply and wait 5 seconds.
OFF
5 s
www.ApolloGateOpeners.com | (800) 878-7829 | [email protected]

EN
02. Hold down key A of the receiver and simultaneously restore the
power supply:
LED B will ash a few times to signal the type of encoding system
of the memorised transmitters (Chapter 3); it will then emit 2 short
orange ashes; lastly, when the steady green light appears (*3),
release key A.
+
ON
1
2
1
2
...
(*3) Note - If the LED emits a steady red light, it means that the memorisation procedure was not com-
pleted. In this case, repeat the procedure from the beginning.
WARNING! - Once the Series/Address has been memorised, the receiver will drive the control unit only through
BusT4. The Stand-By function cannot be active on the control unit. To enable the Stand-By function on the control
unit, do not run the “Memorising the control unit Series/Address for the BusT4 network” procedure.
WARNING! - To ensure correct management of the status on two-way transmitters (ON3EBD (ON3EBD/A)), the
OXIBD (OXIBD/A) receiver must have the same Series as the control unit.
3.6 - Deleting the receiver’s memory (fully or partially)
In a one-way system, the memorisation or code deletion procedures involve the receiver alone. The one-way
transmitter transmits a single command, and it is the receiver that must recognise whether or not the transmitter
www.ApolloGateOpeners.com | (800) 878-7829 | [email protected]

EN
is authorised to enable the automation.
The two-way transmitter, after the sending of a command, becomes itself a “receiver” of information coming
from the associated receiver.
With the memorisation of two-way transmitters in the OXIBD (OXIBD/A) receiver, the identication code of the
same receiver is automatically memorised by the transmitter. Warning! - if the two-way transmitter in the OXIBD
(OXIBD/A) receiver is deleted, to complete the operation it is necessary to also delete the transmitter’s memory.
To perform this procedure, consult the transmitter’s instruction manual.
PROCEDURE 5 - FULL or PARTIAL deletion of the receiver’s memory
01.
On the receiver: hold down key A and observe the status of
the green LED B: after 6 seconds it will light up then switch
off. After a few seconds it will start flashing; then immediately
choose the type of desired deletion:
1
2
> to delete ALL the transmitters: release key A exactly at the
3
rd
flash
1
2
> to delete ALL THE RECEIVER’S MEMORY: release key A
exactly at the 5
th
flash
1
2
> to delete (in the receiver) the control unit’s Series/Ad-
dress, for the BusT4 network: release key A exactly at the 7
th
flash
1
2
This function can be performed also using the O-Box / O-View programmers.
www.ApolloGateOpeners.com | (800) 878-7829 | [email protected]

EN
3.7 - Deleting a SINGLE transmitter or a SINGLE key from the receiver memory
PROCEDURE 6 - Deleting a SINGLE transmitter or a SINGLE key from the receiver memory
01. On the receiver: hold down key A, observe the green
LED B light up and move to step 02 when it switches
off.
1
2
02. On the transmitter to be deleted:
• If the transmitter is a one-way device:
(on the transmitter) hold down the key (*4) to be de-
leted and release it after LED B (on the receiver) has
emitted the 1
st
of 5 quick green flashes (= deletion
completed correctly).
• If the transmitter is a two-way device:
(on the transmitter) press and release the key to be
deleted (*4): LED B (on the receiver) will emit 5 quick
green flashes (= deletion completed correctly).
(*4) Note - If the transmitter is memorised in “Mode 1”, any key can be pressed. If the transmitter is memo-
rised in “Mode 2”, the entire procedure must be repeated for each memorised key that must be deleted.
This operation can also be performed through the O-Box / O-View programmers.
3.8 - Locking (or release) of memorisations carried out with the “near the control unit” procedure
and/or through the “enabling code”
This function prevents the memorisation of new transmitters in the receiver, when using the “near the receiver”
www.ApolloGateOpeners.com | (800) 878-7829 | [email protected]

EN
procedure (Paragraph 3.3) or the “enabling code” procedure (Paragraph 3.4). The default setting is ON for both
procedures. To perform the following procedure it is necessary to have a transmitter already memorised in the
receiver.
PROCEDURE 7 - Locking (or release) of memorisations carried out with the “near the control
unit” procedure and/or through the “enabling code”
01. Disconnect the power supply and wait 5 seconds.
OFF
5 s
02. Hold down key A of the receiver and simultaneously restore the
power supply: LED B rst emits the signals relative to the memo-
rised transmitters (Chapter 3) then emits a few short orange
ashes: release key A exactly at the end of the 2
nd
orange ash.
+
ON
1
2
1
2
...
www.ApolloGateOpeners.com | (800) 878-7829 | [email protected]

EN
03. Within 5 seconds: repeatedly press and release key A of the
receiver to choose one of the following functions, identiable by
the status of LED B:
- No lock active = LED OFF
- Locking of the memorisation “near the control unit” = RED LED
- Locking of the memorisation with the “enabling code” = GREEN
LED
- Locking of both memorisations (“near the control unit” and with
“enabling code”) = ORANGE LED
1
2
...
> 5 sec <
04.
Within 5 seconds: on a transmitter already memorised in the
receiver, press and release a key (memorised) to save the function
that has just been chosen
> 5 sec <
This function can be performed also using the O-Box / O-View programmers.
4
OTHER FUNCTIONS
4.1 - Locking (or releasing) the management of the “Priority” function in the receiver
The “identication code” of a transmitter with “O-Code” or “BD” encoding system is accompanied by a number
(from 0 to 3) that allows for dening (in the receiver) its priority level with respect to any other transmitters with
the same code. The “priority” is aimed at replacing and disabling the use of a lost or stolen transmitter, without
having to go to the customer’s system. Use of the priority function requires knowledge of the lost transmitter
code and allows for keeping the same code and functions of the previous transmitter. The lost transmitter can
therefore be deactivated by simply updating the priority level of the new transmitter to the next highest value.
www.ApolloGateOpeners.com | (800) 878-7829 | [email protected]

17 - English
EN
When the transmitter is used for the rst time, the receiver will memorise the new priority level received and
ignore any command sent by the lost or stolen transmitter, should it be used. The priority can be changed
through the O-Box programmer.
By default the receiver has the “Priority” function enabled, so the installer can exploit its potential applications.
Nonetheless, the O-Box programmer can be used to lock (or release) the receiver in managing this function.
4.2 - Enabling (or disabling) reception of the transmitter codes, modified with respect to the default
code
The codes of transmitters with “FloR” and “O-Code” encoding system can be modied as desired using the
O-Box or O-View programmer. By enabling or disabling this function, the receiver can accept or refuse the
command of a transmitter with modied identication code (the default setting is ON).
4.3 - Disabling (or enabling) the “variable part” (rolling code) of the code received
The receiver is programmed by default to only receive “rolling code”-type codes. The O-Box programmer,
however, can be used to programme the receiver so that it ignores the variable part (rolling code) of the code
received and considers it as a “xed”-type code.
4.4 - “Transmitter keys release” function” (only with O-Code encoding)
During normal use of the transmitter, when a pressed key is released the automation’s manoeuvre continues
for a short pre-set time. If the manoeuvre must be interrupted exactly when the key is released (for example,
to perform a minor adjustment), this function must be enabled in the receiver through the O-Box programmer.
This function is disabled by default.
4.5 - Enabling (or disabling) the receivers to send/receive radio commands through the BUST4 net-
work that connects two or more automations
If one of the automations in systems containing multiple automations connected through the “BusT4” must be
commanded from a distance exceeding the radio range of the transmitter-receiver system, this function can
www.ApolloGateOpeners.com | (800) 878-7829 | [email protected]

EN
be enabled in the receivers involved to increase their reception range. In this way, the receiver that received the
command via radio can retransmit it through the BusT4 cable to the destination receiver (in which the identica-
tion code of the transmitter that sent the command is memorised), so that the latter can execute the command.
This function is disabled by default. To enable (or disable) the repetition and/or reception of the code via BusT4,
programme the relevant receivers appropriately through the O-View and O-Box programmers.
4.6 - Blocking access (through password) to the receiver programming
This function activates in the receiver (with the O-Box / O-View programmer) a password consisting of maximum
10 characters, chosen by the installer. The function allows for protecting all the settings already effected in the
receiver; moreover, it also prevents any subsequent settings through key A of the receiver (Fig. 1) or through
the O-Box and O-View programmers, if the password is not known.
5
TECHNICAL SPECIFICATIONS
OXIBD
Product type Two-way receiver
Decoding OXIBD: “BD” / “O-code” / “FloR” / “TTS” / “Flo” / “Smilo”
OXIBD/A: “BD” / “O-code/A”
Input impedance 50 Ω
Reception frequency 433.92 MHz
Transmission frequency 433.92 MHz (only BD)
Outputs 4 (on “SM” plug-type connector)
www.ApolloGateOpeners.com | (800) 878-7829 | [email protected]

19 - English
EN
Sensitivity –108 dBm
Absorption 50 mA (maximum)
Radiated power (ERP) < 10 mW (OXIBD)
Dimensions (mm) W 49.5; H 41.9; D 18
Weight (g) 22
Operating temperature –20 °C ... +55 °C
• Notesontheproducttechnicalspecications
– The reception capacity of the receivers and the transmitter range are strongly affected by other devices (e.g.
alarms, headphones, etc.) operating on the same frequency in your area. Nice cannot provide any guarantee
with regard to the actual range of its devices under such conditions.
– All technical specications stated herein refer to an ambient temperature of 20°C (± 5° C).
– Nice reserves the right to apply modications to the product at any time when deemed necessary, without
altering the intended use and functions of the product itself.
6
PRODUCT DISPOSAL
This product constitutes an integral part of the automation and, therefore, must be disposed of together with it.
Similarly to the installation phase, once the product reaches the end of its useful life, the disassembly and scrapping operations
must be performed by qualified personnel. This product is made of various types of materials, some of which can be recycled
while others must be scrapped. Seek information on the recycling and disposal systems envisaged by local regulations in your
area for this product category.
WARNING! - Some parts of the product may contain polluting or hazardous substances which, if released into
the environment, constitute serious environmental and health risks.
www.ApolloGateOpeners.com | (800) 878-7829 | [email protected]
/