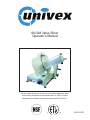
Univex 6612M Operating instructions
- Category
- Slicers
- Type
- Operating instructions
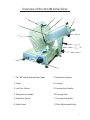
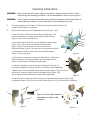
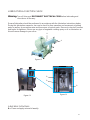
Univex 6612M is a high-performance value slicer designed to meet the demands of commercial kitchens. With its powerful motor and precise slice adjustment, it can handle various slicing tasks with ease. The positive hold carriage ensures stability and control during slicing, while the protective guard and sharp blade ensure safe and efficient operation. Cleaning and maintenance are simplified thanks to the removable components and easy-to-follow instructions provided in the manual.
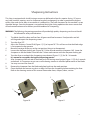
Univex 6612M is a high-performance value slicer designed to meet the demands of commercial kitchens. With its powerful motor and precise slice adjustment, it can handle various slicing tasks with ease. The positive hold carriage ensures stability and control during slicing, while the protective guard and sharp blade ensure safe and efficient operation. Cleaning and maintenance are simplified thanks to the removable components and easy-to-follow instructions provided in the manual.


-
 1
1
-
 2
2
-
 3
3
-
 4
4
-
 5
5
-
 6
6
-
 7
7
-
 8
8
-
 9
9
-
 10
10
-
 11
11
-
 12
12
-
 13
13
-
 14
14


Univex 6612M Operating instructions
- Category
- Slicers
- Type
- Operating instructions
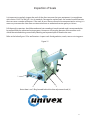
Univex 6612M is a high-performance value slicer designed to meet the demands of commercial kitchens. With its powerful motor and precise slice adjustment, it can handle various slicing tasks with ease. The positive hold carriage ensures stability and control during slicing, while the protective guard and sharp blade ensure safe and efficient operation. Cleaning and maintenance are simplified thanks to the removable components and easy-to-follow instructions provided in the manual.
Ask a question and I''ll find the answer in the document
Finding information in a document is now easier with AI
Related papers
-
Univex 8713M Operating instructions
-
-
-
Univex 1000s User manual
-
Univex 7512 Operating instructions
-
-
-
-
-
Other documents
-
Hobart HS Series Slicers Installation guide
-
Hobart HS Series Heavy Duty Slicers Installation guide
-
Globe S13-16 Owner's manual
-
-
Electrolux 603329 User manual
-
-
-
Globe S13A Owner's manual
-
Globe SG13 Owner's manual
-