HS SLICERS INSTALLATION GUIDE
For HS Series Heavy-Duty Slicers
F48686 (02-22) ©2022 Hobart
1
VERIFY DATA PLATE
Prior to installation, test the electrical service to ensure it agrees with the specications on the machine data plate. The data
plate is located on the le side of the slicer base.
The electrical cord on the machine is equipped with a three-pronged grounding plug which must be connected to a properly
grounded receptacle. If the receptacle is not the proper grounding type, contact an electrician. Do not remove the grounding
prong from the plug.
2
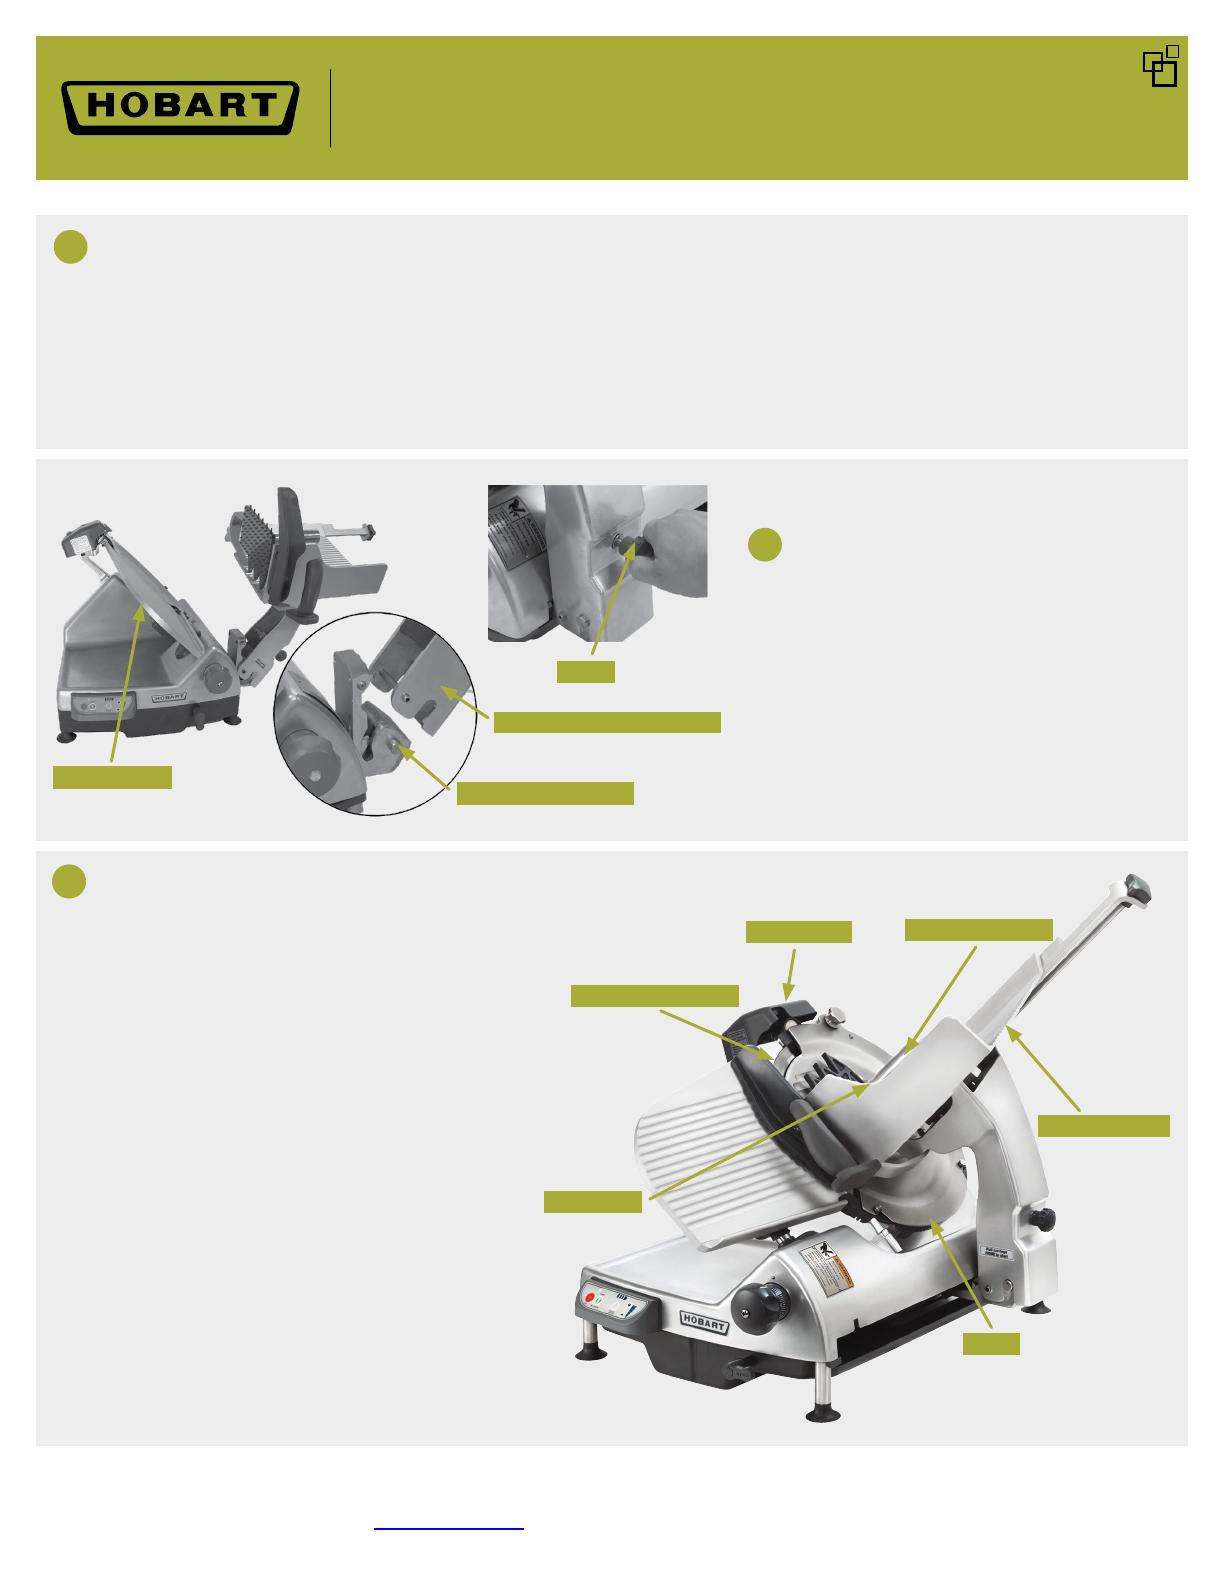
PLACE AND ASSEMBLE SLICER
Place the slicer on a suitable counter or
tabletop. Install the product tray on the
slicer by lowering the bottom of the support
arm onto the carriage hinge pins. Tilt the
product tray toward the gauge plate, and
turn the knob on the support arm until it is
tight against the support arm.
3
CLEAN THE SLICER
Always unplug the machine power cord and turn
the index knob fully clockwise to close the gauge
plate before cleaning the slicer. Exercise extreme
caution when working near the knife.
The slicer must be thoroughly cleaned and
sanitized before being used. To do so, all
removable parts should be removed, cleaned, and
sanitized. Refer to the slicer’s instruction manual
for how to remove and re-install each part.
Once all parts are removed, wipe all surfaces of
the slicer with a cloth soaked in mild detergent
and warm water. Rinse using a fresh cloth and
clean water and then apply sanitizing solution.
Be sure to use only products formulated to be
safe on stainless steel or aluminum.
Once all removable parts are fully dry, re-assemble
the slicer.
GAUGE PLATE
CARRIAGE HINGE PIN
BOTTOM OF SUPPORT ARM
KNOB
MEAT GRIP
PRODUCT TRAY
KNIFE
TOP KNIFE COVER
SHARPENER
RING GUARD COVER
REMOVABLE PARTS
Always refer to procedures as instructed in the Operation Manual for your specic model. Remember that slicer knives are sharp. Use care when operating,
cleaning or performing maintenance.
For additional product resources, please visit www.hobartcorp.com.
Food
Preparation

