Page is loading ...

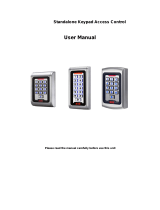
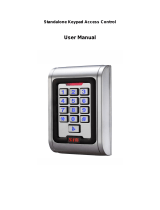
RD-PN10 - Standalone Access Controller and Reader
1 Description & Features
P10 is a waterproof standalone access control, reading EM&HID card, it uses advanced Microprocessor, with high-capacity flash memory for 10000
users. Users can be added and deleted via admin card, very simple to operate. The infrared remote control make the device not only have alarm,
protection, two units interlocked, anti-passback function but also can make two units interlocked, add and delete the user on the remote control key
directly. Besides, it has low power consumption design, anti-theft alarm, door release button etct, all these make it convenient, safe and reliable.
Feature Description
Waterproof Design Rainproof, moisture proof , durable
Ultralow power consumption Longer working life, more stable performance
Large capacity 10000 card users
wiegand reader Can used as wiegand 26 output reader
Connect external reader Can connect EM/IC/HID wiegand 26 output reader
two units interlocked two units can be interlocked online
Anti-passback Single door or two doors anti-passback
2 Installation, wiring, diagram
• Drill the holes according to the distance and the dimension on the back cover, or install the distributing box.
• Thread the cable through the cable hole, connect wires needed, wrapped Unused wires with insulating tape in case of short circuit
• Fix the back cover on the wall with special screw
• Fix the front cover to the back cover with the screws
Wiring
No. Marks Colour Description
1 RESET Pink RESET
2 GND Pink RESET
3 D0 Green Wiegand output D0
4 D1 White Wiegand output D1
5 ALARM- Gray Alarm
6 OPEN Yellow Exit button
7 D_IN Brown Door contact switch
8 +12 - 24V Red +12 - 24V Input
9 GND Black GND
10 NO Blue Relay NO end
11 COM Purple Relay Com
12 NC Orange Relay NC end
Note
Please check all wires and install front cover carefully before power on.
ACCESS SECURITY PRODUCTS LTD

ACCESS SECURITY PRODUCTS LTD

3 Factory Reset and Set management card
Connect the two pink wires then power on. After the sound, Factory reset is finished. When indication LED turns green it means you can set two
admin cards now read the first card as admin add card the second card as admin delete card then LED turns red flash after this, this device can
work resetting to factory default.
Note Reset factory default wont delete user cards, If you present the same card when second read, the device will sound error reminding, then you
can continue present another card. If no operations within 10seconds, the device will enter working mode automatically parameter reset to factory
default.
4 Admin setting on keypad
Entering admin operating mode:
Press * Master code # factory default:999999
Note All the below operations need be under programming mode.
4.1 Change the master code
Press 0 new code # repeat new master code ?????? #
Note: Master Code length:6~8 digits
4.2 Add users by remote control
4.2.1 Read card to add user
Press 1 read card # read card ... #
4.2.2 Use ID Number to add user
Press 1 card number # ... card number # ... #
Note: 1.Card number must be 8 or 10 digits, if the card number is less than 8 or 10 digits, input 0 before the card number
2. Press # confirm press last # finish press * exit
4.2.3 Add consecutive number card.
Press 1 card quantity# 8 or 10 digits card number
Add consecutive number cards users card quantity 1-9999 green fast flash
4.
3
Delete users via remote control
4.3.1 Read card to delete user
Press 2 read card read card … #
4.3.2 Use card NO. to delete user
Press 2 8 or 10 digits card number # 8 or 10 digits card number # … # .
4.3.3 Delete all users
Press 20000 #
Note This operation will delete all users but admin card wont be deleted
4.4 Safe mode setting:
4.4.1 Normal mode factory default
Press 3 0 #
4.4.2 Dead mode
Press 3 1 #
Read invalid cards 10 times continuously within 10minutes the device be dead for 10 minutes
4.4.3 Alarm mode
Press 3 2 #
Re
ad invalid cards 10times continuously within 10minutes
Both external alarm and built-in alarm sound.
4.5 Door open time setting
Press 4 0 99 #
Note range“0 99seconds” 0mS equates 50mS
ACCESS SECURITY PRODUCTS LTD

4.6 Alarm time setting
Press 5 0 3 #
Note range“0 3minutes” factory default 1minute
4.7 Red light mode setting
4.7.1 Static disable mode
Press 6 0 #
4.7.2 Static normal mode factory default
Press 6 1 #
4.8 Interlock setting
4.8.1 Close interlock factory default
Press 7 0 #
4.8.2
Open interlock
Press 7 1 #
4.9 Anti-passback mode setting
4.9.1 Disable anti-passback factory default
Press 8 0 #
4.9.2 Enable anti-passback host mode
Press 8 1 #
4.9.3 Enable anti-passback subsidiary mode
Press 8 2 #
Note Details will be illustrated in Advanced Application below.
5 Admin card operation
5.1 Add user
Press read admin add card read user card1 read user card2 … finally read admin add card exit.
5.2 Delete user
Press read admin delete card read user card1 read user card2 … finally read admin delete card exit.
6
User open door operation
Read user card read valid user card, door will be open, but admin card cant open the door.
7 Remove alarm operation
7.1 External alarm and built-in alarm both sound
Read user card admin card or input admin pin # alarm will be removed.
7.2 Inside buzzer alarm after door close
Close door or press user card admin card or input admin password # alarm will be removed.
8 Sound and Light Indication
Operation LED Color Buzzer
Initialization Orange didi
Static Red Flash
Valid press key
di
Enter programme Red
di
Setting Orange di
Exit Red Flash
di
Operation Failed didi
Lock open Green
di
Alarm Red Quick Flash Alarm
Add sequential No. card Green Quick Flash
ACCESS SECURITY PRODUCTS LTD

9 Specifications
Operating Voltage DC12 - 24V±10%
Static <30mA
Card Reading Distance
5 8cm
Operating Temperature
-10 60℃
Operating Humidity
20% 98%
Lock Output Load 2A
Alarm Output Load 2A
management card 2pcs
10 Packing List
Name
Model/Spec Quantity
Access Control M2 1
Infrared Remote Control 1
Manager Add Card 1
Manager Delete Card 1
Manual M2 1
Self tapping screws Φ3.5*27mm 2
Screw driver Star 1
NOTE Advanced Application
1 two units for single door
Install one at indoor and the other at outdoor indoor one as controller outdoor one as reader
The difference between two units interlocked for single door and standalone for single is below:
1.1
Add users on both unit both indoor user data and outdoor data can be shared users can be up to 20000.
1.2 The setting of the two device must be the same, when admin pin setting is different outdoor unit can’t open the door with saved users data.
2 Two units interlocked for two doors
Install two controllers for two doors control two locks separately set interlocked for two units open door contact . The other door is locked
when door is open. The other door can be open after close the door. The device can’t control another electric lock, data can’t share between
different units. This function mainly apply for bank, prison etc.
3 Anti-passback for Single door
Install a common reader outdoor or use this device without any card No. for reader . Install this device outdoor and set it as anti-passback host
mode. In this case, the two units consist of an anti-passback system for single door, mainly apply to controlling enter and exit for single door.
Details operation is as below
3.1 Set necessary functions and add user card on the host device.
3.2 Users can only present the card on the external reader to enter, and then present the card on the host device to exit, then, present Ucard on
the external reader to enter, do it like this, enter legally, and then exit legally. Users cant enter or exit at continuous 2 times.
4 Anti-passback for two doors
Install one device on Door 1under anti-passback subsidiary mode,Install one device on Door 2 under anti-passback host mode, in this case,
the two units consist of anti-passback for two doors
mainly apply for one-way in and out for double doors like parking. Functions as follows
4.1 Set necessary functions and add user card on the host device.
4.2 Users can only present the card on the subsidiary device to enter, and then present the card on the host device to exit, then, present card on
subsidiary device to enter, do it like this, enter legally, and then exit legally. Users cant enter or exit at continuous 2 times.
ACCESS SECURITY PRODUCTS LTD

Issue Record
Site:
Door
Location:
User
Code User Name /
Pin
Number Card / Fob number Issue Date
00001
ACCESS SECURITY PRODUCTS LTD
/


