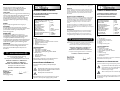
Ferm CDM1046 Owner's manual
- Category
- Cordless combi drills
- Type
- Owner's manual
This manual is also suitable for

Ferm BV • P.O. Box 30159 • 8003 CD Zwolle • The Netherlands • www.ferm.com 0412-29
Art.nr. CDM1046
FAS-1800K2
UK
D
NL
F
E
I
S
SF
N
DK
H
CZ
SL
PL
RU
USERS MANUAL 03
GEBRAUCHSANWEISUNG 06
GEBRUIKSAANWIJZING 09
MODE D’EMPLOI 13
MANUAL DE INSTRUCCIONES 16
MANUALE UTILIZZATI 20
BRUKSANVISNING 23
KÄYTTÖOHJE 26
BRUKSANVISNING 29
BRUGERVEJLEDNING 32
HASZNÁLATI UTASÍTÁS 35
NÁVOD K POUŽITÍ 38
NOVODILA ZA UPORABO 41
INSTRUKSJĘ OBSŁUGI 44
êìäéÇéÑëíÇé èé ùäëèãìÄíÄñàà 48
O 52
GR
UK Subject to change
D Änderungen vorbehalten
NL Wijzigingen voorbehouden
F Sous réserve de modifications
E Reservado el derecho de modificaciones
técnicas
P Reservado o direito a modificações
I Con reserva di modifiche
S Ändringar förbehålles
SF Pidätämme oikeuden muutoksiin
N Rett till endringer forbeholdes
DK Ret til ændringer forbeholdes
H Változtatás jogát fenntartjuk
CZ Změny vyhrazeny
SL Predmet sprememb
PL temat do zmiany
RU äÓÏ·ÌËfl Ferm ÔÓÒÚÓflÌÌÓ Òӂ¯ÂÌÒÚ‚Û
ÂÚ ‚˚ÔÛÒ͇ÂÏÛ ˛ ² ÔÓ‰ÛÍˆË˛.
èÓÁÚÓÏÛ ‚ ÚÂıÌ˘ÂÒË ı‡‡ÍÚÂËÒÚËÍË
ÏÓ„ÛÚ ‚ÌÓÒËÚ¸Òfl ·ÂÁ Ô‰‚‡ËÚÂθÌÓ„Ó
ۂ‰ÓÏÎÂÌËfl.
GR H
Page is loading ...

58 Ferm
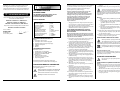
CORDLESS DRILL
THE NUMBERS IN THE FOLLOWING TEXT
CORRESPOND WITH THE PICTURES AT PAGE 2
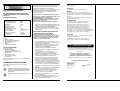
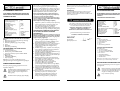
TECHNICAL DATA
PRODUCT INFORMATION
Fig. A
1 On/off switch
2 Speed selector switch
3 Torque setting ring
4 Chuck
5 Battery
6 Direction switch
CONTENTS OF CARRYING CASE
The carrying case contains:
1 Cordless drill
2 FASB-1800K2 batteries
1 FASL-1800K2 battery charger
13 Accessories
1 Operating instructions
1 Safety instructions
1 Warranty card
Check the appliance, any loose parts and accessories for
damage caused during transport.
SAFETY INSTRUCTIONS
The following pictograms appear throughout these
operating instructions:
Indicates danger of injury, risk to life and possible
damage to the appliance if these instructions are
not followed.
Indicates the presence of electrical current.
Read through these operating instructions carefully
before using the appliance. Become familiar with the
functions and method of operation.
To ensure proper operation, always maintain the
appliance according to the instructions. The operating
instructions and associated documents should always be
kept close to the appliance.
When using power tools, you must observe the
follwing basic safety precautions in order to ensure
protection from electric shocks, injury and fire.
Read and follow all the instructions before using this
power tool. Look after the notes on safety.
• Remove the battery block. When the power tool is
not being used, prior to maintenance and when
changing tools such as the clamping chuck, and drill.
• The tool is suitable for use as a screwdriver and drill.
Any other application is specifically excluded.
IMPORTANT SAFETY NOTES ON CHARGER
AND BATTERY BLOCK
If you come into contact with acid from the battery
block, rinse it off with water immediately. If acid gets
into your eyes, rinse out your eyes at
once with water and contact a doctor immediately!
1. Read and note the operating instructions and safety
notes for the charger and battery block before use!
2. NB! Only use the charger and battery block that
were supplied by the manufacturer - otherwise you
will risk an accident.
3. Protect the charger, battery block and power tool
from moisture, e.g. rain or snow.
4. Always check that all cables are connected correctly
before using the charger.
5. If you discover that a cable is damaged, you should
not use the charger again. Have the damaged cable
replaced immediately.
6. When the charger is not in use, the mains plug should
be removed from the power socket. Do not pull out
the plug by grasping the cable.
7. If the charger has been dropped or has otherwise
been exposed to high mechanical stresses, you
should have it checked for damage by an authorised
dealer before using it again. Damaged parts should be
repaired.
8. Exercise caution when handling the battery block
and do not drop it or expose it to impacts.
9. Never attempt to repair the charger or battery block
yourself. Repairs must always be carried out by an
authorised dealer - otherwise you risk an accident.
10. Before cleaning or servicing the charger or battery
block, always pull the plug from the charger socket.
11. Never charge the battery block when the ambient
temperature is below 10°C or above 40°C.
12. The air vents in the charger must never be blocked.
13. The battery block must not be short-circuited.
A short-circuit will cause a high current to flow. This
may result in overheating, the danger of fire or
explosion of the battery block. This may damage the battery
block or the user may risk an accident.
Therefore:
1. Do not connect any cables to the poles of the battery
block.
Voltage | 18 V
—
---
Charger voltage | 230 V
Charger frequency | 50 Hz
Battery output | 1.2 Ah
Charging time | 1 hour
Drill speeds | 2
Max. torque (low speed) | 12 Nm
No-load speed | 0-400/0-1150/min
Chuck capacity | 0.8-10 mm
Weight (incl. battery) | 1.56 kg
Lpa (sound pressure) | < 75 dB(A)
Vibration | < 2.5 m/s
2
Ferm 3

2. Take care that there are no metal objects (nails, paper
clips, coins, etc.) on the contact surface of the battery
block.
3. Do not expose the battery block to water or rain.
4. Only use the battery block supplied in combination
with this cordless drill/screwdriver so as to avoid faults
and/or risks to persons.
14. A damaged battery block or one that can no longer
be charged must be disposed of as special waste. Do
not discard it with household waste.
15. Never throw the battery block onto a fire or into
water. This will risk explosion!
ELECTRICAL SAFETY
Always check whether your battery voltage
matches that shown on the rating plate. Also find
out whether your mains voltage matches the input voltage of
the charger.
The battery charger is doubly insulated in
compliance with EN60335; it therefore does not
require earthing.
Replacing cables or plugs
Dispose of old cables or plugs immediately they are
replaced by new ones. Connecting a plug on a loose
cable to a socket is dangerous.
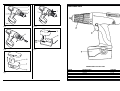
MOUNTING ACCESSORIES
Always remove the battery before starting work.
FITTING AND REMOVING DRILL CUTTERS
Fig. B
In addition to drill cutters, the tool can also
accommodate screwdriver bits with a hexagonal shaft.
• Loosen the drill chuck (4) by rotating the hand-grip
(9).
• Insert the shaft of the drill cutter into the chuck.
• Tighten the drill chuck so that the drill cutter is firmly
clamped.
• Rotate the drill chuck in the opposite direction when
you wish to change the cutter.
CONNECTING AND REMOVING THE
BATTERY
Fig. C
Ensure that the exterior of the battery block or tool
is clean and dry before connecting the charger.
• Ensure that the direction reversing switch (6 Fig. A) is
in the central position in order to prevent the
appliance from being switched on unexpectedly.
• Insert the charger (5) into the base of the appliance,
as shown on the illustration. Push the battery until it
latches in.
• Press the locking buttons (10) on both sides before
removing the battery, and disengage the battery
from the base of the appliance.
OPERATION
Always follow the safety notes and the relevant
safety code.
Hold the appliance firmly and press the drill cutter
steadily onto the workpiece. Do not overload the
appliance.
Only use drill cutters with no visible wear. Worn drill
cutters will have a bad effect on the functioning of the
appliance.
ADJUSTING THE SPEED
The appliance has two drill speeds.
• For slow drilling or for driving or removing screws,
set the speed selection switch (2) to '1'.
• For fast drilling set the speed selection switch to '2'.
NEVER SWITCH OVER WHEN THE
MOTOR IS RUNNING!
ADJUSTING THE TORQUE
Fig. D
The appliance has 16 different torque settings with
which to set the power for driving and removing screws.
• Set the torque adjustment ring (3) to the desired
position.
The available torque settings are indicated on the
adjustment ring by the numbers 1 to 8 and by dots
between the figures to define intermediate settings
(16 in total).
• You should preferably choose as low a setting as
possible when using the screwdriver. Select a higher
setting if the motor slips.
DRIVING AND REMOVING SCREWS
• Set the direction reversing switch (6) to position 'R'
in order to drive screws.
• Set the direction reversing switch to position 'L' in
order to remove screws.
DRILLING
• Rotate the torque adjustment ring (3) to the drilling
position.
Ensure that the direction reversing switch (6) is
always set to 'R' during drilling.
SWITCHING THE DEVICE ON AND OFF
Fig. A
• Depress the on/off switch (1). It regulates the speed
of the appliance by transmitting power to the switch.
• Release the on/off switch (1) to halt the drill chuck
immediately which will no longer run on.
• Move the direction reversing switch (6) to the centre
in order to lock the appliance in its disabled state.
Only lay down the appliance when it has stopped running
completely. Do not place it on a dusty surface as
particles of dust could get into the mechanism.
4 Ferm Ferm 57

CHARGING THE BATTERY
Fig. E
The FASL-1800K2 battery charger is only suitable for
charging batteries of type FASB-1800K2.
• Place the battery (5) inside the charger (11), as
shown on the illustration. Pay attention to + and -
pole markings.
• Insert the charger plug into a power socket. The red
rapid charging lamp (12) should now be illuminated.
• As soon as the green trickle charging lamp (13) lights
up, charging has been completed and the device is
ready for operation.
Only use the charger in a dry environment at
temperatures between 10˚C and 40˚C.
The battery in your drill was not charged up at the
factory. Before using it for the first time, you should
charge it for approx. 1 – 2 hours so that it reaches full
capacity.
The final capacity of the battery is reached after 4 – 5
battery cycles.
DISCHARGING THE BATTERY
Not only charging batteries is important,
discharging is of equal importance or even greater
importance.
• When the battery is charged the cordless drill has to
be used until you start noticing that the power of the
drill is diminishing and that the maximum rotational
speed is not reached.
• The battery is almost discharged now. Only now you
can start charging the battery.
• Charging the battery while it is still charged for say
one-third of capacity, the so-called ‘memory effect’
can occur. Since during charging only the discharged
part of the battery capacity of the battery is being
charged now, the battery can start crystallizing in the
one-third that is still charged. This part of the battery
capacity can never be used afterwards.
• Do not discharge the battery to the minimum. As
soon as you notice that the power or the maximum
rotational speed is diminishing, you have to charge
the battery. When you proceed using the drill and
the battery becomes fully discharged, the so-called
‘switch of poles effect’ can occur. The polarity of the
battery poles will be switched: the ‘+’will become ‘-‘
and the ‘-‘ will become the ‘+’. Once this has
occurred the polarity will remain switched during
loading and this will damage the battery irreparable.
When the cordless drill is not being used over a
longer period of time, the battery has to be charged
fully first. The battery has to be stored in charged condition.
MAINTENANCE
These appliances are designed to function without
difficulty for a long time and to require minimum
maintenance. You will prolong the appliance's life by
cleaning it regularly and using it correctly.
CLEANING
Clean the housing regularly with a soft cloth, preferably
every time it is used. Keep the air vents free of dust and
dirt. Remove stubborn dirt with a soft rag moistened in
soapy water. Do not use any solvents such as petrol,
alcohol, ammonia, etc. as such substances can damage
the plastic parts.
LUBRICATION
The appliance does not need any extra lubrication.
FAULTS
If a fault arises through wear in an element, please
contact the service address shown on the warranty card.
A drawing of the spare parts that may be obtained is
included at the end of these operating instructions.
ENVIRONMENT
To prevent damage during transport, the appliance is
delivered in a solid packaging which consists largely of
reusable material. Therefore please make use of options
for recycling the packaging.
Nickel-cadmium batteries can be recycled. Deliver them
to a disposal site for chemical waste so that they can be
recycled or disposed of in an environmentally friendly
manner.
WARRANTY
Read the terms of warranty on the separate warranty
card which is enclosed. Please contact the Ferm service
address if you have any questions regarding accessories
and/or batteries.
We take sole responsibility for confirming that
this product conforms with the following standards
or related documents:
EN50260-1, EN50260-2-1, EN50260-2-2,
EN55014-1, EN55014-2, EN60335-1,
EN60335-2-29, EN61000-3-2, EN61000-3-3
iin compliance with the provisions of the Directives:
98/37EEC, 73/23/EEC, 89/336EEC
from 01-12-2002
ZWOLLE NL
W. Kamphof
Quality department
CE
ı
DECLARATION OF CONFORMITY
(
UK
)
Ferm 556 Ferm
Page is loading ...
Page is loading ...
Page is loading ...
Page is loading ...
Page is loading ...
Page is loading ...
Page is loading ...
Page is loading ...
Page is loading ...
Page is loading ...
Page is loading ...
Page is loading ...
Page is loading ...
Page is loading ...
Page is loading ...
Page is loading ...
Page is loading ...
Page is loading ...
Page is loading ...
Page is loading ...
Page is loading ...
Page is loading ...
Page is loading ...
Page is loading ...
Page is loading ...
-
 1
1
-
 2
2
-
 3
3
-
 4
4
-
 5
5
-
 6
6
-
 7
7
-
 8
8
-
 9
9
-
 10
10
-
 11
11
-
 12
12
-
 13
13
-
 14
14
-
 15
15
-
 16
16
-
 17
17
-
 18
18
-
 19
19
-
 20
20
-
 21
21
-
 22
22
-
 23
23
-
 24
24
-
 25
25
-
 26
26
-
 27
27
-
 28
28
-
 29
29
-
 30
30


Ferm CDM1046 Owner's manual
- Category
- Cordless combi drills
- Type
- Owner's manual
- This manual is also suitable for
Ask a question and I''ll find the answer in the document
Finding information in a document is now easier with AI
in other languages
- italiano: Ferm CDM1046 Manuale del proprietario
- français: Ferm CDM1046 Le manuel du propriétaire
- español: Ferm CDM1046 El manual del propietario
- Deutsch: Ferm CDM1046 Bedienungsanleitung
- Nederlands: Ferm CDM1046 de handleiding
- dansk: Ferm CDM1046 Brugervejledning
- polski: Ferm CDM1046 Instrukcja obsługi
- čeština: Ferm CDM1046 Návod k obsluze
- svenska: Ferm CDM1046 Bruksanvisning
- suomi: Ferm CDM1046 Omistajan opas