Microtek ArtixScan DI 6240S User manual

Category
Multifunctionals
Type
User manual
www.microtek.com
Document Imaging
Scanner
ArtixScanDI 6240S
ArtixScanDI 6250S
ArtixScanDI 6260S
ArtixScanTS 630S
User's Manual
2 ArtixScan DI 6240S/6250S/6260S & ArtixScan TS 630S User's Manual
Preface
Copyright
Copyright © 2014, Microtek International, Inc., all rights reserved. This document
may not be reproduced or copied in any way, stored electronically, or translated
into any language, without the permission of Microtek International, Inc.
Trademarks
Microtek, ScanMaker, ArtixScan, ScanWizard and ColoRescue are trademarks or
registered trademarks of Microtek International, Inc. All other trademarks or
registered trademarks are the property of their respective holders. Specifications,
software and hardware bundles are subject to change without notice. Not
responsible for typographical errors.
Disclaimer
The contents of this manual have been checked carefully for accuracy, and every
effort has been made to ensure that there are no errors. However, Microtek makes
no guarantee as to the accuracy of the contents of this document and reserves the
right to make changes to the contents without prior warning.
I49-004993 A
July 2014
Microtek International, Inc.
6, Industry East Road 3, Science Based Industrial Park, Hsinchu, 30077, Taiwan
Tel: 886-3-5772155, Fax: 886-3-5772598, http://www.microtek.com
ArtixScan DI 6240S/6250S/6260S & ArtixScan TS 630S User's Manual 3
FCC Compliance Statement
This equipment (Model: MSS-1200A4L) has been tested and found to comply
with the limits for a Class B digital device, pursuant to Part 15 of the FCC rules.
These limits are designed to provide reasonable protection against harmful
interference in a residential installation. This equipment generates, uses and can
radiate radio frequency energy and, if not installed and used in accordance with
the instructions, may cause harmful interference to radio communications.
However, there is no guarantee that interference will not occur in a particular
installation. If this equipment does cause harmful interference to radio or
television reception, which can be determined by turning the equipment off and
on, the user is encouraged to try to correct the interference by one or more of the
following measures:
Reorient or relocate the receiving antenna.
Increase the separation between the equipment and receiver.
Connect the equipment into an outlet on a circuit different from that to which
the receiver is connected.
Consult the dealer or an experienced radio/TV technician for help.
NOTE: A shielded Hi-Speed USB interface cable with ferrite core installed on the
scanner connector end must be used with this equipment.
Caution: Changes or modifications not expressly approved by the manufacturer
responsible for compliance could void the user's authority to operate the
equipment.
This device complies with Part 15 of the FCC Rules. Operation is subject to the
following two conditions: (1) This device may not cause harmful interference, and
(2) this device must accept any interference received, including interference that
may cause undesired operation.
4 ArtixScan DI 6240S/6250S/6260S & ArtixScan TS 630S User's Manual
Safety Precautions
Before using your scanner, read the following safety guides carefully, which detail
the proper operation of the scanner and its accessories to prevent injuries or
damage to users or equipment.
Power Source and AC Power Cord:
Use a power source only with a power rating specified on the marking label.
Insert the plug completely into the outlet, as a loose connection may cause
arcing and result in fire.
Place and route the power supply cord such that it is not likely to be walked
on or pinched by items placed upon or against them, paying particular
attention to the cord near the power plugs, convenience receptacles, and at
the point where it exits from the outlet.
When the scanner is left unattended and unused for long periods of time,
unplug it from the wall outlet.
Moving and Storing the Scanner:
Do not place the scanner on any slippery, slanted, or unstable surface. The
product may slide or fall, causing serious injury to people as well as serious
damage to the product.
Do not use this scanner near water. Never spill liquid of any kinds on the
product, or it may result in electric shock or other hazards.
This scanner should be situated away from heat sources such as radiators,
heat registers, stoves, or other products (including amplifiers) that produce
heat.
Service:
When you need a repair service, unplug the scanner from the power outlet
and consult qualified service personnel.
When replacement parts are required, use replacement parts that are specified
by the manufacturer or have the same characteristics as the original parts.
ArtixScan DI 6240S/6250S/6260S & ArtixScan TS 630S User's Manual 5
Table of Contents
Preface ............................................................................................... 2
FCC Compliance Statement ................................................................ 3
Safety Precautions ............................................................................. 4
Knowing about Your Scanner .............................................................. 7
Features of Your Scanner .................................................................. 7
Installation Requirements .................................................................. 9
Taking a Closer Look ...................................................................... 10
Front/Top View ....................................................................... 10
Open/Back View ...................................................................... 11
Initial Setup ...................................................................................... 12
Step 1: Unpacking Package Contents ............................................... 12
Step 2: Installing the Software ........................................................ 13
Step 3: Opening Feed Tray & Output Tray ........................................ 14
Step 4: Connecting the Scanner ...................................................... 16
To the Power Adapter .............................................................. 16
To the Hi-Speed USB Cable ...................................................... 16
Connecting to an External USB Device ............................................. 18
Positioning Documents ................................................................... 19
To Load a Stack of Documents ........................................................ 19
Paper Stopper and Paper Stabilizer Notice ................................... 21
To Load Cards ............................................................................... 23
Document Notices .......................................................................... 24
Scanning Scenarios ......................................................................... 25
Using ScanWizard DI ..................................................................... 25
Scanning Documents ............................................................... 25
Scanning Documents with Barcodes ........................................... 29
Scanning Cards ....................................................................... 31
Scanning Documents from an Application ................................... 32
Utilizing Scanned Documents .......................................................... 33
Scanning for OCR .......................................................................... 33
Scanning for E-mail ........................................................................ 35
Scanning for Copying ..................................................................... 36
6 ArtixScan DI 6240S/6250S/6260S & ArtixScan TS 630S User's Manual
Scanner Buttons ............................................................................... 37
Starting up the Scanner Button Settings Interface .............................. 38
Customizing the Function Button ..................................................... 39
How the Scanner Buttons Works ..................................................... 40
Care and Cleaning ............................................................................ 41
Cleaning the Scanner Glass Surfaces ................................................ 41
Cleaning the Rollers ....................................................................... 42
Cleaning the Sensors ...................................................................... 43
Cleaning the Recesses of the Roller Cover ......................................... 44
Maintenance ..................................................................................... 45
Replacing the Separation Roller Assembly ......................................... 45
Replacing the Feed Roller Assembly ................................................. 47
Appendix .......................................................................................... 50
Fixing Paper Jams ......................................................................... 50
Troubleshooting ............................................................................ 51
How to Scan the Document Using the
Document Sheath (Optional) ............................................................ 53
Specifications of ArtixScan DI 6240S .............................................. 55
Specifications of ArtixScan DI 6250S .............................................. 56
Specifications of ArtixScan DI 6260S .............................................. 57
Specifications of ArtixScan TS 630S ............................................... 58
ArtixScan DI 6240S/6250S/6260S & ArtixScan TS 630S User's Manual 7
Knowing about Your Scanner
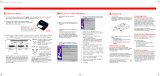
The scanner (ArtixScan DI 6240S/6250S/6260S and ArtixScan TS 630S) is a
sheet-fed color document scanner with an built-in automatic document feeder
(ADF) that can hold up to 100 sheets of papers for the unattended volume
scanning. It features optical resolution of 600 dpi, duplex (double-sided)
scanning, and extra long page support. As well, the scanner is designed with USB
hub capability.
Features of Your Scanner
The scanner comes with several important features, including the following:
Energy-saving LED light source: Adopting LEDs as the light source, when the
scanner is detected by the system, there are no requirements for any warm-up
time before carrying out the scan, which boots your productivity and reduces
energy costs amazingly. With its stable performance, the image quality will
remain consistent even after used for a certain period of time.
Ultrasonic Double-feed Detection — Equipped with an ultrasonic detector, the
scanner is able to detect the thickness between overlapping pages and to
prevent multiple pages from being fed together, efficiently preventing the
happens of mis-feed or double-feed when delivering papers through the
feeder.
Chic and Easy-to-access programmable function button — The scanner is
equipped with one Select, One Scan/Stop and one Favorite buttons located
on the top of the scanner, used to automate a number of customized and
predefined operations, allowing you an intuitive and easy way to access
scanner functions.
Additional USB hub ability — The scanner with embedded USB hub allows
you to connect an external USB device such as Microtek’s flatbed scanners,
storage devices, and hard drives, using Universal Serial Bus technology to a
single USB port.
Duplex scanning support — Allows to scan both sides of a document in a
single pass. With this feature, the scanner can handle up to 120 ipm
(ArtixScan DI 6260S), 100 ipm (ArtixScan DI 6250S), or 80 ipm (ArtixScan
DI 6240S) in color, grayscale and black & white at 200 dpi. Please note that
the ArtixScan TS 630S only supports simplex document scanning.
Superb ability to handle documents in versatile materials — The scanner lets
users easily digitize credit cards, business cards, bank statements, legal
documents, insurance papers, and medical records in just seconds.
Automatic document feeder with card scanning — The automatic document
feeder can hold up to 100 sheets of papers at a time, supporting paper sizes
range from 2.75” x 3.149” (70 mm x 80 mm) to 8.85” x 118” (225 mm x
3000 mm). Please note that ArtixScan TS 630S only supports the length up
to 8.85” x 25” (225 mm x 635 mm).
8 ArtixScan DI 6240S/6250S/6260S & ArtixScan TS 630S User's Manual
New and Advanced Microtek ScanWizard DI software — ScanWizard DI offers
a host of features and image adjustment controls for scanning. Its distinctive
features include:
Text Orientation Recognition — With this feature, the scanner
automatically rotates every saved files in a readable direction based on a
specific OCR language selected.
Smart Threshold — This feature enables the software to specify the best
level for a threshold used in high-contrast and black-and-white images
automatically, improving the clearance and readability of black-and-white
documents.
Combine Images — This feature enables the software to merge two
separate images as one united image. With this function, you do not
need other after-scan editing program to modify your scanned documents.
Smart Document Enhancement — With this feature, the scanner
automatically brings out and improves readability of text and removes
unwanted background color (i.e., green, red, or blue) in/from a document
that includes multi image elements.
Remove Blank Page — With this feature, blank pages are automatically
detected and removed by the software when scanning a stack of
documents. This function is quite helpful especially when users are
scanning double-sided documents and some of the pages only have text
on the front side.
Remove Punch Hole — With this feature, the software automatically
detects the location of the punch holes on the scanned documents and
fills them in white. This function works for most common hole puncher
standards.
Save multiple images as a single file : This advanced feature allows user
to save multiple scanned images as a single file, depending on the
number of the scanned images that are defined for document archival.
Auto-crop and auto-deskew : The auto-crop function automatically
detects the size of the original image, crops the full scan frame to fit the
image, and removes unwanted black borders. The auto-deskew function
automatically corrects distorted images for proper alignment.
Color dropout : Red, green and blue colors can be dropped out to allow
for clearer and more accurate forms processing with problematic color
documents number of the scanned images that are defined for document
archival.
ArtixScan DI 6240S/6250S/6260S & ArtixScan TS 630S User's Manual 9
Installation Requirements
In order to use your scanner, your computer must satisfy the following system
requirements:
CD-ROM/DVD-ROM drive (for installing software)
Color display with 24-bit color output capability
1 GB RAM or more (2 GB is recommended)
Intel Core2 Duo Processor at 2.1 GHz PC or higher with a SATA2/SATA3 at
7200 rpm HDD or SSD (recommended); Intel-Based Mac computer with built-
in USB port
Windows XP/Windows 7 (32-bit/64-bit)/Windows 8;
Mac OS X 10.6 or later
10 ArtixScan DI 6240S/6250S/6260S & ArtixScan TS 630S User's Manual
No. Names of Parts Functions of Parts
1 Scanner Cover Used to cover the inner parts of the scanner.
2 Document Output Tray Stores the stacked documents which have been scanned.
3 Output Tray Extender Used to extend the length of the Document Output Tray.
4 Paper Stopper (1) Stops a stack of the output documents.
5 Paper Stopper (2) Stops a stack of the output documents.
6 Paper Stabilizer Used to keep a stack of the output documents with different
sizes neatly in the Document Output Tray.
7 Button Panel
• Power Button Turns the scanner on or off.
• Select Button Toggles through the numbers of predefined function buttons.
• Scan/Stop Button Starts scan immediately or cancel a ongoing scan job.
• Favorite Button Activates the function associated with the Favorite button
that was defined in the “Save Settings to Function Button”
dialog box.
• LED Display Displays the selected function button number.
8 Guide Arms Slides to hold a stack of documents.
9 Document Feed Tray Holds the documents to be fed into the feeder.
Taking a Closer Look
Front/Top View
ArtixScan DI 6240S/6250S/6260S & ArtixScan TS 630S User's Manual 11
Open/Back View
No. Names of Parts Functions of Parts
1 Output Rollers Used to eject documents after scanning.
2 Separation Roller Assembly Used to separate each sheet of documents when a
stack of documents are fed into the feeder.
3 Release button Lifts up to open the scanner cover.
4 Glass Surfaces The places where the CCD cartridges are stored.
5 Feed Roller Assembly Used to feed documents into the feeder.
6 Hi-Speed USB Port (2) Connects the Hi-Speed USB (USB 2.0) cable to another
flatbed scanner.
7 Hi-Speed USB Port (1) Connects the Hi-Seed USB (USB 2.0) cable to the
computer.
8 Power Connector Connects the scanner to the power adapter.
12 ArtixScan DI 6240S/6250S/6260S & ArtixScan TS 630S User's Manual
Initial Setup
After unpacking your scanner package, follow the steps in order for a quick and
easy installation process.
Step 1: Unpacking Package Contents
After unpacking your scanner package, please check for the major components
listed below.
Scanner
Hi-Speed USB Cable
Power Adapter
Software CDs/DVDs
Power Cord
ArtixScan DI 6240S/6250S/6260S & ArtixScan TS 630S User's Manual 13
Step 2: Installing the Software
Important: Always close any open programs and turn off Anti-virus utilities
before installing software.
PC:
1. Turn on your computer.
2. Place the Microtek Software CD/DVD
into a drive.
3. Follow the on-screen instructions to
install the driver and software.
NOTE: If the Microtek Software Installer
screen does not come up
automatically, double-click the following
in succession: “My Computer”; the CD-
ROM (or DVD-ROM) icon; then
cdsetup.exe to start the installer
program.
4. Click EXIT on the Microtek Software
Installer screen when all the software has been installed.
5. Restart your computer.
MAC:
1. Turn on your computer.
2. Place the Microtek Software CD/DVD (ScanPotter) into a drive, and double-
click the ScanPotter installer icon to install ScanPotter.
3. Install the remaining software components, then restart your computer at the
end of all software installation.
NOTE: After rebooting your Macintosh, the Microtek software will attempt to
locate your scanner on the system. Since this is your first install and you
have not yet connected the scanner, simply ignore the message that appears
and proceed to the next step.
Drivers & Software Upgrades
After you finish the installation of software, if you found that the installed drivers and software
cannot run your product or your computer system properly later, please go to the Microtek
Download Service site at ww7.microtek.com.tw/service.php to download and install any updates
you may require.
For additional information about Microtek products, please visit our website at www.microtek.com.
14 ArtixScan DI 6240S/6250S/6260S & ArtixScan TS 630S User's Manual
Step 3: Opening Feed Tray & Output Tray
Document Feed
Tray
Open Document Feed Tray
1. Lift up the Document Feed Tray to the
highest level which can be opened.
Before
After
2. Along the tracks of the two sides
of the Document Feed Tray, slide
the feed tray down until the
supporters of the tray touch the
bottom edge of the tracks.
3. Tilt the Document Feed Tray
backwards in the direction as
arrow shown to fully open the
tray.
4. Along the tracks of the two sides of
the tray, slide the feed tray down
until it locks in place.
ArtixScan DI 6240S/6250S/6260S & ArtixScan TS 630S User's Manual 15
Open Document Output Tray and Paper Stabilizer
Bring down the Document Output Tray from the top towards the direction as
shown in the graph.
Document
Output Tray
Then, locate the Paper Stabilizer located at the bottom of the scanner cover.
Lower it down gently from the top towards the direction as shown in the graph.
Paper Stabilizer
16 ArtixScan DI 6240S/6250S/6260S & ArtixScan TS 630S User's Manual
Step 4: Connecting the Scanner
To the Power Adapter
1. Connect the power adapter to the back of the scanner.
2. Plug one end of the power cord into the power adapter, and plug the other
end of the power cord into a wall outlet or other power source.
To the Hi-Speed USB Cable
3. Connect one end of the Hi-Speed USB cable to your computer.
4. Connect the other end of the Hi-Speed USB cable to the scanner’s USB port
(1).
ArtixScan DI 6240S/6250S/6260S & ArtixScan TS 630S User's Manual 17
5. Press and hold the Power button ( )
until the orange LED lights on.
Once the scanner is powered on, the
green LED will be lighted up, and the 7-
segment LED display (SSD) will also be
activated as well.
The system will detect the scanner
automatically.
Power button
18 ArtixScan DI 6240S/6250S/6260S & ArtixScan TS 630S User's Manual
Connecting to an External USB Device
The scanner comes with two USB ports, one is used to connect with the
computer, and the other is used to connect with an external USB device such
as an USB storage device or USB hard drive.
1. Follow the procedure (Steps 1 through 4) for “Initial Setup” section to
connect your scanner first.
2. Connect an external USB device to your scanner.
3. Turn on your computer.
The system will start to locate your external USB device. When the
external USB device is found, the found USB device appears on the
device list, indicating your external USB device is ready for use.
NOTE: Your scanner has to be connected to your computer and plugged into
a power source first, and then both of them need to be powered on. At this
moment, the external USB device connected through the scanner may be
detected and work properly.
ArtixScan DI 6240S/6250S/6260S & ArtixScan TS 630S User's Manual 19
Positioning Documents
This section shows you how to position a stack of documents and hard cards,
including embossed cards into the feeder.
To Load a Stack of Documents
1. Fan the stack of papers to be
scanned before putting them onto
the Document Feed Tray.
2. Align the top edges of the papers
neatly.
3. Load the stack of papers onto the
Document Feed Tray, with the
side to be scanned facing down
and the top edge facing toward
the feeder.
Push the stack of papers into the
tray until the paper’s edge touches
the bottom edge of the feeder.
WARNING: The document feeder
is not designed for scanning
photos; doing so may damage
your originals. Microtek accepts
no responsibility for damage that
may arise from misuse of
equipment.
Document Feed Tray
20 ArtixScan DI 6240S/6250S/6260S & ArtixScan TS 630S User's Manual
Paper Stopper (1)
Paper Stopper (2)
Guide Arms
Output Tray Extender
4. Align the stack of originals with the center
of the Document Feed Tray by sliding the
two Guide Arms toward the stacked
papers if needed.
5. Pull out the Output Tray Extender to
carry the longer paper if needed.
6. Lift up either of two Paper Stoppers to keep a stack of output papers stay
neatly and tightly inside the Document Output Tray if needed.
  • Page 1 1
  • Page 2 2
  • Page 3 3
  • Page 4 4
  • Page 5 5
  • Page 6 6
  • Page 7 7
  • Page 8 8
  • Page 9 9
  • Page 10 10
  • Page 11 11
  • Page 12 12
  • Page 13 13
  • Page 14 14
  • Page 15 15
  • Page 16 16
  • Page 17 17
  • Page 18 18
  • Page 19 19
  • Page 20 20
  • Page 21 21
  • Page 22 22
  • Page 23 23
  • Page 24 24
  • Page 25 25
  • Page 26 26
  • Page 27 27
  • Page 28 28
  • Page 29 29
  • Page 30 30
  • Page 31 31
  • Page 32 32
  • Page 33 33
  • Page 34 34
  • Page 35 35
  • Page 36 36
  • Page 37 37
  • Page 38 38
  • Page 39 39
  • Page 40 40
  • Page 41 41
  • Page 42 42
  • Page 43 43
  • Page 44 44
  • Page 45 45
  • Page 46 46
  • Page 47 47
  • Page 48 48
  • Page 49 49
  • Page 50 50
  • Page 51 51
  • Page 52 52
  • Page 53 53
  • Page 54 54
  • Page 55 55
  • Page 56 56
  • Page 57 57
  • Page 58 58
  • Page 59 59

Microtek ArtixScan DI 6240S User manual

Category
Multifunctionals
Type
User manual

Ask a question and I''ll find the answer in the document

Finding information in a document is now easier with AI