Cortelco 2750 Owner's manual
- Category
- Telephones
- Type
- Owner's manual
This manual is also suitable for

OWNER’S INSTRUCTION
MANUAL
Four Line Auto-Attendant/Answering System
MODEL 2750

i
Table of Contents
1. UNPACKING AND INSTALLATION.......................................................................4
1.1 Box Contents .............................................................................................................4
1.2 Telephone Part Identification .....................................................................................5
1.3 Installation ................................................................................................................6
1.3.1 Overview ..................................................................................................................6
1.3.2 Before Installation ....................................................................................................6
1.3.3 Installation Configurations........................................................................................6
1.3.3.1 Standard Configuration.............................................................................................6
1.3.3.2 Private Line ..............................................................................................................6
1.3.3.3 Unconnected Lines ...................................................................................................6
1.3.3.4 Line 1 .......................................................................................................................6
1.3.4 Phone Installation .....................................................................................................7
1.3.4.1 Desk Mount..............................................................................................................7
1.3.4.2 Wall Mount...............................................................................................................7
1.3.4.3 Install Batteries (Optional)........................................................................................7
1.3.4.4 Assign a Station Number ..........................................................................................8
1.3.5 Test Installation.........................................................................................................8
2. SYSTEM PROGRAMMING....................................................................................9
2.1 Station Number Assignment......................................................................................9
2.2 Station Name Assignment .........................................................................................9
2.3 Line Configuration/Type .........................................................................................10
2.3.1 Line Connections/Configuration .............................................................................10
2.4 Loop Voltage Detector ............................................................................................10
2.5 Ringer Configuration ..............................................................................................12
2.5.1 Ring Timing............................................................................................................12
2.5.2 Distinctive Ringing .................................................................................................12
2.5.3 Off-Hook Ringing...................................................................................................13
2.6 Intercom Call Response ..........................................................................................13
2.6.1 Configuring intercom call response:........................................................................13
2.7 Automatic Line Selection........................................................................................14
2.8 Toll Restriction .......................................................................................................14
2.8.1 To set the system’s toll restriction access code: .......................................................14
2.8.2 Setting the restricted numbers .................................................................................14
2.8.3 Allowed numbers ....................................................................................................15
2.8.4 Toll restriction override..........................................................................................15
2.8.5. Line restriction........................................................................................................15
2.9 System Privacy .......................................................................................................16
2.10 Dialing Mode..........................................................................................................16
2.11 Area Codes .............................................................................................................17
2.11.1 Home Area Code ....................................................................................................17
2.11.2 Local Area Codes....................................................................................................17
2.11.3 1 Plus 7...................................................................................................................17

ii
3. MEMORY SETTINGS ...........................................................................................18
3.1. Memory Features....................................................................................................18
3.1.1 Storing a hyphen into memory ................................................................................18
3.1.2 Storing a dialing pause into memory .......................................................................18
3.1.3 Storing a flash into memory ....................................................................................18
3.1.4 Storing temporary tone dialing into memory ...........................................................18
3.1.5 Storing one of the last five numbers dialed into memory .........................................18
3.1.6 Storing a Caller ID number into memory ................................................................18
3.2 To store a personal directory dial number................................................................18
3.3 To Store Caller ID Records .....................................................................................19
3.4 To Store the Centrex Prefix .....................................................................................19
3.4.1 To Set the Centrex Prefix ........................................................................................19
4. MISCELLANEOUS SETTINGS............................................................................19
4.1 Time and Date.........................................................................................................19
4.2 Message Waiting Lamp...........................................................................................20
4.2.1 Message Waiting Line Selection .............................................................................20
4.2.2 Message Waiting Mode Selection............................................................................20
4.3 Caller ID on Call Waiting (CIDCW) Sensitivity......................................................20
4.4 Hold Call Reminder ................................................................................................21
4.5 Adjusting Auto Hold Drop Time .............................................................................21
4.6 Adjusting Flash Timer.............................................................................................21
4.7 Erase Numbers Stored in Memory...........................................................................21
4.8 Erase Toll Restrictions ............................................................................................22
4.9 Erase All Feature Settings .......................................................................................22
4.10 Reset Default Settings.............................................................................................22
5. ANSWERING SYSTEM ........................................................................................22
5.1 Setting Answering Option .......................................................................................22
5.1.1 Turn on Answering Machine ...................................................................................22
5.1.2 Record your OGM ..................................................................................................23
5.1.2.1 Reviewing your OGM. ...........................................................................................23
5.1.2.2 Erasing your OGM. ................................................................................................23
5.1.2.3 Changing your OGM. .............................................................................................23
5.1.3 Setting Your Telephone's Pickup Delay ...................................................................23
5.1.4 Setting Toll Saver....................................................................................................24
5.1.5 New Message Beep.................................................................................................24
5.1.6 Remote Code ..........................................................................................................24
5.1.6.1 Setting the remote code...........................................................................................25
5.1.6.2 Checking Messages Remotely ................................................................................25
5.1.7 Setting Message Length ..........................................................................................25
5.2 Auto-Attendant .......................................................................................................25
5.2.1 Set up the Auto Attendant .......................................................................................26
5.2.2 Record the Auto Attendant Day OGM.....................................................................26
5.2.3 Record the Auto Attendant Night OGM ..................................................................26
5.2.4 Record the Auto Attendant Zero-Out OGM.............................................................27
5.2.5 Setting Auto Attendant Pickup Delay ......................................................................27

iii
5.2.6 Night Timer Set ......................................................................................................27
5.2.7 Setting More Than One Phone as an Auto Attendant ...............................................28
5.2.8 Using Additional Auto Attendant OGMs .................................................................28
5.2.9 Setting Separate Auto Attendant OGM's for Different Lines....................................28
5.2.10 Turn Off the Auto Attendant on One or More Lines.................................................28
5.2.11 Choosing the Zero-Out Action ................................................................................29
5.2.12 All Transfer Feature ................................................................................................29
5.2.13 Leave a Message at the Auto Attendant...................................................................29
5.2.14 Set Night Message by Line .....................................................................................29
5.2.15 Transfer Directly to Voice Mail ...............................................................................30
5.2.16 Repeating the Main Menu and Messages.................................................................30
5.2.17 Summary of Auto Attendant Actions .......................................................................30
5.3 Voicemail................................................................................................................30
5.3.1 Activation ...............................................................................................................31
5.3.2 Message Notification ..............................................................................................31
5.3.3 Play Messages ........................................................................................................31
5.3.4 Stop Message Playback...........................................................................................31
5.3.5 Pause Message Playback.........................................................................................31
5.3.6 Repeat a Message ...................................................................................................31
5.3.7 Skip to the next Message.........................................................................................31
5.3.8 Jump Backward ......................................................................................................32
5.3.9 Jump Forward.........................................................................................................32
5.3.10 Saving a Message as New .......................................................................................32
5.3.11 Message Auto Save.................................................................................................32
5.3.12 Increase Playback Speed .........................................................................................32
5.3.13 Decrease Playback Speed........................................................................................32
5.3.14 Erasing Messages....................................................................................................32
5.3.14.1 Erase a Single Message...........................................................................................32
5.3.14.2 Erase All Messages.................................................................................................32
5.3.15 Using Dial Pad........................................................................................................32
5.3.16 Recording a Memo or Conversation........................................................................33
5.3.16.1 Recording a Memo .................................................................................................33
5.3.16.2 Recording a Telephone Conversation. .....................................................................33
5.3.17 Screening Calls .......................................................................................................33
6. TELEPHONE OPERATION...................................................................................33
6.1 Making and Answering Calls ..................................................................................33
6.2 Redial .....................................................................................................................34
6.2.1 To redial the last phone number dialed ....................................................................34
6.2.2 To redial any of the last five phone numbers dialed .................................................34
6.3 Hold........................................................................................................................34
6.3.1 Placing a Call on Hold ............................................................................................34
6.3.2 Making a call on another line ..................................................................................34
6.3.3 Answering a call on another line .............................................................................34
6.4 Conference .............................................................................................................34
6.4.1 Outside Calls ..........................................................................................................35

iv
6.4.2 Outside Call with Intercom Station .........................................................................35
6.5 Transfer ..................................................................................................................35
6.5.1 Attended Transfer....................................................................................................35
6.5.2 Blind Transfer.........................................................................................................35
6.5.3 Transfer Ring ..........................................................................................................35
6.5.4 Personal Ring..........................................................................................................36
6.6 Caller ID.................................................................................................................36
6.6.1 Incoming call..........................................................................................................36
6.6.2 Call Waiting Caller ID ............................................................................................36
6.6.3 Caller List...............................................................................................................36
6.6.3.1 Reviewing Calls .....................................................................................................36
6.6.3.2 Dialing Calls...........................................................................................................37
6.6.3.3 Deleting Numbers...................................................................................................37
6.7 Volume Levels ........................................................................................................37
6.7.1 Ringer.....................................................................................................................37
6.7.2 Handset...................................................................................................................37
6.7.3 Speakerphone .........................................................................................................37
6.7.4 Intercom Speaker ....................................................................................................37
6.7.5 Discrete alert...........................................................................................................37
6.8 Voice Mail (Message Waiting) ................................................................................37
6.8.1 Accessing Messages................................................................................................38
6.8.2 Resetting MSG Lamp .............................................................................................38
6.9 FLASH ...................................................................................................................38
6.10 Mute .......................................................................................................................38
6.11 Do Not Disturb (DND) ...........................................................................................38
6.12 Line Reserve...........................................................................................................39
6.13 Call Privacy ............................................................................................................39
6.14 Toll Restriction .......................................................................................................39
6.14.1 Toll Restriction Removal (Single Call)....................................................................39
6.14.2 Toll Restriction Removal (Single Station) ...............................................................39
6.15 Timer ......................................................................................................................39
6.15.1 Elapsed Call Time...................................................................................................39
6.15.2 Timer Reset ............................................................................................................40
6.15.3 Elapsed Call Time (Previous Calls) .........................................................................40
6.16 Headset...................................................................................................................40
6.17 Directory Card ........................................................................................................40
6.18 Personal Directory ..................................................................................................40
6.19 Predialing ...............................................................................................................40
6.20 Intercom Calls ........................................................................................................40
6.20.1 Intercom while Idle.................................................................................................41
6.20.2 Intercom while on an Outside Call ..........................................................................41
6.20.3 Answering Intercom Calls.......................................................................................41
6.20.3.1 Intercom Ring.........................................................................................................41
6.20.3.2 Intercom Voice........................................................................................................41
6.20.3.3 Intercom Handsfree ................................................................................................41

v
6.20.3.4 Answering an Intercom Call while on an Outside Call ............................................41
6.21 Paging.....................................................................................................................41
6.21.1 Single Page .............................................................................................................41
6.21.2 All Page ..................................................................................................................41
6.21.3 Blocking Pages .......................................................................................................42
6.21.4 Answering Pages.....................................................................................................42
6.21.4.1 Single Page..............................................................................................................42
6.21.4.2 All Page...................................................................................................................42
6.22 Room Monitoring ...................................................................................................42
7. USING STANARD TELEPHONES .......................................................................42
7.1 Line Status and Calls on Hold .................................................................................43
7.2 Call Privacy ............................................................................................................43
7.3 Intercom .................................................................................................................43
7.4 Fax Machines and Modems.....................................................................................43
8. POWER FAIL OPERATION ..................................................................................43
APPENDIX A.....................................................................................................................................44
Menu Tree...........................................................................................................................................44
Phone Settings ....................................................................................................................................44
Answer Settings ..................................................................................................................................46
Memory Settings.................................................................................................................................47
Time and Date Settings .......................................................................................................................47
Advanced Settings ..............................................................................................................................47
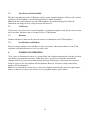
APPENDIX B - Installation Worksheet ...............................................................................................48
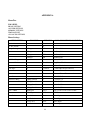
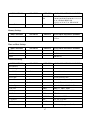
APPENDIX C - Toll Restriction Worksheet ........................................................................................49
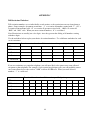
APPENDIX D - Trouble Shooting Guide ...........................................................................................50
FCC INFORMATION.........................................................................................................................51
TELEPHONE REPAIR.......................................................................................................................52
LIMITED WARRANTY.....................................................................................................................53

2
THANK YOU
FOR PURCHASING THE
2750
Four Line Auto-Attendant/Answering Telephone
We want you to know all about your new Telephone.
How to install it, the features it provides, and the services you can expect from its use. We have
included this information in your Owner’s Instruction Manual.
The 2750 is one of our new Series 7 Telephones. It is a stand alone 4-Line Telephone or part of a 4-
Line system consisting of up to 16 stations of 2740's, 2742's, or 2750's. The 2740 is our base unit. It
has 4 line buttons, Intercom, Conference, Page, Transfer, Mute, Headset, Flash, Redial, Hold, 5
memory dial buttons, 40 Number Personal Directory, Type II Caller ID, Speakerphone, and 2.5mm
Headset Jack.
The 2742 Analog Adapter will support attaching an analog telephone to your 4-Line system. For
example you can connect a cordless telephone, fax machine, or modem. These units will have an
extension number and can share all 4 lines.
The other telephone in our system is the model 2740. The 2740 has the same features as the 2750
except for the Answering System.

3
PLEASE READ BEFORE INSTALLING AND USING YOUR NEW
TELEPHONE EQUIPMENT.
SAFETY INSTRUCTIONS
Always follow basic safety precautions
when using your telephone equipment to reduce the risk of
fire, electrical shock, and injury.
1.
Read and understand all instructions
in the Owner’s Instruction Manual.
2.
Read all warnings
and follow all instructions marked on the product.
3.
Unplug this product from the wall outlet before cleaning
. Use a damp cloth for cleaning. Do
not use liquid or aerosol cleaners.
4.
Do not use the telephone near water
. For example, do not use near a bathtub, wash bowl,
kitchen sink, laundry tub, swimming pool, or in a wet basement.
5.
Do not place this product on an unstable cart or stand
. The product may fall causing serious
damage to the product.
6.
Use only the type power source indicated on the label.
If you are not sure of the type power
supply to your home, consult your dealer or local power company.
7.
Do not place any objects on the telephone line cord
. Do not locate the telephone where the
line cord will be walked on.
8.
Do not block or cover ventilation slots and openings
in the bottom of the telephone. The
openings should never be blocked by placing the telephone on a bed, sofa, rug, or other similar
surfaces. The telephone should never be placed near or over a radiator or heat register. The
telephone should never be placed in a built-in installation unless proper ventilation is provided.
9.
Never spill liquid on the telephone or push objects of any kind through ventilation slots
.
Liquid or objects may touch dangerous voltage points or short out parts that could result in a
risk of fire or electrical shock.
10.
Do not disassemble this product
. Opening or removing covers may expose you to dangerous
voltages or other risks. Incorrect reassembly can cause electrical shock when the product is
subsequently used.
11.
Do not overload outlets and extension cords.
Some telephones require AC power from an
outlet. Overloading the outlets can result in the risk of fire or electric shock.
12.
Avoid using a telephone during a local thunderstorm
. There may be a remote risk of
electrical shock from lightning.
13.
Use only the power cord and batteries indicated in this manual
. Do not dispose of batteries
in a fire. They may explode. Check with local codes for possible special disposal instructions.
14.
Do not use a telephone to report a gas leak in the vicinity of the leak.

4
1. UNPACKING AND INSTALLATION
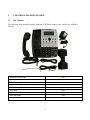
1.1 Box Contents
The following items should be packed with your 2750. Please contact your dealer if any of them is
missing.
2750 Phone (Main Body) 1 pcs
Handset 1 pcs
Handset Cord (Coiled Cord) 1 pcs
Line Cord 7ft 2 pcs
Short Line Cord 7” 1 pcs
Desk Stand 1 pcs
Power Adapter (Transformer 9VDC 500 ma) 1 pcs
Quick Start Guide 1 pcs
User Manual on Mini CD 1 pcs

5
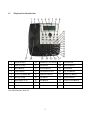
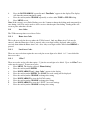
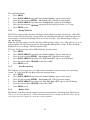
1.2 Telephone Part Identification
1 Telephone Base 10 VM Buttons (See below)
19 Redial Button
2 Handset Cradle 11 Line Buttons 20 Headset Button
3 Menu Button 12 Intercom Button 21 Hold Button
4 Delete Button 13 2.5mm Headset Jack 22 Key Pad Buttons
5 Review Up/Down Btn 14 Conference Button 23 Volume Up Button
6 Message Lamp 15 Page Button 24 Speaker Button
7 Multi-Angle LCD 16 Flash Button 25 Volume Down Button
8 Select Button 17 Transfer Button 26 Speaker
9 Calls Button 18 Mute Button 27 Handset Jack
Voice Mail Buttons (Item 10)

6
1.3 Installation
1.3.1 Overview
The 2750 is part of the 7 Series Multiline phone system. Up to 16 instruments may be connected in
this system. All these devices use conventional telephone wiring. Wiring runs between stations may be
a maximum of 600 feet.
1.3.2 Before Installation
In order to install your telephones correctly, you must determine the incoming wiring configuration. In
most cases, incoming lines will be terminated in either RJ11 Single Line Jacks or RJ14 Double Line
Jacks. If you are not sure of your incoming line configuration, contact your telephone line installer.
All connection between the wall jacks and the telephones may be done with standard telephone
modular cords. Please be sure that your modular cords have at least 4 wires in them.
If you have RJ11 jacks, you will need two line adapters (not included) to connect to the 2750. These
couplers take the single line wiring and convert it to double line wiring. These couplers should be
available where you purchased your 2750.
1.3.3 Installation Configurations
1.3.3.1 Standard Configuration
The 2750 is initially configured so that each line is common at all stations. In other words, Line 1 at
each telephone is connected to the same incoming line; Line 2 at each station is connected to the same
incoming line, etc. This is commonly known as a “square system.” If this is suitable for your
installation, you only need to connect the telephones to the telephone lines.
1.3.3.2 Private Line
A private line is connected to only one telephone in the system. No other phones in the system have
access to this telephone line.
1.3.3.3 Unconnected Lines
It is also permissible to leave one or more lines unconnected.
1.3.3.4 Line 1
Line 1
MUST
be connected to the same incoming line on all phones for the system to function
correctly.

7
1.3.4 Phone Installation
1.3.4.1 Desk Mount
a. Connect the power adapter to the jack on the bottom of the phone. Plug the adapter into a wall
outlet which is not controlled by a wall switch. Use only a 9V DC 500mA, Class 2 adapter.
b. Connect the line cords. If you have RJ14 line jacks, you need only connect 4 wire line cords
between the wall jacks and the jacks in the base of the 2750. If you have RJ11 line jacks, you
will need 2 line couplers as discussed in Section 1.3.2. Note that the jacks on the 2750 are
numbered L1/L2 and L3/L4. Connect your incoming lines accordingly.
c. Select the desired viewing angle and install the desk stand. The desk stand can be installed in
two positions to give a choice of viewing angle.
d. Plug the coiled cord into the handset jack, and plug the other end of the cord into the base.
e. Place the handset on the base.
1.3.4.2 Wall Mount
a. Remove the desk stand. The unit will then mount directly on a standard wall telephone jack.
b. Connect the power adapter and the line cords. See Steps “a” and “b” above. Use the included
short line cord to connect to the mounting jack. Use one of the included long line cords to
connect to the other jack.
c. Mount telephone to wall jack (RJ-11W).
d. Plug the coiled cord into the handset, and then plug the other end of the cord into the base.
e. Rotate the handset hook into the wall mount position and place the handset on the base.
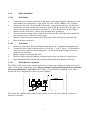
1.3.4.3 Install Batteries (Optional)
The 2750 uses AC power from a standard wall outlet. As long as the telephone is connected to a wall
outlet, it will operate using the AC power.
Please remember to plug your telephone into a wall outlet
that is not controlled by a wall switch.
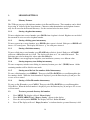
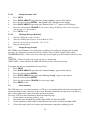
The 2750 uses 3 AAA batteries for backup power. These
batteries fit into a compartment on the base of the telephone.
The display has a battery symbol whenever the batteries are low and need replacing or when no
batteries are installed.

8
Follow the instructions below to install or replace the batteries.
a. Make sure the AC cord is attached to the telephone and to a working electrical outlet.
b. Turn the telephone over.
c. Remove desk pedestal/wall mount bracket if attached.
d. Remove battery door cover by using the tip of a ball-point pen, paper clip, or similar object to
release the battery door tab.
e. Remove the old battery.
f. Insert 3 new AAA size alkaline batteries. Note that we recommend ONLY alkaline batteries.
g. Close the battery cover.
1.3.4.4 Assign a Station Number
Station 01 must be the first extension number assigned.
Station 01 is required for programming
features on the 2750. Refer to Section 2.1 for detailed instructions on assigning station numbers.
1.3.5 Test Installation
This procedure should be used at each telephone after initial installation. It may also be used if you are
having problems with your system. First, verify the three items below at each telephone in the system.
a. Verify that the AC power transformer is connected to the 2750 and to mains power.
b. Verify that Line 1 is connected to the 2750.
c. Verify that a station number has been assigned.
Now, verify that Line 1 has been connected correctly to all telephones.
d. Press Line 1 at one telephone.
e. Verify that the Line 1 LED is Green, the Speakerphone LED is red and that dial tone is heard.
f. Verify that the Line 1 LED is red at each other station.
To verify the connection of lines 2 – 4, perform the following steps at each telephone.
a. Press Line 1.
b. Verify that the Line 1 LED is Green, the Speakerphone LED is red and that dial tone is heard.
c. Dial the telephone number for Line 2. Verify that the Line 2 LED flashes slowly. If it does not
flash, Line 2 may not be properly connected.
d. Repeat the steps above using the telephone numbers for Lines 3 and 4 if applicable. Remember
that Lines 2, 3, and 4 may not be common at all telephones.

9
2. SYSTEM PROGRAMMING
2.1 Station Number Assignment
Each station must be assigned a unique station number.
2750 telephones will not function correctly
until a station number is assigned.
To assign a number to a station:
a. Press
MENU
. The display will read “
Phone Setting
”
b. Press the soft key under
ENTER
. The display will show the currently assigned station number.
c. Press the soft key under
CHANGE
repeatedly, until the desired station number is displayed.
The choices are Station #01 through Station #16.
d. Press
MENU
to exit.
Note:
One phone in the system must be set as Station #01 in order for all the system features to
function. Certain Features can only be programmed at station 01 and will only function at station 01.
2.2 Station Name Assignment
You may give a name to each of your telephones. During Intercom calls, the name that is assigned to
the station will show with the Extension Number. Please note that it may take up to 24 hours for all
stations to be updated with a name change.
Station names must be assigned at Station 01.
Follow
the steps below to assign a station name.
a.
Press
MENU
. The display will read “
Phone Setting
”
b.
Press soft key under
ENTER.
c.
Press the
Down Arrow
repeatedly until the display reads “
Station Naming
”
d.
Press soft key under
ENTER.
The display will show the currently stored name for station #01,
or indicate “No Name” if no name has yet been given to station #01.
e.
Press soft key under
CHANGE
if you wish to store a new name for station #01, or press
DOWN ARROW
repeatedly until you see the station number that you want to name, and then
press soft key under
CHANGE
.
f.
Use the dialpad numbers to enter the name for the desired station. Names may contain up to 16
characters.
g.
Press the soft key under
SAVE.
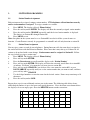
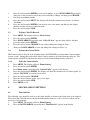
Repeat these steps for any additional stations you wish to name. The following table below shows
which dialpad numbers to press for letters and special characters. Press the down arrow button below
the display to leave an empty space. Press the
DELETE
button to make corrections.
0
0
1
, - ' & . ( ) 1
2
a b c 2 A B C
3
d e f 3 D E F
4
g h i 4 G H I

10
5
j k l 5 J K L
6
m n o 6 M N O
7
p q r S 7 P Q R S
8
t u v 8 T U V
9
w x y Z 9 W X Y Z
* *
#
#
2.3 Line Configuration/Type
While Line 1 must be shared at all stations, Lines 2, 3 or 4 may be unconnected or may be connected to
private lines.
COMMON:
This is the factory setting for all lines. This setting assumes that the line is connected to
the same telephone number at all stations.
PRIVATE:
Use this setting at any telephone that is connected to a different telephone number than the
corresponding line at the other stations. For example, you may connect your private telephone number
to Line 3 at your station instead of connecting your station to the common Line 3. In this example, you
would set Line 3 at your station as PRIVATE.
UNCONNECTED:
Use this setting at any telephone that is not physically connected to all of its lines.
2.3.1 Line Connections/Configuration
a.
Press
MENU
. The display will read “
Phone Setting.
”
b.
Press soft key under
ENTER.
c.
Press the
DOWN ARROW
repeatedly until the display reads ”
Line Connections.
”
d.
Press soft key under
ENTER
. The display will show the line connection setting for Line 2.
e.
Press the soft key under
CHANGE
repeatedly, until the desired line connection setting for Line
2 is displayed. The choices are:
L2: COMMON (factory setting)
L2: PRIVATE
L2: UNCONNECTED
f.
Press the soft key under
NEXT
to see the current setting for Line 3, and repeat steps c, d, and e
to change the settings for Lines 3-4.
g.
Press
MENU
to exit.
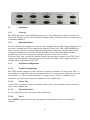
2.4 Loop Voltage Detector
The status indicators of your 2750 telephone are designed to light when a fax machine, modem, or
standard telephone is using a line.
If the line status indicators of your 2750
telephones light when no
telephone is using the line or do not light when a standard telephone is using the line, the loop voltage
detector setting may need to be adjusted. The factory setting of 48 volts is appropriate for most

11
installations. This value can be changed to either 24 volts or 12 volts or the feature can be turned off.
To set Loop Voltage Detector
a.
Press
MENU.
b.
Press
DOWN ARROW
repeatedly until “
Advanced Setting
” appears in the display.
c.
Press soft key under
ENTER
.
d.
Press
DOWN ARROW
repeatedly until “
Loop Detect
:” appears in the display, along with the
current setting

12
e.
Press the soft key under
CHANGE
repeatedly until the desired loop detect setting is displayed.
The choices are:
Loop Detect: 48V (factory setting)
Loop Detect: 24V (24 volts)
Loop Detect: 12V
Loop Detect: OFF
f.
Press
MENU
to exit.
If a line indicator at your 2750 telephone stays lit because there is no telephone line connected, and you
wish to turn it off, do not use this feature, but set this line at this station to UNCONNECTED
2.5 Ringer Configuration
The ringers for each outside line are controlled individually at each telephone. There are three possible
settings for each line ringer:
RINGER ON
: The line will ring normally.
DELAYED RING
: The line will start ringing after the first 20 seconds. This is useful if all phones are
answered at a central location.
RINGER OFF
: The line will not ring. In all these cases, the line indicators will flash to signal an
incoming call.
You can always answer a ringing line, whether or not it is ringing audibly at your telephone, by
pressing the flashing line button.
2.5.1 Ring Timing
a. Press MENU. The display will read “Phone Setting”
b. Press soft key under ENTER.
c. Press the Down Arrow repeatedly until “Ringer Settings” appears in the display.
d. Press soft key under ENTER. The display will show the current ringer setting for Line 1.
e. Press the soft key under CHANGE repeatedly, until the desired ringer setting for Line 1 is
displayed. The choices are:
L1 Ringer: ON (factory setting)
L1 Ringer: DELAY
L1 Ringer: OFF
f. Press the soft key under DOWN ARROW to see the current ringer setting for Line 2. Repeat
steps c - e to change the ringer settings for Lines 2-4.
g. Press MENU to exit.
2.5.2 Distinctive Ringing
All lines are initially set to ring with Ring Sound #1. Each outside line may be assigned one of seven
other distinctive ringer tones. This can be used to easily identify a ringing line or ringing phone. To
assign distinctive rings to one or more lines:
a.
Press
MENU
. The display will read “
Phone Setting
”
b.
Press the
DOWN ARROW
repeatedly until ”
Distinctive Ring
” appears in the display.
c.
Press soft key under
ENTER.
The display will show the distinctive ring setting for Line 1.

13
d.
Press the soft key under
CHANGE
repeatedly, until the desired distinctive ring setting for Line
1 is displayed. There are eight choices.
e.
Press the
DOWN ARROW
to see the current setting for Line 2, and repeat steps c and d to
change the settings for Lines 2-4.
f.
Press
MENU
to exit.
Note:
When a distinctive ring setting is displayed, it may be heard by pressing the soft key under
CHANGE.
2.5.3 Off-Hook Ringing
When a ringer is set to
ON
or
DELAYED
, an incoming call will cause a double ring every 15 seconds
is the phone is in use. This feature is called “off-hook ringing” and can be disabled. To disable off-
hook ringing
a.
Press
MENU.
b.
Press the soft key under
NEXT
repeatedly until “Off Hook Ring” appears in the display, along
with the current setting.
c.
Press the soft key under
CHANGE
to change the setting.
d.
Press
MENU
to exit.
Note:
Off-Hook ringing does not function on intercom calls. However, the line lamps will flash to
indicate an incoming call.
2.6 Intercom Call Response
The 2750 may be configured to respond to intercom calls in one of three ways:
INTERCOM HANDSFREE:
When an intercom call is received, the telephone will ring once and then
give a triple alert tone. The phone will then automatically answer the intercom call on speakerphone.
INTERCOM RING:
When an intercom call is received, the telephone will ring repeatedly with the
intercom ring. The call may be answered by lifting the handset or pressing the
SPEAKER
button.
INTERCOM VOICE:
When an intercom call is received, the telephone will ring once and then give an
alert tone. After this the calling party will be connected. To respond to the calling party, either lift the
handset or press the
SPEAKER
button.
Note:
When an intercom call is received while an outside call is in progress, the 2750 will ring with a
single intercom ring regardless of the intercom ringer setting
2.6.1 Configuring intercom call response:
a.
Press
MENU
. The display will read
Phone Setting
b.
Press soft key under
ENTER.
c.
Press the
Down Arrow
repeatedly until
Intercom Prefs
appears in the display.
d.
Press soft key under
ENTER
. The display will show the current intercom setting.
e.
Press the soft key under
CHANGE
repeatedly, until the desired intercom setting is displayed.
f.
Press
MENU
to exit.

14
2.7 Automatic Line Selection
The 2750 will automatically select an outside line or the intercom line whenever the handset is lifted or
the SPEAKER button is pressed. To choose which line will be automatically selected:
a.
Press
MENU
. The display will read
Phone Setting
b.
Press the soft key under
ENTER
.
c. Press the DOWN ARROW repeatedly until Auto Seize appears in the display. The display will
show the current auto seize setting.
d. Press the soft key under CHANGE repeatedly, until the desired setting is displayed. The
choices are L1, L2, L3, L4 or INTCM.
e.
Press
MENU
to exit.
Note:
An incoming call that will be selected automatically when the handset is lifted or the
SPEAKER
or
HEADSET
button is pressed, regardless of the automatic line selection choice. To select a non-
ringing line, the desired
LINE
button must be pressed before lifting the handset.
Note:
If the chosen line is in-use, the telephone will automatically select the next available line.
2.8 Toll Restriction
Toll Restriction enables control of outgoing calls. The 2750 accomplishes toll restriction by allowing
entry of number strings which may not be dialed. This is done on a station-by-station basis so different
phones may have differing toll restrictions. This may be used to help prevent unauthorized long
distance calls.
For example, to prevent dialing of “900” numbers, the code 1900 should be entered as a toll restriction.
This would prevent the station from dialing any numbers beginning with 1900.
A “#” character may be entered as a wildcard which matches either 0 or 1. If #900 had been entered in
the example, the station would not dial numbers beginning with either 1900 or 0900.
A toll restriction access code is needed to change or add toll restrictions. This code must be set at
station #01.
2.8.1 To set the system’s toll restriction access code:
At Station #01:
a.
Press
MENU
. The display will read “
Phone Setting
”
b.
Press the
DOWN ARROW
repeatedly until “
Toll Restriction
” appears in the display.
c.
Press the soft key under
ENTER
. The display will read “
Access Code:****
.”
d.
Press the soft key under
CHANGE
to store a new access code.
e.
Enter a 4 digit number.
f.
Press
MENU
to exit.
Note that the previous code is not needed to set a new code. The factory default code is 1234.
2.8.2 Setting the restricted numbers
After toll restrictions are set at a phone, they will be retained even after a power failure.
To set restricted numbers at a station
a.
Press
MENU
. The display will read
Phone Setting
b.
Press the
DOWN ARROW
repeatedly until
Toll Restriction
appears in the display.

15
c. Press the soft key under ENTER. The display will read Enter Code: [all stations other than
#01]
d. Enter the 4 digit toll restriction access code which was set at Station #01. A confirmation beep
will sound and the display will read Set Restricted #
e.
Press the soft key under
ENTER.
The display will show the currently stored Restriction #1, or
show
1:
if no Restriction #1 has been stored.
f.
Press the soft key under
CHANGE
.
g.
Dial desired restricted number, up to 6 digits.
h. Press the soft key under SAVE.
i. Press the DOWN ARROW and repeat steps f-h to store any additional restrictions at this
station.
2.8.3 Allowed numbers
After setting toll restrictions, it is sometimes necessary to enter some exceptions which may be dialed.
For example, if “1” had been entered to completely restrict long distance calls, toll free calls could be
allowed by entering “1800” as an allowed number. The “*” character may be used as a wildcard which
matches any digit. Allowed numbers may contain up to 10 digits.
To set allowed numbers at a station
a.
Press
MENU
. The display will read “
Phone Setting
”
b.
Press the soft key under
ENTER.
c.
Press the
DOWN ARROW
repeatedly until “
Toll Restriction
” appears in the display.
d.
Press the soft key under
ENTER
. The display will read “
Enter Code:
”
e. Enter the 4 digit toll restriction access code. A confirmation beep will sound and the display will
read “Set Restricted #”
f.
Press the soft key under
NEXT
. The display will read “
Set Allowed #
”
g.
Press the soft key under
ENTER.
The display will show the currently stored Allowed #1, or
1:
if there is no Allowed #1 yet stored.
h.
Press the soft key under
CHANGE
i.
Dial desired allowed number, up to 10 digits.
j.
Press the soft key under
SAVE
.
k.
Press the soft key under
DOWN ARROW
and repeat steps g-j if you wish to store any
additional allowed numbers at this phone.
2.8.4 Toll restriction override
After setting toll restrictions for a station, its toll restriction is automatically ON. This may be
temporarily overridden without affecting the settings stored in the telephone.
2.8.5. Line restriction
It is possible to restrict any or all of the lines at a particular station. That station will not be able to
make any outgoing calls on the restricted lines, with the exception of the allowed numbers at that
station and calls to 911. The station can still receive incoming calls on these lines, take calls off hold,
and have full use of the intercom. This is normally used for phones which are placed in a public area.
Page is loading ...
Page is loading ...
Page is loading ...
Page is loading ...
Page is loading ...
Page is loading ...
Page is loading ...
Page is loading ...
Page is loading ...
Page is loading ...
Page is loading ...
Page is loading ...
Page is loading ...
Page is loading ...
Page is loading ...
Page is loading ...
Page is loading ...
Page is loading ...
Page is loading ...
Page is loading ...
Page is loading ...
Page is loading ...
Page is loading ...
Page is loading ...
Page is loading ...
Page is loading ...
Page is loading ...
Page is loading ...
Page is loading ...
Page is loading ...
Page is loading ...
Page is loading ...
Page is loading ...
Page is loading ...
Page is loading ...
Page is loading ...
Page is loading ...
Page is loading ...
-
 1
1
-
 2
2
-
 3
3
-
 4
4
-
 5
5
-
 6
6
-
 7
7
-
 8
8
-
 9
9
-
 10
10
-
 11
11
-
 12
12
-
 13
13
-
 14
14
-
 15
15
-
 16
16
-
 17
17
-
 18
18
-
 19
19
-
 20
20
-
 21
21
-
 22
22
-
 23
23
-
 24
24
-
 25
25
-
 26
26
-
 27
27
-
 28
28
-
 29
29
-
 30
30
-
 31
31
-
 32
32
-
 33
33
-
 34
34
-
 35
35
-
 36
36
-
 37
37
-
 38
38
-
 39
39
-
 40
40
-
 41
41
-
 42
42
-
 43
43
-
 44
44
-
 45
45
-
 46
46
-
 47
47
-
 48
48
-
 49
49
-
 50
50
-
 51
51
-
 52
52
-
 53
53
-
 54
54
-
 55
55
-
 56
56
-
 57
57
-
 58
58


Cortelco 2750 Owner's manual
- Category
- Telephones
- Type
- Owner's manual
- This manual is also suitable for
Ask a question and I''ll find the answer in the document
Finding information in a document is now easier with AI
Related papers
-
Cortelco Colleague User manual
-
-
-
-
-
-
-
-
-
Other documents
-
Baldwin Boxall BVOC96S Operating instructions
-
AT&T 830 User manual
-
GE 2-9451 User manual
-
Southwestern Bell 2-9193 User manual
-
-
Toshiba DP5022F-SD User manual
-
Verizon NSQ412 User manual
-
Serene VM-150 Quick start guide
-
Shiro SB2182 User manual
-
Panasonic EASA-PHONE KX-T3280 Operating Instructions Manual