Page is loading ...

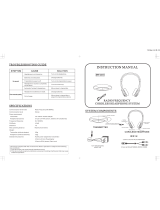
Rechargeable Stereo Wireless Headset
Auriculares Inalámbricos Estéreo Recargables
Model #TV920 | Modelo #TV920
Questions? Preguntas?
Instruction Manual
Please save for future reference.
Manual de Instrucciones
Por favor guarde para futura referencia.
English: page 2 / Español: página 18
1-877-736-6760 / www.unisar.com
www.ActiveForever.com

Thank you for purchasing the Unisar
®
TV Listener
®
J3. This infrared wireless stereo headset
system will enable you to listen to your television, stereo, computer, or any other audio
device at a volume that is comfortable for you without disturbing others in the room. It
is intended for use if you have difficulty hearing, if you simply want to watch television
at a different volume than others in the room, or if you want to watch television while
someone else is sleeping.
Please review the installation choices that are in this manual and determine which
features your television or audio device has before setting up your TV Listener J3.
Please save this manual for future reference.
If you have any questions, please contact our Customer Service Department at
1-877-736-6760 Mon-Fri from 9:00AM-5:00PM Eastern Time, or e-mail us at
Table of Contents
How It Works / page 4
Setting Up the System / page 4
Operating the System / page 10
Tips for Using Your TV Listener J3 / page 12
Care and Cleaning / page 12
T
roubleshooting / page 13
Technical Specifications / page 15
Limited Product Warranty / page 15
Also Available / page 16
En Español / página 18
Warning
Please read all safety and operating instructions carefully and completely before using
this product.
1. For your well-being, medical experts advise against playing any audio device
at a high volume for continuous and extended play. If you hear a ringing in your
ears, reduce the volume immediately or discontinue use.
2. To reduce the risk of fire or electrical shock, do not expose this product to water
or moisture.
3. To pr
event overheating, keep this product away from heat sources such as
radiators, stoves, fireplaces, or direct sunlight.
4. Use only the AC adapter pr
ovided with the transmitter. Use of any other adapter
may damage the unit and void the warranty.
5. Plug the AC adapter into standard household current only (120 volt AC outlet).
6. Avoid damage to the adapter cords. Route cords so that they are not likely to
be walked on or pinched by items placed upon or against them.
7. Use only AAA rechargeable batteries with the headset.
8. Do NOT use alkaline batteries or you will severly damage the unit.
9. Dispose of batteries properly and safely.
10. Unplug the AC adapter and remove batteries during long periods of non-use.
11. Do NOT disassemble.
{2} {3}
Infrared
Light Rays
Transmitter
Headset

Installation of the Transmitter
The following are the five different ways to connect the TV Listener J3. Your installation
will depend on the type of equipment you have.
1. STEREO INSTALLATION – for equipment with two audio output jacks (stereo televi-
sions, DVD players, cable boxes). Refer to Pg. 6.
2.
MONO INSTALLATION – for equipment with only one audio output jack (mono televi-
sions, DVD players, cable boxes). Refer to Pg. 6.
3. SMALL HEADPHONE JACK INSTALLATION – for equipment with a small headphone
jack (most CD players, portable stereos, MP3 players). Refer to Pg. 7.
4.
LARGE HEADPHONE JACK INSTALLATION – for equipment with a large headphone
jack (some home stereo systems). Refer to Pg. 8.
5. MICROPHONE INSTALLATION – for equipment that does not have any audio output
jacks. Refer to Pg. 8.
How It Works
The TV Listener J3 works just like your remote control, sending an invisible infrared
signal from your television or any other audio device to the deluxe stereo headset.
Unlike radio frequency devices, infrared is not subject to interference from cordless
phones, wireless networks, microwaves, etc. You adjust the volume on the wireless,
lightweight headset to suit your personal needs. Multiple headsets can be used
with one transmitter.
Setting Up the System
Charge the batteries in the headset for 16 hours prior to first use.
TV Listener J3 Components
Check that you have all the following components before installation.
RCA 3.5mm stereo adapter
RCA 3.5mm mono adapter
6.3mm stereo headphone adapter
Microphone adapter
AC adapter
{4} {5}
Transmitter (connects to your TV or other audio device)
Wireless Headset
Infrared Rays
Headphone
Adapter
AC Adapter Jack
Power Switch
Infrared
Sensors
Battery
Compartments
Infrared Sensors
Power
Indicator
Light
Power
Switch
Volume
Control
Charging
Adapter
Charging
Indicator Light
Charging
Jack
2 AAA rechargeable batteries

Follow these instructions if your equipment only has one audio output jack (mono
televisions, DVD players, cable boxes).
1. Connect the audio cord on the back of the transmitter (A) to the RCA 3.5mm
mono adapter (E).
2. Plug the other end of the adapter into the audio output jack on your equipment.
If you are connecting to your television, use the audio jack located on the back.
Do NOT use the audio jacks on the fr
ont as these are audio input jacks. Be sure to
plug the adapter into the audio output and not the video output.
If you are connecting to a device that is connected to your television (DVD player
,
VCR, cable box, home theater system), this device must stay on when using the
TV Listener. The VCR must also be set to the same channel as the television.
3. Plug the AC adapter (C) into the jack marked “DC IN” on the back of the trans-
mitter and plug the adapter into an electrical outlet. For long periods of non-use,
we suggest unplugging the AC adapter.
SMALL HEADPHONE JACK INSTALLATION
Follow these instructions if your equipment has a small headphone jack (CD players,
portable stereos, computers, MP3 players).
1. Connect the audio cord on the back of the transmitter (A) directly into the head-
phone jack on your equipment.
2. Plug the AC adapter (C) into the jack marked “DC IN” on the back of the trans-
mitter and plug the adapter into an electrical outlet. For long periods of non-use,
we suggest unplugging the AC adapter.
STEREO INSTALLATION
Follow these instructions if your equipment has two audio output jacks (stereo
televisions, DVD players, cable boxes).
1. Connect the audio cord on the back of the transmitter (A) to the RCA 3.5mm
stereo adapter (D).
2. Plug the red end of the adapter into the right audio output jack and the white
end into the left audio output jack on your equipment.
If you are connecting to your television, use the audio jacks located on the back.
Do NOT use the audio jacks on the fr
ont as these are audio input jacks. Be sure to
plug the adapter into the audio output and not the video output.
If you are connecting to a device that is connected to your television (DVD player,
VCR, cable box, home theater system), this device must stay on when using the
TV Listener. The VCR must also be set to the same channel as the television.
3. Plug the AC adapter (C) into the jack marked “DC IN ” on the back of the trans-
mitter and plug the adapter into an electrical outlet. For long periods of non-use,
we suggest unplugging the AC adapter.
MONO INSTALLATION
Fig. 2
Fig. 3
{6} {7}
Fig. 1
white - LEFT
red - RIGHT

LARGE HEADPHONE JACK INSTALLATION
Follow these instructions if your equipment has a large headphone jack (home
stereo systems).
1. Connect the audio cord on the back of the transmitter (A) to the 6.3mm stereo
headphone adapter (F
).
2. Plug the other end of the adapter into the headphone jack on your audio device.
3. Plug the AC adapter (C) into the jack marked “DC IN” on the back of the trans-
mitter and plug the adapter into an electrical outlet. For long periods of non-use,
we suggest unplugging the AC adapter.
MICROPHONE INSTALLATION
Follow these instructions if your equipment does not have any audio output jacks.
1. Connect the audio cord on the back of the transmitter (A) to the microphone
adapter (G).
2. Affix the microphone mounting piece directly over the speaker on your television
or audio device by exposing the adhesive strip. Insert the microphone into the
mounting piece.
3. Y
ou will have to set your audio device to a very low volume. You can also change
the volume on the headset by adjusting the placement of the microphone.
4. Plug the AC adapter (C) into the jack marked “DC IN” on the back of the trans-
mitter and plug the adapter into an electrical outlet. For long periods of non-use,
we suggest unplugging the AC adapter.
Headset Battery Installation
IMPORTANT: Charge the batteries for 16 hours prior to first use. You must only use
rechargeable batteries (included). Do NOT use alkaline batteries or you will
severely damage the unit.
The wireless headset (B) requires two rechargeable AAA batteries (included). To
access the battery compartment on each ear piece, take of
f the ear pads (refer to
Fig. 6). To remove the ear pads, gently pull them off the headset. Insert one recharge-
able AAA battery in each side matching positive (+) to positive (+) and negative (-) to
negative (-). Do NOT use alkaline batteries. To replace the ear pads, snap them back
on by lining up the prongs with the corresponding openings on the headset.
Charge the batteries for 16 hours prior to first use. Be sure the headset is turned off and
the transmitter is plugged in to an electrical outlet and turned on. Plug the charging
adapter from the back of the transmitter into the jack marked “CHG” on the right ear-
piece ( ) of the headset (refer to Fig. 7). The green charging indicator light on the
headset will illuminate. On a full charge, the battery life is approximately 15 hours.
Recharge when the volume begins to weaken. Do not charge for more than 24 con-
secutive hours as it will shorten the life of the batteries.
For long periods of non-use we suggest removing the batteries.
The batteries need to be replaced when they last much less than the expected time
(approximately 15 hours) after proper charging. Be sure to replace ONLY with
rechar
geable AAA batteries. Do NOT mix alkaline and rechargeable batteries.
Fig. 4
{8} {9}
Fig. 5
Fig. 6
Ear Pad
AAA Battery

5. Adjust the volume to a comfortable listening level using the volume control dial. If
the headset is out of the range of the transmitter or the infrared sensors in the
headset are being blocked, no sound will come through the headset.
6. We recommend turning the transmitter and headset off after each use except
when charging the headset when the headset should be of
f and the transmitter
should be on.
Regardless of what type of equipment you have and which installation instructions you
follow, when you connect the transmitter the sound will be heard either (1) through
your headset and television speakers, or (2) just through your headset. The following
instructions will apply to all five types of installation.
1. The sound from your television is heard from your headset and your television
speakers. If you want the sound to be heard only from the headset, you will need
to mute the television sound. If you simply turn the volume down all the way, you
may r
educe the signal going to the television audio output jacks which will affect
the sound coming through your headset. To mute the television sound, press Mute
on your remote control. Or, if your TV has a speaker switch on the back panel, set
this switch to “OFF”.
If pressing “Mute” on your remote also turns off the sound from your headset, your
TV may have speaker options that you can access with your television's remote
control. Please refer to your television instruction manual to locate this control and
set it to “OFF”.
2. The sound from your television will only be heard through your headset and will
not be heard from the television speakers. If you want the sound to be heard from
the headset and the television speakers, connect the transmitter to your DVD
player, VCR, or cable box or use the micr
ophone adapter (refer to Pg. 8).
NOTE: If you hear static or a radio signal from your headset, it may be due to the elec-
tr
ic current to the transmitter. Unplug the AC adapter from the electrical outlet and
plug it into a surge protector. Then plug the surge protector into the electrical outlet.
If you are using your TV Listener J3 with an LCD or plasma television and are experienc-
ing static, connect the transmitter to your cable box instead of your television. Move
the transmitter as far from your television as possible while making sure it is still in the
line of sight of the headset.
There is no limit to the number of headsets that can be used with a single transmitter.
Please call us at 1-800-430-0222 to find out where you can purchase additional head-
sets.
Operating the System
1. Place the transmitter at or close to your eye level when you are sitting. There
should be nothing obstructing the transmission of the infrared light rays from the
transmitter to the receiver in your headset (refer to Fig. 8). The transmitter must be
within 33 feet (10 meters) of the headset for the system to work properly.
NOTE: Avoid exposure to direct sunlight. Direct sunlight may interfere with the
reception. It is also subject to interference from treadmills.
2. Turn the transmitter on by sliding the power switch to the “ON” position. Four red
lights on the front of the transmitter will illuminate.
3. T
urn the headset on by sliding the power switch to the “ON” position on the right
earpiece ( ). The r
ed power indicator light will illuminate. To prevent possible
damage to your ears, be sure to lower the volume on the headset before putting
it on.
4. Put the headset on making sure the right earpiece ( ) goes over your right ear
and the left earpiece ( ) goes over your left ear
. Caution: To prevent possible
damage to your ears, be sure to lower the volume on the headset before putting
it on.
{10} {11}
Fig. 8
Infrared
Light Rays
Fig. 7

AC adapter is not
connected or electrical
outlet is out of order.
Transmitter is not turned on.
Batteries in headset are
low or improperly installed.
Transmitter and/or headset
are not on.
Batteries in headset are
low or improperly installed.
Headset is not in line
of sight of transmitter.
No audio output from
audio device.
Transmitter is not properly
plugged into audio device.
Headset and transmitter
are too far apart.
Check connection
or change to another elec-
trical outlet.
Make sure power switch
is set to “ON” position.
Check or charge batteries.
Use only AAA rechargeable
batteries. Do NOT use
alkaline batteries.
Make sure both units are on.
Check or char
ge batteries.
Use only AAA rechargeable
batteries. Do NOT use
alkaline batteries.
Make sure nothing is
obstructing the transmission
of the infrar
ed light rays
from transmitter to headset.
Check sound on your
audio device.
Check connections. Make
sure adapter is plugged
into the audio output jack
(not input).
Bring them closer together.
Maximum range is 33 feet
(10 meters).
Four red lights on
transmitter do not
illuminate.
Power indicator light
on headset does not
illuminate.
No sound from headset.
{12} {13}
PROBLEM POSSIBLE CAUSE SOLUTION
Troubleshooting
If you believe your TV Listener J3 is not operating properly, please refer to the
Troubleshooting Guide below. Improper installation of the transmitter is the leading
cause of malfunctions. If you are unable to solve the problem after checking the
Troubleshooting Guide, please follow the instructions for microphone installation (refer
to Pg. 8). If you can hear your audio device from the headset using the microphone,
the problem may be due to improper installation or issues with your television or audio
device. If you can not hear anything from the headset when using the microphone,
please contact our Customer Service Department at 1-877-736-6760 Mon-Fri from
9:00AM-5:00PM Eastern T
ime, or e-mail us at [email protected].
Tips for Using Your TV Listener J3
• If you are using your TV Listener J3 with an LCD or plasma television and are experi-
encing static, connect the transmitter to your cable box instead of your television.
Follow the instructions for Stereo Installation on Pg. 6. Also, move the transmitter so
that it is not directly in front of your television. Move the transmitter as far from the
television as possible while making sure it is still in the line of sight of the headset.
• If you hear static or a radio signal from your headset, it may be due to the electric
current to the transmitter. Unplug the AC adapter from the electrical outlet and plug
it into a surge protector. Then plug the surge protector into the electrical outlet.
• When connecting to your television or other audio equipment, be sure to use the
audio OUTPUT jacks. If you are connecting to your television, these jacks are located
on the back of the television. Do NOT use the audio jacks on the front as these are
audio input jacks.
• When charging your headset, make sur
e the transmitter is turned on and the head-
set is turned off.
• Only use rechargeable batteries. Do NOT use alkaline batteries or you will severely
damage the hedset.
• If your headset is not working, check the batteries first. Make sure the batteries are
char
ged and properly installed. Also, be sure the transmitter is turned on.
Care & Cleaning
Disconnect the transmitter and remove all batteries from the headset before cleaning.
Clean the exterior of the units with a soft, dry or slightly damp cloth. Do NOT spray with
cleaning products or solvents. Do NOT submerge in water or any other liquid.

Technical Specifications
Power Supply 12V, 200mA AC adapter for transmitter
2 rechargeable AAA batteries for headset
Maximum Operating Distance 33 feet (10 meters)
Battery Life Over 15 hours
Transmission Mode
Infrared 850 nanometers
Frequency Modulation 2.3 MHz (left); 2.8 MHz (right)
Frequency Response 40 Hz–12000 Hz
Distortion 1% THD
Signal to Noise Ratio 40 dB
Limited Product Warranty
Unisar Inc., the distributor of the TV Listener
®
J3 (Model #TV920), warrants to the original
owner of this product that this product is free from defects in materials and workman-
ship for a period of six (6) months from the date of the original purchase. If this product
fails to function properly when used as directed under normal conditions within the
six-month period, Unisar Inc. will either repair or replace the product, at its option, free
of charge, when it is returned in its original packaging, postage prepaid, with proof of
purchase. Unisar Inc. will bear the cost of repairing or replacing the product and
shipping it back to you within the United States. Repair or replacement of the defective
product is subject to verification of the malfunction or defect when delivered to:
Unisar
®
Service Center
51-02 21 Street, Floor 7
Long Island City, NY 11101
NOTE: The warrantor expressly disclaims liability for incidental, consequential, or special
damages of any nature. This warranty does not cover: 1) A defect that has been
caused by repair or modification by any person other than a Unisar technician; 2) A
defect caused by negligence, accident, or misuse of the product; 3) A defect caused
by incorrect installation of and/or defective batteries; 4) Battery life; 5) A defect
caused by the use of any adapter not provided by the warrantor; or 6) Damage
resulting from improper operation.
LEGAL RIGHTS VARY FROM STATE TO STATE.
NOTE: This warranty is valid only for products sold in the United States. If you have
purchased this product outside of the United States, please see your local retailer or
distributor for service.
If you have any questions, please contact our Customer Service Department
at 1-877-736-6760 Mon-Fri fr
om 9:00AM-5:00PM Eastern Time, or e-mail us at
{14} {15}
RoHS
Increase volume level.
Bring them closer together.
Maximum range is 33 feet
(10 meters).
Make sure nothing is
obstructing the transmission
of the infrared light rays
from transmitter to headset.
Place transmitter at or
close to your eye level
when you are sitting.
Make sure infrared sensors
are not being blocked by
clothing, hair, hands, etc.
Position unit away from
direct sunlight.
Check or charge batteries.
Use only AAA rechargeable
batteries. Do NOT use
alkaline batteries.
Plug AC adapter into
surge protector and then
plug surge pr
otector
into electrical outlet.
Plug the transmitter into
your cable box instead of
your television. Move trans-
mitter so it is not directly in
front of the TV.
Make sure there isn't
anything obstructing the
transmission of the infrared
light rays from transmitter
to headset.
Plug AC adapter into
surge protector and then
plug surge protector
into electrical outlet.
Check connections. Make
sure you have not connect-
ed the stereo adapter into
a mono output.
Sound from headset
is low or poor.
There is static coming
from headset.
There is a radio signal
coming from headset.
There is sound coming
from only one side of the
headset.
Volume on headset is
too low.
Headset and transmitter
are too far apart.
Headset is not in line of
sight of transmitter.
Transmitter is not placed
properly.
Infrared sensors in
headset are obstructed.
Interference from sunlight.
Batteries in headset
are low.
Electric current to transmitter
is causing static.
LCD or plasma television is
causing static.
Headset is not in line of
sight of transmitter.
Electric current to transmitter
is causing the radio signal.
Audio cord is not properly
plugged into audio
device.
www.ActiveForever.com
/