Page is loading ...

ACOM
OWNER’S MANUAL
MODEL: JW-1
TOP LOADING BALANCE
VER 1.10

TABLE
O
F
CO
NTENT
S
SPECIFICATIONS .......................................................... 1
NOMENCLATURE ......................................................... 1
FUNCTION KEYS .......................................................... 2
DISPLAY ........................................................................ 3
UNPACKING & ASSEMBLY ........................................... 4
SAFETY PRECAUTIONS ............................................... 5
OPERATING THE BALANCE ......................................... 5
SETTINGS MODE .......................................................... 8
DENSITY MEASUREMENT OPTION ............................ 10
WEIGH RANGES ........................................................... 10
TROUBLESHOOTING & ERROR MESSAGES ............. 11
CALIBRATION ................................................................ 12
ENABLE & DISABLE WEIGHING UNITS ....................... 13
PREFACE
Acom Corporation would like to thank you for purchasing our model JW-1
Advanced top loading balance. We are committed to creating high quality
low maintenance products and supplying our customers with diligent
customer service. This manual contains information on the proper
assembly and use of the scale.
Brand and product names are trademarks and/or registered
trademarks of their respective companies.
This company makes no representations or warranties, either
expressed or implied, with respect to the contents hereof and
specifically disclaims any warranties of merchantability or fitness
for any particular purpose. Any software described in this manual
is sold or licensed “as is”. Should the programs prove defective
following their purchase, the buyer (and not this company, its
distributors, or its dealers) assumes the entire cost of all necessary
servicing, repair, and any incidental or consequential damages
resulting from any defect in the software. Further, this company
reserves the right to revise this publication and to make changes
from time to time in the contents hereof without obligation to notify
any person of such revision or changes.
Disclaimer:

1
S
peci
f
ications
Model: JW-1
Maximum Capacity: 300 g 600 g 1,500 g 3,000 g
Minimum Graduation: 0.01 g 0.02 g 0.05 g 0.1 g
Maximum Tare: Full Capacity
External Resolution: 1/30,000
A/D Conversion Rate: 3 Updates / second (adjustable)
Units & Modes: gram, piece, percent, carat, ounce, pound, pennyweight,
grain, kilogram, and Trojan ounce.
LCD Display: 6 Digits, 999999 max
Platter Size: 123 mm (4.84”) Diameter 180 mm (7.09”) Diameter
Width: 275 mm (10.82”)
Depth: 235 mm (9.25”)
Product Dimensions:
Height: 70 mm (2.75”)
Product Weight: 1.1 kg (2.4 lb)
Input: 120 Volts AC, @ 60 Hz
Output: 9 Volts DC, 300 mA
Power Requirements:
Battery: 6 AA Cells (6 x 1.5 = 9 VDC)
Operating Temp: 10°C ~ 30°C
(
50°F~ 86°F
)
Humidity RH 35% ~ 85%(no condensation)
Power consumption Approximately 1 Watt
Nomenclature
1500 g & 3000 g

2
Function Keys
Zero key, used to manually set the zero point.
Tare key, used to enter tares and clear tares.
Mode key, used to toggle between the different weighing units,
counting features, and percentage mode.
Set key, used to sample the Piece Weight in Counting
mode, and to take a sample in Percent mode.
¿ key, no function. (Reserved for future use.)
ZERO
TARE
MODE
SET
À
300 g & 600 g

3
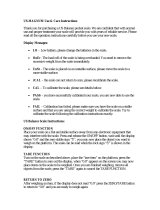
Display
Zero lamp indicates that the balance is at net or gross zero.
Stable lamp indicates that the weight on the balance is stable.
Net lamp indicates that there is a tare set and that the displayed weight is the net
weight. When it is off, it means that the displayed weight is the gross weight.
BATT lamp on indicates that the balance is using battery power. When it’s off it
indicates that the balance is using adapter power source. When it’s flashing it
means that the batteries are running low and should be replaced soon.
t oz lamp indicates that the balance is displaying Trojan ounces.
oz lamp indicates that the balance is displaying ounces.
lb lamp indicates that the balance is displaying pounds.
g lamp indicates that the balance is displaying grams.
kg lamp indicates that the balance is displaying kilograms.
c.t. lamp indicates that the balance is displaying carats.
dwt lamp indicates that the balance is displaying pennyweights.
GN lamp indicates that the balance is displaying grains.
% lamp indicates that the balance is in percentage mode.
pcs lamp indicates that the balance is in counting mode.
Zero Stable Net
8.8.8.8.8.8.
T T T
BATT toz
lb
kg
pcs
%
c.t.
dwt
GN

4
Unpacking & Assembly
Your JW-1 scale should come with the following:
NO Parts Name Units QTY
4-1 IN CARTON BOX EA 1
4-2 STYROFOAM EA 2
4-3 BODY POLY BAG EA 1
4-4 MANUAL POLY BAG EA 1
4-5 AC ADAPTER EA 1
4-6 ADAPTER BOX EA 1
4-7 MANUAL EA 1
4-8 PLATTER EA 1
4-9 PLATFORM EA 1
4-10 BALANCE EA 1
4-15 SILICA DESICANT EA 2

5
Safety Precautions
Place the balance on a flat and rigid surface
Place the balance far from strong RF interference
Level the balance using its adjustable feet
Do not subject the platter to sudden impacts
Do not spill the water or any other liquid on the balance
Do not use any solvents to clean the balance
Do not leave the balance in direct sunlight
Operating the Balance
Make sure the platter is sitting properly on top of the platform and that
there is nothing on top of the platter. Also, make sure that the balance
is plugged into the proper outlet. Place the power switch into the ON
position. The display will run through a self test and then go to zero.
The balance will always remain in the last mode that it was left in. The
display may appear as follows (remember that the decimal place and
number of zeros may differ depending on what mode the balance was
last set to and what the balance’s capacity is:)
This example is the JW-1 300g in lb mode. If all
precautions are followed properly, you will see this
display along with the ZERO and STABLE lamps and the lb enunciator.
Changing Modes
You can toggle through each of the 10 modes by pressing the MODE
key. If you start with pound mode (lb) then the mode key will toggle as
follows:
lb Î dwt Î GN Î kg Î toz Î g Î pcs Î % Î ct Î oz
As the display toggles between the different modes the decimal place
and number of zeros may differ depending on the mode and what the
balance’s capacity is. For more details see the Weigh Range Chart at
the end of this manual.
0
.00000

6
Simple Weighing
1. Make sure that the balance is at ZERO and STABLE
2. Place a load on the platter
3. After the STABLE indicator turns on you may read the weight
4. Remove the load
Entering Tares
1. Make sure that the balance is at ZERO and STABLE
2. Place the container to be tared on the platter
3. After the STABLE indicator turns on press the TARE key
4. The display should be at zero and the NET, STABLE, and ZERO
lamps should all be on
Removing Tares
1. Make sure that the balance is at ZERO, STABLE, and NET
2. Remove the tared container from the platter
3. The display should be at a negative weight and the NET,
STABLE, and ZERO lamps should all be on
4. Press the TARE key
5. The display should now show zeros and be at ZERO and
STABLE
Simple Weighing Using Tares
1. Make sure that the balance is at ZERO and STABLE
2. Follow directions for entering a tare
3. Place a load on the platter
4. After the STABLE indicator turns on you may read the weight
5. Remove the load
6. You may continue to use the same tare by returning to step 3 in
this procedure, OR continue to step 7
7. Follow steps for Removing Tares
Parts Counting
1. Press the MODE key until you reach Counting mode (pcs)
2. Make sure that the balance is at ZERO and STABLE
3. Press the SET key
4. The display will read SEt 10
5. Place sample of 10 pieces on the platter and press the SET key
6. If the sample is not within the Minimum Piece Weight and
Minimum Sample Weight for the balance’s specific capacity, then
the balance will loop back to step 5 but this time asking for a
(continued)

7
sample of 20 pcs; if it fails again then 50 pcs; and finally 100 pcs.
If the display stays at SEt 100 after you press SET more than
once, then the parts are too light
7. If the sample met the proper criterion, then you will see a count on
the display. See the chart below to determine the Minimum Piece
and Sample Weights
8. Remove the sample from the platter
9. If necessary, follow directions for entering a tare
10. Place a sample of quantity to be counted
11. Once the STABLE light is on you may read the pcs
12. Remove sample from the platter and repeat steps 10 thru 12 as
many times as necessary or proceed to step 13
13. If necessary, follow directions for removing a tare
Parts Counting Specifications
JW-1
300g 600 g 1500 g 3000g
Minimum Piece Weight 0.01 g 0.02 g 0.05 g 0.1 g
Minimum Sample Weight 1 g 2 g 5 g 10 g
Maximum Quantity 30,000 pcs
Percentage Mode
1. Press the MODE key until you reach Percentage mode (%)
2. Make sure that the balance is at ZERO and STABLE
3. If necessary, follow directions for entering a tare
4. Press the SET key
5. The display will read SAmPL
6. Place a sample load on the platter and press the SET key
7. The scale will display ------ momentarily and If the sample is not
within the Minimum Percent Weight or Minimum Percentage for
the balance’s specific capacity, then the balance will loop back to
step 5
8. If the sample met the proper criterion, then you will see a
percentage on the display. See the chart on the next page to
determine the Minimum Percent Weight or Minimum Percentage
9. Remove the sample from the platter
10. Place a sample to be evaluated
11. Once the STABLE light is on you may read the %
12. Remove the sample and repeat steps 10 thru 12 as many times
as necessary or proceed to step 13
13. If necessary, follow directions for removing a tare

8
Percentage Sampling Specifications
JW-1
300g 600 g 1500 g 3000g
Minimum 100% Weight 1 g 2 g 5 g 10 g
Minimum Percentage 0.01%
Maximum Percentage 30,000.0 %
NOTE: Once a successful sample has been accepted by the
balance, the Piece Weight and the Percentage will continue to be used
until it is reset by another successful sample. This is true even if you
turn the scale off or unplug it.
Settings Mode
There are 4 parameters that can be set depending upon the balance’s
application. These are designated as User Parameters (UP) 1 thru 4.
The listed values are the default values. See the chart below for a
detailed explanation f each of the User Parameters.
Entering Settings Mode
1. Make sure that the balance is turned OFF
2. Press and hold down the ¿ key
3. Turn the scale ON
4. Once the display reads UP- release the ¿ key
5. Press the ¿ key
6. The display should read UP-1 0 where the 1 signifies the User
Parameter and the 0 is the value that it is currently set at
7. Use the SET key to toggle the value to its desired setting
8. Press the ¿ key to store the value and move on to the next User
Parameter
9. The display should read UP-2 0
10. Use the SET key to toggle the value to its desired setting
11. Press the ¿ key to store the value and move on to the next User
Parameter
12. The display should read UP-3 0
13. Use the SET key to toggle the value to its desired setting
14. Press the ¿ key to store the value and move on to the next User
Parameter
15. The display should read UP-4 0

9
16. Use the SET key to toggle the value to its desired setting
17. Press the ¿ key to store the value
18. The display should read UP-
19. Press the SET key to return to Operation mode (normal use)
User Parameter Specifications
User
Parameter Definition Range
UP-1
This controls the update speed on the display. Set
to 0 will make the display update the weight most
quickly; whereas a setting of 3 will update most
slowly.
0~3
UP-2 A setting of 1 corresponds to Average Weighing; a
setting of 0 sets the balance to Normal Weighing. 0~1
UP-3
A setting of 1 corresponds to disabling Auto-Zero
tracking; a setting of 0 sets the enables Auto-Zero
Tracking.
0~1
UP-4 A setting of 1 corresponds to Handshake RS-232
mode; a setting of 0 sets Stream RS-232 mode. 0~1
Average Weighing: This mode is used whenever you need to weigh
items that may be in motion: liquids, livestock, etc.
Auto-Zero Tracking: You will want to disable this feature when the
items that you weigh most often are very near zero.
Stream Mode: When you use the RS-232 serial port in this mode, the
balance will automatically transmit the displayed data whenever the
balance becomes stable.
Handshake Mode: When you use the RS-232 serial port in this mode,
the balance will only transmit the displayed data whenever the balance
is polled. This is usually done by connecting the balance to a PC.

10
Density Measurement Option
Install the Density Measurement Hook. Set up the balance and
platform as shown below. Calculate the density by using the density
formula. The picture below shows the balance being used in a density
measurement application.
Weigh Ranges
Weigh Range Chart
JW-1-300 g JW-1-600 g JW-1-1500 g JW-1-3000 g
g 300 x 0.01 600 x 0.02 1,500 x 0.05 3,000 x 0.1
c.t. 1,500 x 0.05 3,000 x 0.1 7,500 x 0.2 15,000 x 0.5
oz 10.5815 x 0.0005 21.163 x 0.001 52.907 x 0.002 105.815 x 0.005
lb 0.66135 x 0.00005 1.3227 x 0.0001 3.3068 x 0.0002 6.6615 x 0.0005
dwt 192.90 x 0.01 385.8 x 0.02 964.5 x 0.05 1,929 x 0.1
GN 4,629.4 x 0.2 9,258.8 x 0.5 23,147 x 1 46,294 x 2
kg 0.3 x 0.00001 0.6 x 0.00002 1.5 x 0.00005 3 x 0.0001
toz 9.6445 x 0.0005 19.289 x 0.001 48.222 x 0.002 96.445 x 0.005

11
Troubleshooting & Error Messages
Error Message Table
Display Definition Solution
ZEro Initial zero point failure.
Turn scale on with nothing on or
obstructing the platter.
Turn scale on with the platter
properly placed on the scale.
EEP E2PROM failure. Contact Service.
AdC A/D Converter failure. Contact Service.
PArA Lost memory. Possibly reprogram and recalibrate.
Contact Service.
BATT Battery is low. Replace the batteries.
Brand and product names are trademarks and/or registered
trademarks of their respective companies.

12
Calibration
The following procedure describes how to Zero Calibrate and Span
calibrate the balance. These two are always done together.
Calibration
1. Turn scale off and remove the platter.
2. Locate the CAL Switch (rear of platform).
3. Press and hold down the CAL Switch while you turn on the scale.
4. Once the display reads SPAn , release the CAL Switch.
5. Replace the platter on the platform.
6. Press the ¿ key.
7. After the STABLE lamp turns on, press the ¿ key.
8. The scale will display rEAd and then show FULL.
9. Press the ¿ key.
10. Once the STABLE lamp turns on, place the mass weight on the
platter. This mass must be equal to exactly the balance’s
capacity in grams.
11. After the STABLE lamp turns on, press the ¿ key.
12. The scale will display rEAd , then show End , and then show
SELF.†
13. Remove mass weight from the platter.
14. Turn scale off and then back on.
†NOTE: The balance may show HHHHHH or LLLLLL at this point
instead of End.
If it displays HHHHHH then the mass weight that you are using to
calibrate is too heavy or the scale may need servicing (the load cell
may have been overloaded or shock loaded.)
If it displays LLLLLL then the mass weight that you are using to
calibrate is too light or the scale may need servicing (the scale may
have been dropped or mistreated.)

13
Enable & Disable Weighing Units
Use the following procedure to enable or disable individual weighing
units.
1. Make sure that the scale is plugged into a proper outlet, the
platter is properly seated, there is nothing on the platter, and
that the Power Switch is OFF.
2. Press and hold down the ¿ key while you turn the Power
Switch is ON.
3. The display will read: up-.
4. Press the MODE key and then the ¿key. The display will
read: st-mod.
5. If you want to Enable g weighing press SET; to Disable g
press the MODE key.
6. If you want to Enable Pcs weighing press SET; to Disable Pcs
press the MODE key.
7. If you want to Enable % weighing press SET; to Disable %
press the MODE key.
8. If you want to Enable c.t. weighing press SET; to Disable c.t.
press the MODE key.
9. If you want to Enable oz weighing press SET; to Disable oz
press the MODE key.
10. If you want to Enable lb weighing press SET; to Disable lb
press the MODE key.
11. If you want to Enable dwt weighing press SET; to Disable dwt
press the MODE key.
12. If you want to Enable Gn weighing press SET; to Disable Gn
press the MODE key.
13. If you want to Enable kg weighing press SET; to Disable kg
press the MODE key.
14. If you want to Enable toz weighing press SET; to Disable toz
press the MODE key.
15. If you want to Enable t weighing press SET; to Disable t press
the MODE key.
16. Now press the MODE key 5 times and the balance will run the
display test and go to Zero.
17. Press the MODE key once then turn the Power Switch is OFF
and then back ON.
18. You are done!
For more information go to:
http://www.acomamerica.com/techs.htm#JW-1 Techs

Acom America, Inc.
404 Paulding Avenue
Northvale, NJ 07647
www.acomamerica.com
Copyright 2002, All rights reserved. 800-11004-020000
/