Page is loading ...

Enviromaster International LLC
5780 Success Dr.
Rome, NY 13440
Phone: 1-800-228-9364
Fax: 1-800-232-9364
Email: [email protected]
INSTALLATION, OPERATION AND MAINTENANCE MANUAL
An ISO 9001-2000 Certified Company
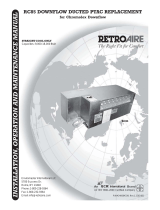
RC75 SINGLE MOTOR PACKAGED
TERMINAL AIR CONDITIONER
Replacement for Amana Curtain Unit
RC 75
STRAIGHT COOL
Nominal Capacities:
9,000 & 12,000 Btuh
P/N# 240004620, Rev. 1.2 [02 /05]

www.retroaire.com
The Right Fit For Comfort
2
TABLE OF CONTENTS
To the Installer and Safety Instructions..............1
Warnings and Installer Responsibilities ............2
Controls and Components .................................3
Preparation for Installation.................................3
Electrical Wiring .................................................3
RC75 Chassis Installation.............................. 4-5
Final Inspection and Start-Up ............................6
PTAC Operation .................................................6
Cleaning and Maintenance............................ 6-7
Troubleshooting .................................................7
Warranty.............................................................8
INSTALLATION, OPERATION & MAINTENANCE MANUAL
P/N# 240004620, Rev.1.2 [02/05]
To obtain technical service or warranty assistance
during or after the installation of this unit, contact your
local representative. Visit our website
www.retroaire.com for a local representative listing.
For further assistance call 1-800-228-9364.
When calling for assistance, please have the
following information ready:
• Model Number_________________________
• Serial Number_________________________
• Date of installation______________________
SAFETY INSTRUCTIONS
• Read all instructions before using the RetroAire
RC75. Install or locate this unit only in accordance
with these instructions. Use this unit only for its
intended use as described in this manual.
• Check the rating plate on the RetroAire RC75
before installation to make certain the voltage
shown is the same as the electric supply to the
unit.
• The RetroAire RC75 must be connected only to a
properly grounded electrical supply. Do not fail to
properly ground this unit.
• Turn off the electrical supply before servicing the
RetroAire RC75.
• Do not use the RetroAire RC75 if it has damaged
wiring, is not working properly, or has been
damaged or dropped.
[Save These Instructions]
This manual is intended as an aid to qualified service
personnel for proper installation, operation, and
maintenance of the RetroAire RC75 Single Motor
Packaged Terminal Air Conditioner (PTAC). Read these
instructions thoroughly and carefully before attempting
installation or operation. Failure to follow these instructions
may result in improper installation, operation, service, or
maintenance, possibly resulting in fire, electrical shock,
property damage, personal injury, or death.
TO THE INSTALLER
(1) Retain this manual and warranty for future reference.
(2) Before leaving the premises, review this manual to be
sure the unit has been installed correctly and run the
unit for one complete cycle to make sure it functions
properly.
!
!
Recognize this symbol as an indication
of important safety information
RC75 SINGLE MOTOR PACKAGED TERMINAL AIR CONDITIONERS
Shipping Damage MUST be Reported to the Carrier IMMEDIATELY!!!
Examine the exterior. Remove cover and examine compressor and piping for signs of damage.
To avoid possible injury or death due to electrical shock,
open the power supply disconnect switch and secure it
in an open position during installation. On a plug and
receptacle connection, keep the unit unplugged until in-
stallation is complete.
!
!
WARNING

www.retroaire.com
The Right Fit For Comfort
3
!
!
!
!
!
!
!
!
WARNING
Completely read all instructions prior to
assembling, installing, operating, or repairing
this product. Inspect all parts for damage prior to
installation and start-up. The RetroAire RC75 must
be installed ONLY by qualified installation personnel.
MODIFICATION AND TAMPERING
DANGER
Tampering with the RetroAire RC75 is
dangerous and may result in serious injury or
death. Tampering voids all warranties. Do not
attempt to modify or change this unit in any way.
DANGER
Do not use the RetroAire RC75 with any electrical
supply voltage other than the one listed on the
rating plate.
Check the rating plate on the unit for the correct
voltage rating. Failure to use the correct voltage may
result in death, serious bodily injury or property
damage. If you have any questions or doubts,
consult the factory before installing this unit.
INSTALLER RESPONSIBILITIES
This manual has been prepared to acquaint you with the
installation, operation and maintenance of the RetroAire
RC75 and to provide important safety information in these
areas.
We urge you to read all of the instructions thoroughly before
attempting the installation or operation of this unit. This
manual should be kept for future reference.
The manufacturer of this unit will not be liable for any
damages caused by failure to comply with the installation
and operating instructions outlined in this manual.
A rating plate identifying this RetroAire product can be found
on the unit. When referring to your unit, always have the
information listed on the rating plate readily available.
IMPORTANT SAFETY FEATURE
Power Cord With Intergral Safety Protection
All PTACs rated 250V or less that are cord connected
to the power supply are equipped with a power cord
with intergral safety protection as standard. Providing
personal shock protection as well as arcing and fire
prevention, the device is designed to sense any
damage in the line cord and disconnect power before
a fire can occur. Tested in accordance with
Underwriters Laboratories, the cord set also offers
a unique “passive” operation, meaning the unit does
not require resetting if main power is interrupted.
WARNING - A DAMAGED POWER SUPPLY CORD
MUST BE REPLACED WITH A NEW CORD FROM
THE MANUFACTURER, AND NOT REPAIRED.
Each power cord should be checked before every
use. Follow the instructions in the order listed on the
device.
WARNING - DO NOT USE THE PRODUCT IF THE
UNIT FAILS THE TEST.
DANGER
The RetroAire RC75 must:
• Be connected to a properly grounded
electrical supply with the proper voltage as
stated on the rating plate.
• Have proper over current protection (i.e.
time- delay fuse/HACR-Breaker) as listed on
the rating plate.
Failure to follow these instructions can result
in a fire, explosion, or electrical shock causing
property damage, personal injury, or death.

www.retroaire.com
The Right Fit For Comfort
4
CONTROLS AND COMPONENTS
Controls and components installed at the factory or supplied
for field installation include:
1. Unit mounted operating controls
• Thermostat
• Fan speed control
2. Motorized fresh air damper (optional)
3. Foam strip seal for supply air duct
4. Removable washable mesh filters
PREPARATION FOR INSTALLATION
1. Remove old unit from wall sleeve and dispose of properly.
IMPORTANT: It is illegal to discharge refrigerant
into the atmosphere. Use proper reclaiming
methods and equipment when installing or
servicing the RetroAire RC75.
2. Inspect wall sleeve for rust or damage. Clean, replace
or repair as necessary.
3. Make sure wall sleeve is pitched a minimum of 5° (at
least ½”) to the outside, this will insure proper drainage.
4. Inspect the existing exterior louver and remove any
debris or obstructions. Verify that the unit is at least two
inches away from the outside louver, to insure proper
air circulation.
5. Inspect indoor supply and return air sections and remove
any obstructions (draperies, bedspreads, etc.) that may
cause an air restriction during operation.
IMPORTANT: Do not place any objects on the
supply air grille.
FINAL INSPECTION AND START-UP
1. Make sure the chassis is level. Check by pouring water
into the drain pan and making certain it flows through
the drain hoses to the condenser side of the unit.
2. Plug or hard wire line voltage to unit.
IMPORTANT: Follow the information provided on
the rating plate for voltage and amperage/fuse size
for proper supply.
3. Turn the power on.
4. Check for proper operation (cooling, fresh air, and heating
(if supplied)).
When turning the selector knob on the RC75 for mode of
operation, it is very important to make sure the knob position
is “SEATED” directly on a mode of operation (clicks into
position). Do not mistakenly place between two positions.
This can result in a potential fan failure while the system is
in a cooling or heating operation. A fan failure could result in
the unit overheating (smoke) in an electric heating mode or
freezing coil in a cooling mode.
The RetroAire RC75 is available as a cooling only model.
The RC75 uses a high-efficiency rotary compressor
protected under a 5-year warranty and an enhanced high-
efficiency heat exchanger to make the replacement of worn
out and inefficient units a very attractive option.
Whisper quiet operation improves the room ambience and
the 20 gauge galvanized steel construction of the chassis
ensures long service life.
The RetroAire RC75 with override switch offers three fan
speeds, and has an optional motorized fresh air feature
with a positive pressure seal, and positive condensate re-
evaporation to improve efficiency.
PRODUCT DESCRIPTION
• 1 Installation Manual
INSTALLATION INSTRUCTIONS
1. Remove existing unit from wall-sleeve and unplug
line-cord from existing receptacle.
2. Remove packaging and kit bag from the RC75
chassis.
3. Plug line-cord into existing receptacle.
4. Slide the RC75 chassis into wall sleeve.
5. Attach top panel and louver.
6. See Final Inspection and Start-Up (below).
RC75 INSTALLATION KIT
ELECTRICAL WIRING
1. Inspect existing wiring for any deficiencies such as cut
or frayed wires.
2. All electrical wiring must be run according to NEC and
local codes. Check the unit rating plate for circuit
ampacity and breaker or fuse size. USE ONLY HACR
TYPE BREAKERS OR TIME-DELAY FUSES. Select
the proper wire for the ampacity rating.
3. If plug and receptacle are used, be sure to check for
proper fit.

www.retroaire.com
The Right Fit For Comfort
5
RC75 SPECIFICATIONS AND PERFORMANCE
IMPORTANT: Due to ongoing product development, designs, specifications, and performance are
subject to change without notice. Please consult factory for further information.
09 9,300 8.2 350/300/275 40/35
12 11,400 7.8 350/300/275 40/35
*Due to RetroAire’s on going development programs, specifications may change
without notice. Please consult factory for the latest information and submittal
data before making any job site updates.
PERFORMANCE DATA*
MODEL
COOLING
BTUH
EER
EVAP CFM
HI/MED/LOW
FRESH AIR
CFM
NEMA Specifications
Non-Locking/Receptacles
Model
Number FLA RLA
115/60/1 4.2 7.4 11.6 13.5 20 104 5-15P
208/230/60/1 2.2 3.8 6.0 7.0 15 197 6-15P
115/60/1 4.2 9.7 13.9 16.3 25 104 5-20P
208/230/60/1 2.2 4.8 7.0 8.2 15 197 6-15P
12
0.333 54.0
0.333 26.3
LRA
09
0.333 44.0
0.333 20.0
RC/RH 75 Electrical Specifications
Voltage/hz/ph
Fan Motor Compressor Total
amps
MCA
Max
Fuse
Min
Voltage
Line
CordHp

www.retroaire.com
The Right Fit For Comfort
6
MOTORIZED FRESH AIR DAMPER (Optional)
The optional motorized damper allows fresh air to be brought
into the room. By moving the “Fresh Air” switch to the YES
position, outside air will be brought into the room when the
indoor fan is circulating air. To circulate indoor air without
fresh air, set the “Fresh Air” switch to the NO position.
FAN CYCLE SWITCH
This option allows the operator of the Single Motor PTAC
to have the evaporator fan cycle or run continuously. With
the switch in the (OFF) “cycling” position the evaporator
fan will only run when the unit is calling for heat or cool-
ing. When the switch is in the (ON) “constant” position,
the evaporator fan will run continuously unless the unit is
physically turned off.
CONDENSATE REMOVAL
The Single Motor PTAC has a drain connection at each
end of the condensate drain pan. This allows the conden-
sate to drain through the bulkhead to the area near the
condenser fan. The condenser fan has a slinger ring that
picks up the condensate and slings it on the hot condenser
coil where it evaporates (Figure 7). On heat pump models
condensate can form on the outdoor coil during the heat
pump cycle. A temperature sensitive valve in the base pan
will allow condensate to flow to an internal piping system or
external drain kit (supplied by others).
COOLING CYCLE
1. Rotate the system switch to the “COOLER” position.
2. Rotate thermostat knob (Figure 6) clockwise until
the compressor fans start running and cold air
begins to flow from the unit. For a colder room
temperature, continue turning the thermostat knob
clockwise and let the unit continue operating to cool
the room and remove humidity. If a warmer room
temperature is desired, rotate the thermostat knob
counter-clockwise until the compressor cycles off.
IMPORTANT: The room temperature must be above
65º F for the compressor to operate.
3. Place system switch in the “OFF” position. All
operation should stop.
Avoid rotating the thermostat knob back and forth from
heating to cooling. This causes the compressor to cycle
on and off rapidly and WILL cause damage to the com-
pressor. Allow the compressor to remain off for at least
three minutes prior to restarting the unit.
! !
CAUTION
SEQUENCE OF OPERATION
UNIT MOUNTED THERMOSTAT CONTROLS
When the unit is first powered up, high humidity condi-
tions can cause condensation to form on the discharge
grill. Keep doors and windows closed to reduce humidity
and condensation will evaporate.
!
!
CAUTION
Turning the unit mounted thermostat knob to the right (red)
will produce warmer air temperature while turning it to the
left (blue) will produce cooler. These settings can be
adjusted for personal comfort. (Figure 6)
RIGHT
WRONG
RC75 SAFETY NOTE
thermostat knob
Figure 6
Thermostat
Knob
Mode Selector
Knob
When turning the selector knob on the RC75 for
mode of operation, it is very important to make sure
the knob position is “SEATED” directly on a mode of
operation (clicks into position). Do not mistakenly
place between two positions. This can result in a
potential fan failure while the system is in a cooling
or heating operation. A fan failure could result in the
unit overheating (smoke) in an electric heating mode
or freezing coil in a cooling mode.

www.retroaire.com
The Right Fit For Comfort
7
CLEANING AND MAINTENANCE
CLEANING THE INTERIOR OF THE UNIT
1. Disconnect power from unit.
2. Remove access panel and do a visual inspection
of the unit, making sure to check for obvious
problems such as broken wires, damaged coils, or
evidence of extended wear on any moving part.
3. Check for unusual odors, oil leaks, or stains on
or around the coil and refrigerant lines. The
presence of oil here may indicate a potentially
serious problem such as a refrigerant leak.
4. Inspect all electrical connections. Look for
frayed wires and poor connections. Terminal ends
that are loose will eventually fail, causing a loss
of performance or worse.
5. Check fan motors and blower assemblies.
Some units may require a drop of light oil to motors
and/or bearing assemblies (look for oil cups).
Check setscrews and motor mounting hardware,
making sure they are tight.
IMPORTANT: The RC75 is equipped with a permanently
lubricated motor. Although oiling is not necessary,
adding a few drops through the oiling ports twice yearly
will extend the life of the motor. Do NOT over oil!!
6. Brush and/or vacuum the blower wheels and blower cage
assemblies. These parts must be clean to operate
efficiently.
7. Inspect and clean the indoor and outdoor coils, using a
fin comb, if necessary, to straighten any damaged fins.
These coils must be clean for proper operation.
IMPORTANT: Do not use a solvent-based cleaner
when cleaning the indoor or outdoor coils. Some
solvents can produce a noxious odor when starting
the fan or electric heat.
8. Inspect and clean the drain pan. Use of an anti-
fungicide tablet is recommended to keep the
condensate system free from bacterial contaminants.
9. Check the pitch of the unit and wall sleeve. Over time,
the building and equipment may settle, causing a shift
in the direction of the condensate flows. Ideally, the
unit should pitch a minimum of 5° (at least ½”) to the
outside to allow for proper drainage.
10. Replace panel and reconnect electrical power.
11. Test unit operation.
!
!
Before servicing the RC75 be sure to turn off electrical
power to the unit. Failure to do so can result in a fire,
explosion or electrical shock causing property damage,
personal injury, or death.
DANGER
It is illegal to discharge refrigerant into the atmo-
sphere. Use proper reclaiming methods and equip-
ment when servicing a RetroAire RC75.
! !
WARNING
CLEANING THE EXTERIOR OF THE UNIT
1. Clean the air filter at least once a month by removing it
from the unit and washing or vacuuming any dust from
its surface. Allowing dust to collect on the filter will
cause the PTAC to lose efficiency and eventually
malfunction.
2. When cleaning the filter, be sure to vacuum any dust
from the return air grille surface as well.
3. Clean the exterior of the cabinet as desired with a mild
soap or household cleaner.
TROUBLESHOOTING
NO COOLING: Check to see if the unit has power and if
the thermostat is satisfied. If the thermostat is not satisfied,
refer to the wiring diagram and check control components
for continuity.
RetroAire RC75 units are designed and constructed
for reliability and long life with minimal mainte-
nance but service or repairs should only be per-
formed by qualified service personnel.
!
!
WARNING

www.retroaire.com
The Right Fit For Comfort
8
ALL PRODUCT LIMITED WARRANTY
Enviromaster International LLC (EMI) warrants to the purchaser/owner that EMI products will be free
from defects in material and workmanship under the normal use and maintenance for a period of
twelve months for all components and sixty months on unit compressors from the date of original
installation, or fifteen months for all components and sixty-three months on unit compressors from the
date of manufacture, whichever comes first.
WHAT WE WILL COVER
EMI will replace any defective part returned to EMI's approved service organization with a new or
rebuilt part at no charge. The replacement part assumes that unused portion of this warranty.
WHAT WE DON'T COVER
THIS WARRANTY DOES NOT INCLUDE LABOR or other costs incurred for repairing, removing,
installing, shipping, servicing, or handling of either defective or replacement parts.
EMI IS NOT RESPONSIBLE FOR:
• Normal maintenance
• Damage or repairs required as a consequence of faulty installation or application by others.
• Failure to start due to voltage conditions, blown fuses, open circuit breakers, or other dam-
ages due to the inadequacy or interruption of electrical service.
• Damage or repairs needed as a consequence of any misapplication, abuse, improper servic-
ing, unauthorized alteration, or improper operation.
• Damage as a result of floods, winds, fires, lightening, accidents, corrosive atmosphere, or
other conditions beyond the control of EMI.
• Parts not supplied or designated by EMI.
• Products installed outside the United States or Canada.
• Any damages to person or property of whatever kind, direct or indirect, special or consequen-
tial, whether resulting from use or loss of use of the product.
LIMITATION OF WARRANTIES
This warranty is exclusive and in lieu of any implied warranties of merchantability and fitness for a
particular purpose and all other warranties express or implied. The remedies provided for in this warranty
are exclusive and shall constitute the only liabilities on the part of EMI including any statements made
by any individual which shall be of no effect.
FOR SERVICE OR REPAIR:
(1) Contact the Installer
(2) Call the Nearest Distributor
(3) Call or Write:
ENVIROMASTER INTERNATIONAL LLC
5780 Success Dr., Rome, NY 13440
Phone: 1-800-228-9364
FAX: 1-800-232-9364
Email: info@retroaire.com
/