Page is loading ...

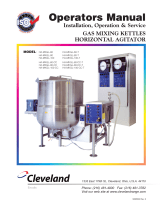
KGL-40, KGL-60, KGL-80, KGL-100
KGL-40-T, KGL-60-T, KGL-80-T
KGL-40-SH, KGL-60-SH,
KGL-40-TSH
KGL-40
KGL-40-T
KGL-40SH
SE95003-1 PRTS Rev. 8
February 2012
Cleveland
™
Maintenance Procedures
& Parts Lists
Gas Floor Model Kettles
For units built after April 2010
1333 East 179th St., Cleveland, Ohio, U.S.A. 44110
Ph: 216.481.4900 Fx: 216.481.3782
www.clevelandrange.com
For your future reference.
Model # ______________________________________
Serial # _______________________________________
This manual is to be used in conjunction with the
“Operators Manual”. See “Operators Manual” for
safety warnings, correct operation, installation
and preventative maintenance.

STATEMENT OF RESPONSIBILITIES /
DÉCLARATION DES RESPONSABILITÉS /
DECLARACIÓN DE RESPONSABILIDADES
This document is for use by experienced
and trained Qualified Cleveland Range,
LLC Authorized Service Representatives
who are familiar with both the safety
procedures, and equipment they
service. Cleveland Range, LLC assumes
no liability for any death, injury,
equipment damage, or property damage
resulting from use of, improper use of,
or failure to use the information
contained in this document. Cleveland
Range, LLC has made every effort to
provide accurate information in this
document, but cannot guarantee that
this document does not contain
unintentional errors and omissions.
The information in this document may
be subject to technical and technological
changes, revisions, or updates.
Cleveland Range, LLC assumes no
liability or responsibility regarding errata,
changes, revisions, or updates.
Qualified Cleveland Range, LLC
Authorized Service Representatives are
obligated to follow industry standard
safety procedures, including, but not
limited to, OSHA regulations, and
disconnect / lock out / tag out
procedures for all utilities including
steam, and disconnect / lock out / tag
out procedures for gas, electric, and
steam powered equipment and / or
appliances.
All utilities (gas, electric, water and
steam) should be turned OFF to the
equipment and locked out of operation
according to OSHA approved practices
during any servicing of Cleveland Range
equipment
Qualified Cleveland Range, LLC
Authorized Service Representatives are
obligated to maintain up-to-date
knowledge, skills, materials and
equipment.
Ce document est destiné à l’usage des
Représentants de Service qualifiés et
autorisés de Cleveland Range, LLC qui
possèdent l’expérience et la formation
ainsi que la bonne connaissance des
mesures de sécurité et du matériel qu’ils
entretiennent.
Cleveland Range, LLC décline toute
responsabilité pour tout cas de décès,
blessure, dommage matériel ou
dommage aux biens résultant de
l'utilisation, de la mauvaise utilisation ou
du manquement d’utilisation des
renseignements contenus dans ce
document.
Cleveland Range, LLC s’est efforcé à
fournir des renseignements précis dans
ce document mais ne peut garantir que
ce document soit exempt d’erreurs et
d’omissions non intentionnelles.
Les renseignements contenus dans ce
document peuvent être assujettis à des
changements techniques et
technologiques, des révisions ou des
mises à jour.
Cleveland Range, LLC décline toute
obligation ou responsabilité concernant
les errata, modifications, révisions ou
mises à jour.
Les Représentants de Service qualifiés
et autorisés de Cleveland Range, LLC
sont tenus de se conformer aux
mesures de sécurité normalisées de
l’industrie, y compris, mais sans s'y
limiter, les réglementations de l'OSHA,
les procédures de débranchement /
verrouillage / étiquetage relatives à tous
les services publics, dont
l’approvisionnement en vapeur, et les
procédures de débranchement /
verrouillage / étiquetage relatives aux
équipements et/ou appareils
fonctionnant au gaz, à l’électricité et à la
vapeur.
Au cours de tout entretien d’un appareil
Cleveland Range, tous les services
publics (gaz, électricité, eau et vapeur)
doivent être FERMÉS au niveau de
l’appareil et le dispositif de
fonctionnement doit être verrouillé
suivant les pratiques approuvées de
l’OSHA.
Les Représentants de Service qualifiés
et autorisés de Cleveland Range, LLC
sont tenus d’actualiser en permanence
leurs connaissances, compétences,
matériel et équipement.
Este documento está destinado para el
uso de los Representantes de Servicio
calificados y autorizados de Cleveland
Range, LLC quienes cuentan con la
experiencia y la capacitación así como el
buen conocimiento de las medidas de
seguridad y de los equipos que
mantienen.
Cleveland Range, LLC, declina toda
responsabilidad en caso de cualquier
fallecimiento, lesiones, daños al equipo o
daños a la propiedad resultantes de la
utilización, del uso indebido o de la falta
de utilización de la información provista
en este documento.
Cleveland Range, LLC se ha esforzado
en suministrar información precisa en
este documento, pero no puede
garantizar que este documento esté
exento de errores y de omisiones no
intencionales.
La información contenida en este
documento podría estar sujeta a cambios
técnicos o tecnológicos, revisiones o
actualizaciones. Cleveland Range, LLC
declina toda obligación o responsabilidad
con respecto a erratas, modificaciones,
revisiones o actualizaciones.
Los Representantes de Servicio
calificados y autorizados de Cleveland
Range, LLC tienen la obligación de seguir
los procedimientos estándar de seguridad
de la industria; los cuales incluyen pero
no se limitan a los reglamentos de la
OSHA (La Administración de la Seguridad
y Salud Ocupacionales), los
procedimientos de desconexión, cierre y
etiquetado relativos a todos los servicios
públicos incluyendo el suministro de vapor
y los procedimientos de desconexión,
cierre y etiquetado para los equipos y/o
aparatos que funcionan a base de gas,
electricidad o vapor.
Cuando se esté dando servicio o
mantenimiento a un aparato de Cleveland
Range, todos los servicios públicos (gas,
electricidad, agua y vapor) deben estar
APAGADOS para el equipo en cuestión y
se debe seguir el procedimiento de cierre
de operaciones de acuerdo con las
prácticas aprobadas por la OSHA.
Los Representantes de Servicio
calificados y autorizados de Cleveland
Range, LLC tienen la obligación de
actualizar constantemente sus
conocimientos, destrezas, materiales y
equipamiento.

GENERAL
1. To turn the unit on, turn the switch to the on
position.
■ Power is sent to primary side of the
120vac/16vac transformer.
■ Power is sent to the normally closed high limit.
■ From the high limit power is sent to the normally
open contacts of the 12VDC relay and the L1 and
L2 terminals of the ignition module.
2. From the secondary of the transformer 16VAC is
sent to the controller.
■ Power is sent to the red LED (low water indicator
light) from terminal 4 of the controller.
■ If the water probe is grounded through water the
LED will go off.
■ If the water probe is not grounded the LED will
remain on and the unit will not heat.
■ If the resistance of the thermistor is higher than
the setting of the potentiometer( the unit is calling
for heat) then 16VDC is sent to the coil of the relay
and the green LED (heat indicator light)
■ The 12VDC relay will close until the unit reaches
temperature
3. With the contacts of the relay closed, 120VAC is
sent to the blower and primary coil of the
120VAC/24VAC transformer.
■ From the secondary of the 24VAC transformer
power is sent to the normally open contacts of the
air switch.
■ When the air from the blower closes the air
switch, 24VAC is sent to the Th terminal of the
ignition module.
4. With both 120VAC (at L1 and L2) and 24VAC (at
Gnd and Th) to the ignition module then 120VAC
will be sent to the surface igniter.
5. After the ignition module has been energized for 24
seconds the module will send 24VAC to the gas
valve.
■ The gas will touch the hot igniter and ignite.
■ The kettle will build pressure until the controller is
satisfied by the thermistor at the setting of the
potentiometer.
■ The controller will then turn off the heat circuit
until the temperature of the kettle is below the
setting
TROUBLESHOOTING GUIDES
TROUBLESHOOTING AND
MAINTENANCE PROCEDURES
The following trouble shooting guide and maintenance procedures
are meant to be used by Qualified Service Technician
0
!
0
!
0
!
ANY REPAIRS TO THE PRESSURE VESSEL MUST BE DONE BY A CERTIFIED PRESSURE
VESSEL REPAIR SHOP AND ALL REPAIR METHODS AND MATERIALS MUST BE
APPROVED BY THE MANUFACTURER.
For periodic maintenance recommendations see “Operators Manual”.

TROUBLESHOOTING GUIDES (continued)
PROBLEM:
KGL
Kettle Won't
Heat
Does red light
come on when unit
is first turned on?
Does red light go
off shortly after
unit is turned on?
Yes
Add water to
jacket of Kettle.
With the
potentiometer set
at 10, is 12 VDC at
the coil of the
relay?
No
Yes
Is 16 VAC
measured across
Pins 9 and 10 on
the controller?
No
Yes
Is 16 VAC at the
secondary side of
the transformer?
No
Replace
the on/off
switch (toggle
or rotary).
Yes
Is there Power to
the primary of the
transformer?
No
Replace the
transformer.
Yes
Supply power
to the kettle.
No
Does the relay pull
in?
Yes
Replace the
relay.
No
Is there power to
the blower?
Yes
With the high limit
temporarily
bypassed, is
power at the
blower?
No
Replace the
high limit.
Yes
Replace
the wire to
the blower.
No
Is there power to
the ignition
transformer?
Is there 24 VAC at
the secondary of
the ignition
transformer?
Is there 24 VAC to
the igniton
module?
Yes
Does the blower
turn?
Replace
blower.
No
Yes
Yes
Replace the
DC relay.
Replace the
ignition
transformer
Replace the air
switch.
No
Is there 120 VAC
to the igniter?
Yes
Replace
ignition
module.
No
Does the ignitor
glow?
Yes
Replace the
ignitor.
No
No
Does the gas
valve get 24 VAC
20 sec. after the
ignitor is
energized?
Yes
No
Does the gas
valve open?
Yes
Replace gas
valve
No
Yes No

TROUBLESHOOTING GUIDES (continued)
PROBLEM:
KGL
Kettle Not
Hot Enough
W
ith kettle pot
empty and
temperature knob
s
et at 10, is the
t
emperature of the
surface of the pot
260 degrees?
U
nit is
operating
properly
Yes
W
hen unit is cold
(room temp) is the
p
ressure gauge in
the green?
N
o
V
ent
the kettle per
i
nstructions in
the manual.
N
o
When the unit is
calling for heat
(the green light is
on), is there flame
at the burner?
Y
es
I
s the resistance of
the thermister
100,000 ohms
+10% at room
temperature?
Yes
Replace the
thermister.
No
Is the
potentiometer
resistance 50,000
ohms at low and 0
ohms at high?
Yes
R
eplace
c
ontroller.
Yes
Replace the
potentiometer.
No
Does the kettle
h
eat at all?
Yes
See Problem:
K
ettle won't
h
eat.
No
Is the blower
turning?
Replace the
h
igh limit?
I
s there voltage to
the blower?
No
Y
es
N
o
Replace the
b
lower
No
Replace the air
switch
Y
es
PROBLEM: KGL Kettle Has Delayed Ignition
Delayed Igniton
Is the gas
pressure to the
burner 3.5" W.C.?
Adjust or
replace the gas
Valve.
Does the ignior
glow evenly
Replace ignitor.
No
Yes
No
Does the gas
valve get 24 VAC
20 seconds after
the ignitor is
energized?
Replace the
ignition
module.
Is the blower
turning?
Replace blower
and air switch.
Replace burner
Yes
No
Yes
No
Yes

TROUBLESHOOTING GUIDES (continued)
PROBLEM:
KGL Kettle
Gets Too
Hot
With the kettle
empty and the
temperature set at
10, is the surface
temp 260-265
degrees?
The
kettle is working
properly.
Yes
Does the kettle
continue to call for
heat (green light
stays on) when
the kettle reaches
260-265 degrees?
No
Is there supply
voltage to the coil
of the gas valve?
No
Replace the
gas valve.
No
Is there any DC
voltage to the coil
of the relay?
Replace the
Relay
Yes
Replace the
controller
Yes
No
Is the resistance of
;the thermister
1
00,000 ohms +
10% at room
temperature?
Yes
Replace the
thermister.
No
Is the resistance of
the potentiometer
50,000 ohms at
the low setting and
0 ohms at high?
Yes
Replace the
controller
Replace the
potentiometer
No
Yes
PROBLEM: Red Add Water LED Stays On
Does Red LED stay on
after adding the proper
amount of distilled
water and rust inhibitor?
Add the proper
amount of distilled
water and rust
inhibitor.
No
Is the red LED on
with probe
grounded?
Yes
Clean or
replace water
probe.
No
Does the red LED
stay on with a
jumper between
pins 5 and 7 on
the controller?
Yes
Replace the
wire harness in
the trunion.
No
Replace the
controller.
Yes

KETTLE SAFETY INSPECTION AND TESTING
SAFETY THERMOSTAT:
SAFETY VALVE
INSTALLATION:
Incorrect
Installations
1.
Safety thermostat probe is not completely inserted into tubing.
2. Safety thermostat probe is removed from tubing.
3. Safety thermostat electrical connection is bypassed.
Correct
Installation
If maximum temperature is not
in this range (on empty kettle),
refer to the “Calibrating
Procedure”.
The above illustrations show
the three variations of factory
installed Safety Valves.
Modifications are unacceptable.
OPERATING
THERMOSTAT:
Thermostat
electrically bypassed
Probe removed
partially
Wiring is properly connected Switch electrically bypassed
Correct Incorrect
P
robe
fully
inserted
i
n tube
Wiring is properly
connected
Probe removed
completely
Probe bypassed by
running (A) an
additional wire
Probe
p
roperly
attached
✔
✘
Probe bypassed by
(B) grounding the
connecting wire
✘
LOW WATER
LEVEL PROBE:
1.
3.
2.
260º - 270º
MAXIMUM
KETTLE
TEMPERATURE
265º
✔
260° - 270° F
MAXIMUM
KETTLE
TEMPERATURE
GAS KETTLE AIR SWITCH:
WARNING:
Use of gloves and eye protection to prevent
personal injury.
1. With the kettle empty, set On-
Off Switch/Temperature Control
to "10" (Max.). Allow the kettle
to heat until the unit cycles off.
2.
Switch On-Off Switch/Temperature
Control to
"
0
"
(Off) and disconnect
main power at fused disconnect
switch.
3. Remove Access Panel at back
of main kettle console.
4.
Pull Pressure Relief Valve Ring open for a maximum of
one second. Repeat test three to four times. Each time
the mechanism should move freely and be
accompanied by a rapid escape of steam.
5.
Replace access panel.
IMPORTANT:
If valve appears to be sticking replace pressure relief
valve.
If foreign material is discharged then drain kettle and
replace pressure relief valve.
PRESSURE RELIEF VALVE TESTING
Access
Panel
Pressure
Relief
Valve
Ring
2
3
5
6
7
8
9
1
4
10
OFF
0
!

CALIBRATING PROCEDURE FREE AIR CALCULATION
1. Insure the unit has a vacuum before you begin
calibrating procedures. If unit requires venting refer to
KETTLE VENTING INSTRUCTIONS.
2.
Set On-Off Switch/Temperature Control to "10"(Max.).
3. Allow the unit to cycle twice.
4. Check temperature of the inner kettle surface with a
digital surface thermometer.
5. Temperature should be between 260°F and 265°F.
6. Using a screw driver
adjust temperature by
turning the potentiometer
on the Solid State
Temperature Control Box.
Turn very little. Turn
clockwise to INCREASES
and counter-clockwise to
DECREASE temperature.
7. Allow the unit to cycle
twice.
8. Check temperature of the
inner kettle surface with a
digital surface
thermometer.
9. Repeat steps 4. through 8. until unit is calibrated.
S
olid State Temperature
C
ontrol Box
A
djustment
P
ot
2
3
5
6
7
8
9
1
4
10
OFF
0
!
0
!
Insert drager pump tube 4" down the center
of the flue and take one sample each of
Carbon Dioxide (CO2) and Carbon
Monoxide (CO) and record results.
With results obtained for CO2 use chart to
determine dilution factor for gas type used.
Enter these numbers in the following formula
to determine the concentration of carbon
monoxide in an air free sample of flue gas.
Dilution Factor X CO (PPM) =
1
0,000
Result must not exceed 0.08% carbon monoxide.
CARBON DIOXIDE IN FACTOR FACTOR
SAMPLE (PERCENT) PROPANE GAS NATURAL GAS
4.0 3.50 3.05
4.2 3.33 2.90
4.4 3.18 2.77
4.6 3.04 2.65
4.8 2.92 2.54
5.0 2.80 2.44
5.2 2.69 2.34
5.4 2.59 2.26
5.6 2.50 2.18
5.8 2.41 2.10
6.0 2.33 2.03
6.2 2.26 1.97
6.4 2.19 1.91
6.6 2.12 1.85
6.8 2.06 1.80
7.0 2.00 1.74
7.2 1.94 1.70
7.4 1.89 1.65
7.6 1.84 1.61
7.8 1.79 1.56
8.0 1.75 1.53
8.2 1.71 1.49
8.4 1.67 1.45
8.6 1.63 1.42
8.8 1.59 1.39
9.0 1.56 1.36
9.2 1.52 1.33
9.4 1.49 1.30
9.6 1.46 1.27
9.8 1.43 1.24
10.0 1.40 1.22
_
_____________
%
CO
(
PPM)
______________
%
CO2
_
__________________________
D
ilution Factor
_____________________________
% Carbon Monoxide

KETTLE VENTING
INSTRUCTIONS
1. Remove Access Panel from
back of main kettle console.
2.
Turn kettle ON and set temperature
control to 10, heat the empty kettle
until unit cycles off.
3. Vent kettle by pulling Valve Ring
eight to fifteen times, holding
valve open for two seconds
each time.
NOTE: If unit cycles ON, stop
venting and wait for kettle to cycle
OFF before continuing.
4. Turn kettle OFF. Add cold water
to kettle until its surface
temperature is below 100°F. The
pressure gauge needle should
be in the green zone, indicating a
vacuum in the kettle’s jacket.
5.
If needle is in the green zone then
venting was successful. If not
repeat procedure.
2
3
5
6
7
8
9
1
4
10
OFF
50
0
100
150
200
250
300
350
400
40
50
60
0
10
20
30
psi
kPa
V
E
N
T
A
I
R
50
0
100
150
200
250
300
350
400
40
50
60
0
10
20
30
psi
kPa
V
E
N
T
A
I
R
50
0
100
150
200
2
50
300
350
400
40
50
60
0
10
20
30
psi
kPa
V
E
N
T
A
I
R
5
0
0
100
150
200
250
300
350
400
40
50
6
0
0
10
20
3
0
psi
k
Pa
V
E
N
T
A
I
R
5
0
0
100
1
50
2
00
250
300
3
50
400
4
0
5
0
60
0
10
20
30
psi
kPa
V
E
N
T
A
I
R
5
0
0
100
1
50
200
2
50
300
350
400
40
50
60
0
1
0
2
0
30
psi
k
Pa
V
E
N
T
A
I
R
The following venting procedure
should be followed when the
Vacuum/Pressure Gauge needle
is in the "VENT AIR" zone:
NOTE: Check for and eliminate leaks prior to venting
(see REPAIRING LEAKS IN STEAM JACKETED KETTLE
FITTINGS).
REPAIRING LEAKS IN STEAM
JACKETED KETTLE FITTINGS
If unit will not hold a vacuum the most likely cause is a
leak at one of the fittings.
Often, the easiest way to eliminate a leak is reseal the
suspect areas.
1. Water Level Probe
Remove,clean threads, apply teflon thread sealant
and reinstall.
2. Pressure Relief Valve
A/ Inspect for signs of leaks. Replace if required.
B/ Remove, clean threads, apply teflon thread
sealant and reinstall.
3. Pressure Gauge
A/ Inspect face of gauge. If it contains moisture
on the inside of face replace.
B/ Check tightness of plumbing connection to
pressure Gauge.
3. Sight Glass
A/ Check tightness of sight glass.
B/ Replace "O" ring if required.
P
ressure
R
elief Valve
Access
Panel
V
alve
R
ing
0
!
0
!
LUBRICATION PROCEDURE
Lubricate the following parts every three months to insure
smooth operation and reduce wear.
TRUNNION HOUSING,
WORM SCREW AND
TILT GEAR
These parts are accessed
through the top cover of
the console.
Apply grease to gear
teeth. Check for
excessive play and adjust
with adjusting screw
located on top of cross
bar.
KETTLE TRUNNIONS
On the left hand side of
the kettle there are two
grease nipples on the top
back portion of the
trunnion housing. On the
right hand side of the
kettle you must remove
the console cover to
access the two grease
nipples.
Adjusting
Screw
Worm
Screw and
Tilt
Gear
Cross
Bar
Trunnion Housing
Grease Nipple
Adjusting
Screw
Worm
Screw and
Tilt
Gear
Cross
Bar
Trunnion Housing
Grease Nipple

RESERVOIR FILL PROCEDURES
The kettle's water level must be maintained at the proper
level. Under normal operating conditions, the sealed
water reservoir should never require the addition of water.
If the red "low water" light comes on during use (while the
kettle is in an upright position), the water level has reached
a critically low level. The low water protection control has
automatically shut off the gas burner. The following
procedure must be completed before further use:
NOTE: Have a qualified service
technician repair the leakage
problem and add water to the
unit. Ensure that the red "low
water" light is on when the kettle
is upright. On tilting kettles, it is normal for the red light to
come on when the kettle is in a tilted position.
1. Ensure kettle is at room temperature
and pressure gauge showing zero or
less pressure.
2. Shut off power to the kettle at the
fused disconnect switch.
3. Remove Console Cover and Access Panel.
4. Pull Pressure Relief Valve Ring open
to insure vessel is not pressurized.
5. Remove 1/4" copper tubing and
reducer bushing.
6. Add distilled water using a funnel if
necessary. Fill the unit to the high
level mark on the Sight Glass.
7. Apply a thread sealant (i.e. Teflon
tape) to the reducer bushing threads
and replace.
8. Replace Console Cover and Access
Panel.
9. Restore power to unit at the fused
disconnect switch.
10. The kettle must now be vented.
(Refer to the KETTLE VENTING
INSTRUCTIONS).
Sight Glass
Important-
Pull ring on
Pressure
Relief Valve
prior to
removal to
insure vessel
is not
pressurized.
WARINING:
IMPROPER REFILLING OF KETTLE
JACKET WILL RESULT IN
IRREVERSIBLE DAMAGE TO UNIT.
0
!
50
0
1
00
150
200
250
3
00
350
400
40
50
6
0
0
10
20
3
0
p
si
k
Pa
V
E
N
T
A
I
R
50
0
100
150
200
250
3
00
3
50
400
40
5
0
6
0
0
1
0
2
0
30
p
si
k
Pa
V
E
N
T
A
I
R
50
0
100
150
200
250
3
00
3
50
400
40
5
0
6
0
0
1
0
20
30
p
si
kPa
V
E
N
T
A
I
R
Pressure
Relief Valve
Access
Panel
Drain Plug Location
Valve
Ring
Console
Cover
0
!
0
!
HINGE ADJUSTMENT
INSTRUCTIONS
1. Insert 3/8" Allen wrench.
2. Turn clockwise to relieve tension on spring.
3. While tension is released remove one of the two
slotted screws.
4. To prevent Allen wrench from springing back abruptly
while the second slotted screw is removed, insert a
pin (approximately 1/8") in the hole where the first
slotted screw was removed from.
5. Remove second slotted screw.
6. While holding Allen wrench remove pin.
7. Turn Allen wrench clockwise to tighten or counter-
clockwise to loosen tension to produce desired
effect.
8. Re-insert pin in one of the two holes.
9. Tighten one slotted screw in the other hole (it may
be necessary to turn Allen wrench slightly to align
holes).
10. Remove pin and repeat step number 9 for other
slotted screw.
3/8" Allen wrench

Pressure
Relief
Valve
Access
Panel
Drain Plug Location
Valve
Ring
Console
Cover
KETTLE JACKET CLEANOUT AND PASSIVATION PROCEDURES
The following procedure should be preformed at least once every three years to prevent possible corrosion
and ensure the optimum life of the kettle.
DANGER:
RUST INHIBITOR CAN BE DANGEROUS.
READ LABEL AND FOLLOW SAFETY
INSTRUCTIONS.
0
!
PROCEDURE
1. Ensure kettle is at room temperature
and
pressure gauge showing zero or less
pressure.
2. Shut off and disconnect gas supply.
3.
Remove electrical plug from power
source.
4. Remove bolts holding kettle to tabletop.
5. Pull ring on pressure relief valve to insure there
is no pressure within the kettle jacket.
6. Remove pressure relief valve.
7. Replace pressure relief valve with street elbow (see
above illustration).
8. Remove sight glass from left side of kettle.
9. Tilt kettle on its side (sight glass opening facing
downwards) and allow to drain. Flush out with water.
10. Tilt kettle upright, apply a thread sealant (i.e. Teflon tape)
to the sight glass threads and replace.
11. Refer to chart below to determine the required volume
of water.
12. In a separate container mix water with the required
rust inhibitor.
13. Fill jacket via the street elbow with the mixture.
14. Remove street elbow.
15. Apply a thread sealant (i.e. Teflon tape) to the pressure
relief valve and replace.
16. Reconnect gas and electrical supplies.
17. Turn kettle on, vent and heat to high for 1/2 hour.
18. Cool kettle.
19. Repeat steps 5-15.
20. Replace bolts holding kettle to tabletop.
21. Reconnect gas and electrical supplies.
22. Turn kettle on and vent kettle.
Kettle Size Volume of Mixture
U.S. Gal. Liters
6 U.S. Gal. 1.6 5.8
12 U.S. Gal. 2.2 8.3
50
0
1
00
1
50
2
00
250
300
350
400
4
0
50
60
0
1
0
20
30
psi
k
Pa
V
E
N
T
A
I
R
50
0
1
00
150
200
250
3
00
350
400
40
50
60
0
10
20
30
psi
k
Pa
V
E
N
T
A
I
R
50
0
100
1
50
2
00
250
300
3
50
400
4
0
50
6
0
0
10
2
0
30
p
si
kPa
V
E
N
T
A
I
R
RUST INHIBITOR
Use a “radiator rust inhibitor” that can be purchased at your
local automotive centre. It should not contain any anti-
freeze and preferably no lubricant.
To ensure satisfactory mixing follow the manufacturer’s
instructions.
DISPOSAL - Follow all Federal, State and local codes when
disposing of product.
WARINING:
IMPROPER REFILLING OF KETTLE
JACKET WILL RESULT IN
IRREVERSIBLE DAMAGE TO UNIT.
0
!
0
!
0
!
0
!

INSTRUCTIONS
NOTE: Use thread sealant compatible with propane gas
on all threaded piping connections.
1. Disconnect electrical connection.
2. Shut off main gas supply and disconnect kettle from
supply line.
3. Remove
TTOOPP CCOOVVEERR
.
4. Remove
PPLLUUGG
and
SSPPRRIINNGG
.
5. Remove
GGAASS OORRIIFFIICCEE
and
““OO”” RRIINNGG
.
6. Replace with new
GGAASS OORRIIFFIICCEE
and
““OO”” RRIINNGG
.
7. Replace
SSPPRRIINNGG
and
PPLLUUGG
.
8. Replace
TTOOPP CCOOVVEERR
.
9. Check inlet pressure is between 12-14 inches W.C.
10.
.
Check input rate of unit.
11. On the underside of the console cover with indelible
marker place the following information: Company,
Name, Address & Date of Conversion.
12. Replace
TTOOPP CCOOVVEERR
.
13. Place gas conversion label next to rating label.
14. Reconnect electrical and gas supplies.
Conversion Parts Required
KGL-40 (Kit Service #KE003716-5)
Part No. Description Quantity
KE603911-5 Conversion Label 1
KE53403-5 Gas Orifice 1
FA05002-29 “O” Ring 1
KGL-60 to 100 (Kit Service #KE003716-4)
Part No. Description Quantity
KE603911-4 Conversion Label 1
KE53403-7 Gas Orifice 1
FA05002-29 “O” Ring 1
KE603910-3 Instruction Seet 1
TOP
COVER
NATURAL GAS TO PROPANE
CONVERSION KIT
For Floor Model Gas Kettles (except KGL-25/T)
THIS CONVERSION KIT SHALL ONLY BE INSTALLED BY A
QUALIFIED SERVICE AGENCY
For use at 0-2000 feet elevation on Honeywell valves Model
8305. For higher elevations consult the factory.
WARNING
This conversion kit shall be installed by a qualified
service agency in accordance with the manufacturer’s
instructions and all applicable codes and requirements
of the authority having jurisdiction. If the information in
these instructions is not followed exactly, a fire, and
explosion or production of carbon monoxide may result
causing property damage, personal injury or loss of life.
The qualified service agency is responsible for the
proper installation of this kit. The installation is not proper
and complete until the operation of the converted
appliance is checked as specified in the manufacturer’s
instructions supplied with the kit.
CAUTION
The gas supply shall be shut off prior to disconnecting
the electrical power, before proceeding with the
conversion.
U
NIT EXHAUST CONTAINS CARBON MONOXIDE.
OPERATE ONLY UNDER A PROPERLY FUNCTIONING
H
OOD WITH ADEQUATE MAKEUP AIR.
PLUG
SPRING
GAS ORIFICE
“O” RING
KE603910-3
Air Intake Washer (KE54420-1) is required for 50Hz units - see conversion kits
KE003716-6 & KE003716-7.

SERVICE PARTS
WARRANTY
O
ur Company supports a worldwide network of Maintenance and Repair Centers. Contact your nearest Maintenance and Repair Centre for replacement parts,
service, or information regarding the proper maintenance and repair of your cooking equipment.
In order to preserve the various agency safety certification (UL, NSF, ASME/Ntl. Bd., etc.), only factory-supplied replacement parts should be used. The use of other
than factory supplied replacement parts will void warranty.
FAUCET ASSEMBLY
ITEM # PART # DESCRIPTION QTY.
SPK2 SINGLE PANTRY FAUCET for KGL60/80T (includes items 1-10)
DPK2 DOUBLE PANTRY FAUCET for KGL60/80T
(includes items 1-8 & 11)
SPK3 SINGLE PANTRY FAUCET for KGL40T
& KGL40TSH (includes items 1-10)
DPK3 DOUBLE PANTRY FAUCET for KGL40T & KGL40TSH (includes items 1-8 & 11)
SPK5 SINGLE PANTRY FAUCET for Stationary Kettles
(includes items 1-10)
DPK5 DOUBLE PANTRY FAUCET for Stationary Kettles
(includes items 1-8 & 11)
1. KE50825-2 3/4" SPOUT for - SPK2 & DPK2 . . . . . . . . . . . . . . . . . . . . . . . . . . . . . . . . . . . . . . . . . . . . .1
KE50825-3 3/4" SPOUT for - SPK3
& DPK3 . . . . . . . . . . . . . . . . . . . . . . . . . . . . . . . . . . . . . . . . . . . . .1
KE50825-5 3/4" SPOUT for - SPK5
& DPK5 . . . . . . . . . . . . . . . . . . . . . . . . . . . . . . . . . . . . . . . . . . . . .1
2. FA95007-10 RETAINING RING . . . . . . . . . . . . . . . . . . . . . . . . . . . . . . . . . . . . . . . . . . . . . . . . . . . . . . . .1
3. FA05002-19 "O" RING . . . . . . . . . . . . . . . . . . . . . . . . . . . . . . . . . . . . . . . . . . . . . . . . . . . . . . . . . . . . . . .1
4. KE51736 LONG FAUCET NUT . . . . . . . . . . . . . . . . . . . . . . . . . . . . . . . . . . . . . . . . . . . . . . . . . . . . . .1
5. KE54159 FAUCET MOUNTING BRACKET for Tilting Kettles . . . . . . . . . . . . . . . . . . . . . . . . . . . . . . .1
6. FA11258 HEX CAP SCREW . . . . . . . . . . . . . . . . . . . . . . . . . . . . . . . . . . . . . . . . . . . . . . . . . . . . . . . .2
7. FA31029 LOCK WASHER . . . . . . . . . . . . . . . . . . . . . . . . . . . . . . . . . . . . . . . . . . . . . . . . . . . . . . . . . .2
8. FA210028 HEX NUT . . . . . . . . . . . . . . . . . . . . . . . . . . . . . . . . . . . . . . . . . . . . . . . . . . . . . . . . . . . . . . .2
9. KE51401 SINGLE PANTRY BODY (c/w item 13) . . . . . . . . . . . . . . . . . . . . . . . . . . . . . . . . . . . . . . . .1
10. KE50335 ADAPTER WASHER . . . . . . . . . . . . . . . . . . . . . . . . . . . . . . . . . . . . . . . . . . . . . . . . . . . . . .1
11. KE51403 DOUBLE PANTRY BODY (c/w item 13 & 14) . . . . . . . . . . . . . . . . . . . . . . . . . . . . . . . . . .1
12. SE50447 REPLACEMENT HORSESHOE WASHER . . . . . . . . . . . . . . . . . . . . . . . . . . . . . . . . . . . . . .1
13. SE50021 REPLACEMENT STEM ASSEMBLY, COLD WATER . . . . . . . . . . . . . . . . . . . . . . . . . . . . . .1
14. SE50020 REPLACEMENT STEM ASSEMBLY, HOT WATER . . . . . . . . . . . . . . . . . . . . . . . . . . . . . . . .1
1
9
11
10
13
1314
12
6
5
7
8
6
5
7
8
2
3
4
1
9
11
13
1314
12
7
8
2
3
4
1
9
11
13 13 15
16
17
18
19
14 14 13
12
2
3
4
SPOUT
(for Standard & Remote Faucets)
STANDARD FAUCET
(Single & Double Pantry for SD or STD Stands)
REMOTE FAUCET
(Double Pantry for SD Stands)
20

SIGHT GLASS
ITEM ON. PART NO. DESCRIPTION QTY.
1. KE50955 RETAINING COVER . . . . . . . . 1
2. KE52871 GASKET . . . . . . . . . . . . . . . . . 1
3. KE51053 SIGHT GLASS . . . . . . . . . . . . 1
4. FA05002-30 ”O” RING . . . . . . . . . . . . . . . . 1
1
L
O
H
I
2
3
4
CONSOLE
CONTROLS
ITEM NO. PART NO. DESCRIPTION QTY.
3. SE00114 POTENTIOMETER WITH ON/OFF SWITCH, C/W ITEM #4 . . . . . . . . . . . . . . . . .1
4. KE51005 RUBBER BOOT . . . . . . . . . . . . . . . . . . . . . . . . . . . . . . . . . . . . . . . . . . . . . . . . . .1
5. KE50569-1 KNOB, POTENTIOMETER . . . . . . . . . . . . . . . . . . . . . . . . . . . . . . . . . . . . . . . . . .1
6. KE55486-2 INDICATOR LIGHT, RED . . . . . . . . . . . . . . . . . . . . . . . . . . . . . . . . . . . . . . . . . . 1
7. KE55486-3 INDICATOR LIGHT, GREEN . . . . . . . . . . . . . . . . . . . . . . . . . . . . . . . . . . . . . . . . 1
10. KE50429-6 PRESSURE GAUGE . . . . . . . . . . . . . . . . . . . . . . . . . . . . . . . . . . . . . . . . . . . . . .1
11. KE95555-10 LABEL . . . . . . . . . . . . . . . . . . . . . . . . . . . . . . . . . . . . . . . . . . . . . . . . . . . . . . . . .1
12. KE603836 BRACKET, LIGHT . . . . . . . . . . . . . . . . . . . . . . . . . . . . . . . . . . . . . . . . . . . . . . . . 1
13. FA21006 #10-24, HEX NUT, S.S. . . . . . . . . . . . . . . . . . . . . . . . . . . . . . . . . . . . . . . . . . . . . 4
K
E
9
5
5
5
5
-
1
0
A
1
0
9
8
7
6
5
4
3
2
1
O
F
F
5
0
0
1
0
0
1
5
0
2
0
0
2
5
0
3
0
0
3
5
0
4
0
0
4
0
5
0
6
0
0
1
0
2
0
3
0
p
s
i
k
P
a
V
E
N
T
A
I
R
4
5
3
10
7
6
12
11
13

ELECTRICAL COMPONENT BOX -
115 VOLT UNITS
ITEM
PART #
DESCRIPTION
QTY.
1
KE003654
COMPONENT BOX WELDMENT; KGL/-T
1
2
KE53469-5
IGNITION CONTROL; KGL/T (CSA/CE/AGA APPROVED)
1
4
KE53838-20
TRANSFORMER;120 V PRIMARY/24 V SECONDARY,
60HZ, 20 VA
1
6 KE53838-27
TRANSFORMER;120 V PRIMARY/14 V SECONDARY,
60HZ, 20 VA
1
7
KE603765
TRANSFORMER BRACKET
1
8 KE00458-1
KETTLE CONTROL BOX
1
9 KE50303-1
ELECTRONIC BOX HOLDER 1
10 KE53599-1
GASKET; KGL/KGL-T
1
16 KE55069-6
THERMOSTAT;SAFETY(KGT/KGL)
1
17
KE54833-3
SNAP-IN BUSHING; 0.875 DIA.
1
18 KE53440
COVER; COMPONENT BOX (KGL/-T)
1
19 KE53620
BRACKET FOR COMPONENT BOX
1
22
KE55501-1
TUBE; AIR SWITCH
1
24
FA15018-4
SCREW; PHILIPS 8-32X3/8"L
4
25 FA15018-3
SCREW; PHILIPS 8-32X1/4"L
6
26 FA10243
SCREW; SLOT 8-32X3/4"L
2
27
FA15018-7
SCREW; PHILIPS 6-32X1/4"L
2
23 KE50753-7
RELAY; SPDT/10A/12VDC #MJN1CF-DC12
1
28 KE02400-1
AIR PRESSURE SWITCH ASSEMBLY; DOMESTIC AND CE
1
29
WHKGLT
WIRING HARNESS; KGL40-100
1
30
KE54662-1
HEAT SHIRINKABLE TUBING; 3/126 ID 12" LONG
1
31
KE54661-2
VARFLO SLEEVING 12" LONG 1
32
NPN00163
CONNECTOR; MARR NO. 2
1
33
KE54668-1
TERMINAL; FULLY INSULATED AMP#2-520181-2 OR 182-2
2
34
KE50988-1
POTENTIOMETER; C/W ON/OFF SW REV LOG TAPER
1
35
KE50567-1
LIGHT; RED-WATER INDICAT #249-7867-3331-504
1
36
KE50567-3
LIGHT; GREEN-HEAT INDICAT #249-7967-3332-504
1
37
KE51005
ROTARY SEAL; #N9030 X 1/4 (AMP-HEXSEAL)
1
38
KE52412
CONNECTOR; MARR NO. 1
2
ITEM DESCRIPTION
QTY.
1
KE003654
COMPONENT BOX WELDMENT; KGL/-T
1
2
KE53469-5
IGNITION CONTROL; KGL/T (CSA/CE/AGA APPROVED)
1
4
KE53838-20
TRANSFORMER;120 V PRIMARY/24 V SECONDARY,
60HZ, 20 VA
1
6 KE53838-27
TRANSFORMER;120 V PRIMARY/14 V SECONDARY,
60HZ, 20 VA
1
7
KE603765
TRANSFORMER BRACKET 1
8 KE00458-1
KETTLE CONTROL BOX 1
9 KE50303-1
ELECTRONIC BOX HOLDER
1
10
KE53599-1
GASKET; KGL/KGL-T
1
16 KE55069-6
THERMOSTAT;SAFETY(KGT/KGL)
1
17
KE54833-3
SNAP-IN BUSHING; 0.875 DIA.
1
18
KE53440
COVER; COMPONENT BOX (KGL/-T)
1
19 KE53620
BRACKET FOR COMPONENT BOX 1
22
KE55501-1
TUBE; AIR SWITCH
1
24
FA15018-4
SCREW; PHILIPS 8-32X3/8"L
4
25 FA15018-3
SCREW; PHILIPS 8-32X1/4"L
6
26 FA10243
SCREW; SLOT 8-32X3/4"L
2
27
FA15018-7
SCREW; PHILIPS 6-32X1/4"L
2
23 KE50753-8
RELAY; DPDT/10A/12VDC #KUP-11D55-12
1
28 KE02400-1
AIR PRESSURE SWITCH ASSEMBLY; DOMESTIC AND CE
1
29
WHKGLT
WIRING HARNESS; KGL40-100
1
30
KE54662-1
HEAT SHIRINKABLE TUBING; 3/126 ID 12" LONG
1
31
KE54661-2
VARFLO SLEEVING 12" LONG 1
32
NPN00057
ANTI-SHORT; NO. 1
2
33
KE54668-1
TERMINAL; FULLY INSULATED AMP#2-520181-2 OR 182-2
2
34
KE50988-1
POTENTIOMETER; C/W ON/OFF SW REV LOG TAPER
1
35
KE50567-1
LIGHT; RED-WATER INDICAT #249-7867-3331-504
1
36
KE50567-3
LIGHT; GREEN-HEAT INDICAT #249-7967-3332-504
1
37
KE51005
ROTARY SEAL; #N9030 X 1/4 (AMP-HEXSEAL)
1
38
KE52412
CONNECTOR; MARR NO. 1
5
RB01564
3/8" FLEXIBLE ALUMINUM CONDUIT (CSA&UL APPRVD)
20"39
KE51384
L-110 CONNECTOR XC290
2
40
PART #
38
17
6 4
1622
7 9
8
19 23 28
2 1
Items #10, 18, 24-27, 29-37 not show for clarity.
KE01422

51
52
53
54
55
56
59
60
58
57
Tilting Models
GAS CONTROL ASSEMBLY
1
16
37
17
18
19
20
21
3931 32 33 34
22
23
24
8
9
10
2
3
30
35
29
4
5
6
4
7
11
13
14
12
15
43 38
25
25
26
27
22
28
29
28
30
Stationary Models
Tilting
Models
34
40 41
42
19 GAS ORIFICES
NATURAL PROPANE
GAS GAS
Sea level up to 2,000', 40 gal. KE53403-8 KE53403-5
Sea level up to 2,000', 60 - 100 gal. KE53403-6 KE53403-7
2000' up to 4,000', 40 gal. KE53403-8 KE53403-9
2000' up to 6,000', 60 - 100 gal. KE53403-10 KE53403-11
4000' up to 6,000', 40 gal. KE53403-12 KE53403-13
4000' up to 6,000', 60 - 100 gal. KE53403-10 KE53403-14

GAS CONTROL ASSEMBLY
ITEM ON. PART NO. DESCRIPTION QTY.
1. KE53441 BLOWER, 115V, 60 HZ . . . . . . . . . . . . . . . . . . . . . . . . . . . . . . . . . . . . . . . . . . . . . . . . . . . .1
KE53441-1 BLOWER, 220V, 50 HZ . . . . . . . . . . . . . . . . . . . . . . . . . . . . . . . . . . . . . . . . . . . . . . . . . . . .1
2. KE54420 AIR INTAKE WASHER (NATURAL GAS, 50hz) . . . . . . . . . . . . . . . . . . . . . . . . . . . . . . . . . .1
KE54420-1 AIR INTAKE WASHER (PROPANE, 50hz) . . . . . . . . . . . . . . . . . . . . . . . . . . . . . . . . . . . . . .1
3. KE54239 CAPACITOR . . . . . . . . . . . . . . . . . . . . . . . . . . . . . . . . . . . . . . . . . . . . . . . . . . . . . . . . . . . .1
4. KE01426-4 MIXING CHAMBER, 40 GALLON KETTLES . . . . . . . . . . . . . . . . . . . . . . . . . . . . . . . . . . . .1
KE01426-1 MIXING CHAMBER, 60 GALLON KETTLES . . . . . . . . . . . . . . . . . . . . . . . . . . . . . . . . . . . .1
KE01426-2 MIXING CHAMBER, 80 GALLON KETTLES . . . . . . . . . . . . . . . . . . . . . . . . . . . . . . . . . . . .1
KE01426-3 MIXING CHAMBER, 100 GALLON KETTLES . . . . . . . . . . . . . . . . . . . . . . . . . . . . . . . . . . .1
5. KE53582 TUBING 1/4 INCH SILICONE . . . . . . . . . . . . . . . . . . . . . . . . . . . . . . . . . . . . . . . . . . . . . . .1
FI05156 HOSE FITTING . . . . . . . . . . . . . . . . . . . . . . . . . . . . . . . . . . . . . . . . . . . . . . . . . . . . . . . . . .1
6. KE53402-4 AIR ORIFICE, 40 GALLON KETTLES (60hz) . . . . . . . . . . . . . . . . . . . . . . . . . . . . . . . . . . .1
KE53402-1 AIR ORIFICE, 60 - 100 GALLON KETTLES (60hz) . . . . . . . . . . . . . . . . . . . . . . . . . . . . . . .1
KE53402-2 AIR ORIFICE, 40 GALLON KETTLES (50 HZ BLOWER) . . . . . . . . . . . . . . . . . . . . . . . . . .1
KE53402-3 AIR ORIFICE, 60 - 100 GALLON KETTLES (50 HZ BLOWER ) . . . . . . . . . . . . . . . . . . . . . .1
7. KE01449 BLOWER MOUNTING PIPE ASSEMBLY . . . . . . . . . . . . . . . . . . . . . . . . . . . . . . . . . . . . . . .1
8. KE53618 SIGHT GLASS GASKET . . . . . . . . . . . . . . . . . . . . . . . . . . . . . . . . . . . . . . . . . . . . . . . . . . .1
9. KE53617 SIGHT GLASS . . . . . . . . . . . . . . . . . . . . . . . . . . . . . . . . . . . . . . . . . . . . . . . . . . . . . . . . . . .1
10. KE53619 SIGHT GLASS RETAINER . . . . . . . . . . . . . . . . . . . . . . . . . . . . . . . . . . . . . . . . . . . . . . . . . .1
11. KE00515 THERMISTOR . . . . . . . . . . . . . . . . . . . . . . . . . . . . . . . . . . . . . . . . . . . . . . . . . . . . . . . . . . .1
12. KE50556-2 WATER LEVEL PROBE . . . . . . . . . . . . . . . . . . . . . . . . . . . . . . . . . . . . . . . . . . . . . . . . . . . .1
13. KE53437-3 IGNITOR . . . . . . . . . . . . . . . . . . . . . . . . . . . . . . . . . . . . . . . . . . . . . . . . . . . . . . . . . . . . . . .1
14. KE53570 GASKET FOR IGNITOR . . . . . . . . . . . . . . . . . . . . . . . . . . . . . . . . . . . . . . . . . . . . . . . . . . .1
15. FI05257 SHUT-OFF COCK . . . . . . . . . . . . . . . . . . . . . . . . . . . . . . . . . . . . . . . . . . . . . . . . . . . . . . . .1
16. FI05213 PLUG . . . . . . . . . . . . . . . . . . . . . . . . . . . . . . . . . . . . . . . . . . . . . . . . . . . . . . . . . . . . . . . . . .1
17. KE53422 SPRING . . . . . . . . . . . . . . . . . . . . . . . . . . . . . . . . . . . . . . . . . . . . . . . . . . . . . . . . . . . . . . . .1
18. FA05002-4 “O” RING . . . . . . . . . . . . . . . . . . . . . . . . . . . . . . . . . . . . . . . . . . . . . . . . . . . . . . . . . . . . . . .1
20. FA05002-29 “O” RING . . . . . . . . . . . . . . . . . . . . . . . . . . . . . . . . . . . . . . . . . . . . . . . . . . . . . . . . . . . . . . .1
21. FI05226-4 NIPPLE, 1/2" NPT, 5 5/16" LONG . . . . . . . . . . . . . . . . . . . . . . . . . . . . . . . . . . . . . . . . . . . .1
22. FI00073 UNION, 1/2" . . . . . . . . . . . . . . . . . . . . . . . . . . . . . . . . . . . . . . . . . . . . . . . . . . . . . . . . . . . . .1
23. FI00133 ELBOW, 1/2", STREET . . . . . . . . . . . . . . . . . . . . . . . . . . . . . . . . . . . . . . . . . . . . . . . . . . . . .1
24. KE93909 STRIP, TO HOLD BLOWER DOWN . . . . . . . . . . . . . . . . . . . . . . . . . . . . . . . . . . . . . . . . . . .1
25. FI00040-1 ELBOW, 1/2" . . . . . . . . . . . . . . . . . . . . . . . . . . . . . . . . . . . . . . . . . . . . . . . . . . . . . . . . . . . .1
26. N0440C4 NIPPLE, 1/2" NPT, 4" LONG, KGL-60-T . . . . . . . . . . . . . . . . . . . . . . . . . . . . . . . . . . . . . . .1
N0440C3-875 NIPPLE, 1/2" NPT, 4" LONG, KGL-80-T . . . . . . . . . . . . . . . . . . . . . . . . . . . . . . . . . . . . . . .1
27. KE55004-3 RETAINING PLATE . . . . . . . . . . . . . . . . . . . . . . . . . . . . . . . . . . . . . . . . . . . . . . . . . . . . . . .1
28. N0640C2 NIPPLE, 1/2" NPT, 2" LONG . . . . . . . . . . . . . . . . . . . . . . . . . . . . . . . . . . . . . . . . . . . . . . . .1
30. F01518-1 GAS SHUT-OFF VALVE, 3/4" (NOT FOR FRENCH CE KETTLES) . . . . . . . . . . . . . . . . . . . .1
34. KE55240R GAS VALVE ASSEMBLY . . . . . . . . . . . . . . . . . . . . . . . . . . . . . . . . . . . . . . . . . . . . . . . . . . .1
36. N0640C1-5 NIPPLE, 3/4" NPT, 1 1/2" LONG . . . . . . . . . . . . . . . . . . . . . . . . . . . . . . . . . . . . . . . . . . . . .1
37. KE01500-5 BURNER, 40 GALLON KETTLES, 140,000 BTU . . . . . . . . . . . . . . . . . . . . . . . . . . . . . . . . .1
KE01500-1 BURNER, 60-100 GALLON KETTLES, 190,000 BTU . . . . . . . . . . . . . . . . . . . . . . . . . . . . .1
38. KE53397 GASKET, BURNER . . . . . . . . . . . . . . . . . . . . . . . . . . . . . . . . . . . . . . . . . . . . . . . . . . . . . . .1
40. KE601085 COVER FOR GAS VALVE . . . . . . . . . . . . . . . . . . . . . . . . . . . . . . . . . . . . . . . . . . . . . . . . . .1
41. RB018151 GASKET FOR COVER . . . . . . . . . . . . . . . . . . . . . . . . . . . . . . . . . . . . . . . . . . . . . . . . . . . . .1
42. KE601081 BRACKET . . . . . . . . . . . . . . . . . . . . . . . . . . . . . . . . . . . . . . . . . . . . . . . . . . . . . . . . . . . . . .1
43. FA15005 BOLT . . . . . . . . . . . . . . . . . . . . . . . . . . . . . . . . . . . . . . . . . . . . . . . . . . . . . . . . . . . . . . . . . . 2
51. FI00040-1 ELBOW, 1/2" . . . . . . . . . . . . . . . . . . . . . . . . . . . . . . . . . . . . . . . . . . . . . . . . . . . . . . . . . . . .1
52. N0440C8 NIPPLE, 1/2" NPT, 8" LONG . . . . . . . . . . . . . . . . . . . . . . . . . . . . . . . . . . . . . . . . . . . . . . . .1
53. FI05231 ADAPTOR . . . . . . . . . . . . . . . . . . . . . . . . . . . . . . . . . . . . . . . . . . . . . . . . . . . . . . . . . . . . . .1
54. FI05222 SWIVEL ELBOW . . . . . . . . . . . . . . . . . . . . . . . . . . . . . . . . . . . . . . . . . . . . . . . . . . . . . . . . .1
55. FI05223-6 SPECIAL NIPPLE . . . . . . . . . . . . . . . . . . . . . . . . . . . . . . . . . . . . . . . . . . . . . . . . . . . . . . . .1
56. KE55240R GAS VALVE ASSEMBLY . . . . . . . . . . . . . . . . . . . . . . . . . . . . . . . . . . . . . . . . . . . . . . . . . . .1
57. F01518-1 GAS SHUT-OFF VALVE, 3/4" . . . . . . . . . . . . . . . . . . . . . . . . . . . . . . . . . . . . . . . . . . . . . . . .1
58. KE000960 NIPPLE PLATE WELDMENT . . . . . . . . . . . . . . . . . . . . . . . . . . . . . . . . . . . . . . . . . . . . . . . .1
59. FA30505-1 WASHER, 1/4” . . . . . . . . . . . . . . . . . . . . . . . . . . . . . . . . . . . . . . . . . . . . . . . . . . . . . . . . . . .4
60. FA11256 HEX BOLT, 1/4-20 X 1/2, 18-8 SS . . . . . . . . . . . . . . . . . . . . . . . . . . . . . . . . . . . . . . . . . . . .4

GEARBOX ASSEMBLY
40
41
42
26 27 28
39
4
5
6
5
7
5
6
5
4
8
25
15
14
1
10
2
3
9
11
12
13
16 19 20
21
22
32
30
32
31
24
23
24
23
36
34
33
35
37
38

GEARBOX ASSEMBLY
ITEM NO. PART NO. DESCRIPTION QTY.
1. KE503752 TILT SHAFT . . . . . . . . . . . . . . . . . . . . . . . . . . . . . . . . . . . . . . . . . . . . . . . . . . . . .1
2. KE50315 WORM . . . . . . . . . . . . . . . . . . . . . . . . . . . . . . . . . . . . . . . . . . . . . . . . . . . . . . . . .1
3. FA95005 TENSION PIN . . . . . . . . . . . . . . . . . . . . . . . . . . . . . . . . . . . . . . . . . . . . . . . . . . .1
4. KE52193-1 THRUST BEARING SPACER . . . . . . . . . . . . . . . . . . . . . . . . . . . . . . . . . . . . . . . .2
5. KE52192 THRUST WASHER . . . . . . . . . . . . . . . . . . . . . . . . . . . . . . . . . . . . . . . . . . . . . . . .4
6. KE52191 ROLLER BEARING . . . . . . . . . . . . . . . . . . . . . . . . . . . . . . . . . . . . . . . . . . . . . . .2
7. FA30088 WASHER . . . . . . . . . . . . . . . . . . . . . . . . . . . . . . . . . . . . . . . . . . . . . . . . . . . . . . .2
8. FA95008 JAM NUTS . . . . . . . . . . . . . . . . . . . . . . . . . . . . . . . . . . . . . . . . . . . . . . . . . . . . . .2
9. KE55057-4 LID FOR GEARBOX . . . . . . . . . . . . . . . . . . . . . . . . . . . . . . . . . . . . . . . . . . . . . .1
10. FA95062 PAN HD. PHILLIPS SCREW . . . . . . . . . . . . . . . . . . . . . . . . . . . . . . . . . . . . . . . .2
11. KE00508 HANDWHEEL ASSEMBLY . . . . . . . . . . . . . . . . . . . . . . . . . . . . . . . . . . . . . . . . . .1
12. FA19501 HANDWHEEL ALLEN SCREW, HEX SOCKET . . . . . . . . . . . . . . . . . . . . . . . . . .2
13. KE51730 TILT SHAFT BEARING . . . . . . . . . . . . . . . . . . . . . . . . . . . . . . . . . . . . . . . . . . . . .4
14. FA19177 HEX SOCKET SET SCREW 5/16-24 X 1” . . . . . . . . . . . . . . . . . . . . . . . . . . . . . .1
15. FA20047 JAM NUT 5/16-24 . . . . . . . . . . . . . . . . . . . . . . . . . . . . . . . . . . . . . . . . . . . . . . . .1
16. KE003209-11 Complete Switch . . . . . . . . . . . . . . . . . . . . . . . . . . . . . . . . . . . . . . . . . . . . . . . . .1
KE603208-4 Momentary Switch Activator*** . . . . . . . . . . . . . . . . . . . . . . . . . . . . . . . . . . . . . .1
KE603208-7 Contact Section Holder, Latch*** . . . . . . . . . . . . . . . . . . . . . . . . . . . . . . . . . . . .1
KE603208-9 Contact Block*** . . . . . . . . . . . . . . . . . . . . . . . . . . . . . . . . . . . . . . . . . . . . . . . . . 4
***NOTE: for units built prior to Dec. 2006 order Complete Switch KE003209-11
19. KE50580 WATER RESISTANT BOOT . . . . . . . . . . . . . . . . . . . . . . . . . . . . . . . . . . . . . . . . .1
20. FA05002-34 "O" RING, CIRCUIT BREAKER . . . . . . . . . . . . . . . . . . . . . . . . . . . . . . . . . . . . . .1
21. KE50579-1 CIRCUIT BREAKER . . . . . . . . . . . . . . . . . . . . . . . . . . . . . . . . . . . . . . . . . . . . . . .1
22. KE51007 MICRO SWITCH . . . . . . . . . . . . . . . . . . . . . . . . . . . . . . . . . . . . . . . . . . . . . . . . .2
FA10139 MACHINE SCREW #6-32 X 1" LG . . . . . . . . . . . . . . . . . . . . . . . . . . . . . . . . . . . .4
KE50498 MICRO SWITCH INSULATION . . . . . . . . . . . . . . . . . . . . . . . . . . . . . . . . . . . . . .2
FA32004 TOOTH LOCK WASHER #6 . . . . . . . . . . . . . . . . . . . . . . . . . . . . . . . . . . . . . . . .4
23. KE50582-1 CPLG. ONTARIO BELTING #G-100 5/8 BORE . . . . . . . . . . . . . . . . . . . . . . . . . .2
24. FA95055-6 SQUARE KEY 3/16 X 3/16 X 1" LG . . . . . . . . . . . . . . . . . . . . . . . . . . . . . . . . . . .1
25. KE50583-1 RUBBER INSERT, ONTARIO BELTING "BUNA N" . . . . . . . . . . . . . . . . . . . . . . . .1
26. KE52832-1 MOTOR . . . . . . . . . . . . . . . . . . . . . . . . . . . . . . . . . . . . . . . . . . . . . . . . . . . . . . . .1
27. FA10487 HEX HD SCREW 1/4-20 X 1" LG . . . . . . . . . . . . . . . . . . . . . . . . . . . . . . . . . . . . .4
28. FA31008 SPLIT LOCKWASHER 1/4" DIA . . . . . . . . . . . . . . . . . . . . . . . . . . . . . . . . . . . . . .4
29. FA20026 HEX NUT 1/4 - 20 . . . . . . . . . . . . . . . . . . . . . . . . . . . . . . . . . . . . . . . . . . . . . . . .4
30. KE517112 LEFT HAND BEARING . . . . . . . . . . . . . . . . . . . . . . . . . . . . . . . . . . . . . . . . . . . .1
31. KE517111 RIGHT HAND BEARING . . . . . . . . . . . . . . . . . . . . . . . . . . . . . . . . . . . . . . . . . . .1
32. KE51712 GREASE NIPPLE . . . . . . . . . . . . . . . . . . . . . . . . . . . . . . . . . . . . . . . . . . . . . . . . .2
33. KE001234-2 MICRO SWITCH TRIGGER/WORM GEAR WELDMENT . . . . . . . . . . . . . . . . . . .1
34. FA10772 SOCKET HD. CAP SCREW . . . . . . . . . . . . . . . . . . . . . . . . . . . . . . . . . . . . . . . . .2
35. FA20030 JAM NUT . . . . . . . . . . . . . . . . . . . . . . . . . . . . . . . . . . . . . . . . . . . . . . . . . . . . . . .2
36. FA95007-4 RETAINING RING . . . . . . . . . . . . . . . . . . . . . . . . . . . . . . . . . . . . . . . . . . . . . . . .1
37. FA95055-1 SQUARE KEY . . . . . . . . . . . . . . . . . . . . . . . . . . . . . . . . . . . . . . . . . . . . . . . . . . .1
38. FA19201 HEX SOCKET SET SCREW 3/8-24 . . . . . . . . . . . . . . . . . . . . . . . . . . . . . . . . . . .1
39. KE50581 BRIDGE RECTIFIER . . . . . . . . . . . . . . . . . . . . . . . . . . . . . . . . . . . . . . . . . . . . . .1
40. KE54535 EDGE CONNECTOR (11 PIN) . . . . . . . . . . . . . . . . . . . . . . . . . . . . . . . . . . . . . . .2
41. KE50753-10 RELAY . . . . . . . . . . . . . . . . . . . . . . . . . . . . . . . . . . . . . . . . . . . . . . . . . . . . . . . . .2
42. KE50473 GROUND LUG . . . . . . . . . . . . . . . . . . . . . . . . . . . . . . . . . . . . . . . . . . . . . . . . . .1

TRUNNION ASSEMBLY
ITEM PART DESCRIPTION QTY.
NO. NO.
1. KE00354 TRUNNION BEARING ASSEMBLY . . . . . .1
(INCLUDES PART # 3, 4 & 6)
2. KE00351 TRUNNION BEARING ASSEMBLY . . . . . .1
(INCLUDES PART # 3, 4 & 6)
3. KE51711 ROLLER BEARING . . . . . . . . . . . . . . . . . 2
4. KE51571-1 BEARING WASHER . . . . . . . . . . . . . . . . . .1
5. FA95081-3 BOLT, 5/16-18 X 1/2" . . . . . . . . . . . . . . . . .1
6. KE51886 GREASE NIPPLE . . . . . . . . . . . . . . . . . . . .2
7. FA11326 BOLT, 5/16-18 X 1 1/2" . . . . . . . . . . . . . .4/2
8. KE50666 SPHERICAL WASHER . . . . . . . . . . . . . . . .1
1
2
3
4
5
6
TANGENT DRAW-OFF VALVE
ITEM NO. PART NO. DESCRIPTION QTY.
Complete KE50972-B 2” DRAW-OFF ASSEMBLY (TD-2) . . . . . . . . . . . . . . . . . . . . . . . . . . . . . . . . . . . .1
Valve KE50973 3” DRAW-OFF ASSEMBLY (TD-3) . . . . . . . . . . . . . . . . . . . . . . . . . . . . . . . . . . . .1
KE02044-2 2” DRAW-OFF ASSEMBLY (TD-2A with ACME THREAD) . . . . . . . . . . . . . . . . .1
KE02044-4 3” DRAW-OFF ASSEMBLY (TD-3A with ACME THREAD) . . . . . . . . . . . . . . . . .1
1. FA95049 WING NUT, TD-2 . . . . . . . . . . . . . . . . . . . . . . . . . . . . . . . . . . . . . . . . . . . . . . . . .1
FA21501-2 ACCORN NUT, TD-2 . . . . . . . . . . . . . . . . . . . . . . . . . . . . . . . . . . . . . . . . . . . . . .1
FA21501-1 ACCORN NUT, TD-3 . . . . . . . . . . . . . . . . . . . . . . . . . . . . . . . . . . . . . . . . . . . . . .1
2. KE52755 KNOB, TD-2 . . . . . . . . . . . . . . . . . . . . . . . . . . . . . . . . . . . . . . . . . . . . . . . . . . . .1
SE50018 KNOB, TD-3 . . . . . . . . . . . . . . . . . . . . . . . . . . . . . . . . . . . . . . . . . . . . . . . . . . . .1
3. FI05180-1 HEX NUT, TD-2 . . . . . . . . . . . . . . . . . . . . . . . . . . . . . . . . . . . . . . . . . . . . . . . . . .1
FI05180-2 HEX NUT, TD-3 . . . . . . . . . . . . . . . . . . . . . . . . . . . . . . . . . . . . . . . . . . . . . . . . . .1
4. KE52753 RETAINER, TD-2 . . . . . . . . . . . . . . . . . . . . . . . . . . . . . . . . . . . . . . . . . . . . . . . . .1
SE50013 RETAINER, TD-3 . . . . . . . . . . . . . . . . . . . . . . . . . . . . . . . . . . . . . . . . . . . . . . . . .1
5. KE52752 PISTON, TD-2 . . . . . . . . . . . . . . . . . . . . . . . . . . . . . . . . . . . . . . . . . . . . . . . . . . .1
SE50010 PISTON, TD-3 . . . . . . . . . . . . . . . . . . . . . . . . . . . . . . . . . . . . . . . . . . . . . . . . . . .1
6. FA05002-24 "O" RING, TD-2 . . . . . . . . . . . . . . . . . . . . . . . . . . . . . . . . . . . . . . . . . . . . . . . . . .1
FA05002-38 "O" RING, TD-3 . . . . . . . . . . . . . . . . . . . . . . . . . . . . . . . . . . . . . . . . . . . . . . . . . .1
3
4
5
6
2
7
For tilting units
w
ith covers
For tilting units
without covers
1
8
/