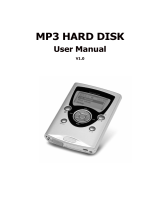
Page is loading ...

User’s Guide
NOMAD IIc family of Digital Audio Player/Voice Recorder
Information in this document is subject to change without notice and does not represent a commitment on the part of Creative Technology Ltd. No part of this
manual may be reproduced or transmitted in any form or by any means, electronic or mechanical, including photocopying and recording, for any purpose
without the written permission of Creative Technology Ltd. The software described in this document is furnished under a license agreement and may be used
or copied only in accordance with the terms of the license agreement. It is against the law to copy the software on any other medium except as specifically
allowed in the license agreement. The licensee may make one copy of the software for backup purposes only.
The Software License Agreement is found in a separate folder on the installation CD.
Copyright © 1998-2001 by Creative Technology Ltd. All rights reserved.
Version 2.0
September 2001
Sound Blaster, the Sound Blaster logo, and the Creative logo are registered trademarks, and Sound Blaster Live! and EAX are trademarks of Creative
Technology Ltd. in the United States and/or other countries.
NOMAD is a registered trademark of Aonix and is used by Creative Technology Ltd. and/or its affiliates under license.
Microsoft and Windows are either registered trademarks or trademarks of Microsoft Corporation in the United States and/or other countries.
Macintosh, Mac, Apple and FireWire are trademarks of Apple Computer, Inc., registered in the U.S. and other countries.
Intel and Pentium are trademarks of Intel Corporation in the U.S. and other countries.
CDDB is a trademark of CDDB, Inc.
SmartMedia is a trademark of Toshiba Corp.
EMusic, Emusic.com, and the EMusic.com logo are trademarks of EMusic.com Inc.
MP3.com and the MP3.com logo are trademarks of MP3.com, Inc.
Audible and the Audible logo are trademarks of Audible, Inc.
audiohighway.com and the audiohighway.com logo are trademarks of audiohighway.com.
All other brand and product names listed are trademarks or registered trademarks of their respective holders.
All specifications subject to change without prior notice. Use of this product is subject to the limited warranty. Actual contents may differ slightly from those
pictured.

Contents
Introduction
Your NOMAD IIc Player......................................................i
System Requirements ...........................................................ii
Document Conventions ........................................................ii
1 Your NOMAD IIc Package
In the Package .................................................................. 1-1
Optional Accessories ....................................................... 1-2
Location of Controls ........................................................ 1-3
2 Setting Up Your NOMAD IIc Player
Step 1: Insert Battery ........................................................ 2-1
Step 2: Connect Earphones to Player .............................. 2-1
Step 3: Put on Your Earphones ........................................ 2-1
Step 4: Install Software .................................................... 2-2
For Windows users ............................................... 2-2
For Macintosh OS 9 users .................................... 2-2
For Macintosh OS X users .................................. 2-2
Step 5: Connect NOMAD IIc Player to PC .................... 2-4
Step 6: Install NOMAD II Driver ................................... 2-5
For Windows users only....................................... 2-5
Step 7: Verify Correct Installation of NOMAD II Driver ....
2-5
For Windows users ............................................... 2-5
For Macintosh OS 9 users and Macintosh users that
installed OS X over OS 9 (Dual-Boot) ..............2-6
For Macintosh users that installed OS X only......2-6
Step 8: Download MP3/WMA Files to Your Player ......2-6
For Windows users ................................................2-6
For Macintosh users ..............................................2-7
Step 9: Listen to MP3/WMA songs .................................2-7
Step 10: Make a Voice Recording ....................................2-7
NOMAD Detector ............................................................2-7
3 Using Your NOMAD IIc Player
Power ON/OFF .................................................................3-1
Lock ...................................................................................3-1
Navigating & Accessing Menus ......................................3-2
In MUSIC Submenu .........................................................3-3
To play an MP3 File ..............................................3-3
To repeat MP3 playback........................................3-3
To repeat a section of a track continuously ..........3-4
To use the DSP Equalizer......................................3-4
To erase an MP3 File.............................................3-5
In VOICE Submenu .........................................................3-5
To change microphone input.................................3-5
To make a voice recording ....................................3-6
To play a voice recording ......................................3-6
To erase a voice recording.....................................3-6
In INFORMATION Submenu .........................................3-7

To change the owner’s name ................................ 3-7
Navigating & Accessing SETTINGS Submenu ............ 3-8
To set Backlight on interval.................................. 3-9
To turn on/off Backlight........................................ 3-9
To set Contrast....................................................... 3-9
To set Power off when idle ................................. 3-10
To set Audio output............................................. 3-10
In TIME Submenu ......................................................... 3-11
To set the date, time and day .............................. 3-11
4 Using Creative PlayCenter 2 in Windows
Introducing PlayCenter 2 ................................................. 4-1
To open PlayCenter 2............................................ 4-1
Using PlayCenter 2 .......................................................... 4-2
To download MP3/WMA files to your player..... 4-2
To rip an audio CD into MP3/WMA files ........... 4-2
To transfer voice files from your player to your
computer ............................................................. 4-2
To delete files from your player ........................... 4-2
To change PlayCenter 2’s settings........................ 4-2
To format your Flash Memory Card (Creative
SmartMedia) ....................................................... 4-3
To connect to the NOMAD website .................... 4-3
5 Using iTunes in Macintosh OS
Transferring music files from iTunes to your NOMAD IIc
player .............................................................................. 5-2
Transferring music files from your NOMAD IIc player to
iTunes ............................................................................. 5-3
A An MP3 Primer
What is MP3? .................................................................. A-1
MP3 Conversion Process ................................................ A-1
Extracting from Audio CD.................................. A-1
Encoding to MP3................................................. A-1
Memory and Audio Quality ................................ A-2
MP3 Web sites ................................................................. A-2
B Technical Specifications & Troubleshooting
NOMAD IIc Player DAP-3205/DAP-6406* .................B-1
Troubleshooting ...............................................................B-2
C Handling Instructions
Handling Instructions .......................................................C-1

i
Introduction
Your NOMAD IIc Player
Any reference to "NOMAD II" in your
package’s software, or elsewhere, also
refers to the NOMAD IIc player.
Your NOMAD IIc player is a digital audio
player for the new Internet generation. You do
not need to carry a cassette tape or CD.
A key feature at the core of the NOMAD IIc is
its programmability, designed to be virtually
future-proof. By incorporating this upgradable
feature, the NOMAD IIc can be programmed
to support multiple digital audio formats, such
as MP3 and Microsoft® Windows Media
Audio (WMA) or software extensions that will
be made available on www.nomadworld.com.
The NOMAD IIc is designed for the active
consumer, with features that emphasize quick
setup and mobility. The new NOMAD IIc
comes equipped with a Universal Serial Bus
(USB) connection for faster transfer rates and
hot-plugging connectivity, a high-quality
backlit LCD, and SSFDC (Solid State Floppy
Disk Card) compliant Flash Memory Card
(Creative SmartMedia™), supported in all
configurations. And like the first NOMAD,
the NOMAD IIc features MP3 playback and
voice recording capability.
The sound in this light shock-resistant player
will not skip or stretch at all, even during
vigorous exercise or after repeated playbacks.
The ID3 Tag information such as song title and
artist name is also conveniently displayed on
the LCD for easy reference.
NOMAD IIc also comes bundled with the
following software and songs:
❑ Creative PlayCenter 2, which manages
your favorite digital audio files on your
computer and NOMAD IIc. It is also an
integrated encoder for ripping audio CD
tracks into compressed digital audio files.
❑ Macintosh® iTunes, which features a
powerful interface for importing music
CDs to MP3 files, creating playlists,
burning music CDs, moving music to your
NOMAD IIc player as well as for listening
to hundreds of radio stations on the
Internet.
You can download more MP3 files through
worldwide web sites or online services to play
them back on your NOMAD IIc.
For more details on MP3, please refer to
Appendix A, “An MP3 Primer”.
Information is correct at time of
printing. For the latest information,
visit www.nomadworld.com.
For the latest information about
Apple® products, including iTunes,
visit www.apple.com.

ii
System Requirements
For PC:
❑ Microsoft Windows® 98, Windows 98SE,
Windows 2000 or Windows Me
❑ 200MHz processor or higher (Intel®
Pentium® II and above recommended for
MP3 encoding)
❑ SVGA graphics adapter 256 colors,
640x480 (High color 16-bit 600 x 800
recommended)
❑ Internet connection for Internet content
downloading or CDDB™ support
(any charges incurred are the
responsibility of the end user)
❑ 32MB RAM (64MB recommended)
❑ USB port
❑ 30MB free hard disk space (more for
audio content storage)
❑ Installed mouse
❑ CD-ROM drive with digital audio
extraction support
For Mac®
❑ Mac OS version 9.0 or higher
❑ iMac™, G3 or higher
❑ Internet connection for Internet content
downloading or CDDB support
(any charges incurred are the
responsibility of the end user)
❑ 64MB RAM (128MB recommended)
❑ USB port
❑ USB Manager version 1.2 or higher
❑ 6MB free hard disk space (more for audio
content storage)
❑ Installed mouse
❑ CD-ROM drive with digital audio
extraction support
Document Conventions
The following typographical conventions are
used throughout this document.
Table i: Text conventions.
Text Elements Use
bold
Text that must be entered
exactly as it appears.
italic
Title of a book or a
placeholder. A
placeholder represents
information that you
must provide.
UPPERCASE
Directory name, file
name, or acronym.
< >
Symbols, letters, and key
names on the keyboard.
Table ii: Icons.
This symbol Indicates
A note.
A warning.
A tip.

1
Your NOMAD IIc Package
In the Package
Your NOMAD IIc player package contains the following items:
USB cable
1 Installation CD
Figure 1-1: NOMAD IIc player package.
NOMAD IIc player
1 AA size battery
Belt clip & Belt clip screw
Quick Start guide

1-2 Your NOMAD IIc Package
Optional Accessories
For the latest list of accessories, please visit
www.nomadworld.com.
Please purchase original Creative
Flash Memory Cards (Creative
SmartMedia) to ensure 100 percent
compatibility with your NOMAD IIc
player.
Availability of Flash Memory Cards
(Creative SmartMedia) varies
according to region.
Figure 1-2: Optional accessories.
Docking station
USB cable
AC Adapter
1
1 rechargeable NiMH battery
Docking Station Kit
2
3
Additional Flash Memory Card
(Creative SmartMedia)
Car Cassette Adapter Kit

Your NOMAD IIc Package 1-3
Location of Controls
Figure 1-3: Front view of the player.
High resolution
bitmapped backlit LCD
Marks segment of track for repeating
Skip track forward
/
Navigate right/down
Repeat 1/All/Random/None
Microphone
Power On
/Play
/Pause
/
Toggle MUSIC/VOICE
/
Select
Menu
Skip track reverse
/
Navigate left/up
Power Off
/Stop
/
Cancel
Docking station connector
PLAYER - Front View
LEGEND
Bold - Press and hold the button
Italics - For menu navigation

Your NOMAD IIc Package 1-4
Battery case
/Flash Memory Card
(Creative SmartMedia)
cover
Flash memory card
Eject button
Belt clip
Note
: Belt clip may not be
screwed on when you first
open the box.
Figure 1-4: Rear view of the player.
PLAYER - Rear View

Your NOMAD IIc Package 1-5
Figure 1-5: Left, right, top and bottom views of the player.
LOCK switch
Note
: This
switch only
locks the
buttons on
the player.
USB connector
cover
Volume +
Volume -
Record
Erase
DSP
Headphone jack
Docking station connector rubber cover
Note
: The docking station connector is used only
together with the optional docking station that also
acts as a battery recharging station.
Left View
Right View Top View
Bottom View

Setting Up Your NOMAD IIc Player 2-1
2
Setting Up Your NOMAD IIc Player
MP3/WMA files can be stored in your player’s internal memory or in a supported Flash Memory
Card (Creative SmartMedia). Depending on the model of the player that you have purchased,
either the player or the Flash Memory Card (Creative SmartMedia) is preloaded with a “Welcome
to NOMAD” MP3 song. So, you can start enjoying MP3 songs without connecting your
NOMAD IIc player to a PC. Just follow these steps and you can get up and running straightaway:
Step 1: Insert Battery
Remove the
battery
case/Flash
Memory Card
(Creative
SmartMedia)
cover.
Insert the
battery.
Figure 2-1: Insert battery.
Step 2: Connect
Earphones to Player
Earphones may not be included in
your package.
Step 3: Put on Your
Earphones
You may want to skip to “Step 9: Listen to
MP3/WMA songs” on page 2-7 to start
playing with your NOMAD IIc player.

Setting Up Your NOMAD IIc Player 2-2
Step 4: Install Software
Any reference to "NOMAD II" in your
package’s software, also refers to the
NOMAD IIc player.
For Windows users
Install all the programs in the software
CD before accessing its contents or the
MP3 content CD.
1. Insert the Creative NOMAD IIc
installation CD into the CD-ROM drive. If
the Setup program does not run
automatically, do steps 2 through 3.
Otherwise, skip to step 4.
2. Click Start -> Run.
3. In the Run dialog, type
D:\CTRUN\CTRUN.EXE (where D:\ is
your CD-ROM drive) and click OK.
The Creative NOMAD II setup screen
appears, listing the languages supported
by the software.
4. Click the language you want. The second
Creative NOMAD II setup screen
appears, selecting by default all
applications to be installed.
5. Select the applications you want to install
and click the Right Arrow button to start
the installation.
The Creative Product Registration
dialog box appears.
6. Follow the instructions on the screen.
7. When prompted to restart your system,
leave the CD in the CD-ROM drive, select
the Yes, I want to restart my computer
now option and then click the Finish
button.
For Macintosh OS 9 users
Macintosh OS 9 users who want to
install iTunes must install Version 1.1
of the application.
1. Insert the Creative Installation CD into
your CD-ROM drive. The NOMAD icon
appears on your desktop.
2. Double-click the NOMAD icon. The
NOMAD window appears.
3. Double-click the iTunes folder. The
iTunes window appears.
4. Double-click the iTunes v1.1 for Mac OS
9 folder. The iTunes v1.1 for Mac OS 9
window appears.
5. Double-click the language folder you
want. For example, if you want to install
the English version of iTunes,
double-click the English folder.
The respective language window appears.
For example, if you double-click the
English folder, the English window
appears.
6. Double-click the Install iTunes icon. The
License window appears.
7. Read the Software License Agreement,
then click Accept if you accept the terms.
The Read Me window appears.
8. Read the information provided, then click
Continue. The Install iTunes window
appears.
9. The Easy Install option is selected by
default. This installs the iTunes
application with audio CD authoring
support. The other option, Custom
Install, installs the iTunes application
with CD authoring support and audio CD
authoring support for USB/FireWire®
CD-RW drives.
10. Click the installation option you want,
then click Install. A dialog box appears,
prompting you to confirm installation of
audio CD authoring support.
11. Click Proceed. A message box appears
informing you that the installation has
been launched.
12. After installation, a dialog box appears,
prompting you to restart your system.
Click Restart to restart your system.
13. After restarting, the iTunes window
appears. Double-click the iTunes icon to
launch the application.
For Macintosh OS X users
Macintosh OS X users who want to
install iTunes must install Version
1.1.1 of the application.
1. Insert the Creative Installation CD into
your CD-ROM drive. The NOMAD icon
appears on your desktop.
2. Double-click the NOMAD icon. The
NOMAD window appears.

Setting Up Your NOMAD IIc Player 2-3
3. Double-click the iTunes folder. The
iTunes window appears.
4. Double-click the iTunes v1.1.1 for OS X
folder. The iTunes v1.1.1 for OS X
window appears.
5. Double-click the iTunes for Mac OS
X.smi icon. The Software License
Agreement window appears.
6. Read the agreement, then click Agree if
you agree to the terms. The iTunes for
Mac OS X window appears.
7. Double-click the iTunes for Mac OS X
folder. The iTunes for Mac OS X window
appears.
8. Double-click the iTunes.pkg icon. The
Install iTunes for Mac OS X window
appears, prompting you to type in the
administrator password.
9. Type in the password, then click OK. An
introduction to iTunes appears in the
Install iTunes for Mac OS X window.
10. Read the introduction, then click
Continue. The iTunes readme text
appears in the Install iTunes for Mac OS
X window.
11. Read the readme text, then click
Continue. The Software License
Agreement appears in the Install iTunes
for Mac OS X window.
12. Read the Software License Agreement,
then click Continue. A dialog box
appears, asking you if you agree to the
terms.
13. Click Agree if you agree to the terms.
Icons representing possible installation
locations in your system appear in the
Install iTunes for Mac OS X window.
14. Click the appropriate icon, then click
Continue.
15. Click Install to start installation. After
installation, click Close to close the
window.
16. Click the iTunes icon on the Dock, then
click Open iTunes to launch the
application.

Setting Up Your NOMAD IIc Player 2-4
Step 5: Connect NOMAD IIc Player to PC
You need not switch off your computer when you connect your NOMAD IIc player to the PC since USB is Plug-and-Play.
Figure 2-2: Connecting the NOMAD IIc player to a PC.
The battery must be in the
player and the player turned
on. NOMAD IIc is not a USB
powered-device.
Position the PC so that
its USB ports can be
easily accessed.
Note: The
USB
port(s) on
your PC
may be
found on
the front
panel
instead of
the back
panel.
Plug the flat USB connector
of the bundled (standard)
USB cable to the PC.
Plug the square connector of the USB
cable to the NOMAD IIc player.
A diagram appears on the LCD,
indicating that the player is connected
to your PC.

Setting Up Your NOMAD IIc Player 2-5
Step 6: Install NOMAD II
Driver
NOMAD IIc uses the "NOMAD II"
driver.
Skip this step if you are a Macintosh
user; installing the software as
instructed in “Step 4: Install Software”
on page 2-2, would have already
installed the drivers necessary for your
NOMAD IIc to work with your
Macintosh.
For Windows users only
Once you have connected your NOMAD IIc
player to your PC,
the dialog box similar to
Figure 2-3 appears.
1. Click the Next button.
2. Select the Search for the best driver for
your device. (Recommended) option and
click the Next button.
3. Clear the Floppy disk drives check box
and select the CD-ROM drive option.
4. Click the Next button twice in succession.
The dialog box similar to Figure 2-4
appears.
5. Click the Finish button.
Step 7: Verify Correct
Installation of NOMAD II
Driver
For Windows users
1. Click Start -> Settings -> Control Panel.
2. In the Control Panel window,
double-click the System icon.
3. In the System Properties dialog box,
click the Device Manager tab.
4. In the Device Manager tabbed page,
double-click Universal Serial Bus
controllers, and then check that Creative
NOMAD II is present as shown in Figure
2-5 below.
Figure 2-3:
Add New Hardware Wizard
dialog
box.
Figure 2-4: Installation of Creative NOMAD II
driver is completed.
Figure 2-5: Verify that Creative NOMAD II
driver is installed correctly.

Setting Up Your NOMAD IIc Player 2-6
For Macintosh OS 9 users and
Macintosh users that installed OS
X over OS 9 (Dual-Boot)
1. On the desktop, double-click the hard disk
icon where iTunes has been installed. The
hard disk window appears.
2. Double-click the System Folder icon.
The System Folder window appears.
3. Double-click the Extensions icon.
The Extensions window appears.
4. Be sure that the NOMAD II USB Driver
icon is listed.
Note: Icons for other NOMAD players are
also listed, representing the additional
drivers installed during the setup.
For Macintosh users that
installed OS X only
1. On the desktop, double-click the hard disk
icon where OS X has been installed. The
hard disk window appears.
2. Double-click the Applications folder. The
Applications window appears.
3. While pressing <Control>, click the
iTunes icon. A menu appears.
4. Click Show Package Contents. The
iTunes window appears.
5. Double-click the Contents folder. The
Contents window appears.
6. Double-click the Plug-ins folder. The
Plug-ins window appears.
7. Be sure that the NOMAD II Plugin.bundle icon is listed.
Note: The NOMAD Jukebox icon is also listed, representing the additional driver installed
during the setup.
Step 8: Download MP3/WMA Files to Your Player
For Windows users
1. To start PlayCenter 2, double-click the Creative PlayCenter 2 icon or connect the USB cable
from your PC to your NOMAD IIc player.
By default, the PC Music Library appears in PlayCenter 2’s Main Window and the
Transfer Window. Ensure that you have MP3/WMA files in your computer.
2. Click the NOMAD II button on the Transfer Window (see Figure 2-6).
3. Select the songs you want to download to NOMAD IIc in the Main Window.
4. Click the lower Transfer button.
After downloading the songs, just disconnect your NOMAD IIc player from your computer and
you can start enjoying the downloaded songs in the player.
For details on how to use Creative PlayCenter 2, refer to Chapter 4 and its online Help file.
Figure 2-6: The PlayCenter 2 user interface.
Transfer Window
Transfer button
Main Window
Note:
The song titles will only be displayed if the PC
is connected to the Internet and you are registered
with the CDDB website.

Setting Up Your NOMAD IIc Player 2-7
For Macintosh users
Refer to “Transferring music files from iTunes
to your NOMAD IIc player” on page 5-2.
Step 9: Listen to
MP3/WMA songs
Press the MENU button on the player and you
will see the NOMAD II main menu. The
MUSIC icon is blinking, which means that it is
selected by default. Press the PLAY button to
go to the MUSIC submenu and then press the
PLAY button again to enjoy clear digital
music.
Step 10: Make a Voice
Recording
Thinking of finding out how your voice
sounds on NOMAD IIc? Wait no more!
Press the MENU button to go to the NOMAD
II main menu and then press the FORWARD
button once to navigate to the VOICE icon.
Press the PLAY button to go to the VOICE
submenu. Press and hold the REC button to
start the recording. To stop the recording, press
the STOP button.
For more details on how to use your
player more effectively, please refer to
Chapter 3, “Using Your NOMAD IIc
Player”.
NOMAD Detector
For Windows users only
NOMAD Detector is a small utility in the
Taskbar (see Figure 2-7 below) that can detect
a connection between the NOMAD IIc player
and the PC via a USB cable. It is installed by
default as part of Creative PlayCenter 2.
To disable NOMAD Detector
1. Right-click the NOMAD Detector icon to
show the shortcut menu. Enable
NOMAD Detector is selected by default.
2. Click the Enable NOMAD Detector to
disable it.
If you want to enable it again, click Start
-> Programs -> Creative -> Creative
PlayCenter 2 -> Creative PDE Detector.
You can also click Exit to quit
NOMAD Detector if you do not need
to use the utility. The utility will
appear the next time you restart your
PC.
Ensure that the utility is enabled or
launched, otherwise the PlayCenter 2
application will not launch
automatically when the NOMAD IIc
is connected to your computer.
Figure 2-7: NOMAD Detector.

Using Your NOMAD IIc Player 3-1
3
Using Your NOMAD IIc Player
Power ON/OFF
1. Press and hold the PLAY button to turn on the power.
The NOMAD IIc main menu appears as shown above.
2. To turn off the power, press and hold the STOP button for more than
1 second.
If the player is idle in 3 minutes, it will turn off automatically.
You can change the Power Off time in the SETTINGS submenu.
Lock
Ensure that the LOCK switch is not on before you continue.
Battery indicator
Flash Memory Card (Smart Media) indicator
Lock indicator
Volume indicator
Repeat Segment
/MIC Input
indicator
Note
: MIC HI/LO
only appears
while recording
Repeat Track
indicator
PLAY
STOP
VIEW OF ALL ICONS
Lock icon appears
To lock the
player’s buttons:
Slide the LOCK
switch downwards.

Using Your NOMAD IIc Player 3-2
Navigating & Accessing Menus
There are two levels of menus which control the operations of the player: the MAIN menu and six submenus.
MUSIC submenu INFO submenu
VOICE submenu
MAIN menu
Press the PLAY button to access a
submenu (represented by an icon) or a
playlist item on the LCD.
Press the FORWARD button to navigate
to the next item on the right or below.
Press the REVERSE button to navigate to
the previous item on the left or above.
Press the MENU button to
go to the MAIN menu or to
return to the submenus after
operating the functions.
SETTINGS submenu
TIME submenu

Using Your NOMAD IIc Player 3-3
In MUSIC Submenu
To access MUSIC submenu, press the PLAY button when the
MUSIC icon is blinking.
The MUSIC submenu appears, with the first file selected.
NOMAD IIc is designed to be future-proof as it is
programmable. New audio formats can be downloaded into the
player when they are available. Visit www.nomadworld.com for
any new releases.
To play an MP3 File
To play back MP3 files, they must first be downloaded in the
NOMAD IIc player.
1. Press the PLAY button to play back the current track or press it
again to pause.
During Pause, the Pause icon appears.
During the playback, the Play icon, time elapsed, song order, the
song title, artist, bitrate, sampling rate, and DSP mode are displayed
on the LCD.
2. Press the STOP button to stop the playback. If held down for longer
than 1 second, the power will be turned off.
You can press and hold the PLAY button to toggle to the VOICE
submenu and back to the MUSIC submenu.
To repeat MP3 playback
Press the REPEAT button and then select either Repeat Current
Track, Repeat All, or Repeat Random which appears in order.
To cancel the operation, press the REPEAT button until the
Repeat indicator disappears from the LCD.
Repeat Current Track Repeat All Repeat Random
/