Page is loading ...

Product No. Jurassic Park Ride On
Battery
1.
Rer
coy
2.
Cor
red
3.
Re
scr
I
I
THE
THE
THE
AT1
TEF
THE FIRST USE.
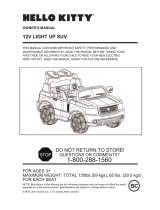
1.
Press the seat lock down.
2.
While pressing the seat lock
down, slide the eat along the
groove on the battery cover from
the front all the way back. Then
release the seat lock.
Seat

'p
/ Charging
Socket
CAUTION:
Your ride-on vehicle is equipped with a built-in
thermal circuit breaker. The thermal circuit breaker
is a self-resetting safety device which
automatically "trips" and shuts down the operation
of the vehicle if it becomes overloaded or the
driving conditions are too severe. Once the circuit
breaker has tripped it will automatically reset itself
after approximately 10 seconds and allow the rider
to resume normal operation.
a.
On/off button
b.
Forward/reverse button
c.
Foot pedal
d.
Horn
1.
Fasten seat belt
2.
Switch the on/off button to on'
3.
Switch the forward/reverse button to the required direction
4.
Press the foot pedal to move
5.
To slow the car down or to stop release the foot pedal
EI.1 ijjjj. .th
e
iibat
t
e
ry
1.
Turn the main switch off
2.
Insert the DC plug of the charger to the r"kt located on the left
side of the car.
3.
Plug the charger to the AC supply.
4.
Charge for 4-6 hours.
WARNING
Only use charger supplied by the manufacturer.
Troubleshooting
If the car does not move make sure the electric cable is connected to the battery.
If the car does not move make sure the charger is unplugged and removed from the car.
If the motor slows down or stops — this may be due to low battery. Recharge the
batter) for 4-6 hours.
1.
Remove the screw and
battery cover from the
steering wheel.
2.
Install or replace 2 x
AA size battery (not
supplied) in correct
polarity.
3.
Replace the battery
cover and screw
(D
AA iSV
e
i5V
DO NOT CHANGE THE FORWARD/REVERSE
cJ)
DIRECTION WHILE MOVING - IT WILL DAMAGE
THE VEHICLE.
)
SWITCH THE POWER OFF AFTER USE.
- - Please retain this leaflet for reference to the manufacturer.
Carefully Made in China

PLEASE READ BEFORE ASSEMBLY
Jurassic
Park Ride On
ED
Jurassic World 6V Battery
Powered 4x2
TOOLS
Screwdriver
Spanner
Hammer
Not included.
mportant owner's information
This product must be assembled by an adult.
Before the first use, the rechargeable battery should be connected.
Before the first use, the battery should be recharged for4-6 hours.
This charger is not a toy.
The rechargeable battery is only to be charged by an adult.
Do not allow children to play with the charger or to recharge the battery.
Turn the main switch off when charging.
It is normal for the charger to feel warm during charging, but if the
charger feels very hot, stop charging, unplug the charger and carefully
check the battery and charger.
Fully charge the ride-on before storing this product for a long period.
Recharge the product every 3 months when not in use to prolong the
battery lifetime.
Examine the charger regularly for damage to cord, plug, enclosure and
other parts. If sjh damage is found, stop using the charger until it is
repaired.
Replacement rechargeable batteries are available at a small fee, please
contact customer services for prices and availability.
Non-rechargeable batteries are not to be recharged.
Different types of batteries or new and used batteries are not to be
mixed.
Only batteries of the same or equivalent type as recommended are to be
used.
Batteries are to be inserted with the correct polarity.
Exhausted batteries are to be removed from the toy.
The supply terminals are not to be short-circuited.
Charging time: 4-6hours
Estimated "playtime": 60 minutes
Estimated battery lifetime: 1 year
Number of recharge: up to 200 times
WARNINGS:
Not suitable for children under 3 years. Small part. Choking hazard.
Not for children with a body weight over 30kg.
Only one child at a time.
MV recommends the use of protective helmet when using this product.
It is dangerous to use this ride-on in areas other than private grounds.
Only use the toy on flat surfaces. For use inside the house, garden or
playground.
Not for use on busy streets, roads or highways. Not to be used in traffic.
Never use near swimming pools or other bodies of water.
Never ride in the dark or dimly lit areas. Never ride in hilly areas or on
steep slopes.
Fasten seat belt when using this product
This vehicle was made to operate on dry level ground.
Never change the forward/backward suddenly while the ride-on is in
use. Switch the direction when the ride-on has come to a halt.
Parents should teach the child how to use the product properly.
Adult supervision is required for young children.
This toy should be used with caution since skill is required to avoid fall or
collision causing injury to the user or third parties
Correct assembly of the toy is vital. Incorrect assembly can cause harm to
the child. Please check the product before each use.
Clean the vehicle with damp cloth only and never submerge the vehicle
in water or spray vehicle with water from a hose.
Waste electrical products and batteries should not be disposed of with
household waste.
1
CUSTOMER HELPLINE
Best Ride On Cars is here for you,
if you need any assistance with your purchase
please feel free to contact us.
L
1-888-411-1786
I
12
11
NOTE: Use a hammer to punch the cap nut
onto the wheel axle until it has fully locked.

~
~
i _
I
►
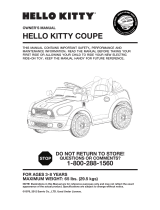
NTENTS:
A Cw..e
O
D
~
'
m
9. Hub cap (x4)
Vheels (x4)
7. Steering
support
Q
~
10. Nut cap x4
0
' 12. Wheel insert (x8)
8. Upper
steering tube
13.Charger
[Assembly of the steering wheel
1.
Remove bolt and nut from the upper steering tube.
2.
Insert the upper steering tube to the lower steering tube and tighten with
the bolt and nut.
3.
Insert the plastic steering support.
4.
Remove the bolt and nut from the steering wheel.
5.
Insert the steering wheel to the upper steering tube, align the hole and
~
then tighten with the bolt and nut
.,,
9
12
11
0
10
~
-
)LJ
UUU
/