Page is loading ...

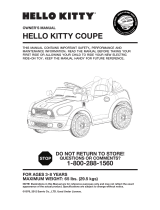
6v Battery-Powered Ride-On
FOR AGES 3
+
MAXIMUM WEIGHT: 65 lbs. (29.5 kgs)
OWNER’S MANUAL
NOTE: Illustrations in this Manual are for reference purposes only and may not reflect the exact
appearance of the actual product. Specifications are subject to change without notice.
DO NOT RETURN TO STORE!
QUESTIONS OR COMMENTS?
1-800-288-1560
STOP

1
TABLE OF CONTENTS
A Introduction, Safety and Warnings
B Before You Begin Assembly
C Parts Diagram
D Assembly
E How to Use Your Vehicle
F Detailed Maintenance and Repair
G Troubleshooting Guide
H Warranty
ELECTRIC CAR SPECIFICATIONS
2
6
7
8
14
17
22
25
SUITABLE AGE
CAPACITY
SPEED
CHARGER / INPUT
OUTPUT
CHARGING
BATTERY
SIZE OF CAR
AVERAGE BATTERY LIFE
3
+
up to 65lbs (29.5kgs)
2.5 mph
ZH06 / V021CA
DC6V,
1A
12-18 Hours
yrettaB x 1 ,HA7V6
126.5 x 76.5 x 49.5 cm
300 Charges

2
INTRODUCTION, SAFETY, AND
WARNINGS
ABOUT THIS MANUAL: This Manual was written to help you and your child get the
most performance, comfort, enjoyment and safety when riding your new electric ride-
on toy. It is important for you to understand your new electric ride-on toy. By reading
this manual before you let your child go out on his/her first ride, you will know how
to get the most from your new electric ride-on toy. It is also important that your or
your child’s first ride be in a controlled environment, away from cars, obstacles, and
other riders.
GENERAL WARNING Riding an electric ride-on toy can be a
dangerous activity, even under the best of circumstances. Proper maintenance of
your new ride-on toy is your responsibility and helps reduce the risk of injury. Certain
conditions may cause components to fail without fault of the manufacturer. The ride-
on toy can and is intended to move and it is therefore possible to lose control, fall off
and/or get into dangerous situations that no amount of care, instruction or expertise
can eliminate. If such a thing does occur your child can become seriously injured or
die, even when using safety equipment and other safety precautions.
WARNING To reduce risk of injury, adult supervision is required. Never use
in roadways, near motor vehicles, on or near steep inclines or steps, swimming pools
or other bodies of water; always wear shoes, and never allow more than one (1) rider.
WARNING CHOKING HAZARD-Small parts not suitable for children under 3
years old.
RIDE AT YOUR OWN RISK AND ALWAYS USE COMMON SENSE.
This manual contains many warnings and cautions concerning the consequences of
failing to inspect, maintain or properly use your electric ride-on toy. Because any fall
can result in serious injury or even death, we do not repeat the warning of possible
serious injury or death each time such a possibility is mentioned in this manual or the
risk of falling leads to a warning.
ALWAYS USE PROPER SAFETY EQUIPMENT AND RIDING ATTIRE.
Always use appropriate safety equipment.

3
Always wear appropriate clothing and shoes, including long sleeved shirts and long
pants and lace-up or similar shoes with rubber soles. Never ride barefoot or in
sandals and make sure that shoelaces or other fasteners are tied and kept away from
the wheels and drive system of the ride-on toy.
RIDER USE AND REQUIRED PARENTAL SUPERVISION
RIDERS MUST NOT EXCEED THE WEIGHT LIMIT OF 65 pounds (29.5kg) and MUST
BE OVER 3 years old.
The age grade for the electric ride-on toy is for 3 years and older. Just because your
child is within the age and weight limitations specified for the electric ride-on toy,
does not mean that his/her size is appropriate to fit or maintain control of the electric
ride-on toy or that he/she is capable of safely operating the electric ride-on toy. You
are the best judge of whether you or your child can safely operate the electric ride-on
toy; this includes determining whether your child is at the appropriate developmental
stage for safe use of the electric ride-on toy. Any rider that is unable to fit comfortably
on the electric ride-on toy should never attempt to ride it. A parent’s decision to allow
their child to use the electric ride-on toy should be based on the child’s maturity, skill
and their ability to follow rules. Remember that the electric ride-on toy is intended for
use only by children who are, at a minimum, able to comfortably and safely operate it.
Children operating the electric ride-on toy should be supervised by an adult at all
times. Parents should ensure that children only use the electric ride-on toy safely and
within their age and physical limits.
This manual contains very important safety information. It is your responsibility to
completely review this information and make sure that all riders understand all of
the warnings, cautions, instructions and safety topics addressed in this manual and
to assure that all riders are able to safely and responsibly use the electric ride-
on toy. You should periodically review and reinforce all information in this manual
with all riders, especially children. You should also regularly inspect and maintain
your electric ride-on toy to insure the safety of all riders. Make sure that your new
electric ride-on toy is properly fitted to any child riding it; that it is in good repair and
safe operating condition; that you and your child have gone over the use, operation
and safety information in this manual; that you and your child have learned and
understand what to do and what not to do with your new electric ride-on toy, including
observing all applicable laws, rules and common sense.
Children should be made aware of all possible riding hazards and correct riding
behavior before they ride the electric ride-on toy and should be supervised by an adult
at all times. Please explain the following to them as often as necessary.

4
SAFE RIDING PRACTICES AND WARNINGS
• Check and obey all local laws or regulations which may be in effect in the locations
where the electric ride-on toy may be used.
• Always wear appropriate clothing and shoes and other safety equipment.
• Observe the age and weight limitations on the cover of this manual.
• Always stay seated while riding the electric ride-on toy. To stop you must take your
foot off the foot pedal.
• Children must be supervised by an adult at all times to be safe.
• Always be alert and ride your electric ride-on toy defensively. Watch out for
obstacles that could catch one of the vehicle ’s wheels or force you to turn suddenly
and/or lose control. Be careful to avoid pedestrians, persons using other wheeled
products (including roller or in-line skates, skateboards, scooters, bikes, etc.),
children or animals who may enter your path. Always respect the rights and
property of others.
• Do not activate the foot pedal unless you are seated in the vehicle and in a safe,
outdoor environment that is suitable for riding your electric ride-on toy.
• Do not attempt or perform any stunts or tricks on the electric ride-on toy. It is not
made to withstand such misuse and abuse.
• Keep both hands on the steering wheel at all times.
• Do not touch the motor on the electric ride-on toy when in use or directly after use
as these parts can become extremely hot.
• Never allow more than one person to ride the electric ride-on toy at one time and
never try to tow anything.
• Do not use near steps, water, or swimming pools.
• Do not ride in wet weather.
• Never immerse the electric ride-on toy in water; electrical and drive components
could be damaged by water or create other potentially unsafe conditions.
• Keep your fingers and other body parts away from the motor, steering system,
wheels and all other moving components.
• Never hitch onto another vehicle or let yourself be pulled or pull anyone or anything
while riding the electric ride-on toy.
• Ride only on smooth, flat, dry surfaces such as pavement or level ground without
loose debris, such as sand, leaves, rocks or gravel. Water, mud, ice, bumpy, un-
even, slick, or rough surfaces could impair traction and contribute to possible loss
of control.
• Do not ride on or near hills or steep inclines. Ride only on level ground to avoid tip over.
• Avoid sharp turns, bumps, drainage grates, and other obstacles.
• Do not ride at night or where there is limited visibility.
• Do not ride indoors or on surfaces that could become damaged such as carpet or
flooring.
• Do not ride on streets, around cars, or in foot or vehicle traffic.
• Regularly check the electric ride-on toy and its components. If any parts are broken
or worn, do not ride the electric ride-on toy until you have fixed or replaced the
broken or worn parts.

5
• Do not to allow hands, feet, hair, body parts, clothing, or similar articles to come in
contact with wheels or other moving parts.
• Before each cycle of operation, you must perform the preoperation checks specified
in this manual or by the manufacturer, including:
• That all guards and pads originally supplied by the manufacturer are in proper place
and in serviceable condition;
• That the area that the unit is to be operated in is safe and suitable for safe
operation;
• That all safety labels are in place and understood by everyone, including the rider;
• That any and all axle guards, chain guards, or other covers or guards supplied by
the manufacturer are in place and in serviceable condition; and
• That tires/wheels are in good condition and have sufficient tread remaining.
• Avoid sharp bumps, drainage grates, and sudden surface changes.
PRE-RIDE SAFETY CHECKLIST
• Check to make sure that all components are properly secured and are functioning
according to the manufacturer’s specifications.
• Components must be maintained and repaired and only with the manufacturer’s
authorized replacement parts. Installation should be performed only by adult,
qualified personnel.
USING THE CHARGER
The charger should be examined regularly for damage to the cord, plug, enclosure and
other parts. In the event such damage has occurred, the electric ride-on toy should
not be charged until the charger has been repaired by qualified personnel or replaced.
Use only the supplied, recommended charger.
• Always use caution when charging.
• The charger is not a toy and should be operated by an adult.
• Never operate the charger near flammable materials or liquids, and operate the
charger in well-ventilated areas.
• Disconnect the charger and unplug it from the electric ride-on toy when not in use.
• Do not exceed the recommended charging time.
• Always disconnect the charger from the electric ride-on toy prior to wiping down or
cleaning the electric ride-on toy with any liquid.
WARNING
Never modify or alter the electrical system. Alterations could cause a fire or explosion
resulting in serious injury or death and could also ruin the electrical system.
FAILURE TO HEED THE WARNINGS LISTED ABOVE INCREASES RISK OF
POTENTIALLY SERIOUS INJURY. USE THE APPROPRIATE CAUTION WHEN RIDING
AND ALWAYS WEAR PROTECTIVE GEAR.

6
BEFORE YOU BEGIN ASSEMBLY
WARNING
Remove all packing and items from the display box. Make sure that the power switch
is turned “OFF” before assembling the electric ride-on toy.
ESTIMATED ASSEMBLY TIME
You should allow approximately 35 minutes for assembly, not including initial
charging time. Initial charging can take approximately 18 hours. (see page 12-13 for
charging information).
WARNING: DO NOT USE NON-ORIGINAL OR
NON-RECOMMENDED PRODUCTS WITH YOUR
ELECTRIC RIDE-ON TOY.
Altering of the original components or use of non-recommended
replacement parts may or may not be compatible with the design and will
void the warranty and may cause an unsafe condition resulting in serious
injury or death.
If you experience a problem with this product, or are missing a part, please
call us at 1-800-288-1560, rather than return this product to the store.
Please identity all parts before assembly and save all packaging material
until assembly is complete to ensure that no parts are discarded.

7
1. Plastic Body Assembly x1
2.
Gear Box x1
Charger x1
3.
Seat x 14.
5.
6.
M5 nut x 1 7.
Motorhood x1
8.
Rear Wheel Axle x1
9.
Driving Wheel x1
10.
M5x45 Machine Screw x1
11.
Steering Wheel x1
12.
13. 12 Washer x8
14. M10 Lock Nuts x4
12 Bushing x315.
Front Wheel & Rear Left Wheel x3
Steering Column x1
16.
17.
View Mirror x2 A. Axle Cap x4
B. 10 Washer x2
C. Split Pin x2
D. Box Wrench x2
Note: Some parts shown are assembled on both sides of vehicle.
Windshield x1
Parts Diagram
Ø
Ø
Ø
Box Wrench(included)

ASSEMBLY
Your new vehicle requires adult assembly. Please set aside around 35 minutes
for assembly. Please identify all parts before assembly and save all packaging
material until assembly is complete to ensure that no parts are discarded.
Tools Required:
WARNING: Children can be harmed by small parts, sharp edges and sharp
points in the vehicle’s unassembled state, or by electrical items. In the unassembled
state, this package contains small parts. Adult assembly is required; children should
not handle parts, or help in assembly of the vehicle.
1. Front Wheel Assembly
8
Phillips Screwdriver
(not included)
Needle-nose pliers
(not included)
17mm Box Wrench
(included)
Ø
Ø
. Turn the vehicle body upside down.
. Remove all parts from front axle.
. Fit a 12 washer onto the axle.
. Fit a bushing onto the axle.
. Slide a wheel onto the axle, make the bushing match inside the wheel.
. Install a 12 washer and locknut, then tighten it. (Note: Do not over-tighten)
. Fasten the axle cap.
. Repeat above operation for the front wheel on the other side.

9
3. Driving Wheel Assembly
. Turn the vehicle body upside down.
. Slide the gear box through the axle into the
vehicle body; making sure the motor and motor
power wire are inserted into the vehicle
body.
2. Rear Axle Assembly
. Turn the vehicle body upside down.
. Remove all parts from rear axle.
. Slide a 12 washer onto the rear axle from
the longer end.
. Insert the rear axle through the hole in the
vehicle body.
Ø
Note: The gear box must be installed onto the
Right side of vehicle (riding position).
. Slide the driving wheel onto the axle and make
it match up with the gear box.
. Slide a 12 washer onto the axle.
. Install the M10 locknut and tighten it.
. Fasten the axle cap.
Note:
Assemble opposite rear wheel refer to the front wheel assembly information at page 8.
Ø
After assembling any wheel onto the axles, make sure to check the
gap between the screw thread and the outside of the wheel (refer to
the adjacent diagram). If the gap is too big, add two or three washers
on the axle to the inside of the wheel. After tightening the nut on the
outside of the wheel, please turn the wheel with your finger to check if
the wheel can run smoothly. This is a very important step because if
the wheel can run smoothly, it is ok; but if the nut presses the wheel
and the wheel can’t run smoothly, the motor will be broken easily!
If the wheel does not run smoothly, you will need to decrease one
or two washers to make sure the wheel can run smoothly!
Note: If the wheel nuts are loose, the wheels will not engage
the forward gear. Tighten the nut with the wrench.
GAP
IMPORTANT! CHECK GAP AFTER ASSEMBLING WHEELS

10
4. Steering Column Assembly
. Turn the vehicle body on its side as shown in picture below.
. Slide a 10 washer onto the steering column from the straight end.
. Insert the straight end of steering column up through the bottom hole at the front of vehicle
body, and out through the hole in the dash.
. Insert the bent end of steering column through the hole in the front axle linkage.
. Fit a 10 washer onto the bent end of the steering column.
. Insert a split pin into the hole in the bent end of steering column, and split it using standard
slip joint pliers (to assure the washer will not fall out).
5. Steering Wheel Assembly
. Put the vehicle body upright.
. Remove the M5x45 machine screw and M5 nut from
the steering wheel with a screwdriver.
. Insert the steering wheel onto the end of the steering
column, line up the hole in the steering wheel and the
hole in steering column, reinsert the M5x45 machine
screw and M5 nut as shown and tighten the
connection with a screwdriver.
(Make sure to align their holes, then tighten securely.)
6. Windshield Assembly
. Fit the tabs on the windshield into slots located at
front of the vehicle as shown, push until you hear it
click into place.
slot and ensure that the orientation of the windshield
is correct. Once the tab clicks into place, it cannot be
pulled out without damaging the vehicle.
Gently insert each tab into the correspondingNote:
7. Power Supply Connection
Note: The battery is disconnected for shipment to
prevent the battery from draining.
. Make sure to plug A connector into B connector.
(They are the same color to assure correct
connection.)
. Make sure to plug C connector into D connector.
(They are the same color to assure correct
connection.)
Ø
Ø
M

11
Check to assure the seat stay firmly after Note:
9. Seat Assembly
. Make sure the lock knob on the seat is unlocked as
shown.
. Insert the tabs on the seat back into slots in the vehicle
body.
. Press the seat (together with the knob) all the way
down, and use a coin or slotted screwdriver to lock the
knob on the seat.
assembly.
8. Motorhood Assembly
. Take out the motorhood from polybag.
. Install the motorhood in the proper position as shown,
by fitting the tabs on the motorhood into slots on the
vehicle body.
step.
move forward or backward before proceeding to next
Open ON/OFF button to check if the vehicle can Note:
11. Connect Audio Input Cable
htiw elbac eht tcennoc nac uoY( .elcihev eht no kcaj ni-enil XUA no elbac tupni oidua eht gulP .
an audio device or MP3 player whenever you want to play.)
Note:
nehw ecalp efas a ni elbac tupni oidua eht erots ot rebmemer esaelp ,esu mret gnol roF
not in use.
10. View Mirrors Assembly
. Insert the view mirror into the hole in front of the
. Repeat for the other side.
vehicle body and push until you hear it click into
place.

12
BATTERY CHARGING
IMPORTANT! Before first time use, charge the battery for at least 18 hours. Charge the
battery for at least 12 hours after each use of the vehicle. Never charge the battery
longer than 30 hours. Over charging or undercharging the battery may shorten battery
life and decrease vehicle running time.
WARNING: Battery can fall out and injure a child if vehicle tips over.
Always use battery retainer.
PREVENT FIRE
Never modify the electrical system.
Alterations could cause a fire resulting in serious injury and could also ruin the
electrical system.
Use of the wrong type battery or charger could cause a fire or explosion resulting
in serious injury.
Use of non-original components on this vehicle could cause overheating,
fire or explosion.
The battery must be handled by adults only.
The battery is heavy and contains sulfuric acid (electrolyte).
Dropping the battery could result in serious injury.
Never allow children to charge the battery.
Battery charging must be done by adults only. A child could be injured by the
electricity involved in charging the battery.
Never lift or carry the battery by the wires or connector. This can damage the
battery and possibly cause a fire resulting in serious injury. Lift and carry the
battery by the case only.
Read the safety instructions on the battery.
Examine the battery, charger and their connectors for excessive wear or damage
each time you charge the battery.
If damage or excessive wear is detected, do not use the charger or the battery
until you have replaced the worn or damaged part.
CAUTION: Use the charger in dry locations only.
IMPORTANT NOTE
We recommend that you start charging your battery before beginning assembly
of your new vehicle.
The battery must be upright while charging.
The charger is not a toy, and should only be operated by adults.
Do not short-circuit the battery.
You do not need to remove the battery from your vehicle to recharge it.
Before charging the battery, examine the battery case for cracks and other
damage which may cause sulfuric acid (electrolyte) to leak during the charging
process. If damage is detected, do not charge the battery or use it in your vehicle.
Battery acid is very corrosive and can cause severe damage to surfaces
it contacts.

13
· Do not charge the battery on a surface (such as a kitchen counter top) which
could be damaged by the acid contained inside the battery. Take precautions to
protect the surface on which you charge your battery.
· ot )A1( V6 CD fo tuptuo na htiw )zH06 V021 CA( regrahc lanigiro na ylno esU
charge your vehicle battery.
· Note to Adults: Regularly examine the charger for damage to the cord, plug,
housing or other parts that may result in the risk of fire, electric shock or injury.
· If your battery is old and will not accept a charge, do not leave it in the vehicle.
Always remove a dead battery from the vehicle.
· After the first charge, recharge the battery for at least 12 hours after each use.
Never charge the battery longer than 30 hours. Charge the battery after each use,
regardless of how long the vehicle was used.
· Do not allow the battery to run down completely before charging.
· Charge the battery before storing the vehicle.
· Charge the battery at least once per month, even if the vehicle has not been used.
NOTE:
· This product has CHARGING PROTECTION: when charging, all the functions will
be cut off.
· The POWER SWITCH must be switched to the OFF position when charging.
· Recharges after initial charge - Up to 12 hours, and never charge the battery
longer than 30 hours.
· When the vehicle begins to run slowly, recharge the battery.
· After each use or once a month minimum recharge time 12 hours, less than 30
hours at most.
WARNING: Use the charger in dry locations only.
2.
Plug the charger port into the input socket (the socket is under the seat).
1.
Plug the charger plug into a wall outlet. The battery will begin charging.
Note: Red LED light indicates battery is charging and a green LED light indicates
battery is fully charged. (If the lights on the charger do not light up, check the power
to the outlets.)

14
HOW TO USE YOUR VEHICLE
FORWARD
1. Shift the "Forward-Backward Shift Lever" to forward position.
2.
1.
2.
Press the
also stop even if your child's foot is still pressing the foot pedal.
Shift the "Forward-Backward Shift Lever" to middle position, the vehicle will
Foot pedal, and the vehicle will move forward.
STOP
BACKWARD
1. Shift the "Forward-Backward Shift Lever" to backward position.
FRONT LIGHTS
The front lights will light up when the power switch is in the "ON" position.
2. Press the Foot pedal, and the vehicle will move backward.
AUDIO INPUT JACK
Use the audio input cable (included) to connect your MP3 player or other
compatible audio device with this vehicle to listen to and enjoy music
and have fun playing.
The vehicle will stop automatically, when your child’s foot is removed from the
Foot
pedal.
1. Plug one end of the audio input cable (included) into the audio input jack
on the vehicle as shown.
2. Plug the other end of the audio input cable into the headphone jack on
your audio device or MP3 player.

15
3. Adjust your audio device or MP3 player volume to low level and turn the
power switch on your vehicle to the “ON” position.
4. Then adjust the volume to increase or decrease its sound level as desired.
Note: MP3 player or Audio device not included.
IMPORTANT
Always stop vehicle when changing the direction to avoid damage to the gears
and motor.
·
This vehicle has an adjustable seat belt; please instruct children on
how to fasten the seat belt before using.
·
moving.
Do not let any child touch the wheels or be near them when the car is
·
Make sure you come to a complete stop before changing directions from
to reverse.
·
forward
To avoid accidents, please inspect the vehicle before riding to ensure that
proper working order and safe to ride.
·
it is in
Protective equipment should always be worn.
·
This toy has no brake; to stop, remove foot from foot pedal.
·
Check all the screws, cap nuts and protective coverings regularly and
tighten as required. Check plastic parts on a regular basis for cracks or broken pieces.
WARNING: Do not let use of an MP3 player or other audio device
interfere with safe riding.

16
SAFETY PRECAUTIONS
Your new battery must be charged for at least 18 hours before you use it in your
vehicle for the first time.
The child must have adult supervision at all times.
Do not ride on the road, footpaths, near pools, or bodies of water.
Do not allow children under the recommended age to ride the vehicle; please
refer to the age grading.
Do not allow riders over the recommended weight rating or age grading to use
the vehicle.
To “stop” you must take your foot off the pedal.
Charging should only be done by an adult.
An adult must teach the child how to operate the vehicle.
Do not ride on hills or slopes, or in sand, or on other soft, wet, or slippery surfaces.
Do not use a different size battery. Use only original or recommended
replacement batteries.
The vehicle is designed to carry only one rider at a time. Never allow more than
one rider or over-load the vehicle.
This product should be assembled and checked by adults before use.
Don’t wash the vehicle with water. Just clean it with a cloth.

17
DETAILED MAINTENANCE AND REPAIR
Turn power “OFF” before conducting any maintenance procedures.
HOW TO REPLACE FRONT WHEELS & REAR LEFT WHEEL
1. Remove the Axle Cap with a flat head screwdriver.
2. Remove the M10 locknut with a 17mm socket wrench.
3. Remove the Ø12 washer.
4. Remove the wheel, then replace with a new one and make sure the Ø12 bushing
sits inside the wheel.
5. Remount the Ø12 washer, M10 locknut and securely tighten the wheel; then
re-insert the axle cap.
Tools Required: Flat head Screwdriver
(not included)
17mm Box Wrench
(included)

18
HOW TO REPLACE DRIVING WHEEL AND GEAR BOX
1. Remove the Axle Cap with a flat head screwdriver.
2. Remove the M10 locknut with a 17mm socket wrench.
3. Remove the Ø12 washer.
4. Remove the driving wheel, and replace with new wheel.
If you do not need to replace the gear box, please proceed to step 9.
5.
6. Unplug the power connector that is connected to the gear box.
7. Remove the gear box and replace with a new one.
8. Plug the power connector back into the gear box.
9. Replace the driving wheel, Ø12 washer, and M10 locknut, and tighten securely.
10. Re-insert the axle cap and lock the seat back onto the vehicle.
HOW TO REPLACE THE BATTERY
1. Turn the lock knob on the seat to "unlock" position, and remove the seat.
2. Use a screwdriver to remove the two screws from the battery retainer.
3. Remove the battery.
4. Unplug the power connector (which is connected to the battery).
5. Carefully lift the dead battery and replace it with a new one.
6. Replace the battery retainer and secure it with the screws. Plug the power
connector into the battery connector and replace the seat.
Turn the lock knob on the seat to "unlock" position, and remove the seat.

19
/