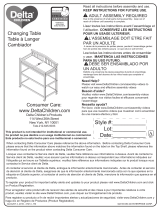
Page is loading ...

2
NOTES ON ASSEMBLY:
-During the assembly process whenever using screws or bolts, check each by placing the screw/bolt on
the diagram of the item which is drawn actual size and design. Be sure to use the proper size and shape
specified in the instructions.
-To assemble this unit you may be required to place the unit on it’s side and face. It is strongly
recommended that assembly is done on a soft, non-abrasive surface to avoid damaging the finish.
NOTES ON CARE AND MAINTENANCE:
- Do not scratch or chip the finish.
- Inspect the product periodically, contact Delta Children's Products for replacement parts or questions.
- Do not store the product or any parts in extreme temperatures and conditions such as a hot attic or a
damp, cold basement. These extremes can cause a loss of structural integrity.
-To preserve the luster of the high quality finish on your product, it is recommended to place a doily or
felt pad under any items you place on the finish.
-Clean with a damp cloth, then a dry cloth to preserve the original luster and beauty of this fine finish.
-Do not use abrasive chemicals.
-Do not spray cleaners directly onto furniture.
-Lift slightly when moving on carpeting to prevent leg breakage.
-Use of a vaporizer near furniture will cause wood to swell and finish to peel.
NOTES ON USE:
Keep children and others safe by following these simple rules:
- Do not allow any child to play on furniture
- Do not allow climbing on any piece of furniture.
- Do not allow hanging from any piece of furniture.
- Always monitor your child’s activity when in the nursery.
WARNING
FALL HAZARD - to prevent death or serious injury, always keep child within arm’s reach.
Read all instructions before use of the changing table.
KEEP THESE INSTRUCTIONS IN A SAFE PLACE FOR FUTURE USE.
Inspect the changing table periodically. Do not use the changing table if it is damaged or
broken. Contact Delta Children’s Products with any questions.
Tighten all loose screws and bolts before each use.
The maximum recommended weight of the child is 30lbs for the changing table.
Use only the pad provided by Delta Children’s Products.

A. Left Side x 1
Côté gauche x 1
Lado izquierdo x 1
28048
6
H. Top Shelf x 1
Tablette supérieur x 1
Estante superior x 1
28055
J. Bottom Shelf x 2
Tablette inférieur x 2
Estante inferior x 2
28056
B. Right Side x 1
Côté droit x 1
Lado derecho x 1
28049
D. Back Top Rail x1
Barre supérieure arrière x1
Barra posterior superior x1
28051
F. Front Top Rail x1
Barre supérieure avant x1
Barra frontal superior x1
28053
C. Back Rail x1
Barre arrière x1
Barra posterior x1
28050
E. Front Top Shelf Rail x1
Barre avant supérieur de la tablette x1
Barra frontal superior del estante x1
28052
G. Bottom Rail x 4
Barre inférieur x 4
Barra inferior x 4
28054
PARTS: MAKE SURE THAT ALL PRE-ASSEMBLED PARTS ARE TIGHT
PIÈCES : VÉRIFIEZ QUE TOUTES LES PIÈCES PRÉ-MONTÉES SONT BIEN SERRÉES.
PIEZAS: ASEGÚRESE DE QUE TODAS LAS PIEZAS PRE-ENSAMBLADAS ESTÁN BIEN APRETADAS.
K. Changer Pad x 1
Matelas à Langer x 1
Superficie para Cambios x 1
27018
L. Metal Bracket x 4
Support métallique x 4
soporte de metal x 4
5962

7
Q. M6 x 7 mm Nut x 2
Écrou M6x7mm x 2
Tuerca M6x7mm x 2
4065
P. Nylon Washer x 4
Rondelle de nylon x 4
Arandela de Nylon x 4
5525
S. Changer Strap x 1
Sangle du Table à Langer x 1
Correa de Cambiador x 1
21748
Parts: Hardware kits part#28057
Pièces: L'ensemble de quincaillerie - pièce n°28057
Piezas: El kit de herramientas - Pieza #28057
M. M6 x 50 mm Bolt x 14
Boulon M6 x 50 mm x 14
Perno M6 x 50 mm x 14
5467
N. M6 x 18 mm Bolt x 2
Boulon M6 x 18 mm x 2
Perno M6 x 18 mm x 2
5463
M4 Allen Wrench (included)
Clé Allen M4 (inclus)
Llave Allen M4 (incluido)
1177
R. 15 mm Screw x 8
Vis de 15 mm x 8
Tornillo de 15 mm x 8
5529
T. Locking Caster x 2
Roulette avec frein x 2
Rueda con bloqueo x 2
10040
V. Free Caster x 2
Roulette libre x 2
Rueda libre x 2
10880
10mm Open End Wrench (included)
Clé ouverte 10mm (inclus)
Llave de boca 10mm (incluido)
5757
Flat Head Screwdriver (not supplied)
Tournevis à tête plate (non fourni)
Destornillador plano (no suministrado)
Phillips Screwdriver (Not Provided)
Tournevis’Phillips’(Non Prévu)
Destornillardor’Phillips’(No siempre)
No drills necessary. Do not use
power screwdriver.
Aucun forage n’est nécessaire. Ne
pas utiliser de tournevis
électrique.
No hace falta taladrar No utilice
destornilladores eléctricos
A pliers or adjustable wrench is required
for assembly.
Des pinces ou une clé anglaise sont
nécessaires pour le montage.
Se necesita unos alicates o una llave
ajustable para ensamblar.

F. Front Top Rail x1
Barre supérieure avant x1
Barra frontal superior x1
C. Back Rail x1
Barre arrière x1
Barra posterior x1
M4 Allen Wrench (included)
Clé Allen M4 (inclus)
Llave Allen M4 (incluido)
Parts and tools required to complete step
Pièces et outils nécessaires au montage
Piezas y herramientas necesarias para completar este paso
8
Step 1
Étape 1
Paso 1
A. Left Side x 1
Côté gauche x 1
Lado izquierdo x 1
M. M6 x 50 mm Bolt x 6
Boulon M6 x 50 mm x 6
Perno M6 x 50 mm x 6
G. Bottom Rail x 4
Barre inférieur x 4
Barra inferior x 4
Attach the Back Rail (Part C), the Front Top Rail (Part F) and the Bottom Rails (Part G) to the Left Side
(Part A) with (6) M6x50 mm Bolts (Part M) using the M4 Allen Wrench as shown. BE SURE THE
GROOVES FACE TO THE INSIDE.
Fixez le Barre arrière (pièce C), la Barre supérieure avant (pièce F) et les barres inférieures (pièce G)
au côté gauche (pièce A) avec (6) boulons M6 x 50mm (pièce M) à l’aide de la clé Allen comme
montré. ASSUREZ VOUS QUE LES RAINURES SOEINT ORIENTÉES VERS L’INTÉRIEUR.
Fije la Barra posterior (pieza C), Barra frontal superior (pieza F) y las barras inferiores (pieza G) al lado
izquierdo (pieza A) con (6) pernos M6x50mm (pieza M) utilizando la llave Allen M4 como se muestra.
ASEGÚRESE DE QUE LAS RANURAS ESTÉN HACIA ADENTRO.
NOTE: ILLUSTRATION ON NEXT PAGE.
REMARQUE: VOIR ILLUSTRATION À LA PAGE SUIVANTE.
NOTA: ILUSTRACIÓN EN LA PÁGINA SIGUIENTE.

14
Step 4
Étape 4
Paso 4
NOTE: ILLUSTRATION ON NEXT PAGE.
REMARQUE: VOIR ILLUSTRATION À LA PAGE SUIVANTE.
NOTA: ILUSTRACIÓN EN LA PÁGINA SIGUIENTE.
Parts and tools required to complete step
Pièces et outils nécessaires au montage
Piezas y herramientas necesarias para completar este paso
From Step 3
À partir de l’étape 3
Desde el paso 3
Attach (4) Metal Brackets (Part L) to the rails using (8) 15mm Screws (Part R). Tighten with the Phillips
Screwdriver.
Fixez (4) supports métalliques (pièce L) aux barres à l’aide de (8) vis 15mm (pièce R). Serrez avec le
tournevis Phillips.
Fije (4) soportes de metal (pieza L) a las barras utilizando (8) tornillos de 15mm (pieza R). Apretar con
el destornillador de cruz.
Phillips Screwdriver (Not Provided)
Tournevis’Phillips’(Non Prévu)
Destornillardor’Phillips’(No siempre)
R. 15 mm Screw x 8
Vis de 15 mm x 8
Tornillo de 15 mm x 8
L. Metal Bracket x 4
Support métallique x 4
soporte de metal x 4

Parts and tools required to complete step
Pièces et outils nécessaires au montage
Piezas y herramientas necesarias para completar este paso
18
Step 6
Étape 6
Paso 6
From Step 5
À partir de l’étape 5
Desde el paso 5
NOTE: ILLUSTRATION ON NEXT PAGE.
REMARQUE: VOIR ILLUSTRATION À LA PAGE SUIVANTE.
NOTA: ILUSTRACIÓN EN LA PÁGINA SIGUIENTE.
T. Locking Caster x 2
Roulette avec frein x 2
Rueda con bloqueo x 2
V. Free Caster x 2
Roulette libre x 2
Rueda libre x 2
Insert the (2) Free Casters (Part V) into the Back Legs of the Changing Table. Insert the (2) Locking
Casters (Part T) into the Front Legs. Attach each Caster by pressing firmly until it “Snaps” into place.
Do not insert the Casters by pounding the ends of the Changing Table on the floor, this will damage
the unit.
Insérez les (2) roulettes libres (pièce V) dans les pieds arrière de la table à langer. Insérez les (2)
roulettes avec frein (pièce T) dans les pieds de devant. Fixez chaque roulette en appuyant
fermement jusqu’à ce que la roulette s’emboite d’un coup sec en place. Ne pas insérer les roulettes
en martelant la table à langer sur le sol, ceci abimera l’unité.
Inserte las (2) puedas libres (pieza V) dentro de las patas traseras del cambiador. Inserte las (2)
ruedas con bloqueo (pieza T) dentro de las patas delanteras. Fije cada rueda presionando
firmemente hasta que encajen en su lugar. No trate de insertar las ruedas golpeando el cambiador
hacia el piso, esto dañaría la unidad.

19
T
T
V
FRONT
T
IMPORTANT: MAKE SURE TO PUT THE LOCKING CASTERS ON THE FRONT OF THE
CHANGING TABLE.
IMPORTANT : ASSUREZ VOUS DE PLACER LES ROULETTES AVEC FREIN SUR LE CÔTÉ
FRONTAL DE LA TABLE À LANGER
IMPORTANTE: ASEGÚRESE DE COLOCAR LAS RUEDAS CON BLOQUEO EN LA PARTE
FRONTAL DEL CAMBIADOR.
Locking Mechanism
Mécanisme de verrouillage
Mecanismo de bloqueo

N. M6 x 18 mm Bolt x 2
Boulon M6 x 18 mm x 2
Perno M6 x 18 mm x 2
NOTE: ILLUSTRATION ON NEXT PAGE.
REMARQUE: VOIR ILLUSTRATION À LA PAGE SUIVANTE.
NOTA: ILUSTRACIÓN EN LA PÁGINA SIGUIENTE.
M4 Allen Wrench (included)
Clé Allen M4 (inclus)
Llave Allen M4 (incluido)
Parts and tools required to complete step
Pièces et outils nécessaires au montage
Piezas y herramientas necesarias para completar este paso
20
Step 7
Étape 7
Paso 7
From Step 6
À partir de l’étape 6
Desde el paso 6
Q. M6 x 7 mm Nut x 2
Écrou M6x7mm x 2
Tuerca M6x7mm x 2
P. Nylon Washer x 4
Rondelle de nylon x 4
Arandela de Nylon x 4
S. Changer Strap x 1
Sangle du Table à Langer x 1
Correa de Cambiador x 1
Align the hole in the end of the strap of the Changer Strap (Part S) with the hole in the Top Shelf. Insert
(1) M6x18 mm Bolts (Part N) through a Nylon Washer (Part P), the Changer Strap and the hole in the
Shelf. Add (1) Nylon Washer (Part P) with a Nut (Part Q). Hold the Nut with a Pliers or Adjustable
Wrench. Repeat with the other side of the strap as shown.
Aligner le trou au bout de la sangle du Table à Langer (Pièce S) avec le trou de la tablette supérieure.
Insérer (1) boulon M6 x 18 mm (Pièce N) dans une rondelle de nylon (Pièce P), dans la sangle du
Table à Langer et dans la fente qui se trouve sur la tablette. Ajouter (1) rondelle de nylon (Pièce P) et
un écrou (Pièce Q). Maintenir l’écrou à l’aide de pinces ou d’une clé réglable. Répéter les mêmes
étapes de l’autre côté de la sangle, tel qu’illustré.
Alinee el agujero del extremo de la correa del cambiador (Pieza S) con el agujero del Estante Superior.
Inserte (1) perno M6x18 mm (Pieza N) a través de una arandela de Nylon (Pieza P), la correa de
cambiador y el agujero del estante. Añada (1) arandela de Nylon (Pieza P) con una tuerca (Pieza Q).
Sostenga la tuerca con una llave ajustable o alicate. Apriete utilizando la llave Allen M4. Repita con el
otro lado de la correa.
A pliers or adjustable wrench is
required for assembly.
Des pinces ou une clé anglaise sont
nécessaires pour le montage.
Se necesita unos alicates o una llave
ajustable para ensamblar.

23
Step 6 / Étape 6 / Paso 6
Final
Final
Final
WARNING : FALL HAZARD
ALWAY KEEP CHILD WITHIN ARMS REACH.
Restraint harness system use:
. Place the infant on the changing table foam pad.
. Position the restraint harness over the middle of the infant’s torso and insert the buckled ends into
each other until the lock shut with a click.
. Gently pull the loose end of the strap to lightly snug the restraint harness around the infant.
Maintenance
. Check fasteners periodically for tightness. Do not over tighten. This may cause distortion or
breakage.
Utilisation du système de harnais de sécurité :
. Placer l’enfant sur le matelas mousse de la table à langer.
. Placer le harnais de sécurité au centre du torse de l’enfant et insérer les boucles l’une dans l’autre.
La sangle est bien bouclée lorsque l’on entend un clic sonore.
. Tirer doucement sur la partie lâche de la sangle en vue d’enrouler légèrement le harnais de sécurité
autour de l’enfant.
Entretien :
. Vérifier régulièrement que les attaches sont bien serrées. Ne pas serrer excessivement. Autrement,
la sangle pourrait se casser ou se déformer.
AVERTISSEMENT : DANGER DE CHUTE :
TOUJOURS RESTER À PORTÉE DE MAIN DE L’ENFANT.
Uso del arnés de sujeción
. Coloque al bebé sobre la almohadilla de esponja del cambiador.
. Coloque el arnés de sujeción sobre la parte media del torso del bebé e Inserte los extremos con
seguros entre sí hasta que el seguro se cierre y Haga un sonido de clic.
. Jale con suavidad el extremo suelto de la correa para aumentar levemente la Sujeción del arnés en
el bebé.
Mantenimiento
. Revise las correas periódicamente para verificar su firmeza. No apriete más de La cuenta. Esto
podría causar distorsión o ruptura.
ADVERTENCIA: RIESGO DE CAÍDAS
MANTENGA SIEMPRE AL BEBÉ AL ALCANCE DE SUS MANOS.

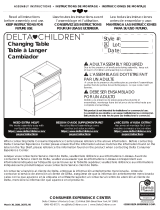
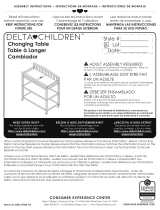
Consumer Care:
www.DeltaChildren.com
Delta Children’s Products
114 West 26th Street
New York, NY 10001
Tele.212-645-9033
To register your product for important safety alerts and updates to
your product please visit www.deltachildren.com
Pour enregistrer votre produit pour avoir les alertes de sécurité et les
mises a jour de votre produit veuillez visiter
www.DeltaChildren.com
Para registrar su producto para alertas importantes de seguridad y
estar al tanto sobre novedades de su producto por favor visite
www.DeltaChildren.com y seleccione Product Registration.
Warranty:
This Delta product is warranted to be free from defects for a period of 90
days from the date of purchase under normal use. This warranty extends only to the
original retail purchaser and is valid only when supplied with proof of purchase, or if
received as a gift, when the registration is on file with Delta.
Garantie: Ce produit Delta est garanti sans défauts pour une période de 90 jours a
partir de la date d’achat et sous condition d’une utilisation normale. Cette garantie
concerne seulement l’acheteur d’origine et est valide uniquement sur présentation de la
preuve d’achat, ou si reçu en cadeau, lorsque l’enregistrement en a été fait chez Delta.
Garantía: Esta producto Delta tienen una garantía por defectos de 90 dias desde la
fecha de su compra bajo uso normal. Esta garantía se ofrece solamente al
compradororiginal y es vålida solo si provee la prueba de su compra, o si fue recibido
como regalo cuando elregistro se encuentra en el archivo de Delta.
Date of Purchase: _____________ (you should also keep your receipt)
Date d’Achat: _____________ (vous devriez aussi garder votre facture d’achat)
Fecha de Compra: _____________ (debe además mantener su recibo)
To report a problem, please log on to www.deltachildren.com and
click the Consumer Care Tab, or contact us by phone at
(212) 645-9033.
Pour signaler un problème, veuillez vous connecter a
www.DeltaChildren.com et cliquez sur la touche Consumer Care,
ou contactez nous par téléphone au (212) 645-9033
Para reportarcualquier problema, por favor entre a
www.DeltaChildren.com y de clicen Servicio al cliente o
contáctenos por telefono al (212) 645-9033.
/