Page is loading ...

THANK YOU
We appreciate the trust and confidence you have placed in Home Decorators Collection through the purchase of this Avondale Grove
collection electric fireplace media mantel. We strive to continually create quality products designed to enhance your home. Visit us online
to see our full line of products available for your home improvement needs. Thank you for choosing Home Decorators Collection!
FOR A FASTER & EASIER EXPERIENCE
ASSEMBLE IT WITH BILT
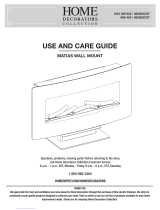
USE AND CARE GUIDE
AVONDALE GROVE COLLECTION: ELECTRIC FIREPLACE MEDIA MANTEL
Questions, problems, missing parts? Before returning to the store,
call Home Decorators Collection Customer Service
8 a.m. - 7 p.m., EST, Monday-Friday, 9 a.m. - 6 p.m., EST, Saturday
1-800-986-3460
HOMEDEPOT.COM/HOMEDECORATORS
IMPORTANT INSTRUCTIONS
PLEASE READ THIS MANUAL BEFORE INSTALLING AND USING APPLIANCE
WARNING!
IF THE INFORMATION IN THIS MANUAL IS NOT FOLLOWED EXACTLY, AN ELECTRICAL SHOCK OR FIRE MAY RESULT
CAUSING PROPERTY DAMAGE, PERSONAL INJURY OR LOSS OF LIFE.
INSTALLER: Leave this manual with the appliance.
CONSUMER: Retain this manual for future reference.
Model # 365-166-48
# 365-166-170-Y
# 365-166-165 -Y
# 365-16 6 - 48-Y
Item # 1001-801-730
# 207001069
# 207001062
# 207001068
171220

2
Table of Contents ....................................2
Warranty ..........................................2
Pre-Assembly ......................................3
Planning Assembly .................................3
Tools Required ....................................3
Hardware Included .................................3
Package Contents ..................................4
Assembly ..........................................5
Troubleshooting ....................................14
Care and Cleaning ..................................15
Shelf Weight Capacity ...............................15
Service Parts ......................................15
Table of Contents
1-YEAR WARRANTY
WHAT IS COVERED
The manufacturer warrants that your new electric replace is free from manufacturing and material defects for a period of one year from
date of purchase, subject to the following conditions and limitations.
This electric replace must be installed and operated at all times in accordance with the instructions furnished with the product. Any
alteration, willful abuse, accident, or misuse of the product shall nullify this warranty. This warranty is non-transferrable, and is made to
the original owner, provided that the purchase was made through an authorized supplier of the manufacturer. This warranty is limited to the
repair or replacement of part(s) found to be defective in material or workmanship, provided that such part(s) have been subjected to normal
conditions of use and service, after said defect is conrmed by the manufacturer’s inspection. The manufacturer may, at its discretion, fully
discharge all obligations with respect to this warranty by refunding the wholesale price of the defective part(s).
WHAT IS NOT COVERED
Any installation, labor, construction, transportation, or other related costs/expenses arising from defective part(s), repair, replacement,
or otherwise of same, will not be covered by this warranty, nor shall the manufacturer assume responsibility for same. Further, the
manufacturer will not be responsible for any incidental, indirect, or consequential damages, except as provided by law.
All other warranties - expressed or implied - with respect to the product, its components and accessories, or any obligations/liabilities on
the part of the manufacturer are hereby expressly excluded. The manufacturer neither assumes, nor authorizes any third party to assume, on
its behalf, any other liabilities with respect to the sale of this product. The warranties as outlined within this document do not apply to
nonmanufacturer accessories used in conjunction with the installation of this product.
This warranty does not cover the lightbulb(s) included with the replace.
This warranty is void if: the replace has been operated in atmospheres contaminated by chlorine, uorine, or other damaging chemicals;
the replace is subjected to prolonged periods of dampness or condensation; the replace is altered, willfully abused, damaged by accident,
or misused in any way.
If warranty service is needed, contact the Customer Service Team at 1-800-986-3460 from 8 a.m. - 7 p.m., EST, Monday-Friday,
9 a.m. - 6 p.m., EST, Saturday or visit www.homedepot.com/homedecorators.
Make sure you have your warranty, your sales receipt, and the model/serial number of your product.
DO NOT ATTEMPT TO DO ANY SERVICE WORK YOURSELF.
Warranty

3
HOMEDEPOT.COM/HOMEDECORATORS
Please contact 1-800-986-3460 for further assistance
VVV
PLANNING ASSEMBLY
Before you begin assembly, locate the instructions and hardware. Compare all parts with the Hardware Included and Package Contents
lists. Be sure you have all the parts and can identify them. A helping hand is always good. Assemble your mantel with an adult assistant if
possible. Some pieces are heavy and will need to be held by a helper. Assembly time will take approximately 30-60 minutes.
Before assembly, use scissors to unwrap the parts from the packaging. Do not use a box cutter or exacto-knife, as you may cut into the
mantel pieces inside the box and damage the nish. Check for the red hardware bag located inside the packaging. Do not discard any
pieces. Use an appropriate screwdriver to insert and tighten all screws.
TOOLS REQUIRED
Safety goggles
Phillips
screwdriver
HARDWARE INCLUDED
NOTE: Hardware not shown to actual size.
Pre-Assembly
HH
GGFFEE
NN
DD
MM
CC
LL
BB
KK
AA
JJ
Part Description Quantity
AA Bolt 53
BB Short Connector 6
CC Long Connector 10
DD Dowel 36
EE Knob 2
FF Back Panel Screw 30
GG Door Hinge Plate 4
Part Description Quantity
HH Shelf Pin 8
JJ Hinge Screw 16
KK Screw 2
LL Long Cam Lock Dowel 4
MM Short Cam Lock Dowel 4
NN Metal Cam Lock 8
Additional Instructions provided by BILT. Download today for iOS and Android to view step by step voice guided instructions, register your
product, view your warranty, order replacement parts, and more.

4
PACKAGE CONTENTS
Part Description Quantity
A Top Panel 1
B Media Shelf 1
C Base Panel 1
D Upper Back Panel 1
E Left Side Panel 1
F Right Side Panel 1
G Inside Panel 2
H Cabinet Door 2
J Top Rail 1
K Rear Apron Panel 1
L Front Apron Panel 1
M Top Trim 1
Part Description Quantity
N Side Back Panel 2
P Left Trim 1
Q Right Trim 1
R Adjustable Shelf 2
S Support Panel 1
T Left Front Panel 1
U Right Front Panel 1
V Support Leg 1
W Firebox 1
X Firebox Remote Control 1
Y Button Cell Battery 1
Pre-Assembly (continued)
YX
A
D
J
K
L
M
B
E
F
G
H
N P Q
S T U
R
V
W
C

5
HOMEDEPOT.COM/HOMEDECORATORS
Please contact 1-800-986-3460 for further assistance
Assembly
1
Attach connectors to the base panel
□ Locate the base panel (C) and the front & rear apron panels
(K & L) and place them on a soft surface to protect the nish.
□ Insert 4 long connectors (CC) into the unthreaded holes in the
base panel (C).
□ Insert 4 short connectors (BB) into the unthreaded holes in the
front & rear apron panel (K & L).
□ Attach the long connectors (CC) to the base panel (C) by
inserting twelve bolts (AA) through the holes in the long
connectors (CC) into the base panel (C). Turn the bolts
(AA) clockwise to tighten. Do not strip the bolts (AA) by
overtightening.
□ Attach the short connectors (BB) to the front & rear apron
panel (K & L) by inserting four bolts (AA) through the holes in
the short connectors (BB) into the front & rear apron panel (K
& L). Turn the bolts (AA) clockwise to tighten. Do not strip the
bolts (AA) by overtightening.
2
Attach the short connectors to the
media shelf
□ Locate the media shelf (B) and place it on a soft surface to
protect the nish.
□ Insert 2 long connectors (CC) into the unthreaded holes in the
media shelf (B).
□ Attach the long connectors (CC) to the media shelf (B)
by inserting four bolts (AA) through the holes in the long
connectors (CC) into the media shelf (B). Turn the bolts
(AA) clockwise to tighten. Do not strip the bolts (AA) by
overtightening.
K
L
C
B
AA
AA
CC
CC
AA
BB

6
Assembly (continued)
3
Attaching the support leg and connectors
□ Locate the base panel (C) and place on a soft surface to protect the nish.
Line up and insert the long connector (CC) on the support leg (V) into the
unthreaded holes in the center of the base panel (C).
□ Attach the support leg (V) to the base panel (C) by turning a bolt (AA)
clockwise through the long connector (CC). Do not strip the
bolt (AA) by overtightening.
□ Locate the top trim (M) and place them on a soft surface
to protect the nish.
□ Insert two short connectors (BB) into the top trim (M) where indicated.
Press down rmly until ush.
□ Attach the short connectors (BB) by inserting two bolts (AA) and turning
clockwise. Do not strip the bolts (AA) by overtightening.
V
C
AA
CC
M
AA
BB
4
Attaching the front and back panels to
the base
□ Line up and insert two wood dowels (DD) into the unthreaded
holes in the side of the base panel (C). Line up the wood
dowels (DD) with the unthreaded holes in the front apron panel
(L). Press together until ush.
□ Line up the short and long connectors (BB & CC) in the base
assembly (C) with the unthreaded holes in the rear apron panel
(K). Press together until ush.
□ Insert ve bolts (AA) into the short and long connectors
(BB & CC) on the base assembly.
□ Attach the front and rear apron panels (L & K) by turning
the bolts (AA) clockwise. Do not strip the bolts (AA) by
overtightening.
C
K
L
AA
AA
BB
CC
DD

7
HOMEDEPOT.COM/HOMEDECORATORS
Please contact 1-800-986-3460 for further assistance
5
Attaching the left and right trim
pieces
□ Line up the short connectors (BB) in the inner panels (G) with
the unthreaded holes in the left and right trim pieces (P & Q).
Press together until ush.
□ Insert four bolts (AA) into the short connectors
(BB) on the inner panels where indicated.
□ Attach the left and right trim pieces (P & Q) by turning
the bolts (AA) clockwise. Do not strip the bolts (AA) by
overtightening.
G
P
G
Q
AA
BB
6
Attaching the inner panels
□ Insert four wood dowels (DD) into the unthreaded holes in the
top trim (M).
□ Line up the four wood dowels (DD) in the top trim (M) with the
unthreaded holes in the left and right trim pieces (P & Q).
□ Press together rmly until ush.
P
Q
G
G
M
DD
Assembly (continued)

8
Assembly (continued)
7
Attaching the media shelf
□ Insert four wood dowels (DD) in the unthreaded holes of the
media shelf (B).
□ Line up the wood dowels (DD) in the media shelf (B) with
the unthreaded holes in the left and right inner panels (G).
□ Line up the short and long connectors (BB & CC) attached to
the inner panel assembly with the holes in the media shelf
(B).
□ Press the inner panel assembly down rmly onto the media
shelf until ush.
□ Insert four bolts (AA) into the short and long connectors
(BB & CC) on the inner panel assembly.
□ Attach the inner panel assembly to the media shelf (B) by
turning the bolts (AA) clockwise. Do not strip the bolts (AA)
by overtightening.
G
G
M
B
DD
AA
AA
BB
CC
8
Attaching the base
□ Insert six wood dowels (DD) into the unthreaded
holes in the media shelf assembly.
□ Line up the wood dowels (DD) with the unthreaded
holes in the base panel (C). Press together rmly until
ush.
□ Attach the base panel (C) to the media shelf
assembly by inserting two bolts (AA) through the
long connectors (CC) on the inner panels (G) and
turning clockwise. Do not strip the bolts (AA) by
overtightening.
B
G
C
G
DD
AA
CC

9
HOMEDEPOT.COM/HOMEDECORATORS
Please contact 1-800-986-3460 for further assistance
9
Attaching hardware onto the side
panels
□ Locate the left and right side panels (E & F) and place them
on a soft surface to protect the nish.
□ Insert long connectors (CC) into the left and right side
panels (E & F) where indicated. Press down rmly until
ush.
□ Attach the long connectors (CC) by inserting and turning
four bolts (AA) clockwise. Do not strip the bolts (AA) by
overtightening.
□ Attach the four door hinge plates (GG) to the left and right
side panels (E & F) by inserting and tightening sixteen hinge
screws (JJ). Do not overtighten and strip the hinge screws
(JJ).
E
F
AA
JJ
GG CC
10
Attaching the side panels
□ Insert eight wood dowels (DD) into the unthreaded holes in
the sides of the media shelf (B) and the base panel (C).
□ Line up the wood dowels (DD) in the sides of the media
shelf (B) and the base panel (C) with the unthreaded holes
in the left and right side panels (E & F).
□ Line up the long connectors (CC) in the media shelf (B) and
the base panel (C) with the holes in the left and right side
panels (E & F).
□ Press the left and right side panels (E & F) rmly until ush
with the media console assembly.
□ Attach the left and right side panels to the media console
assembly by inserting eight bolts (AA) through the long
connectors (CC) in the media shelf (B) and the base panel
(C) and turning clockwise. Do not strip the bolts (AA) by
overtightening.
DD
AA
CC
E
F
C
B
Assembly (continued)

10
Assembly (continued)
11
Attaching the support panel
□ Attach the support panel (S) to the media shelf (B) by lining
up the holes in the bottom of the support panel (S) with the
holes in the media shelf (B). Insert and tighten two screws
(KK) through the media shelf (B) into the support panel (S).
□ Do not strip the screws (KK) by overtightening.
KK
S
B
12
Attaching the top rail
□ Insert four wood dowels (DD) into the unthreaded holes in
the sides of the top rail (J).
□ Line up the wood dowels (DD) in the top rail (J) with the
unthreaded holes in the sides of the left and right front
panels (T & U). Press together rmly until ush.
□ Insert 4 wood dowels (DD) into the unthreaded holes on the
back of the left and right front panels (T & U).
□ Line up the wood dowels (DD) in the left and right front
panels (T & U) with the unthreaded holes in the left and
right side panels (E & F).
□ Line up the long connectors (CC) in the left and right side
panels (E & F) with the holes in the left and right front
panels (T & U). Press together rmly until ush.
□ Attach the top rail assembly to the left and right side
panels (E & F) by inserting two bolts (AA) through the long
connectors (CC) in the left and right side panels
(E & F) and turning clockwise. Do not strip the bolts (AA) by
overtightening.
DD
DD
AA
CC
J
T
E
F
U

11
HOMEDEPOT.COM/HOMEDECORATORS
Please contact 1-800-986-3460 for further assistance
13
Preparing the top panel
□ Locate the top panel (A) and place it on a soft surface to
protect the nish with the nished side facing down.
□ Insert four long cam lock dowels (LL) into the threaded
holes in the sides of the top panel (A) by turning
clockwise. Do not strip the long cam lock dowels (LL) by
overtightening.
□ Insert four short cam lock dowels (MM) into the
threaded holes in the front of the top panel (A) by
turning clockwise. Do not strip the short cam lock
dowels (MM) by overtightening.
LL
MM
14
Attaching the top panel
□ Insert four wood dowels (DD) into the unthreaded holes
in the top of the left and right side panels (E & F). Line up
the wood dowels (DD) in the side panels (E & F) with the
unthreaded holes in the top panel (A).
□ Line up the long and short cam lock dowels (LL & MM) with
the cam lock holes in the media console assembly. Push
down on the top panel (A) until ush.
□ Insert eight metal cam locks (NN) into the cam lock holes in
the left and right side panels (E & F) and the top rail (J).
□ Attach the top panel (A) to the media console assembly by
turning the metal cam locks (NN) clockwise. Do not break
the metal cam locks by overtightening.
□ Insert one bolt (AA) through the short connector (BB) on the
support piece (S) and tighten by turning clockwise. Do not
strip the bolt (AA) by overtightening.
DD
BB
NN
AA
A
A
F
J
S
E
Assembly (continued)

12
Assembly (continued)
15
Attaching the back panels
□ Locate the back panels (D & N) and line them up to the back
of the media console with the nished side facing in.
□ Insert and tighten thirty screws (FF) to attach the back
panels (D & N) to the media console.
□ Do not strip the screws (FF) by overtightening.
FF
D
N
N
EE
GG
E
F
H
H
16
Attaching the doors and knobs
□ Loosen the screws in the hinge plates (GG) in the left and
right side panels (E & F).
□ Line up the hinges in the left and right doors (H) with the
hinge plates (GG) in the left and right side panels
(E & F).
□ Tighten the screws to attach the hinges to the hinge plates
(GG) on the left and right side panels (E & F). Do not strip
the screws by overtightening.
□ Attach knobs (EE) to the left and right doors (H) by inserting
the bolts through the doors (H) and turning clockwise into
the knobs (EE). Do not strip the bolts by overtightening.
NOTE: The door’s left/right and forward/back,
positions are adjusted by turning the screws in the
hinge pivot as shown in the illustration.

13
HOMEDEPOT.COM/HOMEDECORATORS
Please contact 1-800-986-3460 for further assistance
Assembly (continued)
17
Installing the shelves
□ Locate the two shelves (R) and place them on a soft surface
to protect the nish.
□ Insert the 8 shelf pins (HH) into the interior of the side
panels (E, F & G). Be sure to insert the pins parallel to one
another to ensure the shelves (R) are level.
□ Insert the shelves (R) onto the shelf pins (HH) with the
nished side visible.
18
Installing the rebox
□ Insert the rebox (W) into the media console through the
back opening.
□ Push the rebox (W) forward through the front opening
until the metal trim of the rebox (W) is ush with the
left and right front panels (P & Q).
□ Once the rebox is in position insert and tighten the four
screws provided with the rebox through the holes in the
metal trim and into the left and right front panels (T & U).
□ Do not strip the screws by overtightening.
HH
R
R
W

14
Troubleshooting
Problem Possible Cause Solution
The replace does
not operate.
The power light is ON but
the ame effect is not
visible.
There is excessive noise
when the heater is
operating.
The heater is not
operating.
□ The replace is not plugged in.
□ A circuit breaker is tripped or a
fuse blown.
□ The ON/OFF switch is defective.
□ There is loose wiring.
□ The replace is not operating
correctly.
□ LED strip is not functioning.
□ There is loose wiring.
□ The blower is dirty or clogged.
□ The heater assembly is defective.
□ The heater is not operating
correctly.
□ The heater switch is defective.
□ The heater assembly is defective.
□ There is loose wiring.
□ The vents are dirty or clogged.
□ Make sure the replace is plugged in
to a standard 120V outlet.
□ Check additional appliances on the
circuit; ideally the replace should be
on a dedicated 15-amp circuit.
□ Call customer service.
□ Call customer service.
□ Refer to the operating instructions.
□ Call customer service.
□ Call customer service.
□ Refer to Maintenance of Motors in the Care and
Maintenance section of the rebox manual.
□ Call customer service.
□ Refer to the operating instructions.
□ Call customer service.
□ Call customer service.
□ Call customer service.
□ Unplug the unit. Clear the vent area
of dust and debris. Wait ten minutes,
plug the unit in again and turn on the
heater.
If you have any questions regarding the product, please call Home Depot Customer Service, 1-800-986-3460, 8 a.m. – 7 p.m. EST,
Monday – Friday, 9 a.m. - 6 p.m., EST, Saturday.
The power light is ON but
the ember bed ame is not
ickering.
□ LED strip is not functioning.
□ There is loose wiring.
There is excessive noise
when the ame is ON but the
heater is OFF.
□ The rotating ame reector shaft is
rubbing against the housing.
□ The ame reector shaft motor is
defective.
□ Open the back of the rebox and reposition the ame
reector shaft. Turn off the unit prior to servicing.
□ Call customer service.
□ Call customer service.
□ Call customer service.

15
HOMEDEPOT.COM/HOMEDECORATORS
Please contact 1-800-986-3460 for further assistance
Service Parts
Care & Cleaning
□ Always turn the heater OFF and unplug the power cord from the outlet before cleaning.
□ Cleaning of the control panel, located in the upper right-hand corner of the fireplace behind the sliding control
panel cover, is to be done only using a soft cloth, slightly dampened in water (if needed, a small amount of dish
soap can be added to the water) and dried using a clean, dry soft cloth. Cleaning of the screen diffuser is to be
done using only water and lint free cloth. DO NOT use any abrasive cleaners on the diffusing screen.
Shelf Weight Capacity
95 lbs (43.1 kg)
50 lbs (22.7 kg)
20 lbs (9.1 kg)
50 lbs (22.7 kg)
X
A
D
J
K
L
M
B
E
F
G
H
N P Q
S T U
R
V
W
C

16
Service Parts (continued)
Part Description Quantity Part Number
365-166-48 / 365-166-48-Y
Espresso Finish
Part Number
365-166-170-Y
Aged Black Finish
Part Number
365-166-165-Y
Aged White Finish
A Top Panel 1 20-06-116 20-06-136 20-06-156
B Media Shelf 1 20-06-117 20-06-137 20-06-157
C Base Panel 1 20-06-118 20-06-138 20-06-158
D Upper Back Panel 1 20-06-119 20-06-139 20-06-159
E Left Side Panel 1 20-06-120 20-06-140 20-06-160
F Right Side Panel 1 20-06-121 20-06-141 20-06-161
G Inside Panel 2 20-06-122 20-06-142 20-06-162
H Cabinet Door 2 20-06-123 20-06-143 20-06-163
J Top Rail 1 20-06-124 20-06-144 20-06-164
K Rear Apron Panel 1 20-06-125 20-06-145 20-06-165
L Front Apron Panel 1 20-06-126 20-06-146 20-06-166
M Top Trim 1 20-06-127 20-06-147 20-06-167
N Side Back Panel 2 20-06-128 20-06-148 20-06-168
P Left Trim 1 20-06-129 20-06-149 20-06-169
Q Right Trim 1 20-06-130 20-06-150 20-06-170
R Adjustable Shelf 2 20-06-131 20-06-151 20-06-171
S Support Panel 1 20-06-132 20-06-152 20-06-172
T Left Front Panel 1 20-06-133 20-06-153 20-06-173
U Right Front Panel 1 20-06-134 20-06-154 20-06-174
V Support Leg 1 20-06-135 20-06-155 20-06-175
W Firebox 1 27-900-002
X Firebox Remote Control 1 EF33510AS-15
Hardware Pack 1 20-09-550
Manual 1 20-10-266

Questions, problems, missing parts? Before returning to the store,
call Home Decorators Collection Customer Service
8 a.m. - 7 p.m., EST, Monday-Friday, 9 a.m. - 6 p.m., EST, Saturday
1-800-986-3460
HOMEDEPOT.COM/HOMEDECORATORS
Retain this manual for future use.
Printed in China
Manufactured by: GHP Group, Inc. • 6440 W. Howard St. • Niles, IL 60714-3302

GRACIAS
Apreciamos la confianza depositada en Home Decorators Collection por medio de la compra de esta chimenea eléctrica con repisa. Nos
esforzamos para crear continuamente productos de calidad diseñados para mejorar su hogar. Visítenos en internet para ver nuestra línea
completa de productos disponibles para el mejoramiento de su hogar. ¡Gracias por elegir Home Decorators Collection!
PARA UNA INSTALACIÓN MÁS RÁPIDA
Y MÁS FÁCIL, UTILICE BILT
GUÍA DE USO Y CUIDADO
COLECCIÓN AVONDALE GROVE: CHIMENEA ELÉCTRICA CON REPISA
¿Preguntas, problemas o partes faltantes? Antes de regresar a la tienda,
llame al servicio de atención al cliente de Home Decorators Collection
8 a.m. - 7 p.m., Hora del Este de lunes a viernes, 9 a.m. - 6 p.m., Hora del Este de Sábado
1-800-986-3460
HOMEDEPOT.COM/HOMEDECORATORS
INSTRUCCIONES IMPORTANTES
POR FAVOR, LEA ESTE MANUAL ANTES DE LA INSTALACIÓN Y USO DEL DISPOSITIVO
¡ADVERTENCIA!
SI LA INFORMACIÓN EN ESTE MANUAL NO SE SIGUE CON EXACTITUD, PUEDE RESULTAR UN CHOQUE ELÉCTRICO O INCENDIO
OCASIONANDO DAÑOS A LA PROPIEDAD, LESIONES PERSONALES O LA MUERTE.
INSTALADOR: Deje este manual con el dispositivo.
CONSUMIDOR: Conserve este manual para uso futuro.
Núm. de modelo # 365-166-48
# 365-166-170-Y
# 365-166-165 -Y
# 365-16 6 - 48-Y
Núm. de artículo # 1001-801-730
# 207001069
# 207001062
# 207001068

19
HOMEDEPOT.COM/HOMEDECORATORS
Favor contactar al 1-800-986-3460 para mayor asistencia.
Tabla de contenido .................................19
Garantía ..........................................19
Pre-ensamblaje ....................................20
Planicación del ensamblaje ........................20
Herramientas necesarias ...........................20
Piezas incluidas ..................................20
Contenido del paquete .............................21
Ensamblaje .......................................22
Resolución de fallas ................................31
Cuidado y limpieza .................................32
Capacidad de carga de la repisa .......................32
Piezas de servicio ..................................32
Tabla de contenido
GARANTÍA DE 1 AÑO
LO QUE ESTÁ CUBIERTO
El fabricante garantiza que su nueva chimenea eléctrica está libre de defectos de fabricación y materiales por un periodo de un año a partir
de la fecha de compra, sujeto a las siguientes condiciones y limitaciones.
Esta chimenea eléctrica debe ser instalada y operada en todo momento de acuerdo con las instrucciones proporcionadas con el producto.
Cualquier alteración, abuso intencionado, accidente o mal uso del producto anulará esta garantía. Esta garantía es intransferible y es hecha
al propietario original, siempre que la compra fue hecha mediante un proveedor autorizado del fabricante. Esta garantía está limitada a la
reparación o reemplazo de pieza(s) que se encuentren defectuosas en materiales o mano de obra, siempre que tal(es) pieza(s) hayan estado
sujetas a condiciones normales de uso y servicio, luego de que dicho defecto sea conrmado por la inspección de fabricante. El fabricante
puede, a su discreción, liberar de todas las obligaciones, con respecto a esta garantía mediante el reembolso del precio al por mayor de la(s)
pieza(s) defectuosa(s).
LO QUE NO ESTÁ CUBIERTO
Cualquier instalación, trabajo, construcción, transporte u otros costos/gastos que surjan de pieza(s) defectuosa(s), reparación, reemplazo u
otra cosa similar, no será cubierta por esta garantía y tampoco el fabricante asumirá responsabilidad por lo mismo. Además, el fabricante no
será responsable de ningún daño incidental, indirecto o consecuente, excepto como lo establezca la ley.
Todas las otras garantías, expresas o implícitas, con respecto al producto, sus componentes y accesorios, o cualquier obligación/
responsabilidad civil sobre la pieza del fabricante, por la presente se excluyen expresamente. El fabricante tampoco asume, ni autoriza a
ninguna tercera parte a asumir, en su nombre, cualquier otra responsabilidad civil con respecto a la venta de este producto. Las garantías
como están descritas dentro de este documento, no aplican a accesorios que no son del fabricante usadas junto con la instalación de este
producto.
Esta garantía no cubre la(s) bombilla(s) incluidas con la chimenea.
Esta garantía no tiene validez si: la chimenea ha sido operada en atmósferas contaminadas con cloro, úor u otro químico dañino; la
chimenea está sujeta a periodos prolongados de humedad o condensación; la chimenea es alterada, maltratada intencionalmente, dañada
por accidente o usada incorrectamente en cualquier manera.
Si se necesita servicio de garantía, póngase en contacto con el Equipo de Servicio al Cliente llamando 1-800-986-3460, 8 a.m. - 7 p.m., Hora
del Este de lunes a viernes, 9 a.m. - 6 p.m., Hora del Este de Sábado o visite www.homedepot.com/homedecorators.
Asegúrese de tener su garantía, su recibo de venta y el número de modelo/serie de su producto.
NO INTENTE HACER TRABAJO DE SERVICIO USTED MISMO.
Garantía

20
VVV
PLANIFICACION DEL ENSAMBLAJE
Antes de iniciar el ensamblaje localice las instrucciones y las piezas. Compare todas las piezas con la lista de piezas incluidas y contenido
del embalaje. Asegúrese de tener todas las piezas y de que pueda identicarlas. Siempre es bueno contar con ayuda. Ensámblelo con asis-
tencia de una persona adulta si es posible. Algunas piezas son pesadas y necesitará ayuda. El tiempo de ensamblaje se estima entre 30-60
minutos.
Antes de ensamblar, utilice tijeras para sacar las piezas del embalaje. No utilice una navaja o cuchillo exacto, ya que podría cortar las piezas
dentro de la caja y dañar el acabado. Busque la bolsa roja de herramientas situada en el interior del empaque. No deseche ninguna pieza.
Utilice un destornillador apropiado para insertar y ajustar todos los tornillos.
HERRAMIENTAS REQUERIDAS
Gafas de
seguridad
Desarmador
Phillips
PIEZAS INCLUÍDAS
NOTA: Las herramientas son no mostradas en su tamaño real.
Pre-ensamblaje
HH
GGFFEE
NN
DD
MM
CC
LL
BB
KK
AA
JJ
Pieza Descripción Cantidad
AA Tornillo 53
BB Conector corta 6
CC Conector de largo 10
DD Clavija 36
EE Tiradores 2
FF Panel posterior del
tornillo
30
GG La bisagra de puerta
placa
4
Pieza Descripción Cantidad
HH Clavija para estantes 8
JJ Tornillo de bisagra 16
KK Tornillo 2
LL Pasador de bloqueo
largo
4
MM Pasador de bloqueo
corta
4
NN Cerradura de la leva 8
Instrucciones adicionales proporcionadas por BILT. Descargue hoy mismo la aplicación para iOS y Android para ver paso a paso las
instrucciones guiadas por voz, registrar su producto, ver su garantía, comprar piezas de repuesto y más.
Disponible en
iOS y Android
Antes de comenzar
/