Page is loading ...

1
WARNING: Because of the possible danger to persons(s) or
property from accidents which may result from the improper
use of products, it is important that correct procedures be
followed. Products must be used in accordance with the
engineering information specified in the catalog. Proper
installation, maintenance and operation procedures must
be observed. The instructions in the instruction manuals
must be followed. Inspections should be made as necessary
to assure safe operation under prevailing conditions. Proper
guards and other suitable safety devices or procedures as
may be desirable or as may be specified in safety codes
should be provided, and are neither provided by Baldor
Electric Company nor are the responsibility of Baldor
Electric Company. This unit and its associated equipment
must be installed, adjusted and maintained by qualified
personnel who are familiar with the construction and
operation of all equipment in the system and the potential
hazards involved. When risk to persons or property may be
involved, a holding device must be an integral part of the
driven equipment beyond the speed reducer output shaft.
INSTRUCTION MANUAL for 1-7/16” SLEEVOIL® Plain Pillow Block
These instructions must be read thoroughly before installing or operating this product. This instruction manual was accurate at the
time of printing. Please see www.dodge-pt.com for updated instruction manuals.
WARNING: All products over 25 kg (55 lbs) are noted on the
shipping package. Proper lifting practices are required for
these products.
WARNING: To ensure that drive is not unexpectedly started,
turn off and lock out or tag power source before proceeding.
Failure to observe these precautions could result in bodily
injury.
CAUTION: Do not scrape, rebabbitt or otherwise alter this
product. Such action adversely affects bearing performance
and may result in damage to or destruction of equipment.
INSTALLATION
Check mounting structure making sure it is rigid, level and well
supported. Inspect shaft to ensure it is smooth (32 micro-inch
nish or better), within commercial tolerances and free of burrs
or rough spots.
1. Disassemble and thoroughly clean all parts of the pillow
block. Housing caps and liner caps are matched to their
bases and are not interchangeable. Housing and liners
should be interchanged as assemblies only.
WARNING: Rust preventives and solvents can be
toxic and/or flammable. Follow directions and safety
procedures recommended by their manufacturers.
CAUTION: Liner assembly has critical machined
surfaces which are easily damaged. Use care in handing
to protect these surfaces. Liner parts should be placed
on a soft, CLEAN surface.
2. Position housing base on pedestal so that oil gauge is in
the position specied on the construction drawing. Do
not tighten housing base to pedestal. Apply oil to the
spherical seats in the housing base.
3. Set liner base in housing base and apply oil to liner bearing
surface.
4. Apply oil to shaft in the bearing area and set shaft in place.
5. Check alignment of pillow block by noting clearance
between housing and shaft at each end of the housing.
Clearance should be uniform within 1/32”. Shim bearing
pedestal where possible, otherwise use full lengths shims
under base as required. Alignment of pillow block should
be as accurate as possible. The self-alignment feature of
the unit is to compensate for normal shaft deection and
possible setting of the supports.
6. Place oil rings around outside of lower liner and over shaft.
Peen screws to ensure that they are secure. Make sure rings
rotate freely on shaft.
7. Thrust Collars, in a xed unit, should now be installed.
Remove clamp screws from thrust collars and clean cracked
joint with wire brush. Back off set screws to clear inside of
collar. Place one collar half on shaft so shaft inger groove
is next to liner base in the non-expansion (xed) bearing.
Rotate collar half around shaft and place other half in
position. Bring halves together at joint, making sure match
at joint is perfect and insert clamp screws. There should
be no offset at collar face. Tap halves together and tighten
1/4-20 NC (Soc. Hex) clamp screws to recommended
torque of 160 in-lb.. Repeat above operation for opposite
end of bearing. Assemble two collars on one bearing only.
Tap collar up to face of lower liner allowing a total running
clearance of .006”-.012”, then tighten 5/16-18 NC (Soc.
Hex) set-screws to recommended torque of 140 in-lb.
Collar should run parallel to end face of liner within .002”.
8. Apply oil to bearing surface of liner cap. Locate cap in
place on lower liner making sure oil ring is free to rotate.
The 1-7/16” SLEEVOIL liners have upper halves that are
normally reversible on the lower half. By design, they are
not doweled together and therefore not match-marked.
Two modications which require match-marking of these
small PLAIN liners, 1-7/16” are:
a. When using full (Type II) Bronze Thrust Plates:
Since liners are doweled together and machined as an
assembly, care must be used to ensure match marks
are adjacent to each other and identical. The match
marks will be on the Bronze Thrust Plate halves for face
squareness after machining. A liner with Type II Bronze
Thrust Plates is rigid and does not allow the upper half
to self-align to the plunger screw. To compensate for
loss of self-alignment, a special plunger screw and
plunger screw washer are required. The special
loose washer must be positioned on the upper liner
plunger screw seat and under the plunger screw. This
ensures proper alignment of the liner bore to shaft
during operation.
b. When Liners Have a Cylindrical Bore: The liners
are doweled together and match marked. Rotating
liner halves, or switching liner halves from one liner to
another, can change the clearances within the liner.
These actions can change operating clearances within
the liner and adverse machine response can occur.
9. Tighten housing base to pedestal. Torque 5/8” bolts to 1200
in-lb.

2
10. Thread dust seal and seal spring into groove at end of housing
base and around shaft. Hook ends of spring together; taking
care not to overstress spring when stretching. Permanent
set can cause loss or working load and looseness on shaft;
resulting in oil leakage during operation. If unit is furnished
with auxiliary seals, install a second seal on each end. If
using End Closure, neoprene discs should be installed at
this time. Consult construction drawing for type of seal
recommended.
11. Apply Gasket Eliminator to Sleevoil housing base along outer
contour of joint. Loosen plunger screw and locate housing
cap on base taking care not to damage dust seals or gasket
material. To reduce chances for leakage, a non-hardening
sealant must be used under cap bolts. Tighten housing
bolts to 240 in-lb. The plunger screw must be loose until
the housing bolts have been tightened. These SLEEVOIL
plain housings have match marks permanently stamped on
them beginning June 1988. These match marks permanently
ensure that parts stay paired and critical orientation of
assemblies is maintained.
Cap Loaded Bearings: The shaft must be held down to install
cap. Tighten plunger screw to recommended torque of 250 in-lb.
with shaft held down. Mark position of plunger screw. Loosen
plunger screw one complete turn and loosen shaft hold down.
Then tighten plunger screw while tightening shaft hold-down until
plunger screw is tightened to the mark. Do not over-tighten shaft
hold-down as this can misalign the bearing. Remove shaft hold-
down and tighten plunger screw locknut. Note: Do not tighten
plunger screw on accompanying base loaded bearing until cap
loaded bearing has been installed and hold-down removed.
Base Loaded Bearings: Tighten plunger screw to recommended
torque of 250 in-lb. and tighten locknut.
IMPORTANT: Check and re-torque plunger screw to the
specified torque after 24 hours of initial start-up, and then
check periodically as required.
12. The oil level gauge may be located any distance from the
pillow block by the use of a coupling and pipe of the desired
length. The extended pipe must be supported so that it
remains straight and perfectly level. Use a spirit lever, do not
guess. Use pipe sealer on all connections.
13. Remove all pipe plugs and ush liner bore and housing
thoroughly with solvent or cleaner. Reinstall pipe plugs using
pipe sealer. Tighten securely.
14. Each housing base has predrilled holes for doweling bearing
to base plate.
LUBRICATION and OPERATION
Since the satisfactory operation of the pillow block depends
almost entirely on the oil lm being maintained between the shaft
and liner bearing surface, it is recommended that a high grade
straight mineral oil with rust and oxidation (R & O) inhibitors and
anti-foam agents be used. Check equipment specications
for specic recommendations of oil viscosity by equipment
manufacturer. Oil viscosity is determined by the equipment
manufacturer and normally specied on the construction
drawing.
Fill the pillow block with oil to the top of the center circle in the
oil gauge. After placing into operation, remove inspection covers
and check to make sure oil rings are bringing up oil. Operation
should be checked frequently during the rst few days. After some
running of base loaded bearings only, loosen plunger screw 1/4
turn, then retighten. This will allow the liner to align with the shaft.
For cap loaded bearings, follow installation procedure. If noise
develops, check alignment of housing, collar runout, plunger
screw and all operating parts. Check all points and make sure
all screws and nuts are tightened after several days operation.
Oil Maintenance Schedule
Drain, ush, and rell with oil after 2 to 3 weeks of initial break-
in operation. Since the satisfactory operation of the bearing
depends entirely on an oil lm being maintained between the
shaft and the bearing liner surface, it is recommended that an oil
analysis be performed at these regular intervals.
• Every 3 months for 24 hour/day service
• Every 6 months for 8 hour/day service
Acceptability of oil should be referred to the lubricant manufacture.
If oil quality is acceptable then repeat this procedure in three
month intervals. Visually check oil for contamination between oil
analysis checks. Oil service life depends upon several factors
such as ambient conditions, operating temperature and frequency
of bearing starts and stops. It is recommended that the oil be
changed at least once per year for unltered static applications.
Removing contaminants through the use of either the OLF-2 (Oil
Level and Filtration) unit, Cool Lube 2, or a circulating oil system
can extend oil service life. Consult equipment manufacturer for
more information. Maintain oil level above bottom of center circle
at all times while unit is in operation.
NOTE: The MINIMUM oil temperature at start-up is 70ºF.
Oil lm temperature in liner during operation should not exceed
180°F. If in doubt, consult equipment manufacturer.
Any question on installation, maintenance, or arrangement of
should be referred to the original equipment manufacturer.

3
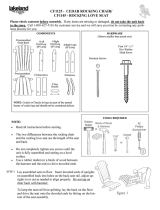
Parts for 1-7/16” SLEEVOIL Plain Pillow Blocks
Order parts by the six-digit part numbers in the Parts list. Each six-digit number is complete identi cation of the part or assembly.
These SLEEVOIL plain housings and SLEEVOIL liners have nameplates attached containing a six-digit part number which fully identi es
the housing and/or liner. Liner nameplates are pinned to the SLEEVOIL liner cap near an oil ring inspection hole. Housing nameplates
are pinned to the housing foot parallel to the shaft. Refer to these part numbers when ordering replacement parts.
Ref Name of Part
Number
Required
Part
Number
Ref Name of Part
Number
Required
Part
Number
Ref Name of Part
Number
Required
Part
Number
12 Exp Pillow Block 1 132983 28 ② Oil Gauge 1 430139 46 ② Seal Retainer 2 –
②
Modular Housing 1 132940 30 ② Oil Gauge Gasket 1 418110 48 Thrust Collar 2 133245
18 ② Housing Bolt 4 411079 34 ② Plunger Screw 1 422392 50 Oil Ring 1 135700
14 ② Drain Plug 2 430008 36 ② Plunger Screw Nut 1 133368
①
End Cover ③ 1 133980
①
② Oil Level Plug 1 430012 ② 38 Liner Assembly ④ 1 133203
①
② Split End Plate
④
133123
24 ② Gasket Eliminator 2 427359
②
Dust Seal Kit 1 389820
①
② End Plate Cap Screw 4 417041
②
26
② Inspection Cover 1 405005 44 ② Dust Seal 2 –
② Nameplate 1 404550
① Not shown on drawing
② Parts marked are furnished with the assemblies under which they are listed
③ Neoprene disc for use, when desired, on installations where shaft does not extend through housing
④ Auxiliary plate for bolting to one or both ends of housing where conditions are extremely dirty and in outdoor installations. Requires one additional dust seal and seal spring
per end plate.
Pillow Block Material Details
Housing: Class 30 Gray Cast Iron
Liner: Class 30 Gray Cast Iron
Babbitt: Lead or Tin Based Babbitt
Oil Rings: Bronze
Aux. Seal: HNBR with Stainless Steel Retainer
Grommet: Synthetic Rubber
Grommet Plate: Carbon Steel
Pipe Nipple: Carbon Steel
Oil Gauge: Stainless Steel, Polypropylene
Hardware: Carbon Steel
Plunger Screw: Carbon Steel
Gasket Eliminator: LOCTITE 515 Sealant
This Sleevoil pillow block could contain lead in the bearing
Babbitt material, please exercise proper precautions in the use,
installation, dismantling and recycling of this unit.
Other Notes:
CAUTION: This product is not to be used for person moving
applications.
NOTE: Care has been taken to keep instruction manuals
accurate and timely. The most recent version of the
instruction manual can be found on our website:
www.baldor.com
Table 1 - Weight of STD PL Pillow Blocks
R-series
shaft size
Approximate Weight (lbs.)
Non-
Expansion
Pillow Block
Expansion
Pillow Block
Liner
Assembly
1-7/16 22 21 4

P.O. Box 2400, Fort Smith, AR 72902-2400 U.S.A., Ph: (1) 479.646.4711, Fax (1) 479.648.5792, International Fax (1) 479.648.5895
Dodge Product Support
6040 Ponders Court, Greenville, SC 29615-4617 U.S.A., Ph: (1) 864.297.4800, Fax: (1) 864.281.2433
www.baldor.com
© Baldor Electric Company
MN3054 (Replaces 499360)
All Rights Reserved. Printed in USA.
01/15 Printshop 100
*3054-0115*
Sleevoil Accessories
The following accessories are available for Sleevoil bearing to enhance operation and extend bearing life. For compatibility and
technical information contact DODGE product support.
OIL LEVEL AND FILTRATION (OLF-2) SYSTEM
• Increase bearing longevity and reliability.
• One OLF-2 system supplies two bearings with a continuous
ow of ltered oil.
• The oil is supplied directly to the circulating oil inlets on
the bearings, which helps minimize wear during startups
and shutdowns.
DODGE SLEEVOIL BEARING ISOLATOR
• Fully split multi-labyrinth sealing system.
• Provides outstanding protection in harsh and dirty
environments.
• IP56 rated
RTD KIT
• Prevent catastrophes by accurately measuring bearing
temperature.
• Features a eld-cuttable stainless steel probe, a platinum
sensing element and a spring-loaded tting with an oil
seal.
COOL LUBE 2
• All the features of the OLF-2 system plus a built-in heat
exchanger for continuous oil cooling and adjustable oil
ow controls.
• Particularly well suited in applications where bearing
operating temperatures and speeds approach the
maximum permissible levels.
HEATER /THERMOSTAT
• The bearing sump heater and thermostat have been
combined into one user-friendly unit.
• Sump heaters are a necessity to ensure safe startups
when bearings are exposed to ambient temperatures
below 70°F.
THERMOMETER
• Dial thermometer for convenient monitoring of the oil
sump temperature
• All stainless steel construction with glass face
COOLANT HOSE KIT
• An easy to install solution for connecting coolant lines to
your Sleevoil bearing.
• Durable exible hoses are composed of a synthetic rubber
inner tube reinforced with ber and steel braids.
/