Page is loading ...

P/N9368987046
English
Français
Español
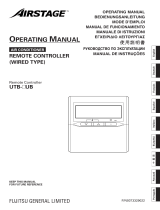
AIR CONDITIONER
CASSETTE TYPE
KEEP THIS MANUAL
FOR FUTURE REFERENCE
FUJITSU GENERAL LIMITED
OPERATING MANUAL
MODE D’EMPLOI
MANUAL DE FUNCIONAMIENTO
9368987046_OM_cover1.p65 5/8/05, 15:181

En-1
SAFETY PRECAUTIONS
● Before using the appliance, read these “PRECAUTIONS” thoroughly and operate in the correct way.
● The instructions in this section all relate to safety; be sure to maintain safe operating conditions.
● “DANGER”, “WARNING” and “CAUTION” have the following meanings in these instructions:
CONTENTS
SAFETY PRECAUTIONS ................................................ 1
NAME OF PARTS ........................................................... 2
PREPARATORY OPERATION ......................................... 3
OPERATION ................................................................... 3
TIMER FUNCTIONS ....................................................... 5
ON/OFF TIMER .............................................................. 5
WEEKLY TIMER ............................................................. 6
TEMPERATURE SET BACK TIMER............................... 8
OPERATING TIPS ........................................................... 9
ADJUSTING THE DIRECTION OF AIR CIRCULATION ...
11
SWING OPERATION.................................................... 11
CARE AND MAINTENANCE........................................ 12
SELF-DIAGNOSIS ........................................................ 13
TROUBLESHOOTING .................................................. 14
DANGER!
● Do not attempt to install this air conditioner by yourself.
● This unit contains no user-serviceable parts. Always consult authorized service personnel for repairs.
● When moving, consult authorized service personnel for disconnection and installation of the unit.
● Do not become over-exposed to cold air by staying in the direct path of the air flow of the air conditioner
for extended periods of time.
● Do not insert fingers or objects into the outlet port or intake grilles.
● Do not start and stop air conditioner operation by turning off the electrical breaker and so on.
● In the event of a malfunction (burning smell, etc.), immediately stop operation, turn off the electrical breaker,
and consult authorized service personnel.
CAUTION!
● Provide occasional ventilation during use.
● Do not direct air flow at fireplaces or heating apparatus.
● Do not climb on, or place objects on, the air conditioner.
● Do not hang objects from the indoor unit.
● Do not set flower vases or water containers on top of air conditioners.
● Do not expose the air conditioner directly to water.
● Do not operate the air conditioner with wet hands.
● Turn off power source when not using the unit for extended periods.
● Always turn off the electrical breaker whenever cleaning the air conditioner or changing the air filter.
● Connection valves become hot during Heating; handle with care.
● Check the condition of the installation stand for damage.
● Do not place animals or plants in the direct path of the air flow.
● When restarting after a long period of disuse in the winter, turn the power switch on at least 12 hours
before starting the unit.
● Do not drink the water drained from the air conditioner.
● Do not use in applications involving the storage of foods, plants or animals, precision equipment, or art
works.
● Do not apply any heavy pressure to radiator fins.
● Operate only with air filters installed.
● Do not block or cover the intake grille and outlet port.
● Ensure that any electronic equipment is at least one metre away from either the indoor or outdoor units.
● Avoid installing the air conditioner near a fireplace or other heating apparatus.
● When installing the indoor and outdoor units, take precautions to prevent access by infants.
● Do not use inflammable gases near the air conditioner.
WARNING!
CAUTION!
DANGER!
This mark indicates procedures which, if improperly performed, are most likely to
result in the death of or serious injury to the user or service personnel.
This mark indicates procedures which, if improperly performed, might lead to the
death or serious injury of the user.
This mark indicates procedures which, if improperly performed, might possibly result
in personal harm to the user, or damage to property.
9368987046_OM_en.p65 5/8/05, 15:191

En-2
NAME OF PARTS
Remote controller
1 Start/Stop Button
2 Set Temperature Button
3 Master Control Button
4 Fan Control Button
5 THERMO SENSOR Button
6 ENERGY SAVE Button
7 Timer Mode (CLOCK ADJUST)
Button
8 DAY (DAY OFF) Button
9 SET BACK Button
0 Set Time Button
A DELETE Button
B SET Button
C Vertical Airflow Direction and
Swing Button
D Operation Lamp
E Timer and Clock Display
F Operation Mode Display
G Fan Speed Display
H Operation Lock Display
I Temperature Display
J Function Display
Defrost Display
Thermo Sensor Display
Energy Save Display
Vertical Swing Display
SU
MO
TU
WE
TH FR
SA
369
12 15 18 21
DAY OFF
DELETE SET
ENERGY
SAVE
THERMO
SENSOR
SET BACK
DAY
CLOCK ADJUST
E
2
7
8
9
0
A
B
H
G
F
I
J
D
1
3
4
C
5
6
9368987046_OM_en.p65 25/8/05, 14:522

En-3
PREPARATORY OPERATION
To set the operation mode
● Operation mode setting
● Room temperature setting
● Fan speed setting
OPERATION
Instructions relating to heating are applicable only to “HEAT & COOL MODEL” (Reverse Cycle).
To start/stop operation
CLOCK ADJUST
Press the timer mode (CLOCK
ADJUST) button for 2 seconds
or more. The time display on
the remote controller will flash.
2
DAY OFF
DAY
SU MO TU WE TH FR SA
Press the DAY button and select the current day.
A
appears around the selected day.
Press the set time buttons to set the current time.
Press repeatedly to adjust the current time in 1-
minute increments. Press and hold to adjust the
current time in 10-minute increments.
ex. Monday, 10:00 A.M.
Press again to end.
CLOCK ADJUST
1
3
4
AUTO COOL DRY HEATFAN
AUTO HIGH MED LOW
Temperature setting range
AUTO ............................................... 64 to 88 °F
COOL/DRY ....................................... 64 to 88 °F
HEAT ................................................ 60 to 88 °F
Lower Rise
Operation lamp
Air conditioner ON: Lit brightly
Air conditioner OFF: Not lit
Press the start/stop button.
Press the master control button to set the operation mode.
If DRY is selected, the fan speed will be set to AUTO.
Press the set temperature buttons to set the room temperature.
Press the fan control button to set the fan speed.
Set the current day and time
SU
MO
TU
WE
TH FR
SA
9368987046_OM_en.p65 25/8/05, 14:523

En-4
OPERATION
Press the ENERGY SAVE button to start or stop the energy-sav-
ing air conditioner operation.
For details on the function, refer to page 9.
ENERGY
SAVE
THERMO
SENSOR
Room temperature sensor selection
Press the THERMO SENSOR button to select whether the
room temperature is detected at the indoor unit (remote
sensor) or the remote controller.
When the
thermo sensor display appears, the room
temperature is detected at the remote controller.
NOTES
• This function is locked at the factory. In order to detect the room temperature correctly, consult authorized service
personnel when using this function.
• If this function is locked, the location where the room temperature is detected cannot be changed and the
mark flashes when the THERMO SENSOR button is pushed.
Indoor unit
Energy save
Part lock function
DAY OFF
DELETE SET
SET BACK
DAY
CLOCK ADJUST
Press the DAY (DAY OFF) button and SET button simulta-
neously for 2 seconds or more to activate the part lock
function and lock all of the buttons on the remote con-
troller except the Start/Stop button, Set Temperature but-
tons, Master Control button, and Fan Control button. Press
the buttons again for 2 seconds or more to deactivate the
part lock function.
When the part lock function is activated, the
mark
appears. If any button is pressed during the part lock, the
PL
display flashes.
9368987046_OM_en.p65 5/8/05, 15:194

En-5
TIMER FUNCTIONS
OFF timer (See page 5.)
Use this timer function to stop air conditioner operation. The timer operates and air conditioner operation stops
after the set time has passed. The timer can be set up to 24 hours in advance.
ON timer (See page 5.)
Use this timer function to start air conditioner operation. The timer operates and air condition operation starts
after the set time has passed. The timer can be set up to 24 hours in advance.
WEEKLY timer (See page 6.)
Use this timer function to set operating times for each day of the week.
Use the DAY OFF setting to switch off timed operation for a selected day in the coming week.
Because all days can be set together, the weekly timer can be used to repeat the timer settings for all of the days.
Temperature SET BACK timer (See page 8.)
Use this timer function to change the set temperature in the operation times set for each day of the week.
This can be used together with other timer settings.
ON/OFF TIMER
Press the timer mode button to se-
lect the ON timer or OFF timer.
2
• Press the DELETE button to cancel the timer mode.
• The timer mode can also be canceled by changing the timer mode using the timer mode button.
1
CLOCK ADJUST
NON
STOP
OFF
TIMER
ON
TIMER
WEEKLY
TIMER
No display
SU
MO
TU
WE
TH FR
SA
Press the set time buttons to set the time.
After the time is set, the timer will start automatically.
The amount of time until the OFF timer operates that is dis-
played on the timer display decreases as time passes.
From 1 to 24 hours
ex. OFF timer set for 6 hours
● To cancel
DELETE
To set the ON/OFF timer
9368987046_OM_en.p65 5/8/05, 15:195

En-6
WEEKLY TIMER
Press the timer mode button to select the weekly timer.
2
Press the SET button for 2 sec-
onds or more.
1
3
CLOCK ADJUST
● Day of the week setting
DAY OFF
DAY
SET
1
2
Press the DAY button to select the day of the week, and then press the
SET button to confirm the setting.
For ALL, all of the days can be set together when a appears around
each day.
ALL SU MO TU WE TH FR SA
4
● Time setting
Press the set time buttons to set the time, and then press the SET button
to confirm the setting and proceed to the next ON or OFF time setting.
Up to two ON and OFF times can be set per day.
Press the DAY button to complete the time setting and return to the day
of the week setting.
5
Repeat steps 3 and 4.
To complete the weekly timer settings, press the SET
button for 2 seconds or more.
SET
● To delete the operating time
DELETE
If the DELETE button is pressed during
steps
3 or 4, the operating time for the
selected day will be deleted.
If all the days are selected, the operating
times for all of the days will be deleted.
NOTES
• The operating time can be set in 30-minute increments only.
• The OFF time can be carried over to the next day.
• The ON timer and the OFF timer functions cannot be set using the weekly timer. Both an ON and OFF time must be set.
SET
Weekly timer setting
SET
1
2
DAY OFF
DAY
3
ON-1 OFF-1 ON-2 OFF-2
SU
MO
TU
WE
TH FR
SA
369
12 15 18 21
SU
MO
TU
WE
TH FR
SA
369
12 15 18 21
When the operating time is set, the
mark appears.
ex. The timer is set for 7:00 A.M.–6:00 P.M.
(7:00–18:00)
SU
MO
TU
WE
TH FR
SA
369
12 15 18 21
9368987046_OM_en.p65 5/8/05, 15:196

En-7
WEEKLY TIMER
● To start
CLOCK ADJUST
When the weekly timer is selected, the
timer starts automatically.
● To cancel
• Press the DELETE button to cancel
the timer mode.
• The timer mode can also be
canceled by changing the timer
mode using the timer mode button.
To set the DAY OFF (for a holiday)
1
During the weekly timer,
press the SET button for 2
seconds or more to set the
day.
SET
Select the day to set the DAY
OFF.
Press the DAY (DAY OFF)
button for 2 seconds or
more to set the DAY OFF.
Press the SET button for 2
seconds or more to com-
plete the DAY OFF setting.
24
DAY OFF
DAY
SET
3
DAY OFF
DAY
NOTES
• The DAY OFF setting is only available for days for which weekly settings already exist.
• If the operating time carries over to the next day (during a next day setting), the effective DAY OFF range will be set as
shown below.
DELETE
WEEKLY timer operation
The operating time for the current
day is displayed.
ex. Operating time 7:00 A.M.
–6:00 P.M. (7:00–18:00)
SU
MO
TU
WE
TH FR
SA
369
12 15 18 21
369
12 15 18 21
SU
MO
TU
WE
TH FR
SA
369
12 15 18 21
SU
MO
TU
WE
TH FR
SA
369
12 15 18 21
● To cancel
Follow the same procedures as
those for setup.
ex. The DAY OFF is set for Monday.
mark: Indicates the DAY OFF
● Normal ● Next day setting
Setting dayPreceding day Next day Setting dayPreceding day Next day
• The DAY OFF setting can only be set one time. The DAY OFF setting is cancelled automatically after the set day has
passed.
ON OFF ON OFF
DAY OFF
WEEKLY WEEKLY
WEEKLY
WEEKLY
ON
OFF
ON
OFF
DAY OFF
NOTES
(1) PRECAUTIONS DURING WEEKLY TIMER SETUP
Setup is not possible in the following cases, so amend
the time.
• Be sure to set the ON time first, then the OFF time. If
either the ON time or the OFF time is not set correctly,
the timer will not operate properly.
• The WEEKLY 2 settings cannot be set earlier than the
WEEKLY 1 settings.
• The WEEKLY 1 and WEEKLY 2 time spans cannot over-
lap.
(2) The earliest OFF time you can set is 30 minutes after the
ON time.
(3) The OFF time can be carried over to the next day.
(4) Even if the timer operation is set, the timer indicator lamp
of the indoor unit does not light up. (The timer indicator
lamp is used for wireless remote controllers only.)
9368987046_OM_en.p65 5/8/05, 15:197

En-8
TEMPERATURE SET BACK TIMER
Press the SET BACK button to change to the SET BACK con-
firmation display.
The SET BACK operating time and the set temperature will
be displayed.
2
Press the SET button for 2
seconds or more.
1
3
● Day setting ● Operating time setting
Follow the same procedures to set the operating time as those for the weekly timer. The DELETE button is also used
as described in the procedures for the weekly timer.
4
SET
DAY OFF
DAY
1
3
SET
2
SET
4
5
Repeat steps 3 and 4.
Press the SET button for 2
seconds or more to com-
plete the temperature SET
BACK timer settings.
SET
Temperature SET BACK timer operation
● To start
SET BACK
Press the SET BACK button. The SET BACK confirmation display appears
for 5 seconds, and then the timer starts automatically.
ex. Display during SET BACK timer operation
(The operating time will not be displayed.)
● To cancel
Press the SET BACK button, and then
press the DELETE button while the
SET BACK confirmation display is dis-
played. Even if the SET BACK button
is pressed again, the SET BACK timer
will be cancelled.
Temperature SET BACK timer setting
SET BACK
1
DELETE
2
SET BACK
If there is no existing
SET BACK tempera-
ture setting, “- -” will
be displayed for the
temperature.
SU
MO
TU
WE
TH FR
SA
369
12 15 18 21
ex. When setting all days together
SU
MO
TU
WE
TH FR
SA
369
12 15 18 21
● Temperature setting
Press the SET TEMPERATURE buttons to
set the temperature (from 64 °F to 88 °F).
ex. Operating time 3:00–10:00 P.M.
(15:00–22:00)
SET BACK
temperature
Normal
temperature
ON
OFF
76°F
76°F
84°F
SU
MO
TU
WE
TH FR
SA
369
12 15 18 21
SU
MO
TU
WE
TH FR
SA
NOTES
(1) The SET BACK timer only changes the set temperature, it cannot be used to start or stop air conditioner operation.
(2) The SET BACK timer can be set to operate up to two times per day but only one temperature setting can be used.
(3) The SET BACK timer can be used together with the ON, OFF, and weekly timer functions.
(4) The SET BACK operating time is displayed only in the SET BACK confirmation display. (Refer to step 1 for the SET
BACK confirmation display.)
(5) The SET BACK operating time is displayed only in the SET BACK confirmation display. (Refer to step 1 for the SET
BACK confirmation display.)
9368987046_OM_en.p65 25/8/05, 14:538

En-9
During cooling operation
When the ENERGY SAVE is
pressed, the thermostat setting
is automatically rised 2 °F every
60 minutes, until the thermostat
is rised a total of 4 °F.
82°F
78°F
80°F
Energy save
74°F
72°F
70°F
68°F
66°F
Energy save
OPERATING TIPS
Mode operation: AUTO
COOLING MODEL
• When the room temperature is 4 °F higher than the set
temperature, the mode will switch between Cooling and
Drying.
• During the Drying mode operation, the FAN setting should
be switched to LOW for a gently cooling effect during which
the fan may temporarily stop rotating.
HEAT & COOL MODEL (Reverse Cycle)
Auto changeover function
• When AUTO CHANGEOVER is selected, the air conditioner
selects the appropriate operation mode (Cooling or Heat-
ing) according to your room’s present temperature.
• When AUTO CHANGEOVER is first selected, the fan will
operate at a very low speed for about 1 minute while the
unit determines the current conditions of the room and
selects the proper operation mode.
• When the room temperature is near the thermostat set-
ting, the air conditioner will begin monitor operation. In
the monitor operation mode, the fan will operate at a very
low speed. If the room temperature subsequently changes,
the air conditioner will once again select the appropriate
operation (Heating or Cooling) to adjust the temperature
to the value set in the thermostat. (The monitor operation
range is ±4 °F relative to the thermostat setting.)
Fan speed: AUTO
Heating: The fan will operate at very low speed when the tem-
perature of the air issued from the indoor unit is low.
Cooling: As the room temperature approaches that of the set
temperature, the fan speed becomes slower.
Fan: The fan alternately turns on and off; when on, the
fan runs at the low fan speed.
AUTO restart
• Should the power supply to the air conditioner be inter-
rupted by a power failure, the air conditioner will restart
automatically in the previously selected mode once the
power is restored.
• Use of other electrical appliances (electric shaver, etc.) or
nearby use of a wireless radio transmitter may cause the
air conditioner to malfunction. In this event, temporarily
turn off the circuit breaker turn it on again and then use
the remote controller to resume operation.
Heating performance
• This air conditioner operates on the heat-pump principle,
absorbing heat from outdoor air and transferring that heat
indoors. As a result, the operating performance is reduced
as outdoor air temperature drops. If you feel that insuffi-
cient heating performance is being produced, we recom-
mend you use this air conditioner in conjunction with an-
other kind of heating appliance.
• Heat-pump air conditioners heat your entire room by
recirculating air throughout the room, with the result that
some time may be required after first starting the air con-
ditioner until the room is heated.
During heating operation
When the ENERGY SAVE is
pressed, the thermostat setting
is automatically lowered 2 °F
every 30 minutes, until the ther-
mostat is lowered a total of 4 °F.
60 min.
30 min.
30 min.
30 min.
Energy save
• The energy conservation mode (ENERGY SAVE) raises the
set temperature slightly in the cooling mode and lowers
the set temperature in the heating mode to economically
control the operation of the unit.
• If you press the ENERGY SAVE button while the unit is in
the timer mode, the unit will go into the conservation mode
when the unit starts with the timer.
• If you turn off the air conditioner while in the conservation
mode, the mode will be shut off.
• The temperature set on the remote controller will not
change if the energy save mode is used.
Hot start (for heating)
The indoor unit prevents cold drafts when heating operation
begins.
The indoor unit fan will not operate or it will operate at a very
low speed until the heat exchanger reaches the set tempera-
ture.
Defrosting (for heating)
When the outdoor temperature is low and the humidity high,
frost will collect on the outdoor unit, reducing heater efficiency.
When this happens, the computer will automatically start the
defrost cycle. During the defrost cycle, the indoor fan will shut-
down and
will be displayed on the remote controller. It
will take anywhere from 4 to 15 minutes before the air condi-
tioner starts up again.
Group Control
One remote controller can control up to 16 air conditioners.
All of the air conditioners will be operated with the same set-
tings.
Dual Remote Controllers (optional)
An additional remove controller can be added up to the maxi-
mum of two remote controllers. Either remote controller can
control the air conditioner. However, the timer functions can-
not be used at the slave unit.
Instructions relating to heating are applicable only to “HEAT & COOL MODEL” (Reverse Cycle).
9368987046_OM_en.p65 25/8/05, 14:539

En-10
This indoor unit can be connected to a multi-type outdoor unit. The multi-type air conditioner allows multiple indoor units to
be operated in multiple locations. The indoor units may be operated simultaneously, in accordance with their respective
output.
Instructions relating to inverter (
❖
) are applicable only to “INVERTER MODEL”.
❖
● Operation can be done in the following different operat-
ing modes.
Cooling mode and dry mode
Cooling mode and fan mode
Dry mode and fan mode
❖
● The operating mode (heating mode or cooling (dry)
mode) of the outdoor unit will be determined by the op-
erating mode of the indoor unit that was operated first.
If the indoor unit was started in fan mode, the operating
mode of the outdoor unit will not be determined.
For example, if indoor unit (A) was started in fan mode
and then indoor unit (B) was then operated in heating
mode, indoor unit (A) would temporarily start opera-
tion in fan mode but when indoor unit (B) started oper-
ating in heating mode,
will be shown on the re-
mote controller display and it would go into standby
mode. Indoor unit (B) would continue to operate in heat-
ing mode.
Instructions relating to heating (*) are applicable only to “HEAT & COOL MODEL” (Reverse Cycle).
*● During use of the heating mode, the top of the indoor
unit may become warm, but this is due to the fact that
coolant is circulated through the indoor unit even when
it is stopped; it is not a malfunction.
● When using a multi-type air conditioner, the multiple
indoor units can be operated simultaneously, but when
two or more indoor units of the same group are oper-
ated simultaneously, the heating and cooling efficiency
will be less than when a single indoor unit is used alone.
Accordingly, when you wish to use more than one in-
door unit for cooling at the same time, the use should
be concentrated at night and other times when less out-
put is required. In the same way, when multiple units
are used simultaneously for heating, it is recommended
that they be used in conjunction with other auxiliary
space heaters, as required.
● Seasonal and outdoor temperature conditions, the struc-
ture of the rooms and the number of persons present
may also result in differences of operating efficiency.
We recommend that you try various operating patterns
in order to confirm the level of heating and cooling out-
put provided by your units, and use the units in the way
that best matches your family's lifestyle.
● If you discover that one or more units delivers a low
level of cooling or heating during simultaneous opera-
tion, we recommend that you stop simultaneous opera-
tion of the multiple units.
❖
● Operation cannot be done in the following different op-
erating modes.
If the indoor unit is instructed to do an operating mode
that it cannot perform,
will be shown on the re-
mote controller display and the unit will go into the
standby mode.
Heating mode and cooling mode (or dry mode)
Heating mode and fan mode
*● During use of the heating mode, the outdoor unit will
occasionally commence the defrost operation for brief
periods. During the defrosting operation, if the user sets
the indoor unit for heating again, the defrosting mode
will continue, and the heating operation will begin after
completion of defrosting, with the result that some time
may be required before warm air is emitted.
Multi-type Air conditioner
Simultaneous Use of Multiple Units
Notice
OPERATING TIPS
9368987046_OM_en.p65 5/8/05, 15:1910

En-11
ADJUSTING THE DIRECTION OF AIR CIRCULATION
Instructions relating to heating are applicable only to “HEAT & COOL MODEL” (Reverse Cycle).
Start air conditioner operation before performing this procedure.
NOTES
• To change the range of swing, use the remote controller vertical airflow direction and swing button.
• The swing operation may stop temporarily when the air conditioner fan is not operating or when it is operating at very
low speeds.
To adjust the vertical airflow direction
Press the vertical airflow direction and swing button.
The
vertical swing display flashes each time the vertical airflow
direction and swing button is pressed.
Each time the button is pressed, the airflow direction setting changes as shown in the following figure.
1
2 3 4
1
2
3
4
NOTES
• The airflow direction is set automatically according to the operation selected.
During Cooling/Dry mode: Horizontal airflow 1
During Heating mode: Downward airflow 4
• During AUTO mode, the airflow direction will be set to horizontal airflow 1 for the first minute of air conditioner opera-
tion. The airflow direction cannot be changed during this time.
• Always use the remote controller vertical airflow direction and swing button to adjust the vertical airflow direction
louvers. Attempting to adjust them manually could result in improper operation. If the louvers are not operating prop-
erly, turn off the air conditioner and restart it.
• When using the air conditioner in a room with infants, small children, or elderly or sick persons, the airflow direction and
room temperature should be considered carefully when making the settings.
SWING OPERATION
Start air conditioner operation before performing this procedure.
To select/stop swing operation
Press the vertical airflow direction and swing button for 2 seconds or
more to select or stop swing operation.
The
vertical swing display appears during swing operation.
Airflow direction setting
1
2, 3
4
Range of swing
1 to 3
2 to 4
1 to 4 (full range)
The range of swing depends on the set airflow direction.
9368987046_OM_en.p65 5/8/05, 15:1911

En-12
CARE AND MAINTENANCE
CAUTION!
● Before cleaning the unit, be sure to stop the unit and power supply. (Turn off the electrical breaker)
● A fan operates at high speed inside the unit, and personal injury could result.
Cleaning the air filter
1
Push the intake grille pushbuttons (two places) and open the intake grille.
2
Hold down the hook at A and pull the filter out.
OPEN
PUSH
Filter
3
Clean the air filters.
Remove the dust from the air filters by vacuuming or washing them. After washing, allow the air filters to dry
thoroughly in an area protected from sunlight.
NOTES
• Dust can be cleaned from the air filter either with a vacuum cleaner, or by washing the filter in a solution of mild deter-
gent and warm water. If you wash the filter, be sure to allow it to dry thoroughly in a shady place before reinstalling.
• If dirt is allowed to accumulate on the air filter, air flow will be reduced, lowering operating efficiency and increasing
noise.
• During periods of normal use, the air filters should be cleaned every two months.
OPEN
PUSH
A A
Filter
A
B
Filter
Intake grille
B
When reinstalling the filter, be sure that the hooks at A and B engage correctly into place.
9368987046_OM_en.p65 5/8/05, 15:1912

En-13
SELF-DIAGNOSIS
1
2
Stop the air conditioner operation.
Press the set temperature buttons simultaneously for 5 seconds or more to
start the self-diagnosis.
SU
MO
TU
WE
TH FR
SA
SU
MO
TU
WE
TH FR
SA
Unit number (usually 0)
Error code
ex. Error display ex. Self-diagnosis check
3
Press the set temperature buttons simultaneously for 5 seconds or more to stop the self-diagnosis.
When the error indication “E:EE” is displayed, inspection of the air conditioning system is necessary. Please consult author-
ized service personnel.
How to cleaning
• When used for extended periods, the unit may accumulate dirt inside, reducing its performance. We recommend that the
unit be inspected regularly, in addition to your own cleaning and care. For more information, consult authorized service
personnel.
• When cleaning the unit’s body, do not use water hotter than 100 °F, harsh abrasive cleansers, or volatile agents like benzene
or thinner.
• Do not expose the unit body to liquid insecticides or hairsprays.
• If the unit will not be operated for a period of one month or more, be sure to allow the inner parts of the unit to dry
thoroughly, in advance, by operating the unit in fan mode for half a day.
CARE AND MAINTENANCE
9368987046_OM_en.p65 5/8/05, 15:1913

En-14
TROUBLESHOOTING
Symptom
Doesn’t operate immedi-
ately:
Noise is heard:
Smells:
Mist or steam are
emitted:
Air flow is stopped:
Problem
● If the unit is stopped and then immediately started again, the com-
pressor will not operate for about 3 minutes, in order to prevent
fuse blowouts.
● Whenever the electrical breaker is turned off then on again, the
protection circuit will operate for about 3 minutes, preventing unit
operation during that period.
● During operation and immediately after stopping the unit, the
sound of water flowing in the air conditioner’s piping may be
heard. Also, noise may be particularly noticeable for about 2 to 3
minutes after starting operation (sound of coolant flowing).
● During operation, a slight squeaking sound may be heard. This is
the result of minute expansion and contraction of the panel due
to temperature changes.
● During Heating operation, a sizzling sound may be heard occa-
sionally. This sound is produced by the Automatic Defrosting op-
eration.
● Some smell may be emitted from the indoor unit. This smell is
the result of room smells (furniture, tobacco, etc.) which have
been taken into the air conditioner.
● During Cooling, a thin mist may be seen emitted from the indoor unit.
This results from the sudden Cooling of room air by the air emitted
from the air conditioner, resulting in condensation and misting.
● During Heating operation, the outdoor unit’s fan may stop, and
steam may be seen rising from the unit. This is due to the Auto-
matic Defrosting operation.
● When Heating operation is started, fan speed is temporarily very
low, to allow internal parts to warm up.
● During Heating operation, if the room temperature rises above
the thermostat setting, the outdoor unit will stop, and the indoor
unit will operate at very low fan speed. If you wish to warm the
room further, set the thermostat to a higher setting.
● During Heating operation, the unit will temporarily stop opera-
tion (between 2 and 16 minutes) as the Automatic Defrosting mode
operates. During the Automatic Defrosting operation,
will
be shown on the remote controller display.
● The fan may operate at very low speed when the unit is monitor-
ing the room’s temperature.
● In the monitor AUTO operation, the fan will operate at very low speed.
● In case of Multi-type unit, if multiple units are operated in
different operation modes as shown below, the units operated
afterward will stop and
will be shown on the remote
controller display of the stopped indoor units.
Heating mode and cooling mode (or dry mode)
Heating mode and fan mode
See Page
—
—
9
—
—
9
—
9
—
—
NORMAL
FUNCTION
Instructions relating to heating are applicable only to “HEAT & COOL MODEL” (Reverse Cycle).
WARNING!
In the event of a malfunction (burning smell, etc.), immediately stop operation, turn off the electrical breaker,
and consult authorized service personnel.
Merely turning off the unit’s power switch will not completely disconnect the unit from the power source.
Always be sure to turn off the electrical breaker to ensure that power is completely off.
Before requesting service, perform the following checks:
10
9368987046_OM_en.p65 5/8/05, 15:1914

En-15
Symptom
Water is produced from
the outdoor unit:
thermo sensor
display on the remote
controller is flashing:
Symptom
Doesn’t operate at all:
Poor Cooling (or Heating)
performance:
See Page
9
—
See Page
—
5 to 7
—
NORMAL
FUNCTION
CHECK ONCE
MORE
Problem
● During Heating operation, water may be produced from the out-
door unit due to the Automatic Defrosting operation.
● The room temperature sensor may be malfunctioning. Please
consult authorized service personnel.
Items to check
● Has there been a power failure
● Has a fuse blown out, or a circuit breaker been tripped?
● Is the timer operating?
● Is the air filter dirty?
● Are the air conditioner’s intake grille or outlet port blocked?
● Did you adjust the room temperature settings (thermostat) cor-
rectly?
● Is there a window or door open?
● In the case of Cooling operation, is a window allowing bright sun-
light to enter? (Close the curtains.)
● In the case of Cooling operation, are there heating apparatus and
computers inside the room, or are there too many people in the
room?
If the problem persists after performing these checks, or if you notice burning smells, stop operation immediately, turn off the
electrical breaker, and consult with authorized service personnel.
TROUBLESHOOTING
9368987046_OM_en.p65 5/8/05, 15:1915
/