Xerox
®
ColorQube
®
8700 / 8900
www.xerox.com/offi ce/CQ8700support
www.xerox.com/offi ce/CQ8900support
7
2
6
3 4 5
1
1
6
3
7
4 52
2
3
4
5
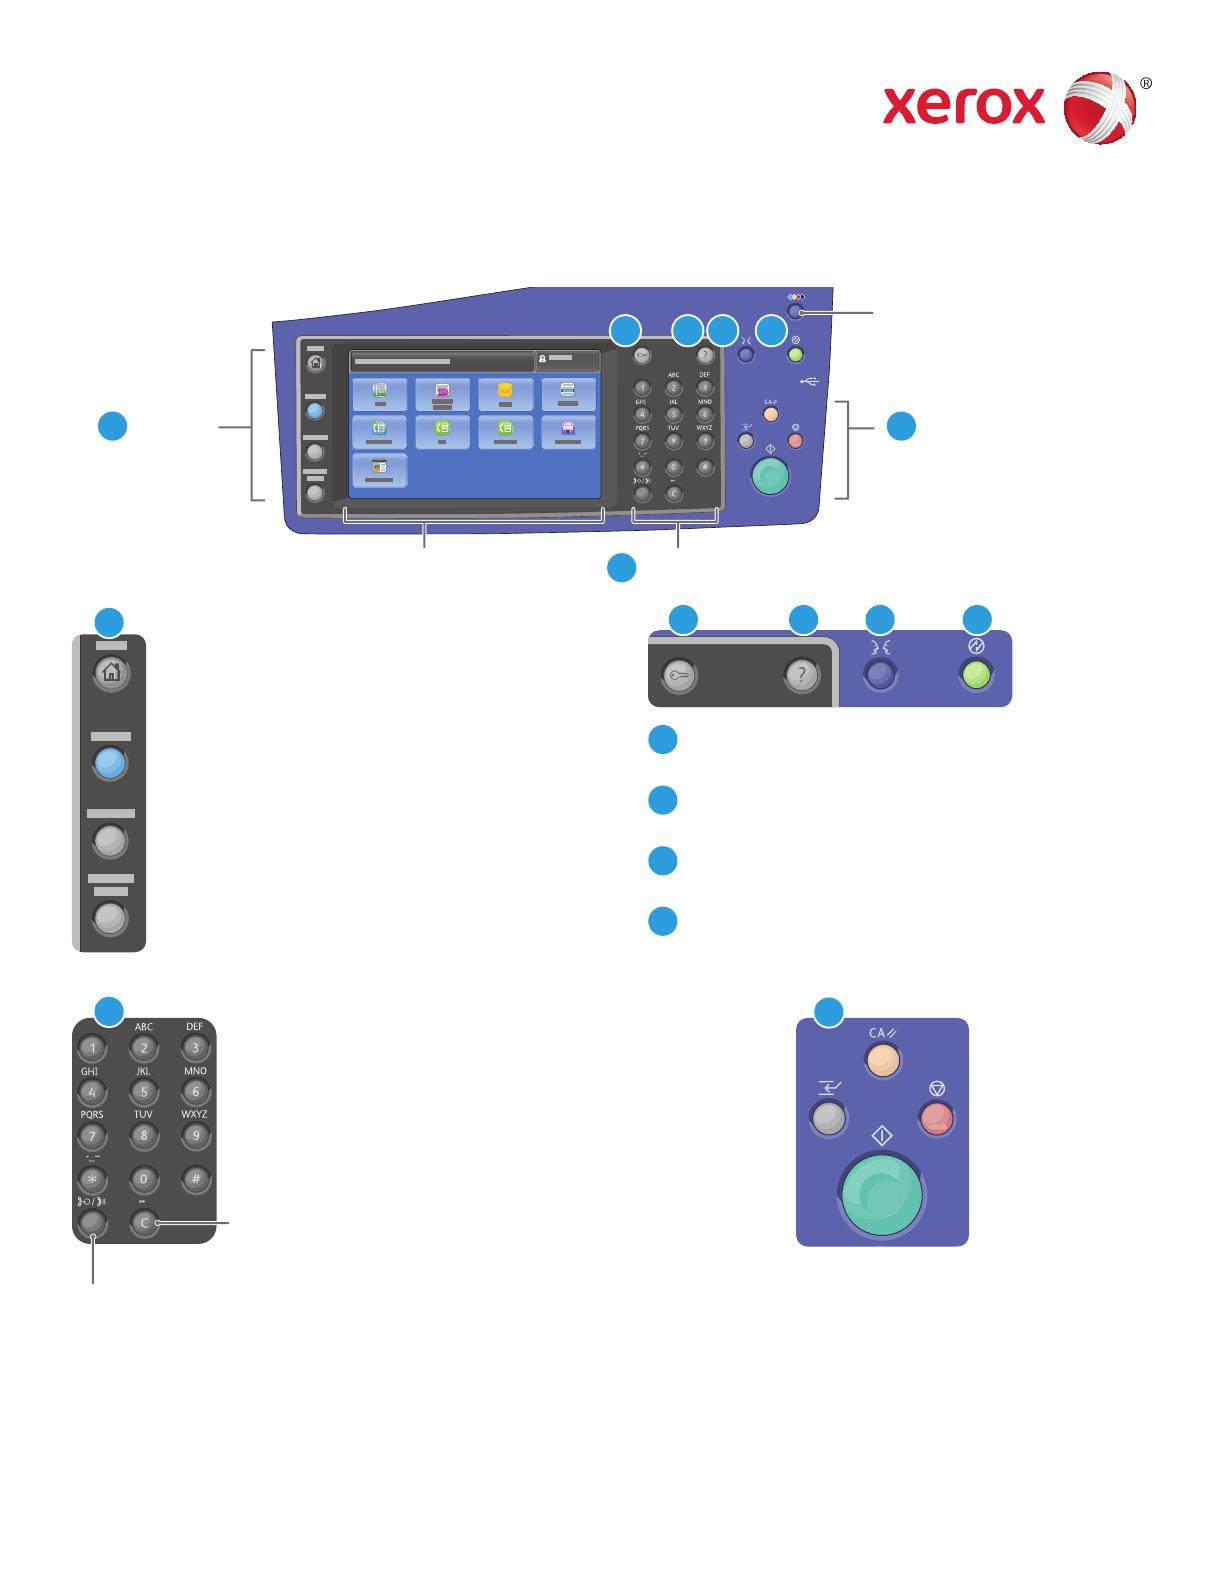
Control Panel
Available services can vary on your printer setup. For details about services and settings, see the User Guide.
Menus Job controls
Ink Access Door Release
Alphanumeric keypadTouch screen
Services Home displays main services, such as copy,
scan, and fax.
Services returns to the active service from the Job
Status or Machine Status screens, or to a preset
service.
Log In/Out accesses password-protected features.
Help (?) displays additional information about the
current selection or service.
Language changes the touch screen language and
keyboard settings.
Power Saver enters or exits Energy Saver mode or Quick
Restart screen.
Clear All
StopInterrupt Print
Start
Job Status displays active, held, and completed jobs.
Machine Status displays settings and information.
Dial Pause inserts a pause in a telephone number when
transmitting a fax.
Alphanumeric keys are used for
entering copy quantities, fax numbers,
and other numeric information.
C (clear) deletes numeric values or the
last digit entered.
Clear All clears previous and changed settings for the
current service. Press twice to reset all defaults and clear
existing scans.
Start starts the selected job.
Stop temporarily stops the current job. Follow the onscreen
instructions to cancel or resume your job.
Interrupt Print pauses the currently printing job to run a
more urgent job.
© 2013 Xerox Corporation. All Rights Reserved. Xerox
®
and Xerox and Design
®
are trademarks of Xerox Corporation in the United States and/or other countries.


