
Bioenno Power SC-122430NE MPPT Series User Manual
12V/24V MPPT SOLAR CHARGE CONTROLLER FOR LFP
THIS CONTROLLER IS FACTORY SET FOR LITHIUM IRON PHOSPHATE BATTERIES
OVERVIEW
Thank you for choosing the Bioenno Power SC-122430NE Series MPPT Maximum Power Point Tracking
Solar Charge Controller. Your product comes in 30A Maximum Load Current and is designed to be used
with Lithium Iron Phosphate (also commonly known as LiFePO4 or LFP) batteries and can be additionally
set for AGM and SLA. The controller uses our proprietary CC/CV Constant Current/ Constant Voltage
circuitry in conjunction with MPPT circuitry to ensure maximum compatibility and performance with the
Bioenno Power battery. Your Solar Charge Controller comes equipped with an LCD display with a visual
presentation of usage status for your solar system. This state-of-the-art unit boasting cutting edge
performance parameters, flexibility and modular capabilities with high aftermarket compatibility with
most batteries and panels represents the cutting edge for fixed installation applications.

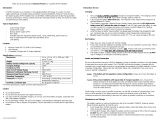
SPECIFICATIONS
Rated Voltage: 12V/24V
Maximum Solar Recharge Current (Charge Current to Battery!): 30A
Maximum Direct Load Current (LOAD Port Only!): 20A
Input Voltage Range: 75V*
Load Disconnect: 9.9V/11.2V/13.2V/14V (Depending on voltage of system)
Efficiency: ≤98% (In optimum conditions)
Operation Temperature: -31°F to 113°F (-35°C to 45°C)
Dimensions: 9.37 in. x 6.81 in. x 2.87 in. (238 mm x 173 mm x 73 mm)
Weight: 4.41 lbs. (2 kg)
*Note: This solar charge controller can accept any voltage under 75V but it will not boost the voltage if the panel voltage is less
than the battery voltage. Make sure your panel voltage is higher than your battery voltage for optimum performance.

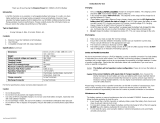
EXTERNAL COMPONENTS OVERVIEW

OPERATION: PROCEDURE ORDER/CABLE ATTACHMENT
1) Make sure the total rated current of the Solar Panel Array and Load are less than the rated
current of your Solar Charge Controller – in this case your maximum current is 30A
2) Make sure the polarity of the wiring from your Solar Panel Array, Battery and Load are
correctly matched to prevent the risk of a short circuit which may damage unprotected
devices
3) Mount you Solar Charge Controller to your selected surface and fasten it securely using
screws
4) Check whether the Battery voltage and Solar Panel Array voltage is within the requested
range
5) Loosen the screw terminals on your Solar Charge Controller – there are 6 screw terminals
total from left to right in this order: Solar Panel Positive, Solar Panel Negative, Battery
Positive, Battery Negative, Load Positive and Load Negative
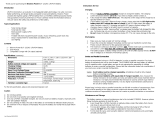
6) Connect the Battery’s input to your Solar Controller using the two screw terminals in the
middle marked with the Battery pictogram, you may need an adapter – attach the wiring
securely but do not over-torque your Solar Charge Controller’s terminals
7) Connect your Load to your Battery’s output using the Battery as the buffer between the
Solar Panel Array and the Load (we DO NOT recommend using the Load Terminals for most
uses) – attach the wiring securely but do not over-torque your Solar Charge Controller’s
terminals
8) Connect the Solar Panel Array to the Solar Panel Input on your Solar Charge Controller using
the two screw terminals on the left marked with the Solar Panel pictogram – attach the
wiring securely but do not over-torque your Solar Charge Controller’s terminals

MOUNTING
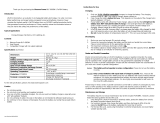
DISPLAY/NAVIGATION

INDICATOR/DISPLAY

INTERFACES

MODES

ERROR CODES

REFERENCE TABLES
Contact Us
Mail: Bioenno Power E-mail: sale@bioennopower.com
3657 W. McFadden Ave. Phone: +1 888 336-7864
Santa Ana, California 92704
-
 1
1
-
 2
2
-
 3
3
-
 4
4
-
 5
5
-
 6
6
-
 7
7
-
 8
8
-
 9
9
-
 10
10


Ask a question and I''ll find the answer in the document
Finding information in a document is now easier with AI
Related papers
-
 Bioenno Power SC-4850JUD User manual
-
 Bioenno Power BLF-1212AB User manual
-
 Bioenno Power BLF-3650AS User manual
-
 Bioenno Power BLF-1212AS User manual
-
 Bioenno Power BLF-0903W User manual
-
 Bioenno Power BLF-12300AS User manual
-
 Bioenno Power BLF-1215AS User manual
-
 Bioenno Power BLF-4830A User manual
-
 Bioenno Power BLF-2450AS User manual
-
 Bioenno Power BLF-2410A User manual


Other documents
-
Renogy STARTER200DR20 User manual
-
PowerTech MP3768 Owner's manual
-
Renogy RCC40RVRE-G1 Installation guide
-
-
Morningstar Prostar MPPT User manual
-
 SimpliPhi Outback AccESS Installation guide
-
Epsolar Tracer-3215RN User manual
-
-
Epever XTRA3415N User manual
-
Victron energy Inverter RS Smart Solar Owner's manual
