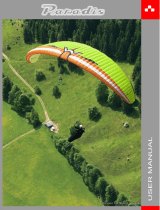
SUPAIR Step Light User manual

Type
User manual

This manual is also suitable for

SUPAIR Step Light is a high-performance paraglider designed for recreational pilots and sportsmen. It is EN B certified, meaning that it has good passive safety and forgiving flying characteristics. The Step Light is also lightweight and easy to handle, making it a good choice for pilots who want a wing that is both fun to fly and easy to transport.

Here are some of the features and possible use cases of the SUPAIR Step Light:

  • High performance: The Step Light is a high-performance wing that is capable of long-distance XC adventures. It has a good glide ratio and is easy to handle, making it a good choice for pilots who want to fly long distances.
User's manual
SUPAIR
34 rue Adrastée
Parc Altaïs
74650 Annecy - Chavanod
FRANCE
45°54.024’N / 06°04.725’E
EN-B+
English
Revision index : 21/08/2020
Glider user's manual | STEP Light
SUPAIR | STEP Light | page 2
Thank you for choosing to fly our STEP Light. We are delighted to have you
on-board to share our passion for paragliding.
SUPAIR has been designing, producing and selling accessories for free
flying activities since 1984. By choosing a SUPAIR product you benefit from
almost thirty years of expertise, innovation and customer care. We pride
ourselves for our work ethics and customer care.
We hope you will find this user's manual comprehensive, explicit and hope-
fully enjoyable as well. We advise you to read it carefully.
You will find the latest information and updates on this product on our
website : www.supair.com. If however you have any further questions, do
not hesitate to ask one of our dealers.
Naturally the entire SUPAIR team remains at your disposal at info@supair.
com
We wish you many safe and enjoyable flying hours and happy landings.
Team SUPAIR
Glider user's manual | STEP Light
SUPAIR | STEP Light | page 3
Introduction 4
Technical data 5
In-flight weight range 6
Equipment overview 7
Setting up the glider 8
Pre-flight preparation 10
Take-off 11
Flight characteristics 12
End of the flight 13
Specific practices 13
Fast descents 14
Flight incidents 16
Line layout 17
Materials 18
Measurements tables 19
Maintenance 27
Recycling 28
Eco-responsibility 28
Mandatory checks 28
Warranty 28
Disclaimer 28
Pilot's gear 28
Contents
Glider user's manual | STEP Light
SUPAIR | STEP Light | page 4
Introduction
Advice Caution ! Danger !!
The STEP Light meets all the requirements of the sport pilot whishing to fly under an accessible but yet performant and lightweight B glider.
It was designed for distance flying and will give the pilot maximum comfort to optimize long distance XC adventures.
The well though out design and choice of materials were guided by the same quality and longevity objectives.
The STEP Light glider is EN EN 926 -1 : 2015 & 926 - 2 : 2013 Class B. Certified.
This means that the paraglider has a good passive safety and forgiving flying characteristics. Gliders in this class show some resistance to depar-
tures from normal flight.
It also means that it requires a skill level and experience compatible with the wings in that category, which is the upper part of the B-class.
It can be used with most harnesses found on the market today. For better inflight comfort and sensations we will advise you to choose the SUPAIR
cross or hike & fly harness models.
After reading this manual we advise you to inflate & check your wing on a training hill first.
N.B. : The following three icons will help you to read this manual.
Glider user's manual | STEP Light
SUPAIR | STEP Light | page 5
Technical data
Glider STEP Light XS S M ML
Cell number 61 61 61 61
Flat surface area (m²) 21,5 24 26 28
Span (m) 11,07 11,7 12,17 12,63
Chord (m) 2,4 2,54 2,64 2,74
Flat Aspect Ratio 5,7 5,7 5,7 5,7
Projected surface area (m²) 18,106 20,21 21,90 23,58
Projected span (m) 8,68 9,17 9,55 9,91
Projected aspect ratio 4,16 4,16 4,16 4,16
Glider weight (kg) 3,35 3,66 3,9 4,2
In-flight weight range (kg) 55-75 70-90 80-100 90-110
Certification
Class B,
EN : 926-2 : 2013 & 926-1 : 2015,
LTF : 2. DV LuftGerPV §1, Nr 7 c
Aerobatics flying NO
Riser number 3+1
Speed system yes, travel: 130mm yes, travel: 170mm yes, travel: 170mm yes, travel: 150mm
Trimmer No
Other variable device No
Break travel at maximal weight (cm) 57 60 62 66
Harness dimensions used for certification
At minimum weight
* Length between main sus-
pension points:
40 ±2 cm
* Height of main suspension
points: 50 ±1 cm
* Length between main sus-
pension points:
40 ±2 cm
* Height of main suspension
points: 43 ±1 cm
* Length between main sus-
pension points:
40 ±2 cm
* Height of main suspension
points: 41 ±1 cm
* Length between main sus-
pension points:
43 ±2 cm
* Height of main suspension
points: 44 ±1 cm
Harness dimensions used for certification
At maximum weight
* Length between main sus-
pension points:
43 ±2 cm
* Height of main suspension
points: 40 ±1 cm
* Length between main sus-
pension points:
43 ±2 cm
* Height of main suspension
points: 43 ±1 cm
* Length between main sus-
pension points:
44 ±2 cm
* Height of main suspension
points: 43 ±1 cm
* Length between main sus-
pension points:
48 ±2 cm
* Height of main suspension
points: 43 ±1 cm
Glider user's manual | STEP Light
SUPAIR | STEP Light | page 6
Weight (kg) 55 60 65 70 75 80 85 90 95 100 105 110
STEP Light
XS
STEP Light
S
STEP Light
M
STEP Light
ML
In-flight weight range
In-flight weight range (kg)
Perfect In-flight weight range (kg) to optimize flight performances
OCEAN VOLCANO
Glider user's manual | STEP Light
SUPAIR | STEP Light | page 7
8
13
Riser hook-up loop
14
15
16
1Leading edge
2Trailing edge
3
Stabilizer
4
5
A riser
6
B riser
7
C riser
10
Brake handle
9
Brake line
11
12
Brake holder
«A» split riser (for Big Ears)
Inner Surface
Outer Surface
Pocket with repair kit.
Compact case
8
13
16
1
2
3
4
5
6
7
10
9
11
12
14
3
15
C-handling bar
Glider user's manual | STEP Light
SUPAIR | STEP Light | page 8
Setting up the glider
Opening the wing
Without twisting the risers, connect them to the harness connection loops using the
carabiners.
Check for the risers to be properly positioned and untwisted. The "A" risers must be
located at the front and facing the flight direction( see schematic ).
Lastly, check for the main carabiners to be fully closed and locked in place.
Risers
Carabiners
Harness:
Flight direction
Choosing an adapted harness.
Install the speed system according to your har-
ness manufacturer's recommendations.
Connect it to the wing using the split hooks.
Once the accelerator/speedbar is connected,
adjust its length according to your measurements.
For correct use, there must not be any tension at
the split-hook level when the accelerator/speed-
bar line is relaxed.
Choose a flat or lightly angled training hill without obstacles or wind.
Open your wing and arrange it in a crescent shape.
Check the fabric and the lines for any sign of wear or damage. Check for the links
connecting the lines to the risers to be fully closed. Identify, separate and arrange the
A,B and C risers as well as the brake lines neatly. Knots or tangles can not be present.
The STEP Light glider was certified EN B with a EN1651 & LTF certified harness and
can therefore be flown with most harnesses models found on the market today. We wil
advise you to choose a EN1651 and or LTF certified harness with a built-in dorsal pro-
tection system.
Connecting the wing to the harness.
Installing the speed system
Glider user's manual | STEP Light
SUPAIR | STEP Light | page 9
Brake line length fisherman's knot
Setting up the glider
Free travel adjustment at full speed
Be certain to maintain a small amount of slack in
the brake line. While flying with the accelerator on
(full speed) you must be able to pull the first centi-
mers of brake line towards you without having any
noticeable action on the trailing edge.
If you modify the original default setting, have it ins-
pected and approved by a professional before flying..
Brake line lengths are set at the factory to allow
optimal glider control. However, if they do not suit
you they can be adjusted to your liking.
We will advise using a fisherman's knot and keeping
your length changes to a minimum (approx 5cm
maximum).
Glider user's manual | STEP Light
SUPAIR | STEP Light | page 10
Pre-flight preparation
Unfold the glider and place it on its upper surface in an arc.
Separate the A,B,C risers and the brakes, be certain for the risers and lines not to have any twists or knots or be hooked to
a branch, stone etc...
The STEP Light wing was designed for for recreational pilots, sportsmen, who want a high performance glider, at the top
of the B-category.
To discover your new wing, we will advise you to practice groundhandling and conduct your first small flights in calm
conditions on a school training hill or a familiar site you are used to flying. We advise you to fly with the harness you are
used to flying
Caution !
It vital to conduct a thorough pre-flight check and have the harness properly connected to the glider prior each takeoff.
Run through the following procedure prior to each takeoff:
- Harness and carabiners do not show signs of wear and tear.
- The reserve parachute container is correctly closed and the handle is in the correct position
- Your personal settings have not been altered
- The wing is properly connected to the risers with all links securely tightened and locked in place.
- The risers are properly connected to the harness without any twist.
- You are securely connected to the harness with the leg and chest strap buckles closed, carabiners locked.
- Your are wearing your helmet and it is properly fastened.
Glider user's manual | STEP Light
SUPAIR | STEP Light | page 11
Take-off
Forward launch
To inflate the glider grab the upper ends of the "A" risers with your hands and progressively move foreward guiding the glider
upward. Once the wing is flying overhead, apply brakes as necessary, look up and perform a visual check before accelerating to take
off.
Reverse launch
If the wind speed is sustained and allows it, we will advise you to use a reversed inflation method more adapted to conduct a better
visual check. Face the wing and grab the "A" risers. With a light pull and adaptedrearwardwalking motion, inflate your wing. Once
the glider is stable overhead, turn around, look up once more to check that all is ok before running down the slope and taking off.
Note: In strong winds you may only need to use the inner A risers to inflate the wing.
Caution !
Before take-off, ensure for the airspace to be clear in front, around and above you with weather conditions matching your flying skill
level..
Inflating the STEP Light is easy without any hard point. The sequence demands and adaptation to the weather conditions of the day.
It is possible to inflate it forward or reversed.
Glider user's manual | STEP Light
SUPAIR | STEP Light | page 12
Flight characteristics
In flight, the STEP Light remains homogeneous even in turbulent air. The "Shark Nose" profile remains solid even when accelera-
ted. The turn is intuitive and easy to control.
Here are a few tips to take advantage of your STEP Light wing's performance in flight:
Flying «hands up» will provide the best glide ratio in nil wind.
Using the accelerator/speedbar.
«Hands up» speed or trim speed
Piloting without the toggles/brakes.
The STEP Light glider was designed to be stable throughout its speed range.
Accelerated, the wing becomes more sensitive to turbulence. If you sense a glider internal pressure decrease while pushing on the
accelerator; lessen the speedbar tension to bring it back to its neutral default setting while slightly pulling the C-riser handles and
prevent a possible leading edge frontal collapse.
If for whatever reason, the handles are no longer available, you will need to pilot your wing using the harness and "C" risers instead.
Beware not to overcontrol the glider to limit the risk of experiencing a stall.
To land, let your wing glide for as long as possible before applying a full braking motion. Braking using the "C" risers is not as effi-
cient as using the handles and could bring a more energetic landing than normal.
Turns To make your glider turn efficiently, and only after checking that the space below you is clear and safe to land on, shift your weight
toward the inside of the turn and progressively pull your brake handle on the same side until the desired turning angle is reached.
The turning speed and radius can also be adjusted by using the other brake handle controlling the upper half side of the wing. When
flying at low speed, begin your turn by raising your hand on the upper and external side of the turn to prevent a possible spin from
occuring. The STEP Light turns very well with handle input, and does not require big weightshifting in the harness.
Piloting with the «C».
Piloting with the "C" is used for accelerated or non-accelerated transitions or, in some cases, for glding into a thermal, making the
most of the wing's performance.
Piloting with the C risers offers a better wing feedback, and is ideal to anticipate the piloting moves.
This method also optimizes the performance of your wing: using a brake handle input to counteract the turbulence strains the
wing's profile and deteriorates its performance.
By using the "C" an effective controlled action is obtained while maintaining a "clean" profile and therefore a better performance.
To steer the glider with the "C" risers, keep the brake handles in hand, and use those mounted on the risers to pilot the wing.
This technique brings a true performance gain, very effective, especially coupled with the accelerator during transition.
Glider user's manual | STEP Light
SUPAIR | STEP Light | page 13
Specific practices
End of the flight
The STEP Light wing can be towed up. Fly only with certified gear operated by qualified personal and only after taking a towing clinic.
The towing force must correspond to the weight of the equipment, and the pulling sequence can only start when the wing is fully
inflated and stable over the pilot's head.
Towing
Your wing was not designed for aerobatic maneuvers. We highly discourage its use for this type of flying.
Repeated practice of said exercise exceeding 4xG (or 2xG if they are asymmetrical) will cause premature aging of your glider and is
to be avoided. “SAT”-type maneuvers are the most damaging to your equipment.
Aerobatics
Be certain to always have enough altitude for a safe landing before approaching the chosen Landing Zone. Never make aggressive
maneuvers close to the ground. Always land into the wind ( upwind ), standing up and ready to run to a stop if necessary. Make your
landing approach with maximum air speed if possible depending on the weather conditions of the moment, then progressively brake
to slow the glider to a final touchdown. Beware not to brake too much, too soon and too rapidly to prevent a possible stall and hard
landing.
In case of a landing in sustained higher wind speeds, you will need to quickly turnaround, face the wing, move forward while braking
down symmetrically. You can equally pull the "C" risers down to deflate the glider and bring it to the ground.
Landing
Fold each side of your wing in an accordion-like shape. Stack-up the leading edge reinforcements on top of one another.
Bring one side of the glider over the other while keeping the leading edge reinforcements flat. Fold the wing on itself, starting from
the leading edge toward the trailing edge. During the entire packing procedure, avoid as much as possible bending the leading
edge's reinforcements.
Folding
The STEP Light wing was not designed for tandem flying.
Tandem
Glider user's manual | STEP Light
SUPAIR | STEP Light | page 14
FAST DESCENTS
The following techniques should only be used in emergencies and require prior training to be safely conducted. Appropriate analysis
and anticipation of the conditions will often prevent the need to use fast descent techniques. We will advise you to practice in still air
and preferably above water.
Big Ears Pulling "ears" increases the glider sink rate
along with the angle of attack. We do not recom-
mend the use of big ears close to the ground
In order to pull "ears", grab the specific riser
(outer "A" riser) while keeping the handles in
hands and lowering them until the win tips col-
lapse.
Once the "Ears" are folded and stabilized, we will
recommend using the accelerator/speedbar to
recover your initial horizontal speed.
To reopen the "Ears", bring the accelerator/speedbar back to its neutral default setting, then let go the risers symmetrically. You can
pump the brake handles on either side of the wing to facilitate its reopening sequence.
Glider user's manual | STEP Light
SUPAIR | STEP Light | page 15
Fast descents
360° spiral dives
To begin a spiral dive make sure the air space is clear around and below you, then lean toward the chosen side while gradually
applying brake handle pressure on that side. The wing will gradually accelerate before entering a full spiral dive. You may use the
outer/upper handle to manage your sink rate.
In order to exit the rotation, get back to a neutral (centered) position in the harness and gradually release the inside brake. You need
to keep the glider in a turn as it decelerates in order to limit the surge while exiting the spiral. If your exit is too radical the glider
will surge aggressively and experience a substantial dive to be immediately controlled. Gradually slowing down the rotation with the
outside and upper brake will allow you to exit the spiral in a controlled manner.
DANGER: This manœuvre places a lot of stress on the glider. The high speed and "G" force might be disorientating and, in extreme
cases, cause you a temporary loss of consciousness. Practice this maneuver gradually with available space around and below you.
This technique is usually physically demanding and will lead to a deep stall configuration and therefore wing control will be dimi-
nished.
Loosing altitude using the "B" risers is done by grabbing the risers at the metal (or soft) links level and applying a symmetrical
downward vertical pull until the wing's profile is deformed. This maneuver can be maintained to increase the wing's sink rate.
To recover a normal flying configuration, bring your hands up quickly to the "A" risers red markers, then let go of the "B" risers alto-
gether. The wing will experience a moderate surge forward which will need to be instantly neutralized and controlled.
B-line stall
Conforming to the B-class of EN-926-2, the STEP LIGHT glider does not show any tendency to stay in a locked spiral configuration
and will return by itself to a normal flying angle in less than three full rotations when the brakes are brought back up.
To prevent excessive stress on the glider we do not recommend combining spiral dives with "Ears".
Glider user's manual | STEP Light
SUPAIR | STEP Light | page 16
Flight incidents
Parachutal stall
Spin / asymetric stall
Even though this configuration only rarely occurs, you may find yourself in a situation called "parachutal stall " where the glider des-
cends vertically with no forward motion. If it happens, release the break handles fully and trims symmetrically. You might also need
to push forward on the "A" risers. Make sure you regained a normal flight configuration before proceeding with break handles usage
again.
Stall
A stall does not happen by itself even in turbulent air. In the event of a cravat (deflated part of the wing tucked in the lines) from
which you can't recover by pumping the concerned side's brake, you might have to stall the glider.
We do not recommend using this technique unless you have proper training and sufficient altitude.
A spin will only occur because of a piloting error. If so, release the brake fully on the stalled side and be certain to keep the glider in
check during the ensuing dive and reopening sequence.
Asymmetric collapses
Any paraglider may occasionally collapse due to turbulence or a piloting error. In the event of an asymmetric collapse your priority
must be to stay clear of the terrain and regain level flight.
In the event of an asymmetrical collapse induced by turbulence or purposely by the pilot, we want to remind you that the best course
of action to take is:
- Shift all your weight onto the open side of the wing.
- If necessary, slightly brake on the open side of the wing to further prevent it from rotating.
- Once the wing is balanced and stabilized, ( straight flight ), if the folded side does not spontaneously reopen, give large up and down
pumping motions until the collapsed glider side is fully reopened.
- Repeat if necessary until full reinflation is achieved. In the event of a “cravat” (where the wing tip is snagged between the lines) you
may pull on the tangled line to release the wingtip.
Front collapses
During a front collapse according to the certification standard the glider is designed to reopen on its own.
In the event of a frontal collapse induced by turbulence or purposely by the pilot, we want to remind you that the best course of
action to take is:
- Brakes must be fully released during the collapse. If the collapse is purposely induced by the pilot, we recommend that brake
handles be clipped back on the stoppers before collapsing the glider.
- Grab the brakes, arms up. Wait for the wing to reopen and come back overhead – do not keep the brake pressure on, if the glider
falls behind you – risk of stalling.
- Dampen the following surge by using the brakes proportionally and symmetrically once the wing has flies again.
Glider user's manual | STEP Light
SUPAIR | STEP Light | page 17
Line layout
Glider user's manual | STEP Light
SUPAIR | STEP Light | page 18
Materials
Fabrics Manufacturer Reference
Outer surface (main) Porcher Sport Skytex 27gr Classic 2 - 70000 E3H
Inner Surface Porcher Sport Skytex 27gr Classic 70000 E71
Supported ribs Porcher Sport Skytex 32 gr Hard finish - 700032E4D
Compression straps and D ribs Porcher Sport Skytex 27gr Hard finish - 70000 E91 &
Skytex 32gr Hard finish - 70032 E4D
Unsupported ribs Porcher Sport Skytex 27gr Hard finish - 70000 E91
Rib reinforcements Porcher Sport SR 170
Main lines Manufacturer Reference
Top cascade Edelrid 8000U-90/70/70
Upper middle cascade Edelrid 8000U-90/70
Lower cascade Edelrid 8000U-230/190/130/90
Stabilo lines Manufacturer Reference
Top cascade Edelrid 8000U-50
Middle cascade Edelrid 8000U-50
Lower cascade Edelrid / Liros 8000U-50 / PPSL 70
Brake lines Manufacturer Reference
Top cascade Edelrid 8000U-50
Upper middle cascade Edelrid 8000U-70
ILower middle cascade Edelrid 8000U-90
Lower cascade Edelrid 8000U-190 / N10_300
Mailons SUPAIR SUPAIR Dyneema softlinks
Glider user's manual | STEP Light
SUPAIR | STEP Light | page 19
Measurements tables
STEP Light glider size XS
Line Check Maintenance Sheet
Measurements made from the base of the lines to the base of the wing, WITH risers and soft links, under a 5 kg tension.
A B C D Brake
Manual Tested
sample
Diff Manual Tested
sample
Diff Manual Tested
sample
Diff Manual Tested
sample
Diff Manual Tested
sample
Diff
Center 16735 6740 56653 6655 26788 6782 -6 6843 6835 -8 7105 7109 4
26650 6658 86568 6565 -3 6699 6696 -3 6753 6746 -7 6871 6872 1
36681 6684 36599 6594 -5 6723 6724 16773 6767 -6 6683 6681 -2
46625 6629 46542 6538 -4 6655 6655 06701 6697 -4 6587 6585 -2
56514 6512 -2 6435 6437 26540 6537 -3 6582 6578 -4 6412 6409 -3
66516 6514 -2 6440 6439 -1 6534 6526 -8 6571 6566 -5 6270 6267 -3
76381 6384 36329 6325 -4 6400 6393 -7 6212 6209 -3
86248 6240 -8 6213 6209 -4 6276 6272 -4 6242 6249 7
96189 6190 16179 6171 -8 6230 6237 76106 6103 -3
Stabilizers 10 5907 5899 -8 5885 5877 -8 5930 5925 -5 6058 6054 -4
Wingtip 11 5797 5804 75821 5815 -6 5876 5870 -6 6028 6028 0
Tolerance +/- 10mm
Tolerance +/- 5mm
Trim Accelerated
Manual Tested
sample
Diff Manual Tested
sample
Diff
A505 505 0375 375 0
A' 505 504 -1 375 374 -1
B505 503 -2 418 415 -3
C505 506 1505 506 1
Risers length,
Measured with
carabiner.
Riser length measurement (mm) table
Glider user's manual | STEP Light
SUPAIR | STEP Light | page 20
Measurements tables
STEP Light glider size XS
Tolérence +/- 10mm •Lines lenghts under 5 kg of tension
*the cut value may differ according to the type of stitching/machine and the thread used **the sewn value is the final length of the line, from one loop end to the other
Lines individual lenghts
A LINES B LINES C LINES D LINES STABILO LINES BRAKE LINES
NAME CUT* SEWN** NAME CUT* SEWN** NAME CUT* SEWN** NAME CUT* SEWN** NAME CUT* SEWN** NAME CUT* SEWN**
AR1 4305 4005 BR1 4255 3955 CR1 4378 4078 STRis 525 305 BRMain 1644 1344
AR2 4529 4229 BR2 4467 4167 CR2 4565 4265 STmain 4509 4289 BRML 1477 1257
AR3 4641 4341 BR3 4622 4322 CR3 4685 4385
CM1 2057 1837 STMA 691 471 BRM1 1921 1701
CM2 1982 1762 STMB 708 488 BRM2 2250 2030
CM3 2002 1782 BRM3 2706 2486
CM4 1791 1571
CM5 1697 1477
CM6 1695 1475
BRMU1 1824 1604
BRMU2 1566 1346
BRMU3 1112 892
BRMU4 1133 913
a1 2493 2273 b1 2461 2241 c1 668 448 721 501 486 sta 493 273 br1 1508 1288
a2 2408 2188 b2 2376 2156 c2 654 434 706 486 433 stb 500 280 br2 1274 1054
a3 2439 2219 b3 2407 2187 c3 658 438 706 486 417 stc 555 335 br3 1344 1124
a4 2159 1939 b4 2138 1918 c4 607 387 651 431 404 br4 1248 1028
a5 2048 1828 b5 2031 1811 c5 586 366 626 406 364 br5 1198 978
a6 2050 1830 b6 2036 1816 c6 582 362 617 397 391 br6 1056 836
a7 1804 1584 b7 1771 1551 c7 1772 1552 br7 977 757
a8 1671 1451 b8 1655 1435 c8 1648 1428 br8 1007 787
a9 1607 1387 b9 1616 1396 c9 1602 1382 br9 1307 1087
a10 605 385 b10 583 363 c10 611 391 br10 1259 1039
br11 1229 1009
  • Page 1 1
  • Page 2 2
  • Page 3 3
  • Page 4 4
  • Page 5 5
  • Page 6 6
  • Page 7 7
  • Page 8 8
  • Page 9 9
  • Page 10 10
  • Page 11 11
  • Page 12 12
  • Page 13 13
  • Page 14 14
  • Page 15 15
  • Page 16 16
  • Page 17 17
  • Page 18 18
  • Page 19 19
  • Page 20 20
  • Page 21 21
  • Page 22 22
  • Page 23 23
  • Page 24 24
  • Page 25 25
  • Page 26 26
  • Page 27 27
  • Page 28 28
  • Page 29 29

SUPAIR Step Light User manual

Type
User manual
This manual is also suitable for

SUPAIR Step Light is a high-performance paraglider designed for recreational pilots and sportsmen. It is EN B certified, meaning that it has good passive safety and forgiving flying characteristics. The Step Light is also lightweight and easy to handle, making it a good choice for pilots who want a wing that is both fun to fly and easy to transport.

Here are some of the features and possible use cases of the SUPAIR Step Light:

  • High performance: The Step Light is a high-performance wing that is capable of long-distance XC adventures. It has a good glide ratio and is easy to handle, making it a good choice for pilots who want to fly long distances.

Ask a question and I''ll find the answer in the document

Finding information in a document is now easier with AI