Page is loading ...

Glider user's manual | SAVAGE
SUPAIR | SAVAGE | page 1
User’s manual
SUPAIR
34 rue Adrastée
Parc Altaïs
74650 Annecy - Chavanod
FRANCE
45°54.024’N / 06°04.725’E
English
Revision index : 06/08/2020
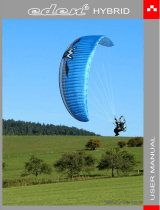
Photo : Guy Bolton

Glider user's manual | SAVAGE
SUPAIR | SAVAGE | page 2
Thank you for choosing to fly our SAVAGE.
We are delighted to have you on-board to
share our passion for paragliding.
SUPAIR has been designing, producing and
selling accessories for free flying activities
since 1984. By choosing a SUPAIR product
you benefit from almost thirty years of ex-
pertise, innovation and customer care. We
pride ourselves on our work ethics and cus-
tomer care.
We hope you will find this user's manual
comprehensive, explicit and hopefully en-
joyable as well. We advise you to read it
carefully.
You will find the latest information and
updates on this product on our website :
www.supair.com. If however you have any
further questions, do not hesitate to ask
one of our dealers.
Naturally the entire SUPAIR team remains
at your disposal at info@supair.com
We wish you many safe and enjoyable flying
hours and happy landings.
Team SUPAIR
Photo : Guy Bolton

Glider user's manual | SAVAGE
SUPAIR | SAVAGE | page 3
Introduction 4
Technical data 5
In-flight weight range 6
Equipment overview 7
Setting up the glider 8
Pre-flight preparation 10
Take-off 11
Flight characteristics 12
End of the flight 13
Specific use 13
Fast descents 14
Flight incidents 16
Line layout 17
Materials 18
Measurements tables 19
Maintenance 27
Mandatory checks 28
Pilot's gear 28
Warranty 29
Disclaimer 29
Recycling 29
Eco-responsibility 29
Contents

Glider user's manual | SAVAGE
SUPAIR | SAVAGE | page 4
Introduction
Advice Caution ! Danger !!
The wing SAVAGE meets all the requirements of the sport pilot whishing to fly under an accessible but yet efficient and lightweight C
glider. It was designed for high performance flying and will give the pilot maximum comfort and optimized feedback for long distance XC
adventures.
The SAVAGE glider is EN 926 -1 : 2006 & 926 - 2 : 2013 Class C. Certified.
This means that the paraglider in spite of good passive safety can react dynamically to over-piloting or in turbulence, and will have to be
handled accordingly to stabilize it.
It also means that it requires a skill level and experience compatible with the wings in that category.
It can be used with most harnesses found on the market today. For better inflight comfort and feeling we will advise you to choose the
SUPAIR XC harness models.
After reading this manual we advise you to inflate & check your wing on a training hill first.
N.B. : The following three icons will help you to read this manual.

Glider user's manual | SAVAGE
SUPAIR | SAVAGE | page 5
Technical data
Glider SAVAGE XS S M ML
Cell number 67 67 67 67
Flat surface area (m²) 22.5 24.5 26 27.5
Span (m) 12.09 12.62 13 13.37
Chord (m) 2.32 2.42 2.49 2.56
Flat Aspect Ratio 6.5 6.5 6.5 6.5
Projected surface area (m²) 18.88 20.57 21.82 23.08
Projected span (m) 9.37 9.78 10.07 10.36
Projected aspect ratio 4.65 4.65 4.65 4.65
Glider weight (kg) 3.6 3.8 4 4.3
In-flight weight range (kg) 65-85 75-95 85-105 95-115
Certification
Class C,
EN : 926-2 : 2013 & 926-1 : 2015,
LTF : 2. DV LuftGerPV §1, Nr 7 c
Aerobatics flying NO
Riser number 3+1 (B on Dyneema string)
Speed system yes, travel: 150mm yes, travel: 160mm yes, travel: 160mm yes, travel: 170mm
Trimmer No
Other variable device No
Break travel at maximal weight (cm) 59 62 65 68
Harness dimensions used for certification
At minimum weight
* Length between main sus-
pension points:
40 ±2 cm
* Height of main suspension
points: 40 ±1 cm
* Length between main sus-
pension points:
40 ±2 cm
* Height of main suspension
points: 43 ±1 cm
* Length between main sus-
pension points:
40 ±2 cm
* Height of main suspension
points: 41 ±1 cm
* Length between main sus-
pension points:
43 ±2 cm
* Height of main suspension
points: 44 ±1 cm
Harness dimensions used for certification
At maximum weight
* Length between main sus-
pension points:
43 ±2 cm
* Height of main suspension
points: 40 ±1 cm
* Length between main sus-
pension points:
43 ±2 cm
* Height of main suspension
points: 43 ±1 cm
* Length between main sus-
pension points:
44 ±2 cm
* Height of main suspension
points: 43 ±1 cm
* Length between main sus-
pension points:
48 ±2 cm
* Height of main suspension
points: 43 ±1 cm

Glider user's manual | SAVAGE
SUPAIR | SAVAGE | page 6
In-flight weight range
Weight (kg) 65 70 75 80 85 90 95 100 105 110 115
SAVAGE XS
SAVAGE S
SAVAGE M
SAVAGE ML
In-flight weight range (kg)
Perfect In-flight weight range (kg) to optimize flight performances
EARTH FIRE POLAR

Glider user's manual | SAVAGE
SUPAIR | SAVAGE | page 7
8
13
Riser hook-up loop
14
1Leading edge
2Trailing edge
3
Stabilizer
4
5
A riser
6
B riser
7
C riser
10
Brake handle
9
Brake line
11
12
Brake holder
«A» split riser (for Big Ears)
Inner surface
Outer surface
TREK 130 lt. capacity carrying rucksack
Speedbar Split-hook
COMPACT CASE
16
17 Pocket with repair kit
1
2
3
4
5
3
15
16
17
14
8
13
15
6
7
10
9
11
12

Glider user's manual | SAVAGE
SUPAIR | SAVAGE | page 8
Setting up the glider
Opening the wing
Without twisting the risers, connect them to the harness connection loops
using the carabiners. Check for the risers to be properly positioned and un-
twisted. The "A" risers must be located at the front and facing the flight direc-
tion( see schematic ). Lastly, check for the main carabiners to be fully closed
and locked in place.
Risers
Carabiners Flight direction
Choosing an adapted harness
Install the speed system according to your harness manufacturer's
recommendations. Connect it to the wing using the split hooks.
Once the accelerator/speedbar is connected, adjust its length accor-
ding to your measurements. For correct use, there must not be any
tension on the split-hook level when the accelerator/speedbar is not
activated by the pilot.
Choose a flat or lightly angled training hill without obstacles or wind.
Open your wing and arrange it in a crescent shape.
Check the fabric and the lines for any sign of wear or damage.
Check for the links connecting the lines to the risers to be fully closed.
Identify, separate and arrange the A,B and C risers as well as the brake lines neatly. Knots or tangles
can not be present.
The SAVAGE glider was certified EN C with a EN1651 & LTF certified harness and can therefore be flown
with most harnesses models found on the market today.
We wil advise you to choose a EN1651 and or LTF certified harness with a built-in back protection sys-
tem.
Connecting the wing to the harness
Installing the speed system

Glider user's manual | SAVAGE
SUPAIR | SAVAGE | page 9
Brake line length Fisherman's knot
Setting up the glider
Free brake line travel adjustment
Be certain to maintain a small amount of slack in
the brake line. While flying with the accelerator on
(full speed) you must be able to pull the first centi-
mers of brake line towards you without having any
noticeable action on the trailing edge.
If you modify the original default setting, have it ins-
pected and approved by a professional before flying..
Brake line lengths are set at the factory to allow
optimal glider control. However, if they do not suit
you they can be adjusted to your liking.
We will advise using a fisherman's knot and to keep
your length changes to a minimum (approx 5cm
maximum).

Glider user's manual | SAVAGE
SUPAIR | SAVAGE | page 10
Pre-flight preparation
Unfold the glider and place it on its upper surface in an arc.
Separate the A,B,C risers and the brakes, be certain for the risers and lines not to have any twists or knots or be hooked to a branch,
stone etc...
The SAVAGE glider was designed for cross-country pilots wishing to fly far and fast. The glider itself gives a sporty feeling similar to
the one fed by competition gliders within a much more accessible EN-C package. It is lightweight, ideal for bivouac adventures.
To discover your new wing, we will advise you to conduct your first small flights in calm conditions on a school training hill or a fami-
liar site you are used to flying with your own harness.
Caution !
It vital to conduct a thorough pre-flight check and have the harness properly connected to the glider prior to each takeoff.
Run through the following procedure prior to each takeoff :
- Harness and carabiners do not show signs of wear and tear.
- The reserve parachute container is correctly closed and the handle is in the correct position
- Your personal settings have not been altered
- The wing is properly connected to the risers with all links securely tightened and locked in place.
- The risers are properly connected to the harness without any twist.
- You are securely connected to the harness with the leg and chest strap buckles closed, carabiners locked.
- Your are wearing your helmet and it is properly fastened.

Glider user's manual | SAVAGE
SUPAIR | SAVAGE | page 11
Take-off
Before the first flight, practice ground-handling to become familiar with your new glider. It is possible to inflate it in a front- or rever-
sed-launch method.
Inflating the SAVAGE is easy without any hard point. The sequence demands an adaptation to the weather conditions of the day.
Forward launch
To inflate the glider grab the upper ends of the "A" risers with your hands and progressively move foreward guiding the glider
upward. Once the wing is flying overhead, apply brakes as necessary, look up and perform a visual check before accelerating to take
off.
Reverse launch
If the wind speed is sustained and allows it, we will advise you to use a reversed inflation method more adapted to conduct a better
visual check. Face the wing and grab the "A" risers. With a light pull and adaptedrearwardwalking motion, inflate your wing. Once
the glider is stable overhead, turn around, look up once more to check that all is ok before running down the slope and taking off.
Note: In strong winds you may only need to use the inner A risers to inflate the wing.
Caution !
Before take-off, ensure for the airspace to be clear in front, around and above you with weather conditions matching your flying skill
level..

Glider user's manual | SAVAGE
SUPAIR | SAVAGE | page 12
Flight characteristics
In flight, the SAVAGE remains homogeneous even in turbulent air. The "Shark Nose" profile remains solid even when accelerated. The turn is
intuitive and easy to control.
Here are a few tips to take advantage of your SAVAGE's performance in flight:
Flying «hands up» will provide the best glide ratio in nil wind.
Using the speedbar
«Hands up» speed or trim speed
Piloting without the brake handles
According to the EN C norm, the SAVAGE glider was designed to be stable throughout its speed range.
Accelerated, the wing becomes more sensitive to turbulence. If you feel a glider internal pressure decrease while pushing on the
accelerator; lessen the speedbar tension to bring it back to its neutral default setting while pulling the C-riser handles and prevent a possible
leading edge frontal collapse.
Turns
To make your glider turn efficiently, and only after checking that the space below you is clear and safe to land on, shift your weight toward the
inside of the turn and progressively pull your brake handle on the same side until the desired turning angle is reached. The turning speed and
radius can also be adjusted by using the other brake handle controlling the upper half side of the wing. When flying at low speed, begin your turn
by raising your hand on the upper and external side of the turn to prevent a possible flat-turn or twisted turn on the vertical axis. The SAVAGE
turns very well with handle input, and does not require big weigh-shifting in the harness.
When flying at low speed, begin your turn by raising your hand on the upper and external side of the turn to prevent a possible spin from occu-
ring.
If for whatever reason, the brake handles are no longer available, you will need to pilot your wing using the harness and "C" risers
instead. Beware not to overcontrol the glider to limit the risk of experiencing a stall.
To land, let your wing glide for as long as possible before applying a full braking motion. Braking using the "C" risers is not as efficient as using
the handles and could lead to a more energetic landing than normal.
Piloting with the « C »
Piloting with the "C" is used for accelerated or non-accelerated transitions or, in some cases, for gliding into a thermal, making the most of the
wing's performance.
Piloting with the C risers offers a better wing feedback, and is ideal to anticipate the piloting moves.
This method also optimizes the performance of your wing: using brake input to counteract the turbulence strains the wing's profile and deterio-
rates its performance.
By using the "C" an effective controlled action is obtained while maintaining a "clean" profile and therefore a better performance.
To steer the glider with the "C" risers, keep the brake handles in hand, and use the bars mounted on the risers to pilot the wing.
This technique brings a true performance gain, very effective, especially coupled with the accelerator during transition.

Glider user's manual | SAVAGE
SUPAIR | SAVAGE | page 13
Specific use
End of the flight
The SAVAGE can be towed up. Fly only with certified gear operated by qualified personal and only after taking a towing clinic. The
towing force must correspond to the weight of the equipment, and the pulling sequence can only start when the wing is fully inflated
and stable over the pilot's head.
Towing
Your wing was not designed for aerobatic maneuvers. We highly discourage its use for this type of flying.
Repeated practice of said exercise exceeding 4xG (or 2xG if they are asymmetrical) will cause premature aging of your glider and is
to be avoided. “SAT” maneuvers are the most damaging to your equipment.
Aerobatics
Be certain to always have enough altitude for a safe landing before approaching the chosen Landing Zone. Never make aggressive
maneuvers close to the ground. Always land into the wind ( upwind ), standing up and ready to run to a stop if necessary. Make your
landing approach with maximum air speed if possible depending on the weather conditions of the moment, then progressively brake
to slow the glider to a final touchdown. Beware not to brake too much, too soon and too rapidly to prevent a possible stall and hard
landing.
In case of a landing in sustained higher wind speeds, you will need to quickly turnaround, face the wing, move forward while braking
down symmetrically. You can as well pull the "C" risers down to deflate the glider and bring it to the ground.
Landing
Fold each side of your wing in an accordion-like shape. Stack-up the leading edge reinforcements on top of one another.
Bring one side of the glider over the other while keeping the leading edge reinforcements flat. Fold the wing on itself, starting from
the leading edge toward the trailing edge. During the entire packing procedure, avoid as much as possible bending the leading
edge's reinforcements.
Folding
The SAVAGE wing was not designed for tandem flying.
Tandem

Glider user's manual | SAVAGE
SUPAIR | SAVAGE | page 14
Fast descents
The following techniques should only be used in emergencies and require prior training to be safely conducted. Appropriate analysis and anticipation
of the conditions will often prevent the need to use fast descent techniques. We will advise you to practice in still air and preferably above water.
Big Ears
Pulling "ears" increases the glider sink rate along with the angle of at-
tack. We do not recommend the use of big ears close to the ground
In order to pull "ears", grab the specific riser (outer "A" riser) while kee-
ping the brake handles around your wrists and lowering them until the
wingtips collapse.
Once the "Ears" are folded and stabilized, we recommend using the
speedbar to recover your initial horizontal horizontal speed.
To reopen the "Ears", bring the speedbar back to its neutral default set-
ting, then let go the risers symmetrically. You can pump the brake handles
on either side of the wing to facilitate its reopening sequence.

Glider user's manual | SAVAGE
SUPAIR | SAVAGE | page 15
Fast descents
360° spiral dives
To begin a spiral dive make sure the air space is clear around and below you, then lean toward the chosen side while gradually
applying brake handle pressure on that side. The wing will gradually accelerate before entering a full spiral dive. You may use the
outer upper handle to manage your sink rate.
In order to exit the rotation, get back to a neutral (centered) position in the harness and gradually release the inside brake. You need
to keep the glider in a turn as it decelerates in order to limit the surge while exiting the spiral. If your exit is too radical the glider
will surge aggressively and experience a substantial dive to be immediately controlled. Gradually slowing down the rotation with the
outside and upper brake will allow you to exit the spiral in a controlled manner.
DANGER : This maneuver places a lot of stress on the glider. The high speed and "G" force might be disorientating and, in extreme
cases, cause you a temporary loss of consciousness. Practice this maneuver gradually with ample space around and below you.
This technique is usually physically demanding and will lead to a deep stall configuration and therefore wing control will be dimi-
nished.
Loosing altitude using the "B" risers is done by grabbing the risers at the metal (or soft) links level and applying a symmetrical
downward vertical pull until the wing's profile is deformed. This maneuver can be maintained to increase the wing's sink rate.
To regain a normal flying configuration, bring your hands up progressively to the "A" risers red markers, then let go of the "B" risers
altogether. The wing will experience a moderate surge forward which will need to be instantly neutralized and controlled.
B-line stall
Conforming to the C-class of EN-926-2, the SAVAGE glider does not show any tendency to stay in a locked spiral configuration and
will return by itself to a normal flying angle in less than four full rotations when the brakes are brought back up.
To avoid excessive stress on the glider we do not recommend combining spiral dives with "Ears".

Glider user's manual | SAVAGE
SUPAIR | SAVAGE | page 16
Flight incidents
Any paraglider may occasionally collapse due to turbulence or a piloting error. In the event of an asymmetric collapse your priority must be to
stay clear of the terrain and regain level flight.
In the event of an asymmetrical collapse induced by turbulence or purposely by the pilot, we want to remind you that the best course of action to
take is:
- Shift all your weight onto the open side of the wing.
- If necessary, slightly brake on the open side of the wing to further prevent it from rotating.
- Once the wing is balanced and stabilized, ( straight flight ), if the folded side does not spontaneously reopen, give ample up and down pumping
motions until the collapsed glider side is fully reopened.
- Repeat if necessary until full reinflation is achieved. In the event of a “cravat” (where the wing tip is snagged between the lines) you may pull on
the tangled line to release the wingtip.
Parachutal stall
Spin / asymetric stall
Even though this configuration only rarely occurs, you may find yourself in a situation called "parachutal stall " where the glider descends verti-
cally with no forward motion. If it happens, release the brakes handle fully and trims symmetrically and push the speed bar. You might also need
to push forward on the "A" risers. Make sure you regained a normal flight configuration before proceeding with brake handle usage again.
A spin will only occur because of a piloting error. If so, release the brake fully on the stalled side and be certain to keep the glider in check during
the ensuing dive and reopening sequence.
Asymmetric collapses
Front collapses
During a front collapse according to the certification standard the glider is designed to reopen on its own.
In the event of a frontal collapse induced by turbulence or purposely by the pilot, we want to remind you that the best course of action to take is:
- Brakes must be fully released during the collapse. If the collapse is purposely induced by the pilot, we recommend that brake handles be clip-
ped back on the stoppers before collapsing the glider.
- Grab the brakes, arms up. Wait for the wing to reopen and come back overhead – do not keep the brake pressure on, if the glider falls behind
you – risk of stalling.
- Dampen the following surge by using the brakes proportionally and symmetrically once the wing has flies again.
A stall does not happen by itself even in turbulent air. In the event of a cravat (deflated part of the wing tucked in the lines) from which you can't
recover by pumping the concerned side's brake, you might have to stall the glider.
We do not recommend using this technique unless you have proper training and sufficient altitude.
Stall

Glider user's manual | SAVAGE
SUPAIR | SAVAGE | page 17
Line layout

Glider user's manual | SAVAGE
SUPAIR | SAVAGE | page 18
Materials
Fabrics Producer Reference
Outer surface Porcher Sport Skytex 27 Classic 2 - 70000E3H // Skytex 32 Universal - 70032E3W
Inner Surface Porcher Sport Skytex 27 Classic - 70000E71
Supported ribs Porcher Sport Skytex 32 Hard - 70032E4D
Compression straps and D ribs Porcher Sport Skytex 32 Hard - 70032 E4D
Unsupported ribs Porcher Sport Skytex 27 Hard - 70000E91
Rib reinforcements Porcher Sport Sticky Skytex
Main lines Producer Reference
Top cascade Edelrid 8000U-050 /8000U-070 / A-9200-030
Upper middle cascade Edelrid 8000U-050
Lower middle cascade Edelrid 8000U-130 / 8000U-090 / 8000U-070 / 8000U-050
Lower cascade Edelrid 8000U-230 / 8000U-130
Stabilo lines Producer Reference
Top cascade Edelrid A9200-30
Middle cascade Edelrid A9200-30 / 8000U-050
Lower cascade Liros DSL 70
Brake lines Producer Reference
Top cascade Liros // Edelrid DC60 // A-9200-30
Upper middle cascade Liros // Edelrid DC60
Lower middle cascade Edelrid 8000U-90 // 8000U-190
Lower cascade Edelrid A 7450 X - 240-041
Mailons Supair Soft link dyneema

Glider user's manual | SAVAGE
SUPAIR | SAVAGE | page 19
Measurements tables
SAVAGE glider size XS
Line Check Maintenance Sheet
Measurements made from the base of the lines to the base of the wing, WITH risers and soft links, under a 5 kg tension.
A B C D Brake
Manual Tested
sample
Diff Manual Tested
sample
Diff Manual Tested
sample
Diff Manual Tested
sample
Diff Manual Tested
sample
Diff
Center 17509 7515 67422 7427 57619 7610 -9 7666 7662 -4 7752 7751 -1
27412 7417 57324 7328 47505 7498 -7 7555 7550 -5 7495 7491 -4
37384 7391 77295 7301 67401 7397 -4 7448 7445 -3 7312 7303 -9
47446 7452 67355 7361 67387 7389 27426 7424 -2 7255 7247 -8
57344 7354 10 7256 7259 37406 7406 07444 7451 77080 7083 3
67241 7249 87157 7167 10 7473 7466 -7 7505 7502 -3 6960 6967 7
77185 7191 67103 7110 77211 7207 -4 6914 6921 7
87223 7220 -3 7142 7140 -2 7114 7114 06942 6942 0
97035 7038 36978 6979 16998 6994 -4 6849 6854 5
10 6924 6923 -1 6879 6874 -5 6950 6944 -6 6783 6783 0
11 6819 6817 -2 6790 6792 26887 6883 -4 6750 6753 3
12 6794 6803 96766 6767 16852 6849 -3 6785 6794 9
Stabilizer 13 6572 6570 -2 6548 6547 -1 6588 6587 -1
Wingtip 14 6499 6496 -3 6512 6510 -2 6593 6591 -2
Tolerance +/- 10mm
Tolerance +/- 5mm
Trim Accelerated
Manual Tested
sample
Diff Manual Tested
sample
Diff
A544 543 -1 394 396 2
A' 544 541 -3 394 394 0
B544 546 2444 448 4
C544 540 -4 544 540 -4
Risers length,
Measured with
carabiner.
Riser length measurement (mm) table

Glider user's manual | SAVAGE
SUPAIR | SAVAGE | page 20
Lines individual lengths
A LINES B LINES C LINES D LINES STABILO LINES BRAKE LINES
NAME CUT* SEWN** NAME CUT* SEWN** NAME CUT* SEWN** NAME CUT* SEWN** NAME CUT* SEWN** NAME CUT* SEWN**
AR1 5000 4740 BR1 4928 4668 CR1 4316 4056 STRis 492 292 BRRis 1899 1599
AR2 5009 4749 BR2 4941 4681 CR2 4289 4029 STmain 5338 5138 BRmain 1284 1084
AR3 5152 4892 BR3 5126 4866
AM1 1300 1100 BM1 1288 1088 CM1 2302 2102 STMA 455 255 BRM1 2350 2150
AM2 1277 1077 BM2 1268 1068 CM2 2214 2014 STMB 464 264 BRM2 2297 2097
AM3 1215 1015 BM3 1205 1005 CM3 2306 2106 BRM3 2885 2685
AM4 1164 964 BM4 1158 958 CM4 1908 1708
AM5 1044 844 BM5 1034 834 CM5 1844 1644
AM6 953 753 BM6 953 753 CM6 1913 1713
CMU1 720 520 BRMU1 1770 1570
CMU2 662 462 BRMU2 1582 1382
CMU3 659 459 BRMU3 1434 1234
CMU4 650 450 BRMU4 1394 1194
CMU5 616 416 BRMU5 904 704
CMU6 650 450 BRMU6 958 758
a1 1355 1155 b1 1352 1152 c1 639 439 d1 686 486 br1 1534 1334
a2 1258 1058 b2 1254 1054 c2 583 383 d2 633 433 br2 1277 1077
a3 1253 1053 b3 1245 1045 c3 570 370 d3 617 417 br3 1282 1082
a4 1315 1115 b4 1305 1105 c4 565 365 d4 604 404 br4 1225 1025
a5 1266 1066 b5 1256 1056 c5 526 326 d5 564 364 br5 1251 1051
a6 1163 963 b6 1157 957 c6 559 359 d6 591 391 br6 1131 931
a7 1158 958 b7 1150 950 c7 1164 964 br7 1125 925
a8 1196 996 b8 1189 989 c8 1067 867 br8 1153 953
a9 981 781 b9 960 760 c9 1015 815 br9 962 762
a10 870 670 b10 861 661 c10 967 767 br10 896 696
a11 856 656 b11 853 653 c11 835 635 br11 811 611
a12 831 631 b12 829 629 c12 800 600 br12 846 646
a13 565 365 b13 541 341 c13 572 372
a14 492 292 b14 496 296 c14 577 377
Measurements tables
SAVAGE glider size XS Lines lenghts under 5 kg of tension Tolerance +/- 10mm
*the cut value may differ according to the type of stitching/machine and the thread used **the sewn value is the final length of the line, from one loop end to the other
/