Page is loading ...

File in:
Vitotec technical guide folder, register4
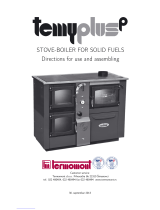
VITOLIG
Solid fuel boiler
5 to 40 kW
Vitolig300
Steel boiler for burning wood pellets
Vitolig200
Steel boiler for burning wood briquettes and
logs up to 50cm long
Vitolig100
Steel boiler with natural draught and water−cooled grate
for burning logs up to 33 cm long
Technical guide
Vitolig200 Vitolig300
58222411 GB 2/2002

Contents
2
Contents Page
1 Principles of burning wood for heat
ti
1.1 Principles of burning logs for heat generation 3. . . . . . . . . . . . . . . . . . . . . . . . . . . . . . . . . . . . . . . . . . . . . . . . . . . . . . . . . . . . . .
pg
generation 1.2 Principles of burning wood pellets for heat generation 4
. . . . . . . . . . . . . . . . . . . . . . . . . . . . . . . . . . . . . . . . . . . . . .
2 Product information 2.1 Product description
HVitolig 300 5
. . . . . . . . . . . . . . . . . . . . . . . . . . . . . . . . . . . . . . . . . . . . . . . . . . . . . . . . . . . . . . . . . . . . . . . . . . . . . . . . . . . . . . . . . . . . . . . . . . . . . . . . . . . . . . . . . . . . . . . . . . .
HVitolig 200 5. . . . . . . . . . . . . . . . . . . . . . . . . . . . . . . . . . . . . . . . . . . . . . . . . . . . . . . . . . . . . . . . . . . . . . . . . . . . . . . . . . . . . . . . . . . . . . . . . . . . . . . . . . . . . . . . . . . . . . . . . . .
HVitolig 100 5. . . . . . . . . . . . . . . . . . . . . . . . . . . . . . . . . . . . . . . . . . . . . . . . . . . . . . . . . . . . . . . . . . . . . . . . . . . . . . . . . . . . . . . . . . . . . . . . . . . . . . . . . . . . . . . . . . . . . . . . . . .
2.2 Construction and function
HVitolig 300 6
. . . . . . . . . . . . . . . . . . . . . . . . . . . . . . . . . . . . . . . . . . . . . . . . . . . . . . . . . . . . . . . . . . . . . . . . . . . . . . . . . . . . . . . . . . . . . . . . . . . . . . . . . . . . . . . . . . . . . . . . . . .
HVitolig 200 7. . . . . . . . . . . . . . . . . . . . . . . . . . . . . . . . . . . . . . . . . . . . . . . . . . . . . . . . . . . . . . . . . . . . . . . . . . . . . . . . . . . . . . . . . . . . . . . . . . . . . . . . . . . . . . . . . . . . . . . . . . .
HVitolig 100 8. . . . . . . . . . . . . . . . . . . . . . . . . . . . . . . . . . . . . . . . . . . . . . . . . . . . . . . . . . . . . . . . . . . . . . . . . . . . . . . . . . . . . . . . . . . . . . . . . . . . . . . . . . . . . . . . . . . . . . . . . . .
3 Vitolig 300 3.1 Specification 9. . . . . . . . . . . . . . . . . . . . . . . . . . . . . . . . . . . . . . . . . . . . . . . . . . . . . . . . . . . . . . . . . . . . . . . . . . . . . . . . . . . . . . . . . . . . . . . . . . . . . . . . . . . . . . . . . . . . . . . . . .
3.2 Positioning 11. . . . . . . . . . . . . . . . . . . . . . . . . . . . . . . . . . . . . . . . . . . . . . . . . . . . . . . . . . . . . . . . . . . . . . . . . . . . . . . . . . . . . . . . . . . . . . . . . . . . . . . . . . . . . . . . . . . . . . . . . . . . .
3.3 Fuel storage
HGeneral 12
. . . . . . . . . . . . . . . . . . . . . . . . . . . . . . . . . . . . . . . . . . . . . . . . . . . . . . . . . . . . . . . . . . . . . . . . . . . . . . . . . . . . . . . . . . . . . . . . . . . . . . . . . . . . . . . . . . . . . . . . . . . . . . . .
HSizing the storage area 12. . . . . . . . . . . . . . . . . . . . . . . . . . . . . . . . . . . . . . . . . . . . . . . . . . . . . . . . . . . . . . . . . . . . . . . . . . . . . . . . . . . . . . . . . . . . . . . . . . . .
HStorage area design and essential system components 12. . . . . . . . . . . . . . . . . . . . . . . . . . . . . . . . . . . . . . . . .
HSystem component details 14. . . . . . . . . . . . . . . . . . . . . . . . . . . . . . . . . . . . . . . . . . . . . . . . . . . . . . . . . . . . . . . . . . . . . . . . . . . . . . . . . . . . . . . . . . . . .
3.4 Flue gas connection
HChimney 19
. . . . . . . . . . . . . . . . . . . . . . . . . . . . . . . . . . . . . . . . . . . . . . . . . . . . . . . . . . . . . . . . . . . . . . . . . . . . . . . . . . . . . . . . . . . . . . . . . . . . . . . . . . . . . . . . . . . . . . . . . . . . . .
HFlue pipe 19. . . . . . . . . . . . . . . . . . . . . . . . . . . . . . . . . . . . . . . . . . . . . . . . . . . . . . . . . . . . . . . . . . . . . . . . . . . . . . . . . . . . . . . . . . . . . . . . . . . . . . . . . . . . . . . . . . . . . . . . . . . . . .
3.5 Water connection
HSafety equipment acc. to DIN 47512 20
. . . . . . . . . . . . . . . . . . . . . . . . . . . . . . . . . . . . . . . . . . . . . . . . . . . . . . . . . . . . . . . . . . . . . . . . . . .
HGeneral design notes 20. . . . . . . . . . . . . . . . . . . . . . . . . . . . . . . . . . . . . . . . . . . . . . . . . . . . . . . . . . . . . . . . . . . . . . . . . . . . . . . . . . . . . . . . . . . . . . . . . . . . . . .
3.6 Application examples
HApplication example 1 21
. . . . . . . . . . . . . . . . . . . . . . . . . . . . . . . . . . . . . . . . . . . . . . . . . . . . . . . . . . . . . . . . . . . . . . . . . . . . . . . . . . . . . . . . . . . . . . . . . . . . .
HApplication example 2 24. . . . . . . . . . . . . . . . . . . . . . . . . . . . . . . . . . . . . . . . . . . . . . . . . . . . . . . . . . . . . . . . . . . . . . . . . . . . . . . . . . . . . . . . . . . . . . . . . . . . .
HApplication example 3 27. . . . . . . . . . . . . . . . . . . . . . . . . . . . . . . . . . . . . . . . . . . . . . . . . . . . . . . . . . . . . . . . . . . . . . . . . . . . . . . . . . . . . . . . . . . . . . . . . . . . .
4 Vitolig 200 4.1 Specification 30. . . . . . . . . . . . . . . . . . . . . . . . . . . . . . . . . . . . . . . . . . . . . . . . . . . . . . . . . . . . . . . . . . . . . . . . . . . . . . . . . . . . . . . . . . . . . . . . . . . . . . . . . . . . . . . . . . . . . . . . . .
4.2 Positioning 31. . . . . . . . . . . . . . . . . . . . . . . . . . . . . . . . . . . . . . . . . . . . . . . . . . . . . . . . . . . . . . . . . . . . . . . . . . . . . . . . . . . . . . . . . . . . . . . . . . . . . . . . . . . . . . . . . . . . . . . . . . . . .
4.3 Fuel
HLogs 32
. . . . . . . . . . . . . . . . . . . . . . . . . . . . . . . . . . . . . . . . . . . . . . . . . . . . . . . . . . . . . . . . . . . . . . . . . . . . . . . . . . . . . . . . . . . . . . . . . . . . . . . . . . . . . . . . . . . . . . . . . . . . . . . . . . . . . .
HWood briquettes 32. . . . . . . . . . . . . . . . . . . . . . . . . . . . . . . . . . . . . . . . . . . . . . . . . . . . . . . . . . . . . . . . . . . . . . . . . . . . . . . . . . . . . . . . . . . . . . . . . . . . . . . . . . . . . . . .
HChipped product 32. . . . . . . . . . . . . . . . . . . . . . . . . . . . . . . . . . . . . . . . . . . . . . . . . . . . . . . . . . . . . . . . . . . . . . . . . . . . . . . . . . . . . . . . . . . . . . . . . . . . . . . . . . . . . . . .
4.4 Flue gas connection
HChimney 33
. . . . . . . . . . . . . . . . . . . . . . . . . . . . . . . . . . . . . . . . . . . . . . . . . . . . . . . . . . . . . . . . . . . . . . . . . . . . . . . . . . . . . . . . . . . . . . . . . . . . . . . . . . . . . . . . . . . . . . . . . . . . . .
HFlue pipe 33. . . . . . . . . . . . . . . . . . . . . . . . . . . . . . . . . . . . . . . . . . . . . . . . . . . . . . . . . . . . . . . . . . . . . . . . . . . . . . . . . . . . . . . . . . . . . . . . . . . . . . . . . . . . . . . . . . . . . . . . . . . . . .
4.5 Water connection
HSafety equipment acc. to DIN 47512 34
. . . . . . . . . . . . . . . . . . . . . . . . . . . . . . . . . . . . . . . . . . . . . . . . . . . . . . . . . . . . . . . . . . . . . . . . . . .
HGeneral design notes 34. . . . . . . . . . . . . . . . . . . . . . . . . . . . . . . . . . . . . . . . . . . . . . . . . . . . . . . . . . . . . . . . . . . . . . . . . . . . . . . . . . . . . . . . . . . . . . . . . . . . . . .
HThermostatic drain valve 34. . . . . . . . . . . . . . . . . . . . . . . . . . . . . . . . . . . . . . . . . . . . . . . . . . . . . . . . . . . . . . . . . . . . . . . . . . . . . . . . . . . . . . . . . . . . . . . . .
HHeating water buffer storage unit 35. . . . . . . . . . . . . . . . . . . . . . . . . . . . . . . . . . . . . . . . . . . . . . . . . . . . . . . . . . . . . . . . . . . . . . . . . . . . . . . . .
4.6 Application examples
HApplication example 1 36
. . . . . . . . . . . . . . . . . . . . . . . . . . . . . . . . . . . . . . . . . . . . . . . . . . . . . . . . . . . . . . . . . . . . . . . . . . . . . . . . . . . . . . . . . . . . . . . . . . . . .
HApplication example 2 39. . . . . . . . . . . . . . . . . . . . . . . . . . . . . . . . . . . . . . . . . . . . . . . . . . . . . . . . . . . . . . . . . . . . . . . . . . . . . . . . . . . . . . . . . . . . . . . . . . . . .
HApplication example 3 47. . . . . . . . . . . . . . . . . . . . . . . . . . . . . . . . . . . . . . . . . . . . . . . . . . . . . . . . . . . . . . . . . . . . . . . . . . . . . . . . . . . . . . . . . . . . . . . . . . . . .
5 Vitolig 100 5.1 Specification 55. . . . . . . . . . . . . . . . . . . . . . . . . . . . . . . . . . . . . . . . . . . . . . . . . . . . . . . . . . . . . . . . . . . . . . . . . . . . . . . . . . . . . . . . . . . . . . . . . . . . . . . . . . . . . . . . . . . . . . . . . .
5.2 Positioning 56. . . . . . . . . . . . . . . . . . . . . . . . . . . . . . . . . . . . . . . . . . . . . . . . . . . . . . . . . . . . . . . . . . . . . . . . . . . . . . . . . . . . . . . . . . . . . . . . . . . . . . . . . . . . . . . . . . . . . . . . . . . . .
5.3 Fuel 57. . . . . . . . . . . . . . . . . . . . . . . . . . . . . . . . . . . . . . . . . . . . . . . . . . . . . . . . . . . . . . . . . . . . . . . . . . . . . . . . . . . . . . . . . . . . . . . . . . . . . . . . . . . . . . . . . . . . . . . . . . . . . . . . . . . . . . . . . .
5.4 Flue gas connection
HChimney 57
. . . . . . . . . . . . . . . . . . . . . . . . . . . . . . . . . . . . . . . . . . . . . . . . . . . . . . . . . . . . . . . . . . . . . . . . . . . . . . . . . . . . . . . . . . . . . . . . . . . . . . . . . . . . . . . . . . . . . . . . . . . . . .
HFlue pipe 57. . . . . . . . . . . . . . . . . . . . . . . . . . . . . . . . . . . . . . . . . . . . . . . . . . . . . . . . . . . . . . . . . . . . . . . . . . . . . . . . . . . . . . . . . . . . . . . . . . . . . . . . . . . . . . . . . . . . . . . . . . . . . .
5.5 Water connection
HSafety equipment acc. to DIN 47512 58
. . . . . . . . . . . . . . . . . . . . . . . . . . . . . . . . . . . . . . . . . . . . . . . . . . . . . . . . . . . . . . . . . . . . . . . . . . .
HGeneral design notes 58. . . . . . . . . . . . . . . . . . . . . . . . . . . . . . . . . . . . . . . . . . . . . . . . . . . . . . . . . . . . . . . . . . . . . . . . . . . . . . . . . . . . . . . . . . . . . . . . . . . . . . .
HEmergency battery 59. . . . . . . . . . . . . . . . . . . . . . . . . . . . . . . . . . . . . . . . . . . . . . . . . . . . . . . . . . . . . . . . . . . . . . . . . . . . . . . . . . . . . . . . . . . . . . . . . . . . . . . . . . . .
HMinimum thermostat 59. . . . . . . . . . . . . . . . . . . . . . . . . . . . . . . . . . . . . . . . . . . . . . . . . . . . . . . . . . . . . . . . . . . . . . . . . . . . . . . . . . . . . . . . . . . . . . . . . . . . . . .
5.6 Application examples
HApplication example 1 61
. . . . . . . . . . . . . . . . . . . . . . . . . . . . . . . . . . . . . . . . . . . . . . . . . . . . . . . . . . . . . . . . . . . . . . . . . . . . . . . . . . . . . . . . . . . . . . . . . . . . .
Explanation of specific
Vitolig 100 connections and functions 64
. . . . . . . . . . . . . . . . . . . . . . . . . . . . . . . . . . . . . . . . . . . . . . . . . . . . . . . . . . . . . . . . . . . . . . . . . . . . .
5822241 GB

1 Principles of burning wood for heat generation
3
1.1Principles of burning logs for heat generation
Units of measurements for wood
as fuel
The units of measurement commonly
used in forestry and the timber industry for
wood as fuel are solid measure of timber
(smt) and stacked cubic metre (stcm).
The solid measure of timber (smt)
describes 1m3 of solid timber mass in the
form of assorted round timbers.
The stacked cubic metre of timber (stcm)
is a measure for stacked or tipped wood,
measuring a total volume of 1m3,
including air gaps.
On average, 1 solid measure of timber
equals 0.7stacked cubic metres.
Energy content and emission
values
Timber is a renewable fuel. In
combustion, on average approx.
4.0kWh/kg energy is released.
The table shows the calorific value of
various types of firewood with a water
content of 20%.
Type of
timber
Density Calorific value
(approx. with 20%
water content)
kg/m3kWh/
smt*1
kWh/
stcm*2
kWh/
kg
Pine
Common
spruce
Norwe−
gian
spruce
Scots
pine
Larch
430
420
510
545
2100
2200
2600
2700
1500
1550
1800
1900
4.0
4.2
4.1
4.0
Deciduous
Birch
Elm
Beech
Ash
Oak
Common
beech
580
620
650
650
630
720
2900
3000
3100
3100
3100
3300
2000
2100
2200
2200
2200
2300
4.1
3.9
3.8
3.8
4.0
3.7
*1Solid measure of timber
*2Stacked cubic metre
1litre fuel oil can be replaced by 3kg
firewood, given the usual efficiencies.
A stacked cubic metre (stcm) of beech
firewood corresponds to the energy of
approx. 200litres fuel oil or 200m3
natural gas. Therefore, burning wood
contributes to the preservation of finite
reserves of oil and gas.
Firewood has a generally neutral
CO2balance, as the CO2 created during
combustion is immediately reabsorbed
into the photosynthetic circle and
therefore, contributes to the formation of
new biomass.
Another aspect relevant to environmental
considerations is the fact that firewood
contains hardly any sulphur and therefore
almost no sulphur dioxide is created
during combustion.
Influence of moisture on the
calorific value
The water content of firewood
substantially influences its calorific value.
The more water firewood contains, the
lower its calorific value, since the water
evaporates during combustion and
consumes energy in the process.
Two measures are used to state the water
content.
HWater content
The water content of firewood is its
water mass as a percentage of the total
firewood mass.
HFirewood moisture
The firewood moisture (in the following
referred to as moisture) is the water
mass expressed as percentage of the
total firewood mass excluding water.
The diagram shows the relationship
between the water content and moisture.
Freshly cut firewood has a moisture
content of 100%. During storage over
one summer, this moisture level reduces
to approx. 40%. During storage over
several years, this moisture level reduces
to approx. 25%.
The following diagram shows the
dependency of the calorific value on the
water content using common spruce as
an example.
With a water content of 20% (moisture
25%), the calorific value is 4.0kWh/kg.
The calorific value of firewood stored
over several years is approximately twice
that of freshly cut firewood.
Storage
Not only is the burning of wet firewood
uneconomical, but it also leads to low
combustion temperatures and high
emissions plus tar deposits inside the
chimney stack.
Tips on storing firewood
HSplit round timbers from a diameter of
10cm upwards.
HStack the split firewood in a ventilated
and preferably sunny spot underneath a
rain canopy.
HStack the split firewood with generous
air gaps to enable the air flow to carry
off the dissipating moisture.
HA hollow should be created underneath
the woodpile, e.g. in the form of storage
beams, to allow moist air to escape
downwards.
HNever store freshly cut firewood in a
cellar, since air and sunshine are
required to dry out firewood. However,
dried firewood can be stored in a
well−ventilated cellar.
5822241 GB
Water content in %
Moisture in %
Water content in %
Moisture in %
Calorific value in kWh/kg

1 Principles of burning wood for heat generation
4
1.2 Principles of burning wood pellets for heat generation
What are pellets?
Wood pellets are made from 100 percent
natural wood residues. This raw material
is waste matter created by the timber
processing industry in large volumes
through planing or sawing.
Without binders, these fine−grained wood
residues are compressed and pelletised
under high pressure, i.e. they are pressed
into small cylindrical shapes.
The raw material is stored and
transported in absolutely dry conditions.
Absolutely dry conditions are equally
necessary for the storage by the system
user. Only these precautions can ensure
perfect and efficient combustion.
Fuel requirements
The wood pellets used for combustion in
Vitolig 300 must correspond to the
requirements of DIN 51731 or
ÖNORM 7135.
Requirements Limits set by DIN 51731
Raw density (analogue to DIN 52182) kg/dm31.0 to 1.4
Water proportion % 12
Ash (acc. to DIN 51718) % 1.5
Calorific value (waf = free of water) kJ/kg 17,500 to 19,500
Sulphur % 0.08
Chlorine % 0.03
Nitrogen % 0.3
Arsenic mg/kg 0.8
Cadmium mg/kg 0.5
Chromium mg/kg 8
Copper mg/kg 5
Mercury mg/kg 0.05
Lead mg/kg 10
Zinc mg/kg 100
Extractable organically bound halogen
(EOX)
mg/kg 3
For the combustion in Vitolig 300, use
pellets with a diameter of 6 mm, a length
from 5 to 30 mm (20 % up to 45 mm) with
a residual moisture content of 7 to 12 %.
Delivered forms
Currently, wood pellets are offered in
15 and 30 kg sacks, in bulk up to 1000 kg
on pallets and loose.
In their loose form, pellets are
transported by tanker and pumped into
the storage room via a hose system.
Careful handling of pellets ensures a low
dust proportion, a perfect fuel supply to
the boiler and a constant boiler output.
5822241 GB

2 Product information
5
2.1 Product descriptions
Vitolig 300
Steel boiler for burning wood pellets
Boiler for wood pellets
Permissible flow temperature up to 95ºC
Maximum operating pressure 3 bar
HThe Vitolig300 for burning wood pellets
hardly differs at all in terms of
convenience and control from oil or
gas−fired heating systemslargely due
to a modulating output and digital
control unit.
HIdeal energy utilisation through
self−regulating output, therefore low
flue gas temperatures and high
combustion efficiency of up to95%.
HLow space requirement through
compact design (floor area: 0.6m2).
HFully automatic pellet feed and vacuum
system (accessories). The integral pellet
hopper (150litres capacity) will provide
fuel for up to two days heating
operation, subject to the prevailing
outside temperature.
HHot air fan for fully automatic, quiet
ignition.
HA pulsating pellet worm−drive, a
variable speed vacuum draught fan and
precisely metered volumes of fuel and
air for modulating operation ensure
optimum matching to the prevailing heat
demand.
HDigital control unit with automatic
function monitoring with fault
diagnostic system, heating circuit
control for one heating circuit with
mixer and DHW cylinder thermostat.
HWith self−cleaning heating surfaces and
ash removal from the burner tray for
long cleaning intervals.
Vitolig 200
Steel boiler for burning wood briquettes and logs up to 50 cm long
High performance wood gasification
boiler for split logs up to 50 cm long,
wood briquettes and chippings
Permissible flow temperature up to
100ºC
Maximum operating pressure 3 bar
HHigh−grade wood gasification boiler:
50cmlong split logs, chippings and
wood briquettes are easily managed by
the stainless steel hopper and
combustion chamber made from
special ceramic material.
HAutomatic heat−up process for useable
heat in minutes.
HHigh performance, variable speed,
vacuum draught fan.
Modulating operation in every output
range, therefore optimum matching to
any prevailing heat demand.
HThe process−optimised combustion and
automatic output control achieves a
combustion efficiency of up to 92%, and
with low emissions.
HNo odour nuisance in the boiler room
because of our patented carbonisation
gas extract system.
HSimple, easy to operate digital boiler
control unit with self−diagnostic system
and fault display.
HLarge stainless steel hopper for long
combustion periods of up to 12hours,
without re−filling.
HSimple, mechanical cleaning of the
heating surfaces and long cleaning
intervals, e.g. ash needs to be removed
only every other week.
Vitolig 100
Steel boiler with natural draught with water−cooled grate for burning logs up to 33 cm long
Boiler for burning logs up to 33 cm long
Permissible flow temperature up to 90ºC
Maximum operating pressure 3 bar
HSolid fuel boiler for logs up to 33cm
long at a particularly attractive price.
HRated output up to 14.8kW: no
monitoring obligation acc. to the
1stBlmSchV.
HThe water−cooled grate and controllable
pre−heated secondary air flow ensure
good fuel utilisation.
HSolid fuel boiler with natural draught
and low draught requirement, enabling
the operation with almost all types of
chimney.
HQuick installation and simple operation
from the front.
HLong combustion periods through large
hopper.
HSimple filling from the front through a
large feed door.
HControllable, pre−heated secondary air
flow for clean, environmentally friendly
combustion.
5822241 GB

2 Product information
6
2.2 Construction and function
Vitolig 300
Construction
Essentially, the Vitolig 300 comprises a
pellet feeder (l.h. side of the boiler) and a
combustion part (r.h. side of the boiler).
The pellet feeder on the l.h. side of the
boiler comprises the pellet hopper A
with cleaning aperture, the hot air fan for
automatically igniting the pellets B, the
feed worm (pellet worm−drive) C with
drive motor, the drive motor for removing
ash from the burner tray, the motor for
the heating surface cleaning facility and
the motor for the automatic ash removal.
The r.h. side of the boiler (combustion
part) comprises an operating part D with
boiler control unit and heating circuit
controller HKR for one heating circuit
with mixer and DHW cylinder thermostat,
the pellet feed channel E, the burner
tray F with automatic ash removal and
the automatic ash removal system G. On
the r.h. side of the boiler is the ash trolley
for the automatic ash removal system.
Function
Prior to the initial start−up check, whether
the system contains water and has been
vented.
The Vitolig 300 starts automatically, as
soon as a heat demand is reported to the
control unit.
After the pre−purge (safety function, only
for combustion chamber temperatures
above 190ºC), the ignition starts (hot air
fan), and the pellet worm−drive is
activated. The burner tray is filled with
pellets, the hot air fan ignites the pellets
and the boiler starts its heat−up phase.
A flame has been built, if the temperature
in the combustion chamber rises by 70 K,
after the heat−up phase commences. The
hot air fan is switched off and runs on for
a further minute without heat.
Vitolig 300 begins to modulate when the
temperature inside the combustion
chamber rises above 240ºC. In
modulating operation, the pellet
worm−drive feeds the required volume of
pellets into the burner tray, and the
vacuum draught fan will run at a speed of
between 800 and 2400 rpm.
The fuel will be completely burnt if the set
boiler water temperature is exceeded by
15 K for 15 minutes or if the boiler water
temperature rises above 82 ºC.
Subject to the output and combustion
state, the pellet worm−drive will either be
stopped immediately or runs on for a
further 3 minutes with the smallest
volume of fuel. During the complete
combustion mode, the fan will run at
1500 rpm. Below a combustion chamber
temperature of 250ºC the fan will run on
for two minutes.
The combustion process is completed
with the removal of the ashes from the
burner tray.
5822241 GB
D
A
E
F
C
B
G

2 Product information
7
Vitolig 200
Construction
The r.h. side of Vitolig 200 comprises the
variable speed vacuum draught fan for a
modulating matching of the system to the
output A, the large stainless steel feed
hopper for 50 cm logs with a large feed
door B, the de−gassing zone with fire
clay lining C and the large ash box with
door D.
The l.h. side of the boiler is the actual
combustion part of Vitolig 200. Primary
and secondary air apertures with variable
control E and the combustion chamber
constructed from special ceramics F
with temperature sensor provide
excellent combustion results. The large
clean−out door provides easy access to
the heating surfaces G to enable
thorough cleaning from the front. A
100mm thick thermal insulation H
reduces cool−down losses.
The ready−to−connect control unit K is
easily accessible for maintenance
purposes.
Function
Prior to the initial start−up, check whether
the system contains water and has been
vented.
The wood gasification (pyrolysis) takes
place inside the stainless steel hopper
through the incandescent bed. The
combustible wood gases created by this
process are sucked into the ceramic
combustion chamber and there, transfer
their heat via the heating surfaces. This
quickly raises the combustion chamber
temperature to a high level, resulting in
clean combustion both in partial and in
full load operation.
Before heating up or re−filling with fuel,
operate the heating surface cleaning lever
L 3 5times.
For heating up, the feed flap is pulled out
after opening the feed door, and the
exposed grate is covered with crumpled
paper balls up to the top edge of the lined
de−gassing zone (approx. 5 cm). The
paper is then covered with a layer of
dried chippings, thin kindling or course
cuttings. Several layers of split logs with
a height (edge) of 4 to 6 cm and
preferably without air gaps should then
be inserted. Then, the feed hopper can be
filled with split logs up to 45 to 55 cm in
length and a max. height (edge) of 15cm.
A complete filling of Vitolig 200 can only
be recommended if the heating water
buffer storage unit is cold and/or the
outside temperature is low (ensure
sufficient heat consumption).
Fill with less wood for summer operation.
After pressing the system On/Off switch
at the control unit, the unit tests itself and
all connected sensors; at the end the
boiler water temperature is displayed.
To fire Vitolig 200, the ash door and the
upright grate behind the door are opened.
Ignite the paper and press the heat−up
button on the boiler control panel. Close
the upright grate and the ash door, when
the paper is thoroughly burned through
(approx. 20 to 30 seconds).
Depending on the fill level of the hopper,
the fuel quality and the heat
consumption, combustion may last from
4 to 13.5 hours. Do not open the feed
door for at least three hours after heat−up.
Open the feed door up to the lock
position when re−filling and leave in that
position for at least 15 seconds. The
carbonisation gases inside the hopper
will then be withdrawn by the vacuum
draught fan, and the feed door can be
fully opened. If sufficient incandescence
is present, distribute this evenly over the
grate and pile up split logs horizontally as
for the heating−up process. If insufficient
incandescence is present (the grate is
visible), proceed as for heating up.
At the end of combustion, the fan runs on
for 20 minutes at maximum speed and is
then switched off. This make best use of
remaining incandescence.
5822241 GB
K
A
H
L
F
E
B
C
D
G

2 Product information
8
Vitolig 100
Construction
As a boiler with natural draught and
combustion from below, Vitolig 100
comprises only a few, simple operating
elements.
Behind the large feed door A is the
hopper B for split logs up to a length of
33 cm. A water−cooled and therefore
low−wearing grate C utilises the high
temperatures of the incandescent bed.
The secondary ventilation control D
assures Vitolig 100 of excellent
combustion results from heat−up to
complete combustion.
The secondary air is channelled into the
feed door through a rotary valve. The
heat−up flap E is easy to operate from
the front and is only opened during
heating−up and re−filling.
The combustion controller F regulates
the required boiler water temperature via
the primary air volume. To achieve this,
close the ash door G.
The integral heat exchanger H in
conjunction with a thermostatic drain
valve (accessory) acts as excess
temperature protection. The 60 mm thick
thermal insulation K ensures low losses
during the heating operation.
Function
Prior to the initial start−up, check whether
the system contains water and has been
vented. The required boiler water
temperature is regulated via the
combustion controller using the following
table (ash door must be closed).
The highest flow temperature is usually
allocated to the lowest outside
temperature (in this example 20ºC).
A three−way mixer with heating circuit
control (accessory) regulates the heating
flow temperature in weather−compensated
mode.
Outside temperature 20ºC10ºC0ºC+10ºC
For system temperature 90ºC
Heating flow temperature 90 80 65 45
Boiler water temperature 90 80 75 75
For system temperature 75ºC
Heating flow temperature 75 65 55 40
Boiler water temperature 75 75 75 75
For underfloor heating and low−temperature
heating systems
Heating flow temperature 45 40 38 28
Boiler water temperature 75 75 75 75
5822241 GB
H
K
F
E
A
B
D
C
G
During the heat−up phase, and if the
boiler water temperature falls below
60ºC, the standard minimum
temperature controller switches the
heating pump and possibly the DHW
circulation pump off.
The pumps are automatically switched
on again, if the minimum temperature of
60ºC is exceeded. A fall below the dew
point (condensation) is thereby safely
prevented.
The installation of a three−way mixer is
essential to improve the controllability
of Vitolig 100.
Do not add too much fuel when heat is
only drawn off in modest quantities
(mild outside temperature). Always
ensure that heat is drawn off.

3 Vitolig 300
9
3.1 Specification
Rated output range kW 5 to 15 8 to 26
Permissible flow temperature ºC 95 95
Minimum return temperature ºC 20 20
Max. operating pressure
Boiler
Heat exchanger
bar
bar
3
6
3
6
CE designation
In accordance with the
Machinery Guideline
CE CE
Boiler class acc. to EN3035 3 3
Overall dimensions
Overall length
Overall width
Overall height
boiler
with fully automatic
pellet feed
mm
mm
mm
mm
656
1285
1142
1805
721
1285
1142
1805
Total weight kg
Boiler shell with thermal insulation
250 297
Max. elec. power consumption
during ignition
during heating operation
W
W
1377
61
1377
95
Contents
Boiler water
Fuel hopper
litres
litres
32
150
38
150
Boiler connections
Boiler flow and return plus G(female thread) 1" 1"
safety connection
(safety valve)
Safety return and R(male thread) ½" ½"
drain
Heat exchanger connections
Cold water, hot water R(male thread) ½" ½"
Primary side
Flow resistance
DT=20K
DT=10K
mbar
mbar
1.2
5.9
5
19.3
Flue gas*1
Average temperature (gross*2)
at upper heat output
at partial load (33% of the
upper heat output)
Mass flow rate
at upper heat output
at partial load (33% of the
upper heat output)
CO2 content in the flue gas
ºC
ºC
kg/h
kg/h
%
145
86
38.9
14.8
12.0
144
90
63
23.4
12.0
Flue outlet External ∅mm 130 130
Required draught Pa
mbar
5
0.05
5
0.05
*1Values for calculating the size of the flue system, according to DIN4705 based on 12.0% CO2.
*2Flue gas temperature measured as gross value as per EN304 at 20ºC combustion air temperature.
5822241 GB

3 Vitolig 300
Rear view − boiler
144
Overall length
Overall boiler height
Overall height with fully automatic pellet feed
Overall width
930
382
E
KR
452
192
736
816
922
322
AGA
KV/SA
279
B
C
D
E
A
WW
KW
TAS
10
Legends
AGA Flue pipe
E Drain and diaphragm
expansion vessel
KR Boiler return
KV Boiler flow
KW Cold water entry of the
safety heat exchanger
SA Safety connection
(safety valve)
TAS Coupling R½" for sensor for
thermostatic drain valve
WW Hot water outlet of the safety heat
exchanger (no DHW connection)
APellet feed connection
BReturn air connection
CFully automatic pellet feed
DBoiler
EAsh trolley for fully automatic ash
removal
5822241 GB

3 Vitolig 300
A
approx. 3000
min. 100
ED
C
F
approx. 2000
B
*1
*1
11
3.2 Positioning
HNo air contamination through
halogenated hydrocarbons (e.g. as
contained in sprays, paints, solvents
and cleaning agents).
HAvoid very dusty conditions.
HAvoid high levels of humidity.
HAvoid danger of freezing and ensure
good ventilation.
Otherwise the system may suffer faults
and damage.
The boiler may only be installed in
rooms, where air contamination through
halogenated hydrocarbons may occur,
such as through hairdressing salons,
printing shops, chemical cleaners,
laboratories etc., if adequate measures
can be taken to provide uncontaminated
combustion air.
If in doubt, please contact us.
If these instructions are not observed, any
consequential damage to the boiler
directly related to any of these causes,
are excluded from our warranty.
Installation example − system with fully automatic pellet feed
*1Example, dimensions not binding
AFully automatic pellet feed
BChangeover unit
CFill and return air adaptor
(Storz couplings)
DTimber planks
ESuction wands
FDeflector
5822241 GB
*1Required for cleaning and manual venting
*2Required for the removal of the worm−drive
*3With fully automatic pellet feed
*4Without fully automatic pellet feed
*5Required for the removal of the ash container
200
650
1285
930500
120
400
721 (8−26 kW)
656 (5−15 kW)
*6For the installation of the fully automatic pellet feed
Boiler with fully automatic pellet feed
2010
400*6

3 Vitolig 300
12
3.3 Fuel storage and feed
General
Pellets are delivered in a tanker when
bought loose and in bulk. The size of the
delivery vehicle must be taken into
consideration when planning the access.
These vehicles are mostly over 15tonnes
in weight and can be between 3.7to
3.9 m high. Therefore, check whether the
access could be affected by weight
restrictions, subways, narrow or steep
access routes, tight bends or a lack of
turning space.
Pellet storage areas should, where
possible, be located alongside an outside
wall to leave the supply hoses as short as
possible. Because of fluctuating air
volumes, handling with supply hoses
between 20 and 40 m becomes difficult.
Supply tankers are equipped with a pump
fan, i.e. pellets are blown into the storage
area at a working pressure of 0.5 to
0.9 bar. The overpressure is then
withdrawn from the storage area by a
vacuum fan and filter installation. A
power supply with 230 V and at least 10 A
capacity is required.
Sizing the storage area
The storage area should be more
rectangular than square and should be of
a size, which allows an annual quantity of
fuel to be stored. The size of the storage
room depends on the heat demand of the
building.
The storage volume in m3 (incl. empty
space) is calculated by multiplying the
required heat output (in kW) by a factor of
0.9 (m3/kW).
Example:
A detached house with a heat demand of
15 kW requires a storage volume of
approx. 13.5 m3 incl. empty space (this
corresponds to a room of 2 x 3 m floor
area and a useable height of 2.25 m).
Storage room characteristics and fuel feed with all necessary system components
HThe pellet storage area must be dry, as
pellets will substantially swell up if
subjected to moisture. This leads to
great difficulties (e.g. blockages at the
suction wand).
HThe pellet storage area must be
constructed as a solid, leak−proof
structure, since blowing pellets into this
room will create dust and blowing
pellets against the walls creates high
pressure.
HSurrounding walls and ceiling must
correspond to fire resistance class F 90,
e. g. house bricks 12 cm, rendered on
both sides; hollow breeze block 17 cm,
rendered on both sides; concrete 10 cm,
plaster slab 12 cm.
HDoors or access hatches into the pellet
storage area must open outwards and
must be sealed. Ensure the doors or
hatches are constructed as fire doors
T 30 or, if necessary, T 90.
HFit protective boards A on the inside of
the door opening, so that pellets do not
push against the door (see page 13).
HThe pellet storage area should not
contain any electrical installations.
Essential electrical installations must be
of the explosion−proof type in
accordance with current regulations.
HAvoid the installation of water pipes
inside the storage area because of
condensation and the risk of burst
pipes.
HPellet storage areas should be equipped
with a filling F and a return air adaptor
G with Storz system type A Ğ100 mm
coupling (fire hose adaptor) with
extension hose leading into the storage
area. Pipes should be metal (not
plastic), and should be connected to the
brickwork and must be earthed.
HA deflector B should be fitted opposite
the filling adaptor to protect the pellets
and the brickwork.
HThe pellet storage area must be free
from debris (small stones, wood
particles, etc.).
HDistribute the suction wands H so that
the storage area is efficiently emptied.
HThe maximum length of the feed and
return hoses E and the maximum
height of the suction wand, which is the
furthest removed from the feed unit
should not be greater than 15 m in
length or 2.8 m in height. Hoses should
be earthed, may not be installed on the
outside and should be protected
against temperatures above 60ºC.
HClose the wall opening for the
automatic changeover unit D from the
storage room side in a fireproof manner
(e.g. rendering).
5822241 GB

3 Vitolig 300
13
Top view onto the pellet storage and the boiler room (installation example)
Section through the pellet storage area (installation example)
*1Example, dimensions not binding
AProtective boards
BDeflector
CVitolig 300
DChangeover unit
EPellet feed and return air hose
FFill adaptor
GReturn air adaptor
HSuction wand
KAir gap
LEmpty space
MLateral slope for improved
emptying
5822241 GB
approx. 3000 mm
>100 mm
F
G
E
H
A B
C
D
*1
500 −
1000 mm
= =
300 mm
approx. 2000 mm
Useable volume
approx. ¾ of the
room volume
>200 mm
Height of room 2500 mm
45
E
M
F
L
G
K
*1
*1

3 Vitolig 300
14
System component details
Protective boards with Z profiles
Z profiles are available as accessories for
the installation of the protective boards.
Do not install Z profiles up to the ceiling
to permit the removal or addition of the
protective boards.
AZ profile (length 2000 mm)
BProtective board (30 mm thick
on−site provision)
CFire door T 30 or T 90
Deflector
The deflector should be installed at a
distance of at least 100 mm from the wall
opposite the filling adaptor (see adjacent
diagram). This deflector protects the
pellets as well as the brickwork or the
rendering/plaster.
Plaster/rendering or pieces of brick that
have been dislodged can block the
suction wands and the pellet worm−drive
or the burner tray ash removal of
Vitolig 300.
*1Blow inlet approx. 4 5 m
AFill adaptor
BDeflector (1500 x 1500 mm)
5822241 GB
A B A
C
>100 mm
AB

3 Vitolig 300
15
Feed and return air hose
HThe maximum length in one direction
(feed or return air) should not be
greater than 15 m; the height from the
furthest suction wand to the feed unit
should not be greater than 2.8 m.
HHoses should not be kinked and radii
should not be tighter than 30 cm.
HHoses should be routed as straight and
level as possible. If hoses are routed
several times up and down, pellets will
not be perfectly transported from the
lower lying areas.
HSelect the shortest possible way from
the storage area to the feeder unit and
route hoses, positioning than so that no
one can step onto them. However,
hoses should be long enough to enable
all to be connected to any position of
the changeover unit. This is necessary
to allow the pellet feed hose to be
purged with return air, if necessary.
HHoses must be earthed to prevent static
being built up during pellet handling.
HThe pellet feed hose should be made
from one piece, whilst the return air
hose can be made from several
sections. The connection fitting should
be made from metal to ensure the earth
continuity.
HThe hoses should not be exposed to
temperatures above 60ºC (these could,
for example, be created by non−
insulated heating pipes and at the flue
pipe).
HHoses should not be routed outside
(danger of becoming brittle through UV
radiation).
HTo calculate the required length of hose,
the distance between the feeder unit
and the changeover unit as well as the
distances between the changeover unit
and all three suction wands must be
established. These dimensions are
added and multiplied by two, since
pellet feed and return air hoses are
required.
Filling adaptor and return air adaptor
HGeneral
Arrange the adaptors so that, during
the filling process, no overpressure is
created in the pellet storage area.
Therefore, keep the return air adaptor
unrestricted, even when the maximum
filling level in the storage area has been
reached (see page 13).
The adaptors should be located as high
as possible inside the storage area, to
enable the pellet storage area to be
filled to the maximum. The filling
adaptor should be at least 20 cm below
the ceiling, to prevent pellets hitting the
ceiling (fit protective boards if the
ceiling is plastered).
The adaptors should be located along
the narrow side of the storage room.
Pellets are blown approx. 4 5 m with
straight filling adaptors. Where a 90º
elbow fitting is located before the entry
into the storage room, fit a straight pipe
of at least 1 m length on the other side
to protrude into the storage room. This
enables the pellets to reach the required
velocity and therefore the necessary
blow−in distance.
HEarthing
Earth all adaptors to prevent static
building up during the filling process.
Generally, the connection of each pipe
element to the building earth is
recommended. At the very least,
connect each pipe element to the
brickwork, either by setting the pipe
into the brickwork (without insulating
material) or via pipe cleats set into the
brickwork.
5822241 GB

3 Vitolig 300
16
HAdaptor length and location
Adaptor clearance y 500 mm Adaptor clearance < 500 mm The length of the filling adaptor is subject
to the distance from the return air
adaptor.
Adaptor clearances of < 500 mm may
occur if both adaptors are set into a cellar
window.
AFill adaptor
BReturn air adaptor
Alternating filling
If adaptors must be located in the long
flanks of the storage room, filling should
be alternated from side to side. This
would ensure a more efficient filling. In
any event, both adaptors should be
earthed. A deflector should be installed
opposite both adaptors.
ADeflector
BFilling and return air adaptors
Internal pellet storage area
If the filling and return air adaptors must
be routed through a neighbouring room,
clad both with a material offering fire
resistance compliant with class F 90
(Rockwool, etc.). Earth each extension
piece via pipe cleats. Plastic pipes should
not be used as extension pieces.
AAdaptors
BFire resistant cladding (F 90)
CExtension piece
DPipe cleat
5822241 GB
approx. 100 mm
>500 mm
B
A
<500 mm
approx. 100 mm
>500 mm
B
A
approx. 100 mm
>100 mm
A
B
A
B
A B C D

3 Vitolig 300
17
HAdaptor installation options
AFill adaptor
BThrough brickwork Ğ 150 mm
Setting into brickwork
The adaptor is set into the opening
without insulation.
CScrews
DThrough brickwork Ğ 110 mm
EPipe cleat for earthing
Threaded wall installation
The adaptor is fitted to the outside wall
via threaded connections and earthed via
a pipe cleat.
Threaded window installation
A plate is set into the window opening.
The adaptor is fitted through the plate,
connected with threaded fittings and
earthed via a pipe cleat.
FWindow opening
Installation into a lighting duct
Adaptors may be installed through a wall
or through a window opening. The
reduced filling and return air adaptors are
each pushed into a 45º elbow fitting,
which in turn is located in an extension
piece pushed through the wall or the
window opening.
GExtension piece
H45º elbow
5822241 GB
AB
CD
E
A
C
E
A
D
F
G
B or D
A
H
E

3 Vitolig 300
18
Suction wands
Distribute suction wands along the floor
of the pellet storage area, so that the
room is emptied evenly.
The distance of the wands to the walls of
the storage area should be approx. half of
the distance between wands (see
adjacent diagram).
The dimensions shown are only
examples. Select appropriate distances
for storage areas with alternative
dimensions.
AFill adaptor
BReturn air adaptor
CSuction wands
Changeover unit
Create a wall opening in the storage area
in accordance with the adjacent diagram.
Close the gap between the wall opening
and the fitted changeover unit with
fire−resistant material (e.g. rendering/
plaster).
5822241 GB
approx. 3000 mm
500 mm 1000 mm 1000 mm 500 mm
A
B
C
>150 mm
>200 mm

3 Vitolig 300
19
3.4 Flue gas connection
Chimney
A chimney corresponding to regulations
and appropriate for the rated boiler
output is a pre−requisite for an efficient
operation.
The chimney opening (clearance
diameter, smallest lateral length) should
be 130 mm, or better still 140 mm. In
borderline cases, provide verification in
accordance with DIN 4705.
Note that in its lower output range, Vitolig
300 can create flue gas temperatures
below 90ºC. Therefore, connect
Vitolig 300 to a moisture−resistant
chimney (heat throughput factor
resistance class I acc. to DIN 18160 T1).
If Vitolig 300 should not be connected to
a moisture−resistant chimney, carry out a
chimney calculation or request a chimney
assessment (values for a chimney
calculation see page 9).
Flue pipe
AClean−out cover
BThermal insulation
CFlexible flue pipe adaptor
The vacuum draught fan may induce
vibrations, which may lead to a noise
nuisance. We therefore recommend you
implement the connection to the chimney
with a flexible flue pipe adaptor.
Note the following when connecting the
flue pipe:
HInstall the flue pipe rising to the
chimney (if possible with 45º).
HDo not push the flue pipe too far into
the chimney.
HEnsure the full flue gas path (incl.
clean−out cover) is gas−tight.
HDo not insert the flue pipe into the
brickwork of the chimney; instead use a
flexible flue pipe adaptor.
HProvide the flue pipe with thermal
insulation (min. thickness 50 mm).
5822241 GB
400 mm
CB
A

3 Vitolig 300
20
3.5 Water connection
Safety equipment acc. to DIN 47512
DIN 47512 requires the following safety
equipment to be installed:
HA sealed expansion vessel.
HA safety valve at the highest point of
the boiler or a pipe connected with the
boiler.
The pipework between the boiler and
the safety valve must not be able to be
shut off. Pumps, fittings or restrictions
must not be present in this pipework.
The blow−off line should be constructed
so as to prevent the possibility of
increases in pressure.
Any expelled heating water must be
able to be drained off safely. Arrange
the outlet of the blow−off line so that
any water expelled from the safety
valve can be safely observed and
drained off.
HA low water indicator (water limiter
available as accessory).
HA thermometer and a pressure gauge.
HAn automatic device for heat disposal,
which prevents the maximum
permissible operating temperature to
be exceeded. To affect this, connect a
thermostatic drain valve (available as
accessory) to the integral heat
exchanger.
General design notes
This boiler is only suitable for heating
systems with pumped hot water.
HThe minimum boiler water inlet
temperature is 60ºC.
Only regulated heating circuits with
mixers may be installed.
We recommend the installation of a
check valve into the heating flow, acting
as gravity brake. This prevents
uncontrolled heat entering the heating
system through gravity, when DHW
heating is given priority, or the system
is in summer mode.
For underfloor heating circuits, a high
limit thermostat should be installed.
HVitolig 300 can be operated with a
return temperature as low as 20ºC
when operated with an internal return
temperature raising facility. This makes
an external return temperature raising
facility unnecessary.
Systems with a combination or heating
water buffer storage unit loaded directly
by Vitolig 300 are an exception to this
rule. The large volume of cold water
returning from the cylinder in such
cases necessitates the installation of an
external return temperature raising
facility.
HIn many cases, the heat demand of a
building does not remain constant
(extensions or thermal insulation
measures). Therefore, the rated output
is matched to the maximum heat
demand foreseeable in the long term. A
heating water buffer storage unit
should be installed, if the heat demand
of 8 kW (for Vitolig 300, 5 to 15 kW) or
12 kW (for Vitolig 300, 8 to 26 kW) will
not be reached within a given period.
5822241 GB
/