Page is loading ...


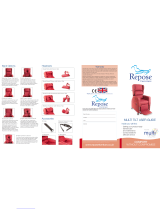
OPERATION
MANUAL
ABOUT SEATING MATTERS AND THE TIERNEY FAMILY
PLEASE TAKE TIME TO READ AND UNDERSTAND THIS INFORMATION
BEFORE ENJOYING THE COMFORT OF YOUR SPECIALLY CRAFTED
SEATING MATTERS CHAIR.
SEATING MATTERS design and manufacture a range of specialist wheelchairs and
other associated products for healthcare environments. The Seating Matters chairs have
been designed by Martina Tierney Occupational Therapist, who worked with seating
throughout her professional career. She was continually searching for seating that would
help her clients but was unable to nd anything that fully met their needs and so Seating
Matters was established by the Tierney Family. Together with Martina and other therapists,
clinicians, engineers and designers, Seating Matters have designed the world’s leading range
of specialist chairs for those in the nursing and care environments. Martina continues
to research seating to nd new answers to seating challenges and educate audiences
throughout the world on her ndings. Today we manufacture a range of adult and paediatric
chairs and other items to make life more comfortable for those in need. We supply our
products across the globe but have not forgotten the family ethos with which we began.
We care about your comfort and wellbeing and it’s our commitment to you to make your
experience as satisfying as it can possibly be. If you have any questions regarding Seating
Matters’ service or the chair you are enjoying, we invite you to call us up direct and speak
to one our team. You can reach us on
+1 (905) 507 9007 or at [email protected] - we will be glad to hear from you.
2www.seatingmatters.com


PRODUCT
DESCRIPTION
TERMINOLOGIES
PATIENT: The person sitting in the chair
USER: Competent person with responsibility for the persons sitting in the chair as well
as the suitability of the equipment for the Patient. The User is responsible for checking the
chair for faults during the course of its use.
There are many options, accessories and alternative features available with the Seating
Matters chairs. We suggest you consult your local Seating Matters provider for exact
information on what the best specications are for you and to nd out what comes as
standard on your chair. Some of the available combinations and features are outlined here.
The Sorrento™ chair can provide pressure distribution due to the multi-stretch material
and reex foam in the seat cushion and offers a great deal of support with the Tilt in Space
mechanism and adjustable lateral supports. The angle of the back can be adjusted to the
Patients liking and the elevating leg rest can raised and lowered, also increasing Patient
comfort. The Tilt in Space will allow all angles on the chair to remain the same while
tilting the Patient back, allowing their weight to be spread throughout the body and reduce
pressure on a given point. The push handle and castors allow the Patient to be transported
in the chair and the chair is fully accessible with a Patient lift, reducing moving and handling
signicantly. The removable arms allow width adjustment and also facilitating side transfers.
The Sorrento™ arm height, seat depth and width and foot board height and angle are all
fully adjustable.
4www.seatingmatters.com


WHAT IS THE
INTENDED USE OF
THE PRODUCT?
The Sorrento™ is designed for the comfort of those who sit for long periods. It is used in
rehabilitation and also for clients with progressive conditions. Its adjustability allows greater
comfort for the Patient and accommodation of their changing needs. (This adjustability can
also accommodate the needs of multiple Patients.) For those who require support in the
trunk and a certain degree of head support, the Sorrento™ accommodates these needs by
using laterals and various head supports.
The Sorrento™ provides pressure distribution due to the multi-stretch material and reex
foam in the seat cushion. Due to the ergonomic design and Tilt in Space mechanism a
comfortable seating position can be achieved. The back can be reclined to a rest position
by the User to accommodate xed hips. The tilt in space and leg rest can then be operated
without changing the back angle, therefore reducing the risk of compromising the position
of the pelvis.
6www.seatingmatters.com


The Sorrento™ can have a manual reclining back and the option of a manual or powered
tilt mechanism and elevating leg rest. The electric system allows the Patient's position to
be changed with a reduced moving and handling risk. It also has the option of a foot board,
adjustable in height and angle to accommodate plantar and dorsal exion and adjustable
height and width lateral supports to assist in stroke therapy or with spinal deformities.
With braking castors at the rear and non-braking castors to the front of the seat and a
push handle, this chair can be used for mobility/transportation around the environment it
is used in.
In addition, the removable arms facilitate side transfers and allow more space for adding
and removing slings for a Patient lift. Various head supports can be used to support the
position of the head for improved function and comfort. Options include concave supports,
horseshoe supports, lateral supports, positioning belts, trays and removable and washable
covers. To order any of these items after delivery of your chair, please contact Seating
Matters on [email protected], +1 (905) 507 9007 or your local Seating Matters
provider.
PRODUCT WARRANTY DETAILS:
The Sorrento™ holds a 2 year warranty from the date of manufacture and a 3 year frame
warranty, where reasonable care has been exercised.
PRODUCT
FEATURES
8www.seatingmatters.com


SAFETY
INSTRUCTIONS
ALL INSTRUCTIONS MUST BE READ AND
UNDERSTOOD BEFORE THE PRODUCT MAY BE USED.
• When the Sorrento™ is not in transit, all the braking castors on the product must
be engaged to prevent risk of injury when being used.
• Under no circumstances must the User or Patient stand or sit on the foot board of
the Sorrento™.
• As far as possible, the Patient specic adjustments should be made when the
Patient is not in the chair to avoid injury. These include head support, back height,
seat depth, foot board height and foot board angle adjustments.
• Care must be taken when making the adjustments on the chair to avoid injury to
the User and Patient. Only a competent person should make adjustments to this
chair. If in doubt as to any of the adjustments, feel free to contact Seating Matters
• Keep all body parts away from the mechanisms under the chair. Repairs and
maintenance should only be carried out by fully trained technicians.
• Exercise care in using the release lever for the reclining mechanisms and adjustments to
avoid injury.
10 www.seatingmatters.com

• The User must ensure that the Patient has a period out of the chair after prolonged
sitting to raise tissue oxygenation levels. Although the chair offers pressure reduction,
the body tissue still needs time to recover. A maximum of 2 hours sitting is
recommended at any one time. You must also observe Patient specic
recommendations and guidelines as set by their health professional with regard to
pressure care.
• For the safety of the User and Patient and to ensure longevity of the electrics on
powered options, please ensure that your Sorrento™ is charged nightly using a Seating
Matters charger through the handset of the chair. For further details or replacement
chargers please contact your Seating Matters provider.
• The chair should not be transported in a vehicle while the Patient is seated on the chair.
• When operating the leg rest, recline and tilt in space features on the chair please
ensure there is a 450mm gap at the front and back of the chair to prevent the back
or leg rest coming into contact with a wall or any other object.
ASSEMBLY AND INSTALLATION GUIDE
• This chair should arrive with you fully assembled. The User must ensure that the
product is in good condition before use (check all nuts and bolts are fastened, fabric in
good condition etc). If there are any problems, these must be reported to your Seating
Matters provider and corrected before the chair is put into use.
• The product must be used on a level, plane, hard surface with the brakes engaged to
avoid it moving during use and to ensure stability.
• The product must be clear of any obstacles before reclining the back to avoid damage
to the chair and objects in its immediate environment.
• The product may not be left in an outdoor environment. More information on fabrics
and their environment can be found on page 21.
11
Sorrento™ Instruction Manual

KILOGRAMS POUNDS STONE
Unloaded chair
weight 67 147.71 10.56
Max Patient
weight (WG1)
(Weight Grade
1 Model)
113.40 250 17.86
Max Patient
weight
(WG2 Model)
158.76 350 25
Max Patient
weight
(WG3 Model)
181.44 400 28.57
Max loaded
weight (WG3
Model)
248.44 547.71 39.13
Please note the maximum safe load for the Patient depends upon the Weight Grade of chair you are using.
The Patient using this chair must not exceed the maximum Patient weight specied for that chair. Please refer
to your Seating Matters provider for further details. IP Rating, power supply, AC/DC Voltage range and settings can be
provided upon request.
12 www.seatingmatters.com

USER GUIDE AND OPERATING INSTRUCTIONS
Please Note:
• BRAKING CASTORS: The Sorrento™
chair must be used on a plane, hard
surface with the brakes engaged to
ensure stability and to avoid the device
moving undesirably during use. Braking
castors must be in the braked position
while in use.
Braking Castors
Model: Sorrento™
(g.1)
(g.1) A competent person, trained in the use of the chair,
should make adjustments and set it up according to the User requirements and Patient
dimensions before the Patient sits in the chair. Ensure there is more than one
competent person there when making adjustments to ensure they are correct and safe
for the Patient. Ensure all xings are secure before allowing the person to sit in the
chair. This includes lateral supports, arm adjustments, seat adjustment and foot board
Please call your Seating Matters provider if you have any questions on these points. This
product should not be lifted at any time unless by competent persons trained in such
manual handling.
13
Sorrento™ Instruction Manual

Back Angle
Adjustment
Wing Knob for
Laterals adjustment
Tilt in
Space
(g.2)
Back Angle Adjustment (g.2a)
Tilt in Space (g.2b)
14 www.seatingmatters.com
Seat Belt
Loops
• BACK ANGLE ADJUSTMENT:
To recline the back of the chair, the
User must inform the Patient then
stand behind the chair, and with two
hands, rmly hold the push handle while
closing the release lever (g. 2a). Move
the back of the chair slowly until it is in
the required position and allow the
release lever to move to its relaxed
position before letting go of the push
handles. (g.2) In powered options,
exercise care in case of injury to the
Patient or damage to the surrounding
environment. Adjustments are
performed according to the buttons
on the handset.
• TILT IN SPACE: To tilt the chair, the
user must inform the Patient then stand
behind the chair with two hands, rmly

15
Sorrento™ Instruction Manual
hold the push handle while closing the
release lever. (g.2b) Tilt the chair to
the required position then let go of the
release lever. In powered options,
exercise care in case of injury to
Patient or damage to surrounding
environment.
• SEAT DEPTH: To increase or
decrease seat depth, loosen the thumb
screws set at 45 degrees under the
seat. (g.3 & g.3b) Adjust the seat to
the required depth by carefully pulling
the seat out. Tighten the screws again to
ensure the seat depth doesn’t
unintentionally change. (g3b)
• ARM REMOVAL: To remove the arms,
loosen the thumb screws behind and in
front of the arm (g.3a & g.3b) and
carefully pull the arm out, leaving it
in a safe place to avoid tripping hazards
or other injuries. When replacing the arms,
ensure the thumb screws are tightened
against the frame of the arm.
Thumb screws
for seat depth
• SEAT WIDTH: To increase the seat
width of the chair, loosen the thumb
screws behind and in front of the arm
(g.3a & g.3b) and carefully pull the
arm out. This can be set at any position.
Ensure the thumb screws are tightened
again to hold the arm in position.
(g.3)
Seat belt loop
Arm removal
Arm removal
Seat depth
(g.3a)
(g.3b)

• LEG ELEVATION: Before changing
the angle of the elevating leg rest, the
User or Patient must ensure there are
no objects in the immediate environment
that could obstruct the leg rest elevation
or come into contact with the Patient's
legs. Using the manual lever located
under the front of the seat, move the leg
rest until it is in the required position
and allow the release lever to move to
its relaxed position. In powered options,
use the handset control to move the leg
rest until it is in the required position
and release the button. Ensure that
only the weight of the Patient's legs
are placed on this leg rest.
• FOOT BOARD HEIGHT: The foot
board can be adjusted in height by pulling
out the spring plungers and sliding it up
(g.4)
Manual Lever
to elevate leg rest
Elevating Leg Rest
Foot Board
16 www.seatingmatters.com
Foot Board height adjustment
Foot board angle adjustment
(g.4a)
(g.4b)

and down on the glide rail. (g.4a) When the spring plungers are released, they will
catch into the nearest hole immediately below the pins. The foot board can also be
removed by dropping it off the bottom of the chair.
• FOOT BOARD ANGLE: Pull out to the spring plungers at the foot board and rotate
to lock out. (g.4b) Ensuring the feet are supported, adjust the angle of the foot
board up or down. When the desired angle is reached, rotate the spring plungers and
ensure they click into position. For those who stand transfer, ensure the leg rest is fully
retracted from its elevated position. Fold the footboard against the calf pad.
Tilt the chair forward to a safe position for the Patient and perform the stand
transfer. At no point should anyone stand or sit on the foot board.
• CHAIR MOVEMENT: To move the chair around, ensure that the back is in a fully
upright position and push using the push handle on the back. Only a competent person
should move this chair.
ACCESSORIES
THE FEATURES OF YOUR SORRENTO™ CHAIR CAN BE ENHANCED BY
THE ADDITION OF SEVERAL ACCESSORIES AND OPTIONS.
• SEAT CUSHION: The seat cushion on the Sorrento™ is a waterproof, pressure
reducing breathable medium foam cushion providing pressure relief and comfort.
The seat cushion will have Velcro on one face and a zip closure at the rear.
User guide and operating instructions: To t the seat cushion to the chair, ensure the Velcro is
on the bottom and makes contact with the Velcro already on the base board, with the zip
closure at the rear. This is important as the structure of the foam allows good immersion and
envelopment of the body ONLY when tted as instructed.
• FOOT BOX: The height adjustable foot box is double sided and has pressure
reducing foam and a Dartex covering. Two can be used on the one chair to give
maximum support of the lower legs and is recommended to reduce the risk of Patient
injury from the foot board hardware.
User guide and operating instructions: The foot box is added to the same hardware that the
height adjustable foot board attaches to. First remove the foot board by pulling out the spring
plungers and dropping it off the bottom of the chair. On the foot box, pull out both spring
plungers and slide it onto the glides of the calf panel. Locate to the desired height or position
and reattach the foot board.
• LATERAL SUPPORTS: Two individual lateral supports which include pressure
reducing padding can be added to this chair.
17
Sorrento™ Instruction Manual
(g.4a)

User guide and operating instructions: Insert the tubular end of the lateral into the mounting
hardware on the back. Being careful to meet the Patient's support needs, move the lateral to
the desired position and lock it in place using the adjustable wing knob at the back.(g.2)
• POSITIONING BELTS: The Seating Matters two point belt is only to be used for
positioning in accordance with facilitator local regulations regarding restraint.
User guide and operating instructions: Adjust the belt to the desired length. Clip the two metal
ends of the belt onto the two positioning belt loops on the hardware of the chair. (g.2)
Pull to ensure it is locked in place. Fasten the belt to a safe and suitable position on the Patient.
Monitor and check regularly in accordance with facility or local regulations regarding the use of
the belt. The positioning belt should not be used for restraint purposes
18 www.seatingmatters.com
(g.5) Accessories
Seat Cushion
Seat Cushion Cover
Positioning Belts
• ARM SUPPORT: One or two modular, pressure relieving hip and arm supports can
be used rest the Patient's arm on and can also help to reduce the seat width to
16 inches/400mm.
User guide and operating instructions: Arm supports will t on tightly over the arm of the chair
Ensure the padding goes to the inside and to the front of the arm that they are pulled down as
far as possible.
/