Page is loading ...

INSTRUCTION MANUAL / RECIPE GUIDE
MANUAL DE INSTRUCCIÓNES / GUÍA DE RECETAS
For customer service questions or comments
Dudas o commentarios para departamento de servico a clientes
1-866-832-4843
www.sensioinc.com
Follow us on:
www.bellahousewares.com
twitter.com/Bellalifefacebook.com/Bellalife
©2012 Sensio.
BELLA® is a registered trademark of Sensio Inc., Montréal, Canada H3B 3X9
BELLA® es una marca registrada de Sensio Inc., Montréal, Canada H3B 3X9
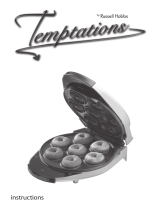
MINI DONUT MAKER
MÁQUINA PARA HACER MINI ROSQUILLAS
SO-307530_13466 BELLA Donut Maker IM Cover r2_Layout 1 12-02-13 3:01 PM Page 1

SO-307530 BELLA DN Maker IM Interior r2_Layout 1 12-02-22 12:18 PM Page 1

1
TABLE OF CONTENTS
Important Safeguards ............................................................................................................2
Additional Important Safeguards............................................................................................3
Notes on the Cord.................................................................................................................3
Notes on the Plug .................................................................................................................3
Getting to Know Your Mini Donut Maker................................................................................4
Before Using for the First Time ..............................................................................................5
Operating Instructions ...........................................................................................................5
Mini Donut Baking Tips .........................................................................................................6
User Maintenance Instructions...............................................................................................7
Care & Cleaning Instructions..................................................................................................7
Storing Instructions................................................................................................................7
Recipes............................................................................................................................8-13
ÍNDICE
Medidas de seguridad importantes .....................................................................................14
Otras medidas de seguridad importantes............................................................................15
Notas sobre el cable............................................................................................................15
Notas sobre el enchufe........................................................................................................15
Conozca su máquina para hacer mini rosquillas..................................................................16
Antes de utilizar por primera vez..........................................................................................17
Instrucciones de funcionamiento ....................................................................................17-18
Consejos para hornear mini rosquillas ............................................................................18-19
Instrucciones de mantenimiento para el usuario ..................................................................19
Instrucciones de limpieza y cuidado ....................................................................................19
Instrucciones de almacenamiento........................................................................................20
Recetas..........................................................................................................................21-26
SO-307530 BELLA DN Maker IM Interior r2_Layout 1 12-02-22 12:18 PM Page 1

2
IMPORTANT SAFEGUARDS
WARNING: When using electrical appliances, basic safety precautions should always
be followed, including the following:
1. READ ALL INSTRUCTIONS
1. The cord to this appliance should be plugged into a 120 V AC electrical outlet only.
2. To protect against risk of electric shock, do not immerse the cord, plug or cooking unit
in water or any other liquid.
3. Do not touch hot surfaces. Use handles.
4. This appliance is not intended for use by persons (including children) with reduced
physical, sensory or mental capabilities, or lack of experience and knowledge,
unless they have been given supervision or instruction concerning use of the appliance
by a person responsible for their safety.
5. Children should be supervised to ensure that they do not play with the appliance.
6. Unplug from wall outlet when not in use and before cleaning. Allow to cool
before cleaning or storing this appliance.
7. Never yank the cord to disconnect the cooking unit from the outlet.
Instead, grasp the plug and pull to disconnect.
8. Do not operate any appliance if the cord is damaged. Do not use this appliance if the unit
malfunctions, if it is dropped or has been damaged in any manner. In order to avoid
the risk of an electric shock, never try to repair the Mini Donut Maker yourself.
Bring it to a qualified technician for examination, repair or electrical or mechanical
adjustment. An incorrect reassembly could present a risk of electric shock
when the Mini Donut Maker is used.
9. The use of accessories or attachments not recommended by the manufacturer
may cause fire, electrical shock or injury.
10. Do not use outdoors or for commercial purposes.
11. Do not use this appliance for purposes other than the one for which it was designed.
12. Do not let the electrical cord hang over the edge of the table or countertop,
or touch hot surfaces.
13. Do not place on or near a hot gas or electric burner or heated oven.
14. Use on a heat-resistant, flat level surface only.
15. Use extreme caution when moving any appliance containing hot food, water,
oil or other liquids.
16. To disconnect, remove plug from outlet.
17. Always unplug after use. The appliance will remain ON unless unplugged.
18. CAUTION HOT SURFACES: This appliance generates heat during use.
Proper precautions must be taken to prevent the risk of burns, fire or other damage
to persons or property.
19. When using this appliance, provide adequate ventilation above and on all sides for air
circulation. Do not allow this appliance to touch curtains, wall coverings, clothing,
dish towels or other flammable materials during use.
20. Use with wall receptacle only.
FOR HOUSEHOLD USE ONLY
SAVE THESE INSTRUCTIONS
SO-307530 BELLA DN Maker IM Interior r2_Layout 1 12-02-22 12:18 PM Page 2

3
ADDITIONAL IMPORTANT
SAFEGUARDS
CAUTION: This appliance is hot during operation and retains heat for some time after
turning OFF. Always use oven mitts when handling hot materials and allow metal parts
to cool before cleaning. Do not place anything on top of the appliance while
it is operating or while it is hot.
1. All users of this appliance must read and understand this Instruction
Manual before operating or cleaning this appliance.
2. Do not leave this appliance unattended during use.
NOTES ON THE CORD
The provided short power-supply cord (or detachable power-supply cord) should be used
to reduce the risk resulting from becoming entangled in or tripping over a longer cord.
Do not use an extension cord with this product.
NOTES ON THE PLUG
This appliance has a polarized plug (one blade is wider than the other). To reduce the risk
of electric shock, this plug will fit in a polarized outlet only one way. If the plug does not fit fully
into the outlet, reverse the plug. If it still does not fit, contact a qualified electrician.
Do not modify the plug in any way.
PLASTICIZER WARNING
CAUTION: To prevent Plasticizers from migrating to the finish of the counter top or table top
or other furniture, place NON-PLASTIC coasters or place mats between the appliance
and the finish of the counter top or table top. Failure to do so may cause the finish to darken;
permanent blemishes may occur or stains can appear.
ELECTRIC POWER
If the electrical circuit is overloaded with other appliances, your appliance may not operate
properly. It should be operated on a separate electrical circuit from other appliances.
SO-307530 BELLA DN Maker IM Interior r2_Layout 1 12-02-22 12:18 PM Page 3

L
atch Lock
Figure 1
P
olarized Plug
Lid
Non-Stick Upper
and Lower
C
ooking Plates
Green READY Light
Non-skid Feet
(Not Shown)
Orange POWER ON
Light
GETTING TO KNOW YOUR MINI DONUT MAKER
Product may vary slightly from illustrations.
4
SO-307530 BELLA DN Maker IM Interior r2_Layout 1 12-02-22 12:18 PM Page 4

BEFORE USING FOR THE FIRST TIME
1. Carefully unpack the Mini Donut Maker and remove all packaging and materials.
2. Before using your Mini Donut Maker for the first time, wipe the cooking plates
with a damp cloth to remove all dust, and then dry. Wipe outer surfaces with a slightly
damp, soft cloth or sponge.
CAUTION: Take care to prevent water from running into the appliance.
NEVER IMMERSE MINI DONUT MAKER BODY IN WATER OR ANY OTHER LIQUIDS!
3. Set the appliance on a dry, clean and flat surface. Keep the Mini Donut Maker closed
until use.
OPERATING INSTRUCTIONS
1. Firmly press the handle’s latch lock and lift the top lid to the open position.
2. Before baking the first mini donuts of the day, pour a teaspoon of vegetable oil
to both the top and bottom mini donut plates. Spread with an absorbent kitchen towel
and wipe off any excess oil.
3. Plug unit into a 120 V AC electrical outlet to preheat. The orange POWER ON light
and green READY light will illuminate. Close the lid.
NOTE: When your Mini Donut Maker is heated for the first time, it may emit slight smoke
or odor. This is normal and should disappear after 1 or 2 uses. This does not affect
the safety of the appliance. However, as it may affect the flavor of the first mini donuts
prepared in the Mini Donut Maker, it is recommended that these be discarded.
4. While preheating, prepare mini donut batter.
5. After approximately 2 to 3 minutes, the green READY light will turn off, indicating the unit
is preheated and is ready for use.
6. For best results, use a non-stick cooking spray to lightly coat the non-stick plates before
cooking. This will assist in the removal of the mini donuts after cooking.
7. Recipes will vary in cook time and brownness; batters with more sugar will brown quicker.
Note the perfect bake times for each batter recipe for future use.
8. Place a scant tablespoon of donut batter into the center of each of the mini donut molds
on the lower cooking plate. Spread slightly to fill the entire shape. Try not to overfill,
batter will expand when cooked.
9. Lower the top lid, press down so that the latch lock is secured.
10. The green READY light will turn off once the mini donuts are ready; cook 2 to 3 minutes
until brown on outside.
11. Wearing oven mitts, wipe the outside clean with a clean paper towel or cleaning cloth
as necessary.
12. At the end of the cook time, press the handle’s latch lock and lift the top lid gently;
if it pulls, continue cooking for 30 seconds and test again.
NOTE: If the mini donuts need to bake to a darker finish, close the lid and continue baking
for 15 seconds until the desired color is achieved.
NOTE: As the mini donuts use a small amount of batter, and the Mini Donut Maker plates
are very hot, the cooking time is generally shorter rather than longer.
Be careful not to burn mini donuts.
13. Wearing oven mitts, remove mini donuts from the cooking plate using a non-metallic
utensil. A plastic spatula or spoon will help to remove the mini donut.
NOTE: If additional mini donuts are to be baked, keep the Mini Donut Maker closed
to retain heat. Always wait until the green READY light turns off before baking more mini
donuts.
NOTE: Mini Donuts made later will bake faster because extra heat has been retained.
It may be necessary to adjust to a shorter cooking time to accommodate.
14. When baking is complete, after mini donuts have been removed, unplug the power cord
from electric outlet. Lift the top lid to expose the cooking plates and allow unit to cool.
15. Do not clean until unit has been fully cooled.
5
SO-307530 BELLA DN Maker IM Interior r2_Layout 1 12-02-22 12:18 PM Page 5

6
MINI DONUT BAKING TIPS
• Recipes may be doubled.
• Sift all dry ingredients together. It is not necessary to beat egg yolks and milk separately.
Just add them to the combined flour mixture and use a whisk or mixer to blend
the ingredients well.
• Do not open the Mini Donut Maker during the first minute of baking or the mini donut
will separate. Completely bake the mini donut before removing.
• When a mini donut is done, the top lid should lift easily. Lift gently; if it pulls,
continue cooking for 1 minute and test again.
• When preparing mini donut batter, do not over-mix or mini donuts will be tough.
Stir batter only until large lumps of dry ingredients disappear.
• The optimal amount of batter to produce a full-shaped mini donut, without overflowing,
will vary with different mini donut batters.
• For more evenly shaped mini donuts, spread thick batters to the outer edge
of the cooking plate using a heat-proof rubber spatula or other non-metallic utensil before
closing the lid.
• To retain crispness, move baked mini donuts to a paper napkin or a wire cooling rack
to absorb any condensation. To keep mini donuts hot, place in an ovenproof dish
on an oven rack and warm at about 200-250° F (90-120° C). Mini Donuts will keep
for about 20 minutes before they begin to dry out.
• Add fun glazes and toppings to cooled mini donuts. See Mini Donut Glazes and Toppings
section in the Recipe section of this Instruction Manual.
• Baked mini donuts freeze well. Cool completely on a wire rack. Store in a plastic freezer
bag or in a covered container. Thaw frozen mini donuts in a toaster oven until hot
and crisp or place in a microwave oven for 10 seconds. Do not over-cook.
• Add glazes and toppings to the thawed donuts.
For lower sugar mini donuts:
• Use sugar substitutes.
• Use sugar-free maple syrup.
• Use sugar-free or no sugar added jello, puddings, jellies, jams, etc. for flavorings
and toppings.
For lower fat, lower cholesterol mini donuts:
• Use skim milk.
• Adapt recipes by eliminating the egg yolk. Always use liquid vegetable oils
such as canola, corn or sunflower, instead of butter.
For higher fiber mini donuts:
• Substitute 1⁄2 cup or more of white flour with whole-wheat flour.
• Substitute 1⁄4 cup of white flour with wheat or oat bran.
SO-307530 BELLA DN Maker IM Interior r2_Layout 1 12-02-22 12:18 PM Page 6

USER MAINTENANCE INSTRUCTIONS
This appliance requires little maintenance. It contains no user serviceable parts. Do not try
to repair it yourself. Contact a qualified appliance repair technician if the product requires
servicing.
CARE AND CLEANING
CAUTION: Unplug from electrical outlet and allow to cool thoroughly before cleaning.
1. The Mini Donut Maker does not disassemble for cleaning.
2. Never immerse appliance in water or other liquids. Never place Mini Donut Maker
in dishwasher.
3. The mini donut cooking plates should be cleaned and conditioned before each heating.
4. Brush cooking plates with a clean, soft pastry brush or cloth. To condition plates,
lightly coat the cooking surfaces with solid vegetable shortening or vegetable oil. Carefully
follow suggested cleaning procedures below. After a time, if mini donuts show signs of
sticking, recondition as needed.
5. To protect the premium quality non-stick surfaces, use only plastic, nylon or wooden
utensils.
6. To remove any batter baked onto the cooking plates, pour a small amount of cooking oil
onto the hardened batter. Allow to set for 5 minutes, then wipe softened batter off
with a paper towel or soft cloth. Remove stubborn stains with a plastic mesh puff or pad.
A clean round kitchen brush or a toothbrush works well to remove baked-on batter
from the molds. For best results, use only products with directions stating they are safe
for cleaning non-stick cooking surfaces. Do not use steel wool or coarse scouring pads.
7. The exterior finish should be cleaned with a non-abrasive cleaner and a soft, damp cloth.
Dry thoroughly.
STORING INSTRUCTIONS
1. Make sure unit is unplugged and fully cooled.
2. Secure the lid shut with the latch.
WARNING: Never store Mini Donut Maker while it is hot or still plugged in.
3. Use the cord wrap on the bottom of the Mini Donut Maker to store the cord.
(See Figure 2.)
4. Do not put any stress on cord where it enters unit, as this could cause cord to fray
and break.
5. Store Mini Donut Maker in its box or stand unit on its end for easy and compact storage
Figure 2
7
SO-307530 BELLA DN Maker IM Interior r2_Layout 1 12-02-22 12:18 PM Page 7

BASIC DONUT RECIPE
1 cup flour
1/2 cup sugar
1 tbsp baking powder
1 egg
1/2 cup milk
1/2 teaspoon vanilla
4 tablespoons cooking oil
–––––––––––––––––––––––––––––––––––––––––––––––––––––––––––––
Stir dry ingredients together. Add egg, vanilla, and milk and beat
1 minute with electric mixer or vigorously by hand.
Add oil and continue to beat 1 minute more.
–––––––––––––––––––––––––––––––––––––––––––––––––––––––––––––
BUTTERSCOTCH DONUTS
The crunchy outside and the soft sweet inners make this treat a winner.
3/4 cup unbleached, pre-sifted flour
1/2 cup sugar
1 (1 oz.) package Jello
®
Instant Sugar Free Fat Free
Butterscotch Pudding Mix
1 teaspoon baking powder
3 tablespoons maple syrup
3 tablespoons water
3 tablespoons vegetable oil
–––––––––––––––––––––––––––––––––––––––––––––––––––––––––––––
Makes 21 mini donuts
–––––––––––––––––––––––––––––––––––––––––––––––––––––––––––––
9
SO-307530 BELLA DN Maker IM Interior r2_Layout 1 12-02-22 12:18 PM Page 9

CHERRY CHERRY
CHIP DONUTS
1 box Betty Crocker
®
Cherry Chip Cake Mix
1 egg
2 cups cherry pie filling
–––––––––––––––––––––––––––––––––––––––––––––––––––––––––––––
BLUEBERRY DONUTS
3/4 cup unbleached, pre-sifted flour
1/2 cup brown sugar
1 teaspoon baking powder
3 tablespoons Smucker’s
®
Blueberry Preserves
3 tablespoons milk
3 tablespoons vegetable oil
–––––––––––––––––––––––––––––––––––––––––––––––––––––––––––––
Makes 14 mini donuts.
–––––––––––––––––––––––––––––––––––––––––––––––––––––––––––––
10
SO-307530 BELLA DN Maker IM Interior r2_Layout 1 12-02-22 12:18 PM Page 10

MOCHA ‘SPRESSO DONUTS
1 egg
1/4 cup cold water
1/4 cup vegetable oil
1 tablespoon dark Karo
®
corn syrup
2 rounded teaspoons espresso powder
3/4 cups all-purpose flour
1/2 cup brown sugar
1 packet Swiss Miss
®
Milk Chocolate Hot Chocolate Mix
1 teaspoon baking soda
1/2 teaspoon salt
–––––––––––––––––––––––––––––––––––––––––––––––––––––––––––––
Makes 14 mini donuts.
–––––––––––––––––––––––––––––––––––––––––––––––––––––––––––––
PINKIE STRAWBERRY
BANANA DONUTS
1 cup Bisquick
®
1/2 cup liquid Coffeemate
®
(plain)
1 (.3-oz.) box Strawberry Banana Sugar Free Jello
®
1 tablespoon cherry pie filling
1 egg
1 tablespoon vegetable oil
–––––––––––––––––––––––––––––––––––––––––––––––––––––––––––––
Makes 14 mini donuts.
–––––––––––––––––––––––––––––––––––––––––––––––––––––––––––––
11
SO-307530 BELLA DN Maker IM Interior r2_Layout 1 12-02-22 12:18 PM Page 11

12
ORANGE GINGER DONUTS
3/4 cup all purpose flour
1/2 cup sugar
1 teaspoon baking powder
2 teaspoons fresh grated ginger
1/4 teaspoon salt
1 large egg
8 tablespoons thawed frozen orange juice concentrate
3 tablespoons vegetable oil
1 teaspoon orange marmalade
–––––––––––––––––––––––––––––––––––––––––––––––––––––––––––––
Makes 14 mini doughnuts.
–––––––––––––––––––––––––––––––––––––––––––––––––––––––––––––
SO-307530 BELLA DN Maker IM Interior r2_Layout 1 12-02-22 12:18 PM Page 12

13
MINI DONUT GLAZES
AND TOPPINGS
GLAZES
NOTE: The basic rule of thumb is to prepare glazes by adding
1 part water (or milk) to 3 parts product and then heating
in a microwave for 10 seconds. Stir well and reheat
in 10 second increments until the desired consistency
is achieved for glazing.
NOTE: Times may change depending on quantities used.
Honey
Chocolate (melted mini chips)
Maple Syrup
Strawberry Preserves
Raspberry Preserves
Peanut Butter heated with milk
Cherry Pie Filling
Lemon Preserves or Pie Filling
Orange Marmalade
Blueberry Preserves
Mixed Berry Preserves
Caramel (melted butter + sugar)
TOPPINGS
Colored and Rainbow Sprinkles
Chopped Chocolate
Sweetened Coconut
Chopped Peanuts
Crushed Cookies
Crushed Candy
Mini Chocolate Chips
Mini Butterscotch Chips
–––––––––––––––––––––––––––––––––––––––––––––––––––––––––––––
SO-307530 BELLA DN Maker IM Interior r2_Layout 1 12-02-22 12:18 PM Page 13

SO-307530 BELLA DN Maker IM Interior r2_Layout 1 12-02-22 12:18 PM Page 27

SO-307530 BELLA DN Maker IM Interior r2_Layout 1 12-02-22 12:18 PM Page 28
/