Page is loading ...

1
Questions, problems, missing parts? Before returning to your retailer, call our customer service department at 1-877-319-3757,
7 a.m. - 5 p.m., CST, Monday - Friday.
DRINKING WATER
FAUCET
Español p. 5
04-13-2012
www.homewerksww.com
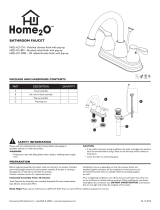
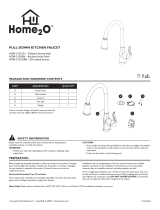
PACKAGE AND HARDWARE CONTENTS
PREPARATION
PART DESCRIPTION QUANTITY
A Faucet 1
SAFETY INFORMATION
Please read and understand this entire manual before
attempting to assemble, operate or install the product.
CAUTION
• If you solder the joints during installation of the faucet,
the seats, cartridges, and washers must be removed
before using a ame or the warranty will be voided on
these parts.
• Cover the sink drain to avoid losing parts.
WARNING
• Protect your eyes with safety glasses when cutting or
soldering water supply lines.
Before beginning assembly of product, make sure all parts
are present. Compare parts with package contents list and
hardware contents. If any part is missing or damaged, do
not attempt to assemble the product. Contact customer
service for replacement parts.
Estimated Assembly Time: 30 minutes
Tools Required for Assembly (not included): Adjustable
Wrench, Groove Joint Pliers, Pipe Wrench, Phillips Screw-
driver, Pipe Tape or Pipe Thread Compound, and Supply
Lines
Installations may vary depending on how the previous faucet
was installed. Supplies necessary for the installation of the
faucet are not all included; however, they are available
wherever plumbing supplies are sold.
Prior to beginning installation, turn off the hot or cold water
lines, then turn on the old faucet to release built-up pressure.
When installing the new faucet, hand tighten the connector
nuts. DO NOT OVERTIGHTEN. Connections that are too
tight will reduce the integrity of the system.
MODEL #3310-160-CH-B-Z
A

2
PRODUCT SPECIFICATIONS
SPECIFICATIONS SPECIFICATIONS
Max. ow rate: 6.9 GPM (26.1 LPM) at 60 PSI Manufactured to include no more than 0.25% weighted
average lead content on wetted surfaces
ASME A112.18.1/CSA B125
NSF 61-9
Total weight of item: 0.55 lbs.
Brass waterways
www.homewerksww.com
ASSEMBLY INSTRUCTIONS
1. Turn off water at the supply
valve under the sink or at the
main water supply, disconnect
the supply line, and remove old
faucet.
Clean and dry surface area where
new faucet will be mounted.
Use PTFE tape or joint
compound on all threaded
connections (wrapped clockwise).
1
2. If this is a new installation you
will need to drill a hole through
your counter top to mount the
faucet. The hole should be
within 2-1/4" of the sink to allow
the faucet to drain into the sink.
The hole must be at least 7/16"
in diameter but no more than
1-1/2" in diameter. A smaller
hole will supply better support
for your faucet.
Drill Hole Size:7/16"
2
Once you have drilled the hole, insert the packing (rubber) washer,
brass washer, another packing (rubber) washer and the iron washer
over the faucet shaft. Make sure you follow this order; the iron
washer should be on the bottom of the shaft.
3. Insert the faucet shaft through the counter top hole from the top.
4. From under the counter top, slip the lock washer onto the shaft and
hand tighten. Make sure the faucet spout is positioned where you
want it above the sink and tighten the lock nut.
5. If using a exible supply line it
must have a 1/4" compression
nut on the side hooking onto the
faucet. The other side must
t onto your lter outlet or water
supply.
Discard the compression nut and
ring that came with the faucet.
Tighten your supply line directly
onto the faucet shank.
5
If using 1/4" vinyl tube follow steps above but be sure to insert a 1/4"
tubing adapter (not included) into the end of your vinyl tube before
attaching the compression ring and nut.
Hook the other end of the supply line up to your water source or lter
output per the instructions that came with the lter or valve/tting.
6. Turn on water and look for any
leaks.
Flip the faucet lever up and
allow water to run for 30
seconds to clear any debris
out of the line.
6
OPERATION INSTRUCTIONS
CARE AND MAINTENANCE
Your water faucet is NOT intended for use with hot water.
Using it with hot water may damage the faucet and cause
leaking and scalding.
Flipping the faucet lever up will cause the water to run
continuously from the faucet. To stop the water, push the
faucet lever back down to its starting postion.
Pushing the faucet lever down will turn on the water until
you release the lever which will then stop the water ow
automatically.
Clean periodically with a soft cloth. Avoid abrasive cleaners,
steel wool, and harsh chemicals as these will dull the nish
and void your warranty.

3
www.homewerksww.com
TROUBLESHOOTING
PROBLEM: Faucet drips.
POSSIBLE CAUSE: There may be debris in the handle.
CORRECTIVE ACTION:
1. Shut off the water supply.
2. Take hold of the faucet spout, hold the base down with
your other hand and pull up. The faucet spout should
come out of the base.
3. Slide the faucet handle straight out.
4. Use needle nose pliers, insert into the opening in the
faucet base. Gently secure the spring mechanism and
turn counter-clockwise while pulling up.
5. Remove the spring mechanism and rinse clean.
6. Replace the spring mechanism remembering to turn it
clockwise to tighten.
7. Slide the faucet handle back into place.
8. Push the faucet stem back into place.
9. Turn on the water and ush for 30 seconds.
PARTS LIST
For replacement parts, call our customer service department at 1-877-319-3757, 7 a.m. - 5 p.m., CST, Monday - Friday.
PART DESCRIPTION PART NUMBER
1 Nut
RP01450
2 Ring
3 Locknut
4 Lock washer
5 Washer
6 Packing
7 Washer
8 Packing
9 Shank –
10 Body –
11 O-ring
RP01451
12 Stem
13 Spring
14 O-ring
15 Bonnet
16 O-ring
17 Set screw
18 Handle bushing
19 Handle
20 Spout
RP01452
21 Drain nozzle
22 O-ring (2)
23 Filter
1
2
3
4
5
6
7
8
20
23
19
11
12
13
14
15
16
17
18
21
22
10
9

www.homewerksww.com
ROUGH-IN
4
6.75"
5.0"
2.0"
1.75"
2.375"
.4375"–24UNS

5
www.homewerksww.com
¿Preguntas, problemas, piezas faltantes? Antes de regresar a la tienda, llame a nuestro departamento de servicio al cliente al
1-877-319-3757, 7 a.m.-5 p.m., hora del centro, de lunes - viernes.
BEBER AGUA DEL
GRIFO
CONTENIDO DEL PAQUETE
PREPARACIÓN
INFORMACIÓN DE SEGURIDAD
Lea y comprenda completamente este manual antes de inten-
tar ensamblar, usar o instalar el producto.
PRECAUCIÓN
• Si suelda las juntas durante la instalación del grifo, se
deben retirar los asientos, los cartuchos y las arande
las antes de usar la llama. De lo contrario, se anulará la
garantía de dichas piezas.
• Cubra el desagüe para evitar que se pierdan piezas.
ADVERTENCIA
• Proteja sus ojos con las gafas de seguridad al cortar
o soldando líneas de suministro del agua
Antes de comenzar a ensamblar el producto, asegúrese de
tener todas las piezas. Compare las piezas con la lista del
contenido del paquete y los aditamentos. Si falta alguna pieza
o hay piezas dañadas, no intente ensamblar el producto.
Póngase en contacto con el Departamento de Servicio al
Cliente para obtener piezas de repuesto.
Tiempo calculado de ensamblaje: 30 minutos
Herramientas necesarias para el ensamblaje (no se incluyen):
Llave inglesa ajustable, pinzas con dientes ranurados, llave
para tuberías, destornillador Phillips, cinta para tuberías o
compuesto para roscas de tubería y tuberías de suministro.
Las instalaciones pueden variar según cómo se instaló el grifo
anterior. No se incluyen todos los materiales necesarios para
la instalación del grifo; no obstante, estos están disponibles en
cualquier lugar donde se vendan artículos de plomería.
Antes de comenzar la instalación, corte el suministro de agua
fría y caliente, y luego abra el grifo viejo para liberar la presión
acumulada. Cuando instale el grifo nuevo, Apriete las tuercas
de conexión. NO APRIETE. Las conexiones que estén muy
apretadas reducirán la integridad del sistema.s
MODELO #3310-160-CH-B-Z
PIEZA DESCRIPCIÓN CANTIDAD
A Grifo 1
A

6
www.homewerksww.com
ESPECIFICACIONES DEL PRODUCTO
ESPECIFICACIONES ESPECIFICACIONES
Caudal de ujo máximo: 8,3 LPM (2,2 GPM) a 60 PSI Fabricado para que no incluya más de 0,25% de contenido
promedio en peso de plomo para supercies con agua
ASME A112.18.1/CSA B125
NSF 61-9 Peso total del artículo: 0,2495 kg
Cursos de agua de latón
INSTRUCCIONES DE ENSAMBLAJE
INSTRUCCIONES DE FUNCIONAMIENTO
CUIDADO Y MANTENIMIENTO
El grifo de agua no está destinado para su uso con agua
caliente. Su uso con agua caliente puede dañar el grifo y causar
fugas y quemaduras.
Inversión de la palanca del grifo hacia arriba hará que el agua
corra continuamente desde el grifo. Para detener el agua,
empuje la palanca del grifo hacia abajo hasta su posición de
partida.
Empujando la palanca del grifo de abajo se enciende el agua
hasta que suelte la palanca de la que se parará el ujo de agua
automáticamente.
Limpie periódicamente con un paño suave. Evite utilizar limpiad-
ores abrasivos, lana de acero y químicos agresivos, ya que
pueden dañar el acabado y anular su garantía.
1. Cierre el agua en la válvula de
suministro debajo del fregadero o
en el suministro principal de agua,
desconecte la línea de aliment-
ación y retire la llave vieja.
Supercie limpia y seca en la que
se monta nuevo grifo.
Utilice cinta de PTFE o
compuesto para juntas en todos
los recauchutados conexiones
de las agujas del reloj
(envuelto).
1
2. Si se trata de una nueva
instalación tendrá que perforar un
agujero a través de ustedes frente
a la parte superior para montar el
grifo. El agujero debe estar dentro
de 2-1/4" de la pileta para que el
grifo para drenar en el fregadero.
El agujero debe ser por lo menos
7/16" de diámetro, pero no más
de 1-1/2" de diámetro. Un agujero
más pequeño proporcionará un
mejor apoyo a su grifo.
Drill Hole Size:7/16"
2
Una vez que haya perforado el agujero, inserte el embalaje (de caucho)
y la arandela, la arandela de bronce, otro embalaje (de caucho) y la
arandela y la arandela de hierro sobre el eje del grifo. Asegúrese de
seguir este orden, la arandela de hierro debe estar en el fondo del
pozo.
3. Inserte el eje del grifo a través del oricio de la parte superior del
mostrador.
4. Por debajo del mostrador, deslice la arandela en el eje y apriete a
mano. Asegúrese de que la boquilla de la llave se coloca donde
usted quiera sobre el lavabo y apriete la tuerca de bloqueo.
5. Si se utiliza una línea exible de
suministro debe tener un 1/4"
tuerca de compresión en el lado
de enganche en el grifo. El otro
lado debe encajar en su salida
del ltro o de suministro de
agua.
Deseche la tuerca de compre-
sión y el anillo que viene con
la llave. Apriete la línea de
alimentación directamente en
el mango del grifo.
5
Si se utiliza 1/4 "tubo de vinilo siga los pasos anteriores, pero asegúrese
de insertar un 1/4" adaptador del tubo (no incluido) en el extremo de la
tubería de plástico antes de colocar el anillo de compresión y la tuerca.
Conecte el otro extremo de la línea de suministro hasta su fuente de
agua o el ltro de salida de acuerdo con las instrucciones que vienen con
el ltro o la válvula / accesorio.
6. Abra el agua y buscar las
fugas.
Levante la palanca del grifo y
permitir que el agua corra
durante 30 segundos para
eliminar cualquier residuo
fuera de la línea.
6

7
www.homewerksww.com
PROBLEMA: La llave gotea.
POSIBLE CAUSA: es posible que los desechos en el
mango.
ACCIÓN CORRECTIVA:
1. Cortar el suministro de agua.
2. Echa mano de la boquilla de la llave, mantenga la base
hacia abajo con la otra mano y tire hacia arriba. La
boquilla de la llave debe salir de la base.
3. Deslice la manija de la llave hacia fuera.
4. Use unas pinzas de punta de aguja, inserte en la
abertura de la base del grifo. Suavemente asegurar el
mecanismo de resorte y gire hacia la izquierda mientras
tira hacia arriba.
5. Retire el mecanismo de resorte, enjuagar y limpiar.
6. Vuelva a colocar el mecanismo de resorte recordar para
convertirlo las agujas del reloj para apretar.
7. Deslice la llave del grifo en su lugar.
8. Empuje el vástago del grifo en su lugar.
9. Abra el agua y enjuague durante 30 segundos.
SOLUCIÓN DE PROBLEMAS
LISTA DE PIEZAS
Para piezas de repuesto, llame a nuestro departamento de servicio al cliente al 1-877-319-3757, de 7 am - 5 pm, hora central,
Lunes - Viernes.
PARTE DESCRIPCIÓN PIEZA
1
Tuerca
RP01450
2
Anillo
3
Contratuerca
4
Arandela de seguridad
5
Lavadora
6
Embalaje
7
Lavadora
8
Embalaje
9
Mango
–
10
Cuerpo
–
11
Junta tórica
RP01451
12
Tallo
13
Primavera
14
Junta tórica
15
Capó
16
Junta tórica
17
El tornillo de ajuste
18
Anillo de la palanca
19
Manejar
20
Pico
RP01452
21
Escurrir la boquilla
22
O-ring (2)
23
Filtrar
1
2
3
4
5
6
7
8
20
23
19
11
12
13
14
15
16
17
18
21
22
10
9

8
www.homewerksww.com
PREPARACIÓN EN
6.75"
5.0"
2.0"
1.75"
2.375"
.4375"–24UNS
/