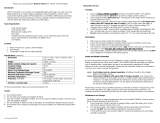
Page is loading ...

On-board Charging Converter B2B
Fully automatic charger for charging, trickle charging und maintenance of unit batteries
TS Battery Charger PFPN 1204 Input 12 V / 24 V, Charging Capacity 12 V / 4 A No. 0694
TS Battery Charger PFPN 1204 Fc as 0694, with Transmission FIRECAN Signals No. 0694c
Charging of the starter battery 12 V from the 12 V/24 V vehicle board mains of:
• Portable fire pumps TS / PFPN
• Mobile power generators
• Units
The unit ensures quick readiness for use of the unit battery
and protection of the full battery in case of extended standstill
periods by disconnection of the charging current with
systematic pulse recharching, if required also with training, to
avoid "drying up" of the battery.
Further Characteristics of the Unit:
• Full main charging, trickle charging and storage charging by
6-stage charging characteristic linesIU1oU2oU3.
• Four (4) adapted charging characteristic lines for 12 V lead,
acid, gel, AGM1, AGM2 starter batteries can be adjusted.
• Four (4) adapted charging characteristic lines for 12 V-13.3 V
lithium LiFePO4 starter batteries can be adjusted.
• Battery capacities 6-100 Ah with charging current rates 1 A-4 A can be adjusted.
• Supply can be switched over from the 12 V or 24 V vehicle board mains.
• Disconnection from power of the charging plug after withdrawal avoiding plug corrosion and short circuits.
• Automatic charging start with charging of the vehicle board battery (driving, mains charging).
• Automatic disconnection in case of missing charging of the vehicle board battery (undervoltage protection).
• Galvanic isolation of input and output by built-in isolating transformer:
o Corrosion of the unit rack (creepage) is avoided.
o Ensures exact observation of the charging voltage rates, neat ground ratio.
o Completely 24 V/12 V puncture-proof, also in case of failure.
• Clearly arranged display of the battery condition.
• Audible and visual alarm.
• Potential-free relay signalling contact (change-over contact) for "Charge o.k."-
• Battery trainer for lead-acid, gel, AGM1, AGM2 batteries can be activated during the charging breaks.
• Weekly battery regeneration for lead batteries.
• Input for battery temperature sensors, optionally Votronic 625, 825.
• The robust housing protects from water and dust by system of protection IP65, fire-fighting DIN 14679.
• Unattended Charging: Multiple protection against overload, overheating, overvoltage, short circuit, incorrect
behaviour and back discharge of the battery by electronically controlled gradual reduction down to complete
separation of charger and battery.
• The charging voltage is free from peaks and is controlled in such a way, that overcharging of the batteries is
excluded.
• Fully Automatic Continuous Operation: The charger may be connected continuously to the battery, thus keeping the
full charge. If the charging source is missing (power failure, engine stop), the battery will not be discharged.
• High efficiency, minimum current consumption.
• Execution "Fc" for transmission FireCAN bus with standard connector M12, prepared for central diagnostics,
transmission of status and charging data in fire-fighting vehicles.
Functioning:
Automatic activation of the unit will only be effected, if the vehicle board mains is able to supply power, i. e. the engine is
running (generator), or a mains supply charger is active at the parking lot. Thus, the vehicle battery is protected safely
against discharge by the units. The exact determination of the battery (terminal) voltage rates is effected by short-time
disconnection of the charging current, every 2.5 seconds, for automatic compensation of losses due to cable lenghts and
cross-sections.

--2--
Observe the "Safety Regulations and Appropriate Application", Page 12!
Wire End Sleeves: A correct pressing is gastight and can only be achieved with high-quality press
pliers. The tension spring clamps used do not provide the required pressure forces alone, but are
very suitable for direct stranded wire connection.
Observe maximum permissible cross sections, especially for the relay connections "S, M, O"!
Installation of the Unit
Install the unit near the unit rack, preferably at a vertical body panel with the screwed cable glands pointing downward.
For this purpose and for further connections and settings, open the upper housing.
The housing can be screwed down to the now visible mounting holes.
The plug-type connector "X1", which is located on the lower right side in the housing, can be withdrawn carefully for easy
handling.
Connection:
"Relay": Signal contact (potential-free) for remote display, charging control etc.:
The contact M and S will be closed, if the unit battery is charged properly.
If the battery is missing, the vehicle supply is low, in case of overvoltage or overtemperature of the battery,
general failures etc., the contact remains open.
Terminal Function
IN + Vehicle Board Mains +12 V or +24 V
IN – Vehicle Board Common Minus, Ground
Observe the cable cross-sections according to table 1,
protect the supply line (cable protection)!
Terminal Function
OUT + Positive Pole of the 12 V Unit Battery (red)
OUT + Negative Pole of the 12 V Unit Battery (black)
Observe the cable cross-section according to table 1.
Insert the fuse near the battery (cable protection)!
Option:
TK Connection for Temperature Sensor,
2nd Connection of the Temperature Sensor to
OUT + or directly to the positive pole of the
battery
"Relay" Signal "Charge o. k.":
Terminal Relay Contact
S Make Contact (NO)
M Centre Contact (COM)
O Normally Closed (NC)

--3--
Table 1: Recommended Cable Cross-Sections, Cable Lengths and +Fuse Capacities:
Full charging capacity is ensured, if the cable cross-sections and cable lengths are observed
according to the below-mentioned table!
Cable
Cross-Sections
From 12 V Board Mains
From 24 V Board Mains
To the 12 V Unit Battery
Cable Lengths
" IN "
"+ and
–
"
Cable
Protective
Fuse
Cable Lengths
" IN "
"+ and
–
"
Cable
Protective
Fuse
Lengths
Charging Cables
"OUT + and
–
"
Cable Protection,
Fuse Near the Unit
Battery
0.5 mm² - - - - Helix Charging Cable 5 A
0.5 mm² - - up to 16 m 5 A up to 3 m 5 A
0.75 mm² up to 3 m 10 A up to 24 m
10 A up to 4.5 m 10 A
1 mm² up to 4 m 10 A up to 32 m 10 A up to 6 m 10 A
1.5 mm² up to 6 m 10 A up to 48 m 10 A up to 9 m 10 A
2.5 mm² up to 10 m 10 A up to 80 m 10 A up to 15 m 10 A
Observe:
• Terminals „+/-IN“ and „+/-OUT“ cable cross-sections (with Wire End Sleeves /fine-wired): 0.25 - 1.5 mm2 / 2.5 mm²
• Terminal "TK": Connection temperature sensor (option), recommended cross-section min. 0.5 mm2
• In case of a wrong setting 12 V / 24 V by mistake, the unit will stop working, but damage does not occur.
• If "IN" "+ and –" had been mixed up (reverse battery at the input) the internal car fuse 10 A will be released.
The replacement fuse should always have the same capacity!
• The unit is equipped with a protection against mixed up "OUT" "+ and –" (reverse battery at the output). It will
continue working as soon as the polarity is correct.
• The unit is protected against inadvertent connection of 24 V batteries at the output „OUT" "+ and –".
It is switched off automatically and will continue working when a proper 12 V battery is connected.
Unit Settings:
Carefully move the micro slide switches "10" to "1" to the desired position using a
small screw-driver. The switch actuators are shown in white.
1.) How to set the "IN" vehicle board mains voltage:
Selector Switch
Voltage
"10" and "9":
"IN"
Vehicle
Board Mains
Voltage
Switching
Threshold
"ON"
Switching
Threshold
"OFF"
Application
24 V HIGH 26.6 V 26.0 V
24 V
Standard
Setting
24 V LOW 26.2 V 25.6 V 24 V
Low Setting
12 V HIGH 13.3 V 13.0 V
12 V
Standard
Setting
12 V LOW 13.1 V 12.8 V 12 V
Low Setting
Observe:
• The settings marked in bold are recommended.
• With the low settings, the vehicle battery might be discharged slightly more until the TS 1204 (Fc) is switched-
off.
• In case of a wrong setting 12 V / 24 V by mistake, the unit will stop working, but damage does not occur.

--4--
2.) How to set the unit battery type (design, technology)"OUT":
Eight (8) charging programs for the different battery types are stored in the unit.
They can be selected by means of the slide switches "6", "7" and "8":
If not being specified divergently by the battery manufacturer, the suitable charging
program for the battery to be charged can be determined by means of the following
description and the technical data (voltage rates U1 and U2).
If the unit battery will be recognized as being already full at the charging start after a
short test with U1 (5 to 12 minutes), the charging voltage will be lowered immediately to
level U2.
TS = Temperature Sensor (Effect with/without connection of the temperature sensor)
Lead Batteries (Acid, Gel, AGM):
4 Characteristic lines, charging voltage rates and temperature equalization for batteries in lead
technology:
1 "START" Switch Position
U1=14.30 V U2=13.45 V U3=13.20 V
0.5-1.5 h 6 h Continuous
Universal charging characteristic line for acid
lead-acid batteries according to DIN 57 510/VDE 0510
for charging and trickle charging of
starter and supply batteries.
Ensures short charging times, high charging factor and
acid mixing for open standard batteries and closed,
SLA, low-maintenance, maintenance-free "starter",
"non-solid electrolyte", "lead-acid", drive, lighting,
solar and heavy-duty batteries. Also suitable for
recently developed batteries (low-antimonous, with silver-
alloy, calcium or similar) and batteries with low (L) and very low
(VL) water consumption.
2 "Gel" Switch Position
U1=14.30 V U2=13.80 V U3=13.40 V
4-8 h 14 h Continuous
Adapted to closed, gas-tight
Gel/dryfit batteries VRLA with
determined electrolyte, which are generally
requiring longer dwell times U1 to achieve
high capacity storage and to
avoid deep discharge (becoming deaf) of the battery,
such as EXIDE, Sonnenschein, "dryfit", Varta, Bosch,
Banner etc.

--5--
3 "AGM 1 14.4 V" Switch Position
U1=14.40 V U2=13.50 V U3=13.20 V
0.5-2 h 8 h Continuous
Adapted to closed,
gas-tight AGM (absorbed glass mat)/
lead-fleece batteries VRLA with indicated
charging voltage "14.4 V".
4 "AGM 2 14.7 V" Switch Position
U1=14.70 V U2=13.60 V U3=13.20 V
0.5-2 h 8 h Continuous
Adapted to closed,
gas-tight AGM (absorbed glass mat)/
lead-fleece batteries VRLA with indicated
charging voltage "14.7 V or 14.8 V".
It is highly recommended to check the
specification sheet of the battery
concerning the high charging
voltage U1 14.7 V!
LiFePO4 Batteries:
4 Characteristic lines, charging voltage rates and temperature control (if required) adapted to lithium
batteries:
• Observe the instructions of the battery manufacturer!
• An operation of the unit at a LiFePO4 battery without BMS (Battery Management System) and
without equalization charging of the cells (balancing) as well as safety circuit is not admissible!
These important protection systems are already integrated with LiFePO4 batteries with release
for application as starter battery with generator charging.
• If possible, the temperature of the LiFePO4 battery should be kept above 0 °C.
5 "LiFePO4 14.0 V" Switch Position
U1=14.00 V U2=13.50 V U3=13.35 V
0.2-0.5 h 6 h Continuous
Designed for LiFePO4 starter batteries with
integrated safety circuit and BMS,
particularly gentle, low charging voltage.

--6--
6 "LiFePO4 14.2 V" Switch Position
U1=14.20 V U2=13.60 V U3=13.35 V
0.2-0.5 h 6 h Continuous
Designed for LiFePO4 starter batteries with
integrated safety circuit and BMS,
gentle, low charging voltage.
7 "LiFePO4 14.4 V" Switch Position
U1=14.40 V U2=13.70 V U3=13.40 V
0.2-0.5 h 6 h Continuous
Designed for LiFePO4 starter batteries with
integrated safety circuit and BMS,
usual Li charging voltage.
8 "LiFePO4 14.6 V" Switch Position
U1=14.60 V U2=13.80 V U3=13.40 V
0.2-0.5 h 6 h Continuous
Designed for LiFePO4 starter batteries with
integrated safety circuit and BMS.
Check the battery data for admissible higher
charging voltage rates!
Battery Lifetime and Efficiency:
• Keep the batteries cool, LiFePO4 preferably above 0 °C. Choose an appropriate location for
installation.
• Store only fully charged batteries and recharge them periodically.
• Open lead-acid batteries and batteries being "maintenance-free according to EN / DIN":
Check the acid level periodically!
• Recharge deeply discharged lead batteries immediately!
• LiFePO4: Only use complete batteries with integrated safety circuit and BMS!
! Deep discharge is to be absolutely avoided !

--7--
3.) How to set the battery size (capacity Ah) of "Capa." units:
Charging Current/Battery
Selector Switch Capacity
"5" and "4":
"Capa."
Unit
Battery
Capacity
Ah
max.
Charging
Current
A
Safety Timer:
Charging Phase I
max.
h
6 - 12 Ah 1.0 A 14
13 - 20 Ah 2.0 A 14
21 - 40 Ah 3.0 A 18
41 - 100 Ah 4.0 A 25
Observe:
• The unit housing might heat up more strongly with the higher charging currents. Depending on the operating
conditions, the charging current 4 A will be reduced slightly after half an hour to one hour.
• If two or several batteries are connected in parallel to the charging port, set the total capacity (total Ah-value of
the connected units)!
According to the battery manufacturers, permanent parallel operation is admissible in case of two or several
batteries of the same type, the same capacity, as well as of the same age (history) in cross connection.
• The above-mentioned capacity rates should be considered as approximate values regarding battery load and
charging time.
4.) Activation of the Unit Battery Trainer (only possible with lead batteries):
If the vehicle is not used for an extended period, the idle mode at a socket is recommended, since the vehicle battery,
as well as the unit battery will be kept charged (storage charging U3).
If mains supply is not available, the trainer for lead-acid, gel, AGM batteries can be used.
It trains the unit battery with short, but quite powerful current pulses, which shall counteract creeping sulphation.
Nevertheless, the average current consumption is still low.
The trainer will be activated automatically, if there is no charging source (vehicle board mains is not charged and the
selector switch "3" "Trainer" is positioned to "ON".
The automatic disconnection of the trainer is effected, if the unit battery drops below < 12.3 V (discharge
protection).
With switch position "OFF" or always when the charging characteristic line LiFePO4 had been set, the trainer will
not be active.
5.) Selector Switches "2" and "1":
These switches have no function:
Set the selector witch "2": to position "B".
Set the selector witch "1": to position "II".

--8--
Option: Battery Temperature Sensor:
Lead-Acid, Gel, AGM Batteries:
The charging voltage rates and charging times U1 of the unit are already adapted in such a way, that a safe, durable
operation of the unit battery is ensured, particularly with the gentle trickle charging U2 and the storage charging U3.
A temperature sensor can be recommendable, if the battery temperature can be permanently below +5 °C or above
approx. +35 °C during operation.
Function: The temperature-dependent charging voltage of the unit battery will be adapted automatically to the battery
temperature (automatic temperature equalization). In case of low temperatures (winter operation), the charging voltage
will be increased, in order to improve and accelerate full charging of the weak battery.
In case of summery temperatures, the charging voltage is reduced to minimize the load (gassing) of the battery. In case of
excessive battery temperatures (from +50 °C), the charging voltage will be reduced strongly to the safety charging voltage
of approx. 12.80 V for battery protection.
Ensure that the installation place of the sensor is not influenced by any source of heat (engine heat, exhaust, heater etc.)!
The unit recognizes automatically a missing sensor, cable break or short circuit of the sensor cables, as well as
unreasonable measuring values. In that case, it will switch automatically to the usual charging voltage rates of 20 °C / 25
°C being recommended by the battery manufacturers.
Connection and Installation of the Sensor:
Accessories: Temperature sensor 625, order No. 2088 (for screw M6) or 825, order No. 2001 (for screw M8)
2-Pole Charging Cable and Connector:
If the standardized fire-fighting C connectors or the practical connectors MagCode (see accessories) are used, there is no
third connection for the connection of the sensor signal "TK". In order to still get an indication of the battery temperature
(summer/winter operation), the ambient temperature can be used. Install the temperature sensor near the unit rack, run
the connections cables through the screwed cable gland "AUX" (see fig. 2), and connect it to the terminals "TK" and "+
OUT 12 V" (any polarity).
3-Pole or Multipole Charging Cable and Connector:
The sensor is screwed down to the positive pole of the battery. This is the most accurate method of temperature
measurement, and it is also suitable for extraordinary conditions. The connection is made directly to the positive pole of
the battery (any polarity) and via a separate cable of the connector (min. 0.5 mm2) to terminal "TK".
LiFePO4 Batteries:
With LiFePO4 batteries with release for application as starter battery and for generator charging (dynamo), the important
protection devices are already installed, so that mostly a temperature sensor is not required.
Fig. 2: Fig. 3:

--9--
Pilot Lamps:
"Care" (Battery care, fully charged battery, green):
• If it is on: Equalization charging of the battery cells in the progressed charging phase U2, storage
charge U3.
• Short flashing every 20 s: Without charging source (vehicle board mains is not active), the battery trainer trains
the (lead) battery of the unit with short, powerful current pulses.
• Off: Charging process is still in phase I, U1 or beginning of the phase U2.
"Battery Full" (Unit battery fully charged, green):
• If it is on: Battery has been charged to 100 %, trickle charge U2 and storage charge U3, finished.
• If it is flashing: Main charging process is effected in the charging phase U1, indication of charging state
of approx. 75 % (lead) / 90 % (LiFePO4). Gradual increase to 100 % (long flashing).
• Off: Main charging process is still being executed in the phase I.
"Charge" (Main charging unit battery, yellow):
• If it is on: Main charging process is effected in the phase I and after that in charging phase U1.
• Off: Trickle charge U2 or storage charge U3.
• If it is flashing: 1. Battery Protection: Battery overtemperature > 50 °C, switchover to low safety
charging voltage. Automatic return, as soon as the temperature is 2 °C less.
2. External battery overvoltage > 15.2 V delay 20 s,
Automatic reset < 13.2 V (depending on type), delay 10 s.
3. Disconnection of the safety timer, duration of the charging phase I was
too long, battery defective (short circuit of the cells) or too large.
Set a higher value for the charging current "Capa."
Reset by withdrawal of the charging connector.
4. Internal unit failure (overheating), automatic reset after cooling down.
"Battery" (Unit battery, green):
• If it is on: Unit battery is charged.
• If it is flashing: Unit battery is not connected, charging plug is de-energized,
vehicle board mains is active.
• Is flashing shortly every 2 s: Unit battery is connected, the vehicle board mains is not active.
• Off: Unit battery is not connected, charging plug is de-energized,
the vehicle board mains is not active.
"Stand by" (Vehicle board mains, green):
• If it is on: Vehicle board mains is active,
Unit battery is not connected, charging plug is de-energized.
• Is flashing shortly every 2 s: Vehicle board mains is not active.
• Off: Vehicle board mains is active, unit battery is connected and charged.
Start-up and Function Test:
After connection at the vehicle board mains and at the unit battery and after the correct settings at the slide switches,
charging will be started after the engine start or supply of the vehicle by means of a mains supply charger at the socket.
Verification by measurement of the increasing battery voltage, measurement of the charging current (DC measuring calliper).
For exact terminal voltage measurement, the unit switches to a momentary, power-off measuring mode every 2.5 seconds.
Tips:
Charging cycle does not start:
a. Unit battery is not recognized: Check for at least 7.2 V at the terminals OUT - and + for charging start; check fuse, charging plug,
polarity charging cable, stripped cable ends and possibly existing blocking diode in the charging cable of the unit.
b. Check the setting of the slide switches "12 V / 24 V".
c. Vehicle board voltage is still too low. Set the slide switch HIGH/LOW to LOW by way of trial. The voltage directly at the terminals
IN - and + must be at least 13.1 V or 26.2 V.
Full charging current is not reached:
d. Unit battery is already charged: Turn on devices with high current draw. Current rate rises gradually (minutes) to approx. set
value.
e. Check the adjustment of the slide switches "Capa." according to table 2.
f. Check the cabling from the terminals OUT - and + to unit battery, fuse, charging plug, cross-sections and lengths according to
Table 1.
g. Check the cabling from the vehicle to the terminals IN - and +.
h. Set the slide switch HIGH/LOW to LOW by way of trial: Directly at the terminals IN - and +, the measured values must be at least
12.0 V or 21.6 V (under load).

--10--
Charging Process at the Unit Battery:
A new, complete main charging cycle will be executed:
• After return of higher voltage of the vehicle board mains by engine start (generator) or mains supply charger.
• After insertion of the charging plug to the unit battery, minimum voltage 7.2 V, for battery recognition.
• If the battery voltage drops below the reset voltage of approx. 12.80 V due to high load beyond the maximum charger
current for 20 seconds, such as by unit starter.
1. Main charging with maximum charging current (phase I) in the mean voltage range up to close to the phase U1 for
short charging times, LED "Charge" (main charging) is lighting, and approx. 75 % (lead), approx. 90 % (LiFePO4) of the
capacity will be charged. The duration of phase I depends on the battery conditions, the load by additional small
consumers and the charging state. The charger is recording the course of charging. For reasons of safety, the phase I
will be terminated by the safety timer (see table "Capa", page 7) after 25 hours, at the latest (cell defects of the
battery etc.).
2. In case of high battery voltage rates, the charging current will be slightly reduced for battery protection (orientation
phase). After that, automatic switching to the following phase U1.
3. During the phase U1 (full charging, cell equalization charging, LED "Charge" is lighting), the battery voltage will be
kept constant on a high level. The green LED "Full" is flashing (at first, short flashing, with rising charge increasingly
longer flashing), and gentle charging of the additional high battery capacity. The charger controls the charging time
and the charging current. From these values and from the course of charging being recorded during the phase I, the
charger determines the 100 % full charge point of the battery for automatic switching to U2. In case of only slightly
discharged batteries, the
duration of phase U1 will be kept short for relief of the battery and low maintenance expenditure. In case of major
discharge, the phase U1 must be extended for full charging of the battery and cell equalization charging. During this
process, any influence by consumer loads is avoided reliably. The LED "Charge" turns off at the end of the phase U1.
4. Phase U2 (Full trickle charge, LED "Full" is lighting permanently): The charger has now switched to the lower voltage
for trickle charge maintaining and buffering 100 % charge of the battery, which is indicated after some hours by the
lighting LED "Care". Depending on the battery type, the duration of the phase U2 is limited to 12 to 24 hours to allow
gentle recharging and equalization charging of the cells with small charging current rates.
5. Phase U3 (storage charge, LEDs "Full" and "Care" are permanently on, adapted to the battery type):
In case of long-term operation, such as for extended standstill periods or during winter break, the charging voltage will
be switched-off, and it will be reactivated, if current is required (self-discharge of the battery, consumers). Then, the
charging voltage will be reduced to the low level U3 for minimization of battery gassing and corrosion.
6. Lead battery regeneration in case of extended down-time: For activation of the lead battery (avoidance of electrolyte
accumulation and sulphation), the charger will automatically run up to the charging voltage U1 twice a week for a
short time (approx. 1 hour). After that, direct return to the storage charge U3.
Charging Process:

--11--
Technical Data: TS-Battery Charger PFPN 1204
Input "IN" from the 12 V/ 24 V Vehicle Board Mains:
Board Mains Input Voltage, Switchable: 12 V / 24 V
Input Voltage Range: 12 - 33 V
Automatic Activation/Deactivation, see Table: 1.) Set the Voltage "IN" of the Vehicle Board Mains, Page 3.
Overvoltage Disconnection 12 V / 24 V: < 16.5 V / < 33.0 V
Current Draw Stand-by 12 V/24 V: < 2 mA / < 3 mA
Current Draw from Trickle Charge to max. Charging Capacity, 12 V/24 V: 0.07 - 5.2 A / 0.05 -2.5 A
Terminal Cable Cross-sections (with Wire End Sleeves** /Fine-wired): 0.25 - 1.5 mm2 / 2.5 mm²
Charging Port "OUT" to the Unit Battery:
Nominal Battery Voltage Lead/LiFePO4: 12 V / 12.0 - 13.3 V
Battery Capacity adjustable, recommended: 6 Ah - 100 Ah
Charging Current max., adjustable: 1 A, 2 A, 3 A, 4 A*
Battery Charging Programs Lead-Acid, Gel, AGM1, AGM2, adjustable: 4
Battery Charging Programs Lithium LiFePO4, adjustable: 4
Charging Characteristic Lines, Full, Equalization, Storage Charging IU1oU2oU3: Yes
Charging Current Disconnection at Storage Charge, Phase U3, Recharging as required: Yes
Automatic Battery Regeneration: 2 x week: Yes
Automatic Compensation of the Voltage Losses of the Charging Cables: Yes
Minimum Battery Voltage for Battery Recognition and Charging Start: 7.2 V
Input "TK" for Battery Temperature Sensor, Option Yes
Reverse Current, Standby: < 1 mA
Disconnection from Power of the Charging Plug: Yes
Galvanic Isolation between Input "IN" and Charging Port "OUT": Yes
Terminal Cable Cross-sections (with Wire End Sleeves** /Fine-wired): 0.25 - 1.5 mm2 / 2.5 mm²
Safety Timer per Charging Phase I /U1, U2: Yes
Safety Protect. ag. Reverse Batt./Short-circuit/Back Discharge: Yes
Trainer for Lead-acid, Gel, AGM Batteries, if no charging (switchable): Yes
Training Current Pulses, Depending on Battery Size and Charging Cables (very short-time): 10 - 45 A
Recurrence Rate: 20 sec.
Capacity Consumption by Training Current Pulses per Month: 0.1 - 0.2 Ah
Low Voltage Disconnection Trainer: < 12.3 V
"Relay" Signalling Port "Charge o.k.", Change-over Contact Potential-free: 12 V - 24 V / max. 1 A
Terminal Cable Cross-sections (with Wire End Sleeves** /Fine-wired): 0.25 – 0.75 mm2 /1.5 mm²
Audible Alarm for Battery Failures: Yes
Temperature Range: -20 / +45 °C
Gradual Reduction of Charging Capacity at Overtemperature: Yes
Safety Disconnection in Case of Overheating: Yes
Housing Dimensions (mm, D/W/H): 102 x120 x 58
Fitting Position of Unit, Generally / For IP65: Any / Horizontal Wall Mounting
Weight: 270 g
Execution TS Battery Charger PFPN "Fc": Data as TS Battery Charger PFPN
Prepared for Transmission of the FIRECAN Bus Signals: Yes
Standard Connector FIRECAN M12 with Thread (Vehicle Side): Yes
3 Terminals, CAN-L, CAN-H, Shield, Unit Side (with Wire End Sleeves** /Fine-wired): 0.25 - 0.75 mm2 /1.5 mm²
* Depending on the operating conditions, the charging current 4 A will be reduced slightly after half an hour to one hour.
** Use of Wire End Sleeves s. Page 2.

--12--
Safety Regulations and Appropriate Application:
The charger has been designed according to the valid safety regulations.
Appropriate application is restricted to:
1. Charging of lead-gel, lead-AGM, lead-acid or LiFePO4 batteries (with integrated BMS, balancing,
safety circuit and approval!) Batteries of the indicated nominal voltage in
fixed / mobile installed systems.
2. Connection in consideration of the indicated cable cross-sections at the inputs and outputs of the
unit.
3. Fuses of the indicated capacity are to be provided near the battery to protect the cabling between
battery and unit.
4. Technically faultless condition.
Never use the unit in locations where the risk of gas or dust explosion exists!
• Lay the cables in a way, that damages are excluded and observe to fasten them tightly.
• Check live cables or leads periodically for insulation faults, points of break, as well as loosened or
overloaded connections and remedy possible defects.
• The unit is to be disconnected from any connection prior to execution of electrically welding or work on the
electric system.
• If the user is not able to draw from the manual, which characteristic values are valid for a unit or which
regulations are to be observed, a specialist is to be consulted.
• The user / buyer is responsible for the observation of construction and safety regulations of any kind.
• Observe the safety regulations of the battery manufacturer; ventilate the battery room.
• Non-observance may result in injury or material damage.
• The warranty period is 36 months from the purchase date (against presentation of the sales slip or invoice).
• The warranty will be void in case of any inappropriate utilisation of the unit, if it is used beyond the
technical specification, in case of improper operation or external intervention. We do not assume any
liability for any damage resulting hereof. The liability exclusion is extended to any service being executed by
third, which has not been ordered by us in writing. Service is to be effected exclusively by VOTRONIC
Lauterbach.

--13--
Notes:

--14--
Notes:

--15--
Accessories:
Order No. 2317
Helix Charging Cable, 2x 0.5 mm2, max. 4 A, 0.8 m, Extension Length up
to 2 m.
Order No. 2323
C Connector, 2 poles Charging connector for fire-fighting vehicles
according to DIN 14690.
Order No. 2326
MagCode Power-System-Set 12 V, Magnetic connector system with
connector and socket, magnetic latching, automatic release in case of
strong tension, max. 15 A, in practical use very good suitable for
helix charging cable No. 2317.
Order No. 2328
MagCode Power System Set Pro 12 V, execution as No. 2326, however
magnetic and mechanic latching (bayonet), max. 25 A.
Order No. 2088 Order No. 2001
Temperature Sensor 625 Temperature Sensor 825
(Installation at bolts M6) (Installation at bolts M8)

--16--
Declaration of Conformity:
In accordance with the provisions of the statutory requirements and the relevant directives, Electrical
Equipment (Safety) Regulations 2016, Electromagnetic Compatibility Regulations 2016, The Restriction of
the Use of Certain Hazardous Substances in Electrical and Electronic Equipment Regulations 2012 this
product complies with the following standards or normative documents:
BS EN55014-1; BS EN61000-6-1; BS EN61000-4-2; BS EN61000-4-3; BS EN61000-4-4; BS EN62368-1;
BS EN50498, BS EN IEC 63000.
Declaration of Conformity:
In accordance with the provisions of Directives 2014/35/EU, 2014/30/EU, 2009/19/EC, this
product complies with the following standards or normative documents:
EN55014-1; EN55022 B; EN61000-6-1; EN61000-4-2; EN61000-4-3; EN61000-4-4;
EN62368-1; EN50498.
The product
must not be
disposed of in
the household
waste.
The product is RoHS compliant.
It complies with the directive
2015/863/EU for Reduction of
Hazardous Substances in electrical
and electronic equipment.
Recycling:
At the end of its useful life, you can send us this device for professional disposal:
You can find more information about this on our website at www.votronic.de/recycling
Delivery Scope:
• TS Battery Charger PFPN 1204 (Fc)
• Operating Manual
Subject to misprints, errors and technical modification without notice.
All rights reserved, particularly the right of reproduction. Copyright VOTRONIC 11/2022.
Made in Germany by VOTRONIC Elektronik-Systeme GmbH, Johann-Friedrich-Diehm-Str. 2, 36341 Lauterbach/GERMANY
Phone: +49 (0)6641/91173-0 Fax: +49 (0)6641/91173-10 E-Mail: info@votronic.de Internet: www.votronic.de
/